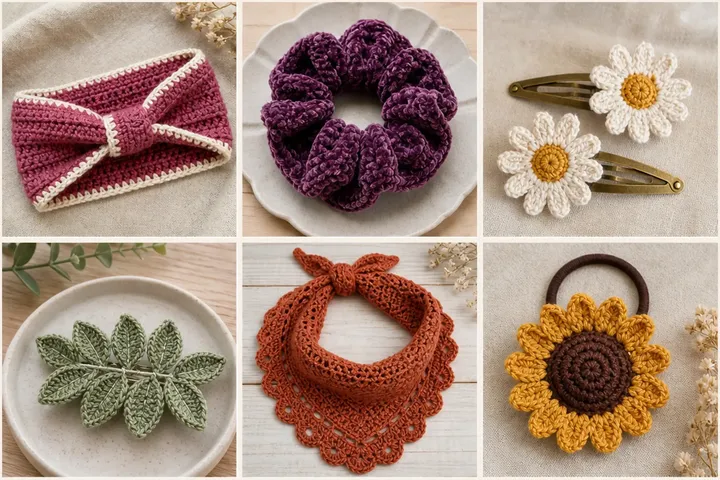
Crochet hair accessories are quick enough for a weekend project yet special enough to become memorable handmade gifts. These twelve original Hunerli Parmaklar designs combine firm cotton stitches, wearable shapes and secure hardware for a boutique finish. Instructions use US terms. Choose snag-free findings, conceal every yarn end and avoid loose beads or small decorations on accessories intended for young children.
Berry Knotted Headband
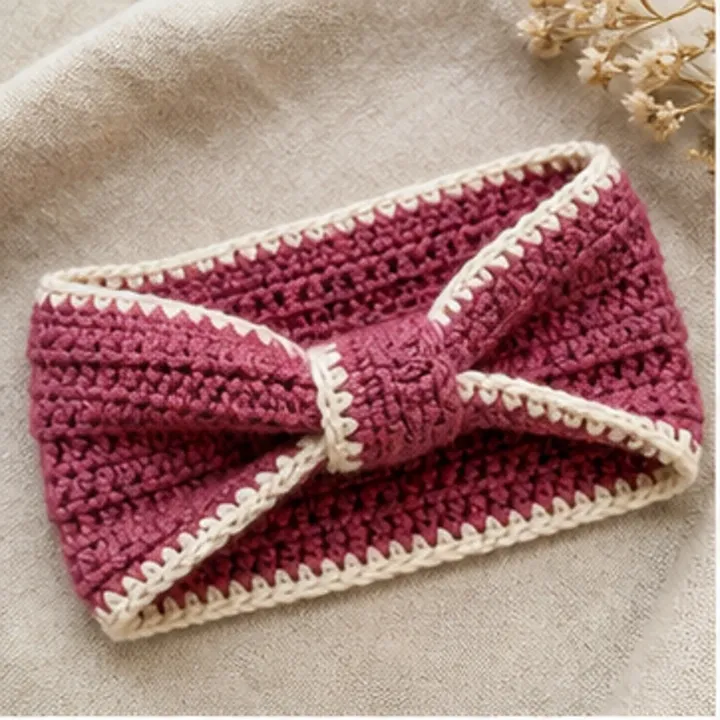
A wide berry headband with cream edging and a structured center knot adds polished color without feeling bulky.
- LEVEL
- Advanced beginner
- TRY IT WITH
- DK cotton in berry and cream; 3.5 mm hook; 1 in elastic
- FINISHING NOTE
- Adult circumference 21–23 in.
Short Pattern
Abbreviations: ch chain · sc single crochet · hdc half double crochet · sl st slip stitch
- Chain 23 in berry and work hdc rows until the band measures about 19 in.; keep both long edges straight.
- Work one cream sc round around the rectangle, placing three sc in each corner and matching stitch counts on both sides.
- Cross the short ends, fold each end in half around the other and stitch through all four layers to create the turban knot.
- Join a 1 in elastic loop behind the knot, testing the finished stretch before securing the second side.
Assembly: Reinforce both elastic joins with several passes of matching thread, weave ends away from the stretch points and steam lightly.
Plum Velvet Scrunchie
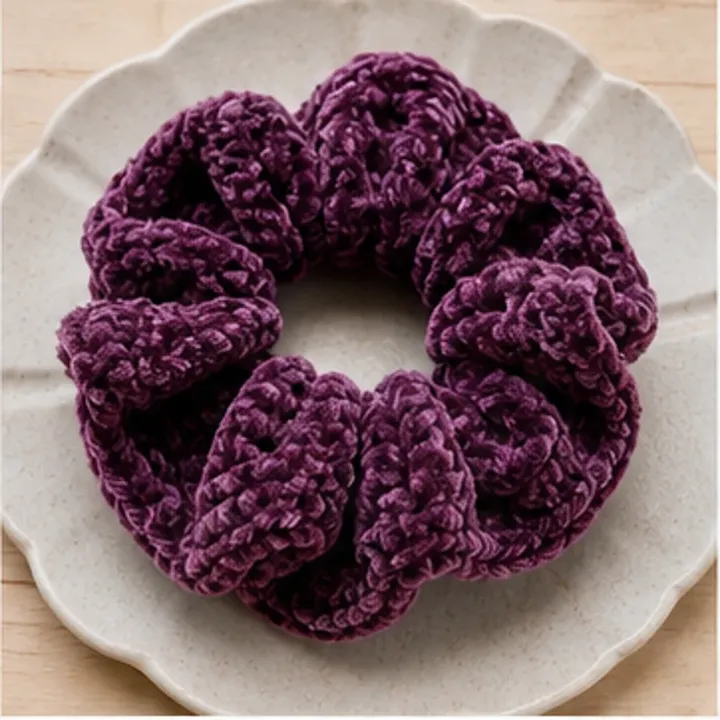
Plush plum texture turns a simple elastic into an oversized statement scrunchie with a rich boutique look.
- LEVEL
- Beginner
- TRY IT WITH
- Velvet or chenille yarn; 5 mm hook; snag-free hair elastic
- FINISHING NOTE
- About 6 in. across when relaxed.
Short Pattern
Abbreviations: ch chain · sc single crochet · dc double crochet · sl st slip stitch
- Attach yarn around the elastic with a slip stitch, taking care not to pierce or twist the elastic.
- Work 60 closely packed sc around the ring, sliding stitches together until the elastic is completely covered.
- Work three dc into every sc for the ruffled second round; keep the loops loose enough for the plush yarn.
- Finish with a round of sc along the outer edge, joining invisibly and leaving a long end for reinforcement.
Assembly: Run the finishing end through the first and last stitch twice, knot securely inside a fold and trim only after testing repeated stretch.
Daisy Snap Clips
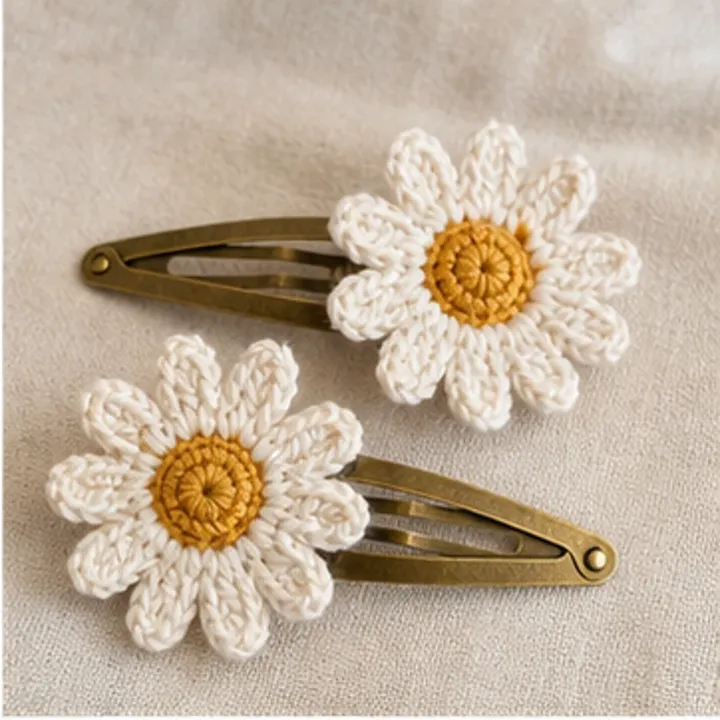
Cream daisies with mustard centers transform simple metal snap clips into cheerful matching accessories.
- LEVEL
- Beginner
- TRY IT WITH
- Fingering cotton in cream and mustard; 2.5 mm hook; two 2.25 in snap clips
- FINISHING NOTE
- Flowers about 1.5 in. wide.
Short Pattern
Abbreviations: MR magic ring · ch chain · sc single crochet · hdc half double crochet · sl st slip stitch
- Work 10 mustard sc into a magic ring, close firmly and join without adding height.
- For each petal, chain 5, work sc, 2 hdc and sc back toward the center, then slip stitch into the next center stitch.
- Repeat for ten petals, straighten each petal and weave the cream end beneath the center stitches.
- Crochet a narrow cream strip long enough to cover the upper arm of each snap clip.
Assembly: Stitch the strip around the clip without blocking its mechanism, sew the daisy to the covered end and add a small felt backing.
Sage Leaf Barrette
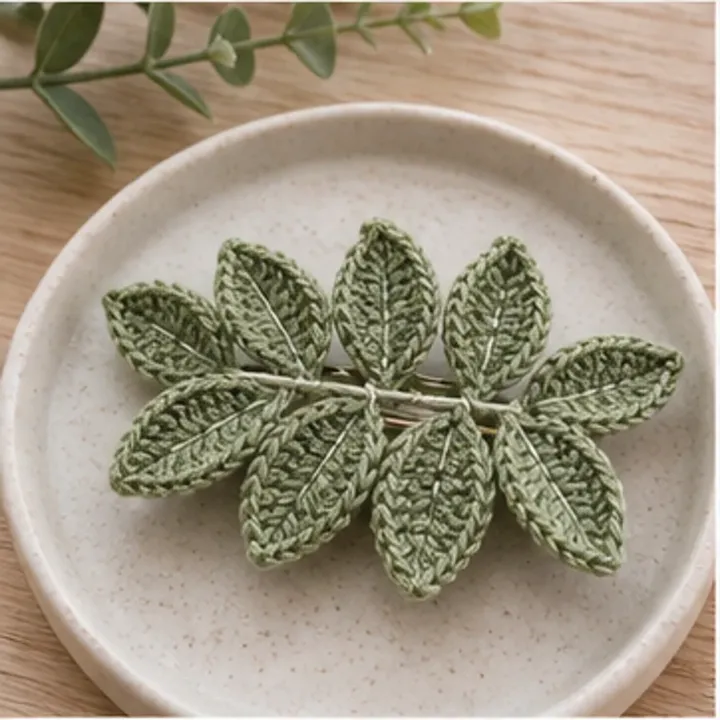
Layered sage leaves create a calm botanical barrette that looks elegant on a low bun or half-up style.
- LEVEL
- Intermediate
- TRY IT WITH
- Fingering cotton in sage and olive; 2.5 mm hook; 3 in barrette
- FINISHING NOTE
- About 4.5 × 2 in.
Short Pattern
Abbreviations: ch chain · sc single crochet · hdc half double crochet · dc double crochet
- For each leaf, chain 12 and work sc, hdc, dc, 3 dc, dc, hdc and sc along one side.
- Work three stitches into the final chain, then mirror the sequence down the opposite side to complete the leaf.
- Make seven leaves in two shades and add an olive surface-slip-stitch vein to each one.
- Arrange the leaves in a balanced fan, overlapping their bases so no hardware will show from the front.
Assembly: Sew leaves to a firm felt oval, stitch the barrette through the felt openings and cover all knots with a second narrow felt strip.
Terracotta Scalloped Bandana
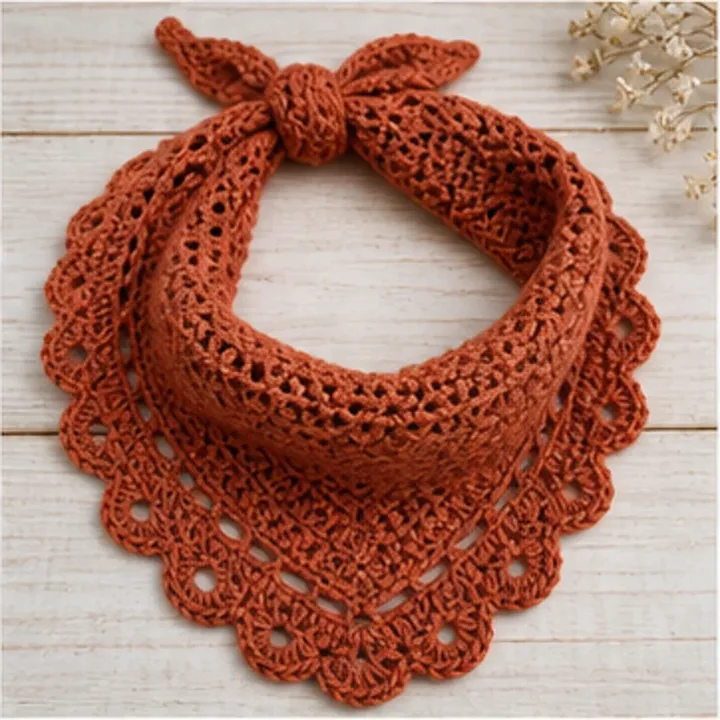
An airy triangular bandana with a deep scalloped edge brings vintage crochet texture to everyday hair.
- LEVEL
- Intermediate
- TRY IT WITH
- Sport cotton in terracotta; 3 mm hook
- FINISHING NOTE
- Triangle about 17 in. wide plus ties.
Short Pattern
Abbreviations: ch chain · sc single crochet · dc double crochet · sp space · sl st slip stitch
- Begin at the top center with chain 5 and work two dc groups separated by chain 2 into the first chain.
- Turn each row and increase with one dc group at both outer edges and two groups into the center chain space.
- Continue until the top edge measures about 17 in., then work one stabilizing sc row across it.
- Along both diagonal edges, alternate 5-dc shells and slip stitches; chain 55 from each upper corner for ties.
Assembly: Slip stitch back along both ties, weave ends into dense sections and wet-block the triangle with every scallop pinned open.
Sunflower Hair Tie
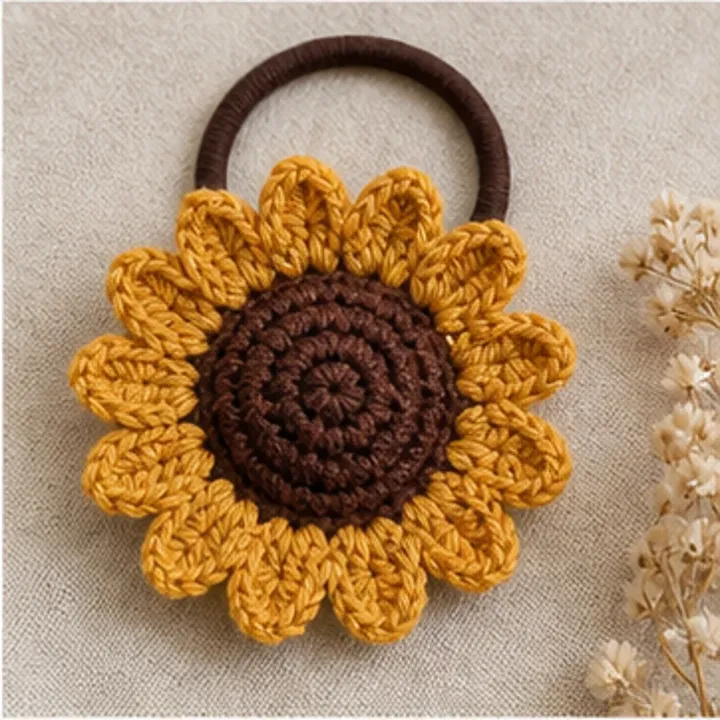
A dimensional mustard sunflower gives a plain hair tie a bright, handmade focal point.
- LEVEL
- Advanced beginner
- TRY IT WITH
- Sport cotton in mustard and brown; 3 mm hook; strong hair elastic
- FINISHING NOTE
- Flower about 3.5 in. wide.
Short Pattern
Abbreviations: MR magic ring · ch chain · sc single crochet · hdc half double crochet · dc double crochet
- Work 12 brown sc in a magic ring, increase to 24 and finish with one round of raised surface stitches.
- For the first petal layer, chain 6, work sc, hdc, 2 dc and hdc back down each chain, repeating 12 times.
- Add a second mustard petal layer behind the first, offsetting each petal and making chains one stitch longer.
- Crochet a flat brown backing circle matching the flower center and weave all petal ends into it.
Assembly: Sandwich the elastic between the flower and backing circle, stitch around the center twice and confirm the elastic slides without catching yarn.
Ivory Bridal Flower Comb
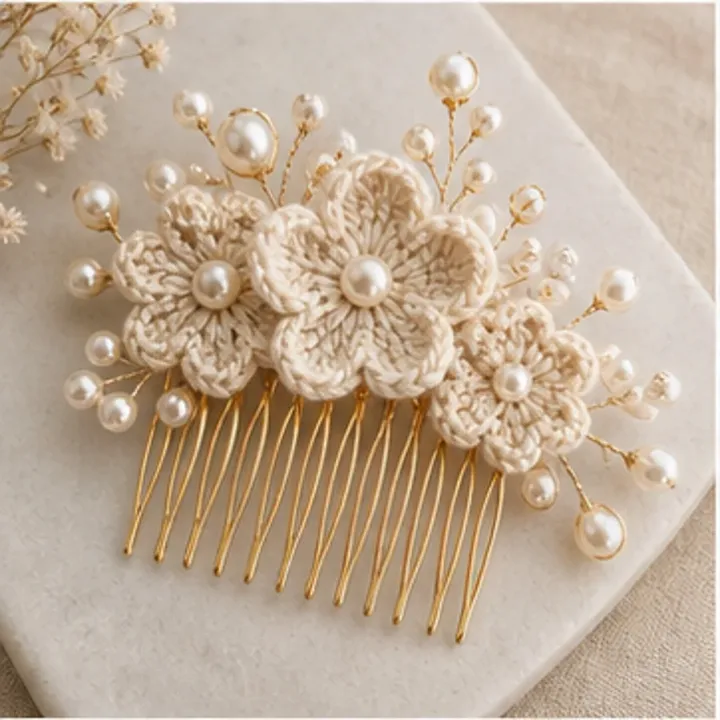
Fine ivory flowers and pearl-like accents form a romantic bridal comb with an heirloom crochet feel.
- LEVEL
- Advanced
- TRY IT WITH
- Size 10 crochet cotton; 1.75 mm hook; metal hair comb; sew-on pearls
- FINISHING NOTE
- About 5 × 3 in.
Short Pattern
Abbreviations: MR magic ring · ch chain · sc single crochet · dc double crochet · picot
- Make three flowers with 12 sc centers and two layers of six dc-cluster petals, varying the flower diameter slightly.
- Crochet six small leaves around chain-8 foundations and finish each tip with a chain-2 picot.
- Arrange flowers and leaves over a felt crescent cut to follow the upper edge of the comb.
- Sew pearl-like beads through both felt and flower centers using doubled, knotted thread.
Assembly: Stitch the felt crescent through every second comb tooth, cover the reverse with another felt piece and test that no thread loops can snag hair.
Rainbow Bow Clip
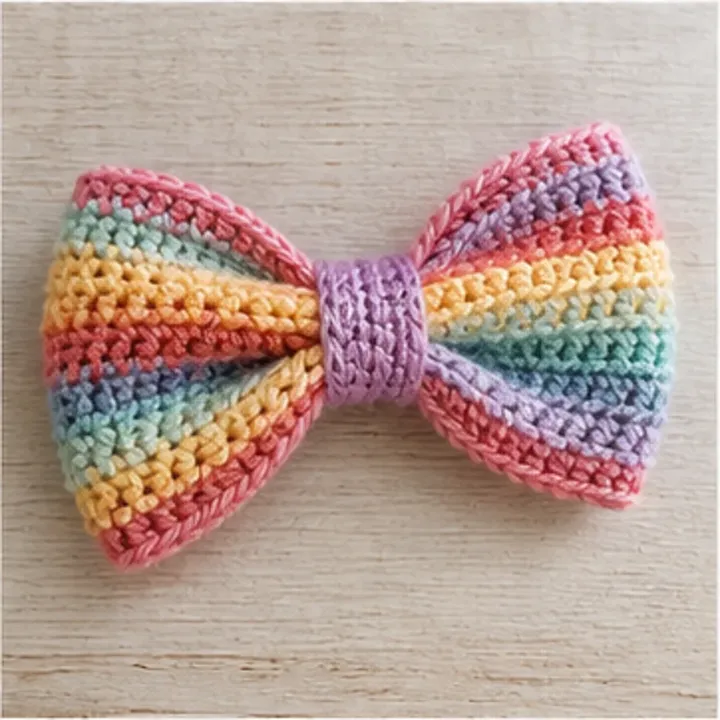
A crisp rainbow bow with a lilac center band adds playful color while keeping a clean, structured shape.
- LEVEL
- Beginner
- TRY IT WITH
- Sport cotton in five colors and lilac; 3 mm hook; 2.5 in alligator clip
- FINISHING NOTE
- Bow about 4.5 × 2.5 in.
Short Pattern
Abbreviations: ch chain · sc single crochet · hdc half double crochet · sl st slip stitch
- Chain 34 and work two hdc rows in each of five colors, carrying no unused yarn across the reverse.
- Join the short ends to form a loop, flatten the seam at center back and shape two equal bow wings.
- Crochet a lilac band eight stitches wide and long enough to wrap firmly around the pinched center.
- Add one sc border around the bow before wrapping and sewing the center band closed.
Assembly: Cover the upper arm of the alligator clip with felt, sew it behind the center band and keep stitches clear of the spring and hinge.
Teal Twisted Ear Warmer
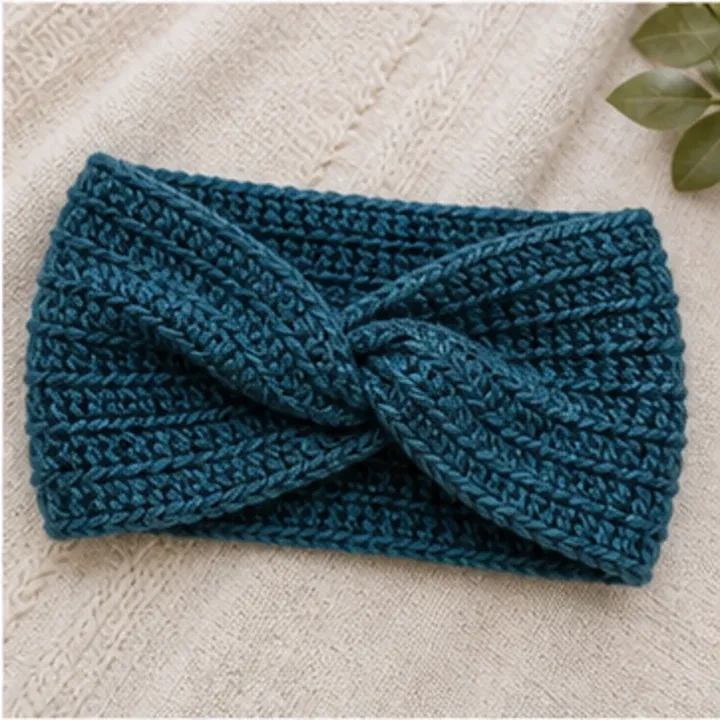
Deep teal ribbing and a central twist create a warm headband with the clean finish of a winter boutique accessory.
- LEVEL
- Advanced beginner
- TRY IT WITH
- Worsted merino-blend yarn; 4.5 mm hook
- FINISHING NOTE
- Adult circumference 20–22 in.
Short Pattern
Abbreviations: ch chain · sc single crochet · BLO back loop only · sl st slip stitch
- Chain 17 and work BLO sc rows to create vertical ribbing, measuring without stretching after every ten rows.
- Continue until the strip measures 19–20 in. or comfortably circles the head with slight negative ease.
- Fold both short ends in half, interlock the four folded layers and stitch through all layers in a straight line.
- Turn the seam inward and gently pull the fabric apart so the interlocked ends form a smooth front twist.
Assembly: Reinforce the seam ends, wash according to the yarn label and dry flat without overstretching the ribbing.
Lavender Vine Hair Pins
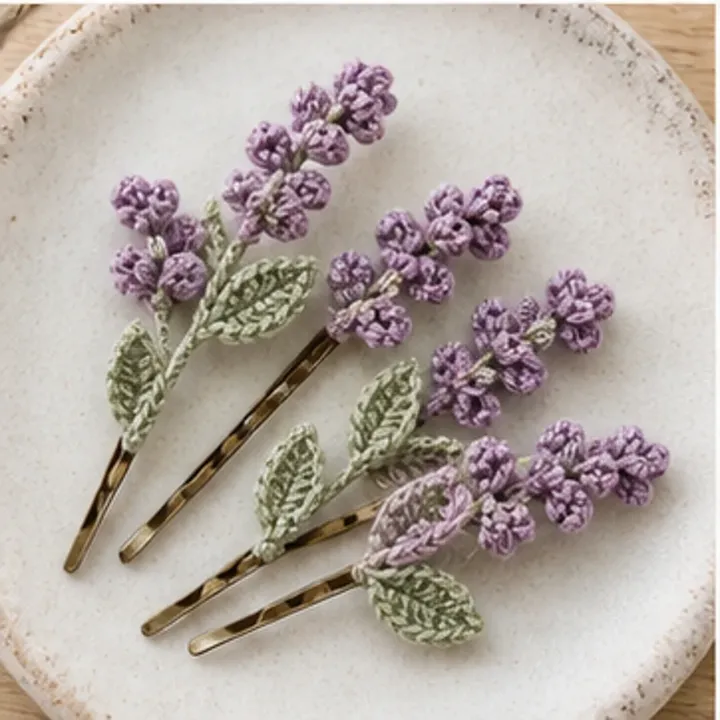
Tiny lavender buds and sage leaves climb slim pins for a delicate botanical accent worn singly or as a set.
- LEVEL
- Intermediate
- TRY IT WITH
- Fingering cotton in lavender and sage; 2.25 mm hook; three bobby pins
- FINISHING NOTE
- Each spray about 3.5 in. long.
Short Pattern
Abbreviations: ch chain · sc single crochet · hdc half double crochet · sl st slip stitch
- Chain 24 in sage and slip stitch back to form a firm stem that will not curl.
- For each bud, chain 4 in lavender, work three hdc into the first chain and close with a slip stitch.
- Make six buds per pin and sew them in alternating pairs along the upper half of each stem.
- Add two narrow leaves around chain-6 foundations and angle them away from the buds.
Assembly: Lay each stem along a bobby pin and wrap tightly with sage thread from tip to bend, knotting beneath the final leaf.
Retro Checkerboard Claw-Clip Cover
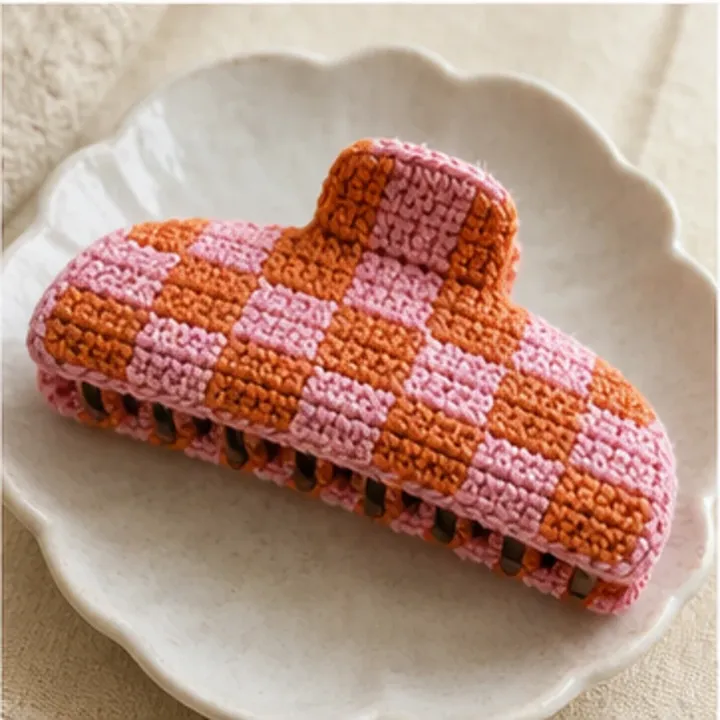
Pink and orange checks give a practical claw clip a bold retro update without interfering with its grip.
- LEVEL
- Intermediate
- TRY IT WITH
- Fingering cotton in pink and orange; 2.5 mm hook; 4 in claw clip
- FINISHING NOTE
- Sized to fit the selected clip.
Short Pattern
Abbreviations: ch chain · sc single crochet · tapestry colorwork · sl st slip stitch
- Measure one outer arm of the claw clip and crochet a fitted rectangle using 4-stitch checkerboard blocks.
- Carry the resting color loosely along the wrong side, changing color on the final yarn-over of each block.
- Make a mirrored second panel and add one narrow sc round around both pieces in orange.
- Join the long edges at the top, leaving the lower edges open so the clip teeth and hinge move freely.
Assembly: Slide the cover over the clip, tack only through existing holes near each end and repeatedly test full opening and closing.
Celestial Moon Hair Slide
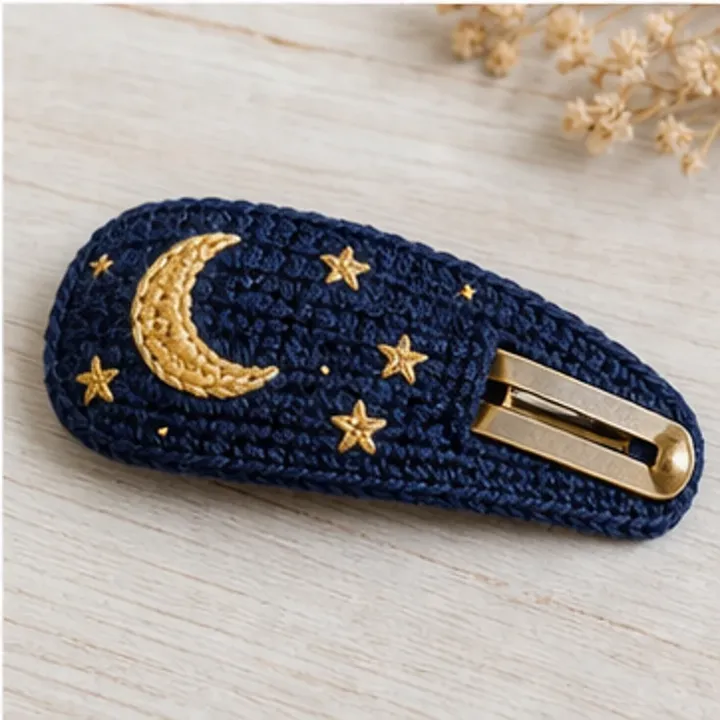
A gold crescent and tiny stars shine against navy crochet for a dramatic evening hair slide.
- LEVEL
- Intermediate
- TRY IT WITH
- Fingering cotton in navy and gold; 2.5 mm hook; 3 in barrette
- FINISHING NOTE
- About 4 × 2 in.
Short Pattern
Abbreviations: MR magic ring · ch chain · sc single crochet · dc double crochet
- Crochet a navy oval around a chain-14 foundation, increasing evenly at both ends until it covers the barrette top.
- Make a gold circle, fold one side behind and stitch along the fold to create a clean crescent shape.
- Form three tiny stars from five chain-3 loops and add several small embroidered star stitches.
- Arrange the crescent and stars on the oval, then sew every point securely without pulling the base out of shape.
Assembly: Back the oval with felt, stitch the barrette through the felt openings and trim the backing so it remains hidden from the front.
Make thoughtfully and check as you go.
Yarn, hook size and personal tension can change the finished scale. Count every round, stuff gradually and use embroidered features instead of safety eyes when making toys for children under three.