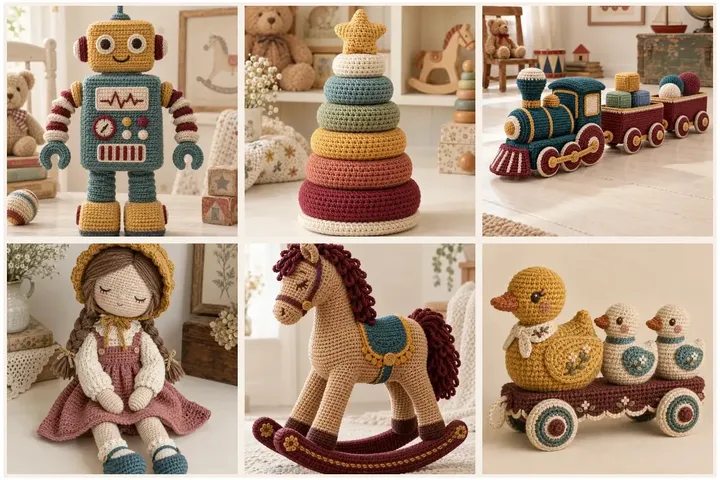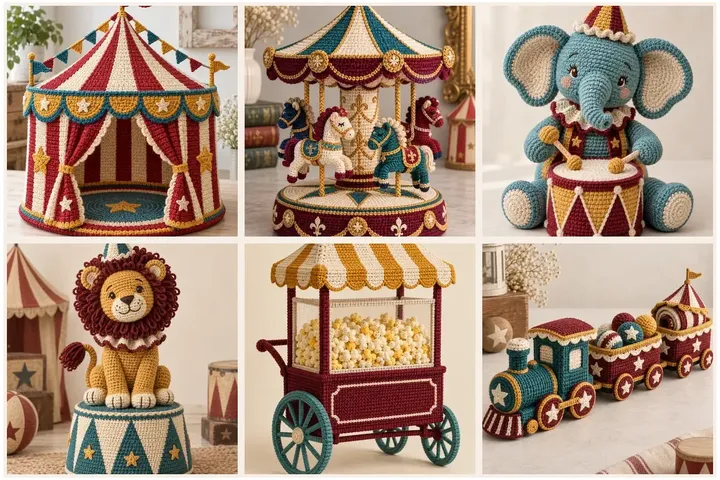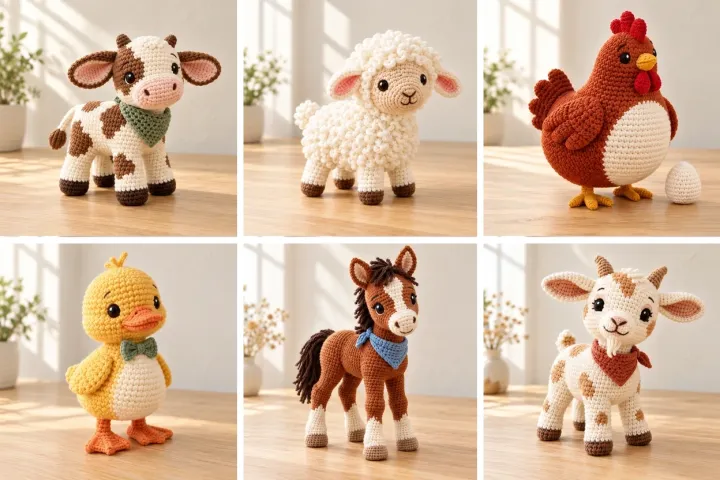
Bring a little countryside charm to your yarn basket with fifteen barnyard friends in cream, cocoa, rust, sage and golden yellow. Each animal has its own photograph, materials list, approximate size and detailed construction guide. Work in continuous spiral rounds unless a step says to turn, mark the first stitch of every round and use a hook that makes a dense fabric without visible filling. When a round increases or decreases by six, distribute those changes evenly; numbers in parentheses are the finished stitch counts. The AI-created photographs are design references, and these original guides have not been sample-tested, so check proportions and adjust to your yarn and tension as you go. Embroider facial features and sew accessories firmly in place.
Sage Bandana Spotted Calf
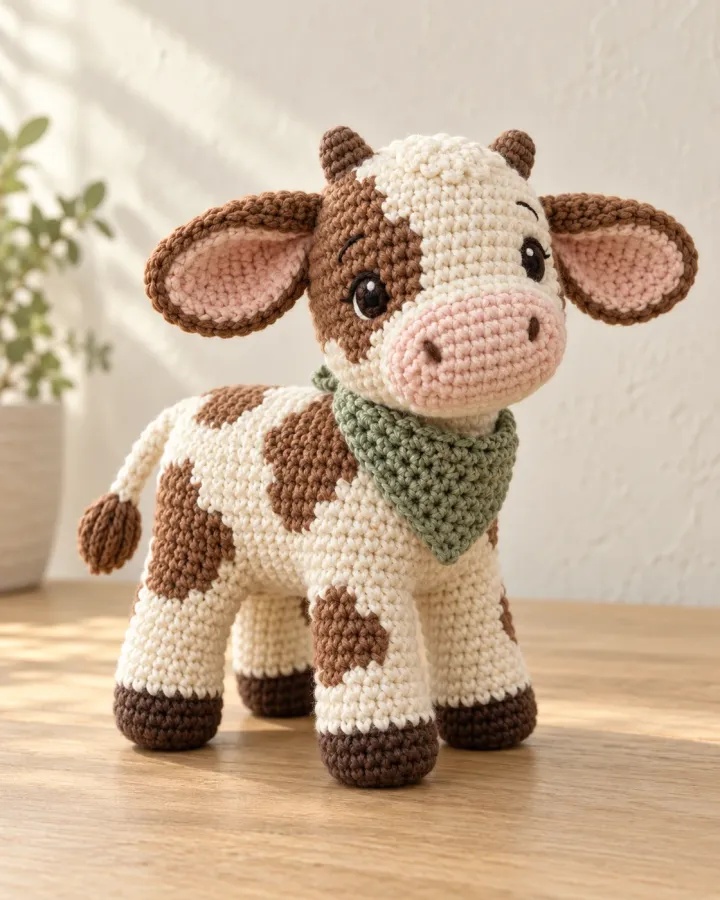
A cream-and-cocoa calf pairs floppy ears and a rosy muzzle with a neat sage-green neckerchief. Irregular patches and little rounded hooves give this countryside companion a playful personality, perfect for a coordinated crochet barnyard display.
- LEVEL
- Intermediate
- TRY IT WITH
- DK cotton: cream 180 yd, cocoa 70 yd, pink 25 yd, sage 25 yd; 2.75 mm hook; washable filling; tapestry needle
- FINISHING NOTE
- Approx. 9 in tall; use a tight stitch that hides the filling.
Short Pattern
Abbreviations: MR magic ring · ch chain · sc single crochet · inc 2 sc in one stitch · dec invisible decrease over 2 stitches · BLO back loop only · hdc half double crochet · dc double crochet · sl st slip stitch
- Horizontal body: make 6 sc in MR and increase by 6 each round to 42. Work 10 rounds at 42, then decrease by 6 per round to 36, 30, 24, 18 and 12. Add filling gradually, keep the underside slightly flatter and close the remaining opening; position the body lengthwise.
- Head: in the main color, make 6 sc in MR. R2: inc around (12). R3–6: add 6 evenly spaced increases each round to reach 18, 24, 30 and 36 stitches. Work 7 rounds at 36. Decrease by 6 per round to 30, 24, 18 and 12, stuffing before the opening narrows. Fasten off with a long sewing tail.
- Four legs: start each hoof with 6 sc in MR, increase to 12 and work 1 BLO round plus 2 plain rounds. Change to the main color and work 6 rounds at 12. Stuff the lower half firmly, flatten the open top and leave a sewing tail. Make all four to the same length.
- Muzzle: in pink, ch 7. Starting in the second chain, sc 5, make 3 sc in the last chain, sc 4 along the underside and inc in the last stitch (14). Increase at each curved end for two rounds to 18 then 22; work 2 plain rounds. Embroider two nostrils, add a thin layer of filling and sew it over the lower face.
- Ears: make two cocoa outer and two pink inner ovals, each starting with ch 7 and working sc, hdc and dc along both sides. Join each pair around the edge, pinch the base and sew beside the forehead. Horns: MR 4, then 6, 8 and 8 sc over the next three rounds; stuff lightly and sew above the ears.
- Spots: make irregular cocoa patches from MR 6, using hdc increases on one side to create uneven ovals. Sew 5–7 patches flat across the body, forehead and one cheek. Make a narrow 10-stitch tail chain, return with sl st and stitch a compact cocoa tuft to its tip.
- Embroider the eyes and a tiny white yarn highlight before sewing the head down. Stitch the neck across several rounds of body stitches, then anchor the legs in matched front and back pairs. Set the animal on a flat surface and adjust placement before completing the seams.
- Neckerchief: ch 2, work 2 sc in the second chain, ch 1 and turn. Increase at both ends of each row until the triangle measures about 2.5 in across. Add a narrow sc edge and sew the short ends together at the back of the neck; tack the point flat.
Assembly: Sew through every patch edge and both ear layers. Position the hooves before tightening the final leg seams so all four touch the table.
Cloud Fleece Curly Lamb
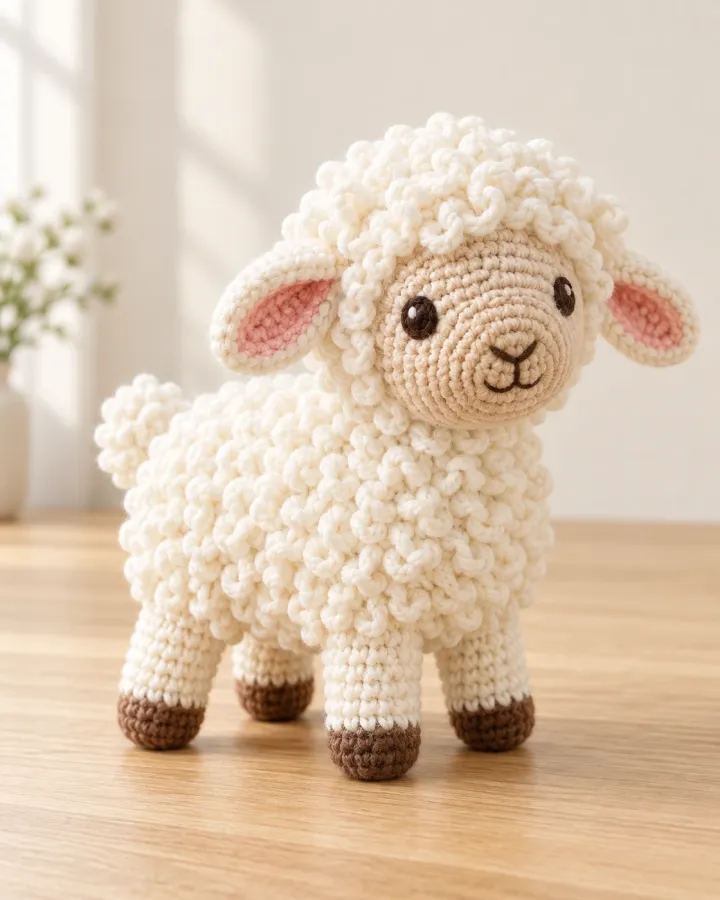
An ivory lamb combines soft looped fleece, a warm tan face and tiny chocolate-brown hooves. Its rounded body and gently spreading ears create a cuddly silhouette, while the textured coat adds lovely contrast to the smooth crocheted face.
- LEVEL
- Intermediate
- TRY IT WITH
- DK cotton: ivory 240 yd, tan 65 yd, brown 20 yd, blush 10 yd; 2.75 mm hook; filling
- FINISHING NOTE
- Approx. 8–9 in tall; keep fleece loops short and even.
Short Pattern
Abbreviations: MR magic ring · ch chain · sc single crochet · inc 2 sc in one stitch · dec invisible decrease over 2 stitches · BLO back loop only · hdc half double crochet · dc double crochet · sl st slip stitch
- Horizontal body: make 6 sc in MR and increase by 6 each round to 42. Work 10 rounds at 42, then decrease by 6 per round to 36, 30, 24, 18 and 12. Add filling gradually, keep the underside slightly flatter and close the remaining opening; position the body lengthwise.
- Head: in the tan, make 6 sc in MR. R2: inc around (12). R3–6: add 6 evenly spaced increases each round to reach 18, 24, 30 and 36 stitches. Work 7 rounds at 36. Decrease by 6 per round to 30, 24, 18 and 12, stuffing before the opening narrows. Fasten off with a long sewing tail.
- Four legs: start each hoof with 6 sc in MR, increase to 12 and work 1 BLO round plus 2 plain rounds. Change to the ivory and work 6 rounds at 12. Stuff the lower half firmly, flatten the open top and leave a sewing tail. Make all four to the same length.
- Cover the body with short fleece loops after the base is stuffed. Attach ivory yarn near the underside, ch 4 and sl st into the next base stitch; repeat along spaced surface rows. Keep the loops about 1/4 in high and leave the leg attachment areas clear.
- Add the same fleece around the back and crown of the tan head, preserving a clean oval face. Crochet two tan ear ovals from ch 8, add smaller blush inner pieces and sew them flat before pinching the bases.
- Embroider two eyes, a tiny brown triangle nose and a Y-shaped mouth. Sew the ears slightly below the crown so they angle outward, and add a small ivory tail made from MR 6, then 12 sc for 3 rounds before decreasing closed.
- Embroider the eyes and a tiny white yarn highlight before sewing the head down. Stitch the neck across several rounds of body stitches, then anchor the legs in matched front and back pairs. Set the animal on a flat surface and adjust placement before completing the seams.
Assembly: Check fleece tension on a sample first: loops should sit firmly against the base. Trim no structural yarn and bury all loop-row ends inside the body.
Rust Hen and Little Egg
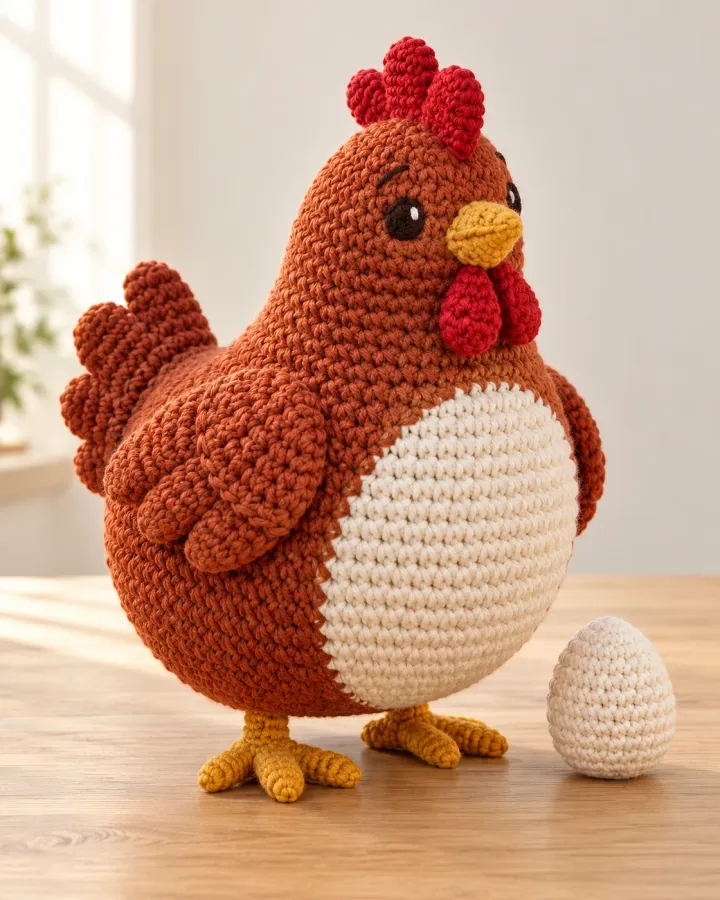
A rounded rust-red hen shows off a cream belly, sculpted red comb and one tiny crocheted egg. Layered wings and a softly shaped tail bring extra character, making this warm-toned bird a charming centerpiece for your handmade farmyard.
- LEVEL
- Intermediate
- TRY IT WITH
- DK cotton: rust 170 yd, cream 65 yd, red 30 yd, mustard 25 yd; 2.75 mm hook; filling
- FINISHING NOTE
- Approx. 8 in tall; egg approx. 2 in.
Short Pattern
Abbreviations: MR magic ring · ch chain · sc single crochet · inc 2 sc in one stitch · dec invisible decrease over 2 stitches · BLO back loop only · hdc half double crochet · dc double crochet · sl st slip stitch
- Body and head in one piece: MR 6 in rust; increase by 6 each round to 48. Work 10 rounds at 48, then decrease to 42, 36 and 30. Work 2 rounds at 30; decrease to 24 and work 3 rounds; decrease to 18, 12 and 6 while filling gradually. Close the crown.
- Belly: ch 9 in cream and crochet around both sides for an 18-stitch oval. Add 3 oval rounds, increasing only at the two rounded ends until it lies flat. Sew it vertically over the front, leaving the upper face clear.
- Wings: MR 6, then 12, 18 and 24 sc; work 3 rounds at 24. Flatten without stuffing and join the opening with 12 sc. Sew one wing on each side, angled back with the rounded edge lower.
- Comb: make three red cups, each MR 6 then 9 sc for 2 rounds. Flatten and sew the cups together along their lower edges; anchor the complete comb across the crown. Make two small red wattle ovals and stitch below the beak.
- Beak: MR 4 in mustard, then 6 sc for 2 rounds. Flatten into a soft cone and sew centered on the face. For each foot, make three short ch-5 toes, sl st back along each, then join all three at a single reinforced base.
- Tail: crochet three rust double-layer leaf shapes using a chain spine with sc at the tip and hdc/dc at the center. Stitch the bases together and sew firmly to the rear. Embroider the eyes and anchor the feet beneath the body.
- Egg: MR 6 in cream; increase to 12 then 18. Work 4 rounds at 18, then 12 for 2 rounds; stuff, decrease to 6 and close. Arrange beside the hen for display.
Assembly: Keep the belly patch flat, support the hen with a broad stuffed base and place both feet evenly beneath it.
Buttercup Bow Duckling
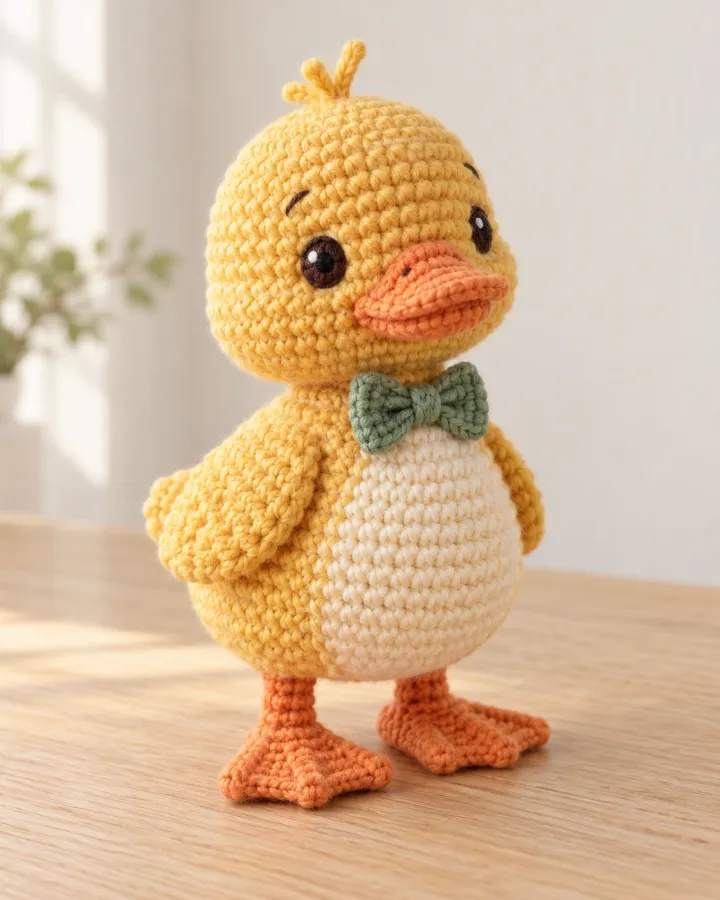
A golden duckling brings a cream tummy, orange webbed feet and a little sage bow to the barnyard. Rounded wings and a cheerful oversized head create a sweet silhouette, with contrasting colors that highlight each carefully crocheted detail.
- LEVEL
- Intermediate
- TRY IT WITH
- DK cotton: golden yellow 160 yd, cream 55 yd, orange 30 yd, sage 20 yd; 2.75 mm hook; filling
- FINISHING NOTE
- Approx. 8 in tall.
Short Pattern
Abbreviations: MR magic ring · ch chain · sc single crochet · inc 2 sc in one stitch · dec invisible decrease over 2 stitches · BLO back loop only · hdc half double crochet · dc double crochet · sl st slip stitch
- Pear body: MR 6 in yellow; increase by 6 per round to 42. Work 8 rounds at 42, then decrease to 36 and work 2 rounds. Decrease to 30, 24 and 18, stuffing firmly at the base; leave the neck opening ready for the head.
- Head: in the yellow, make 6 sc in MR. R2: inc around (12). R3–6: add 6 evenly spaced increases each round to reach 18, 24, 30 and 36 stitches. Work 7 rounds at 36. Decrease by 6 per round to 30, 24, 18 and 12, stuffing before the opening narrows. Fasten off with a long sewing tail.
- Make a cream belly oval from ch 7, working around the chain and adding end increases for 4 rounds. Stop when it covers the lower front without reaching the wing seam; sew the entire edge down.
- Beak: in orange, ch 7 and crochet around both sides for 14 sc. Work 2 rounds at 14, flatten and join the back edge. Sew horizontally across the lower face with a short dark embroidered dividing line.
- Feet: crochet two orange circles from MR 6 to 12 and 18 sc. Fold each circle in half and join the curved edges; add three shallow surface stitches from the folded back toward the front to suggest webbing. Sew the back edges beneath the body.
- Wings: MR 6, then 12 and 18 sc; work 2 rounds at 18 and decrease to 12. Flatten and sew to the sides. Add a small tail from a folded yellow 12-stitch circle.
- Sew the head across the open neck, embroider the eyes and add a few short yellow loop stitches at the crown. Bow: crochet a sage 12-by-5-sc rectangle, pinch the center, wrap with yarn and sew the bow directly to the neck.
Assembly: Keep the bow compact and the feet flat. A slightly wider lower body helps the duckling sit upright without a support.
Blue Bandana Chestnut Foal
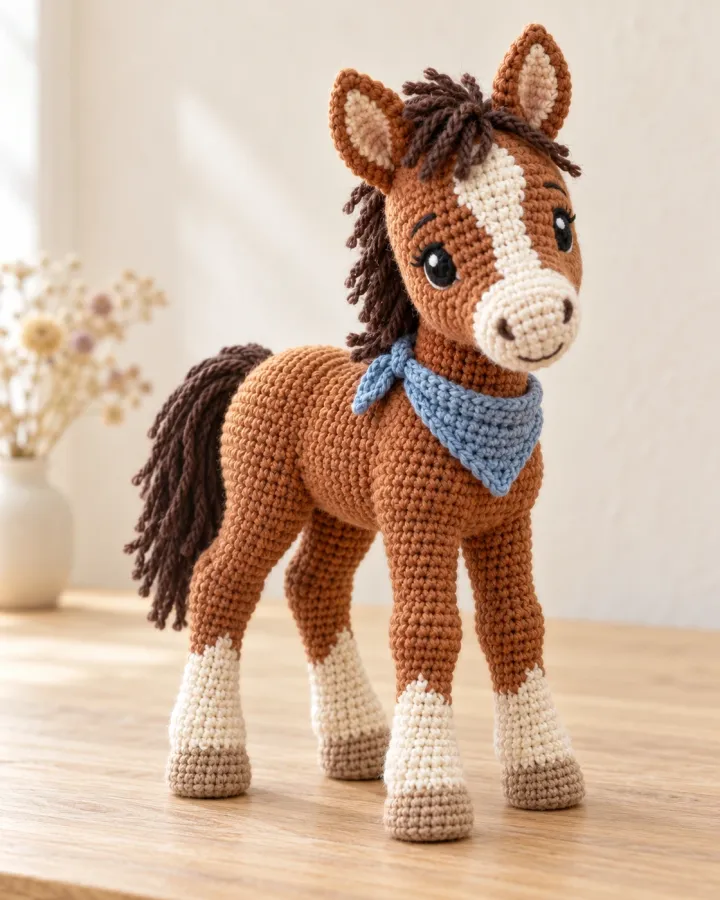
A chestnut foal wears a denim-blue bandana above cream socks and a softly flowing dark mane. Its upright ears, rounded muzzle and contrasting hooves give this little horse a friendly expression that fits beautifully into a handmade stable scene.
- LEVEL
- Intermediate
- TRY IT WITH
- DK cotton: chestnut 210 yd, dark brown 70 yd, cream 65 yd, denim blue 25 yd; 2.75 mm hook; filling
- FINISHING NOTE
- Approx. 10 in tall.
Short Pattern
Abbreviations: MR magic ring · ch chain · sc single crochet · inc 2 sc in one stitch · dec invisible decrease over 2 stitches · BLO back loop only · hdc half double crochet · dc double crochet · sl st slip stitch
- Horizontal body: make 6 sc in MR and increase by 6 each round to 42. Work 10 rounds at 42, then decrease by 6 per round to 36, 30, 24, 18 and 12. Add filling gradually, keep the underside slightly flatter and close the remaining opening; position the body lengthwise.
- Head: in the chestnut, make 6 sc in MR. R2: inc around (12). R3–6: add 6 evenly spaced increases each round to reach 18, 24, 30 and 36 stitches. Work 7 rounds at 36. Decrease by 6 per round to 30, 24, 18 and 12, stuffing before the opening narrows. Fasten off with a long sewing tail.
- Four legs: start each hoof with 6 sc in MR, increase to 12 and work 1 BLO round plus 2 plain rounds. Change to the chestnut and work 6 rounds at 12. Stuff the lower half firmly, flatten the open top and leave a sewing tail. Make all four to the same length.
- Make a cream oval muzzle from ch 7 as for the calf, increasing the curved ends for 3 rounds, then work 2 rounds without increases. Sew it low on the face and embroider two nostrils. Add a narrow cream forehead blaze with surface sc or a flat triangular applique.
- Ears: crochet two chestnut cones, MR 4, then 6, 8 and 10 sc; work 2 more rounds at 10. Add a small cream inner triangle, flatten the base and stitch the ears upright on either side of the crown.
- Mane: crochet a dark brown strip 4 sc wide to reach from between the ears to the lower neck. Work ch-8 loops along one long side; sl st each loop back to its base. Sew the strip flat along the centerline and tack loops into a swept shape.
- Tail: make a chestnut narrow tube of 6 sc for 7 rounds. Stitch dark brown short loop chains around its tip, close the base and sew to the rump. Shape the front of the body with two small hidden stitches to create a slightly raised chest.
- Embroider the eyes and a tiny white yarn highlight before sewing the head down. Stitch the neck across several rounds of body stitches, then anchor the legs in matched front and back pairs. Set the animal on a flat surface and adjust placement before completing the seams.
- Blue neckerchief: ch 2, work 2 sc in the second chain, ch 1 and turn. Increase at both ends of each row until the triangle measures about 2.5 in across. Add a narrow sc edge and sew the short ends together at the back of the neck; tack the point flat.
Assembly: Place the front legs just under the chest and the hind legs near the rump. Anchor the mane along its full strip rather than at its two ends only.
Terracotta Neckerchief Baby Goat
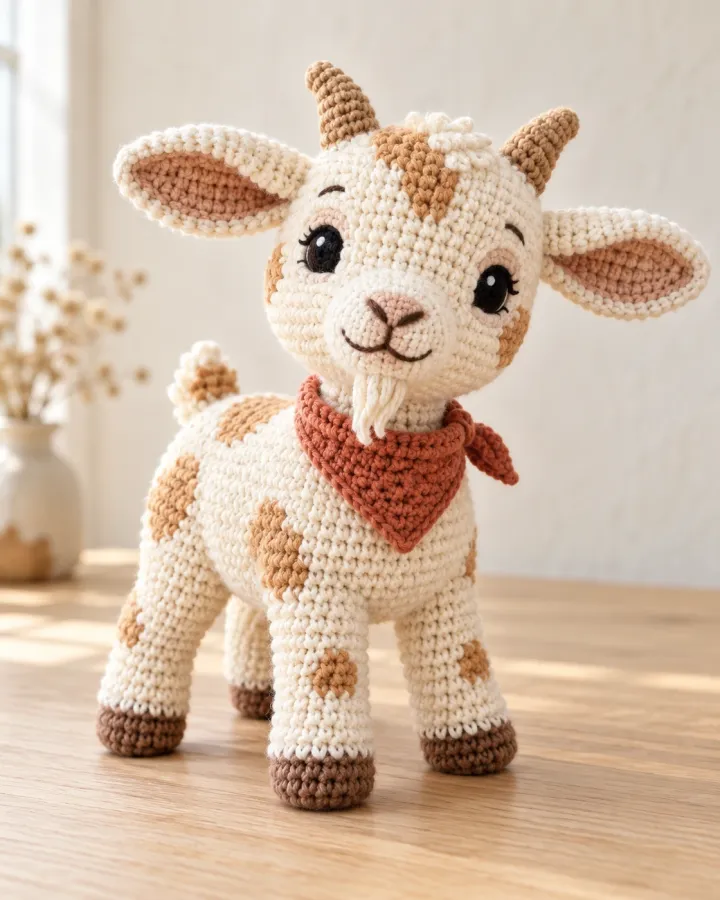
A playful cream-and-caramel kid has little horns, wide ears and a terracotta bandana. The warm neutral palette keeps its features easy to appreciate, while compact hooves and a rounded muzzle add plenty of personality to this miniature farm friend.
- LEVEL
- Intermediate
- TRY IT WITH
- DK cotton: cream 180 yd, caramel 70 yd, terracotta 25 yd, cocoa 15 yd; 2.75 mm hook; filling
- FINISHING NOTE
- Approx. 9 in tall.
Short Pattern
Abbreviations: MR magic ring · ch chain · sc single crochet · inc 2 sc in one stitch · dec invisible decrease over 2 stitches · BLO back loop only · hdc half double crochet · dc double crochet · sl st slip stitch
- Horizontal body: make 6 sc in MR and increase by 6 each round to 42. Work 10 rounds at 42, then decrease by 6 per round to 36, 30, 24, 18 and 12. Add filling gradually, keep the underside slightly flatter and close the remaining opening; position the body lengthwise.
- Head: in the main color, make 6 sc in MR. R2: inc around (12). R3–6: add 6 evenly spaced increases each round to reach 18, 24, 30 and 36 stitches. Work 7 rounds at 36. Decrease by 6 per round to 30, 24, 18 and 12, stuffing before the opening narrows. Fasten off with a long sewing tail.
- Four legs: start each hoof with 6 sc in MR, increase to 12 and work 1 BLO round plus 2 plain rounds. Change to the main color and work 6 rounds at 12. Stuff the lower half firmly, flatten the open top and leave a sewing tail. Make all four to the same length.
- Make a small cream muzzle from MR 6 to 12 and 18, work 1 round at 18, stuff lightly and sew to the lower face. Embroider a caramel nose, curved mouth and two eyes; use a few short cream chain loops beneath the chin for the beard.
- Horns: MR 4 in caramel, increase to 6 and work 4 rounds at 6. Stuff very lightly and bend gently while sewing them to the crown. Ears: make two cream ch-8 ovals with smaller caramel inner ovals, join the edges and pinch the bases.
- Create 4–5 flat caramel patches in different sizes, from MR 6 with a mixture of sc and hdc increases. Place one around an eye, one on the forehead and the rest on the body. Sew every patch edge before the legs are attached.
- Add a short upright tail from MR 6 worked for 4 rounds, with a tiny caramel end. Sew the tail against the rear rather than leaving a long dangling strand.
- Embroider the eyes and a tiny white yarn highlight before sewing the head down. Stitch the neck across several rounds of body stitches, then anchor the legs in matched front and back pairs. Set the animal on a flat surface and adjust placement before completing the seams.
- Terracotta neckerchief: ch 2, work 2 sc in the second chain, ch 1 and turn. Increase at both ends of each row until the triangle measures about 2.5 in across. Add a narrow sc edge and sew the short ends together at the back of the neck; tack the point flat.
Assembly: Balance the horn spacing and ear angle before sewing. Anchor the beard loops with extra stitches and keep them short.
Plum Scarf Blue Donkey
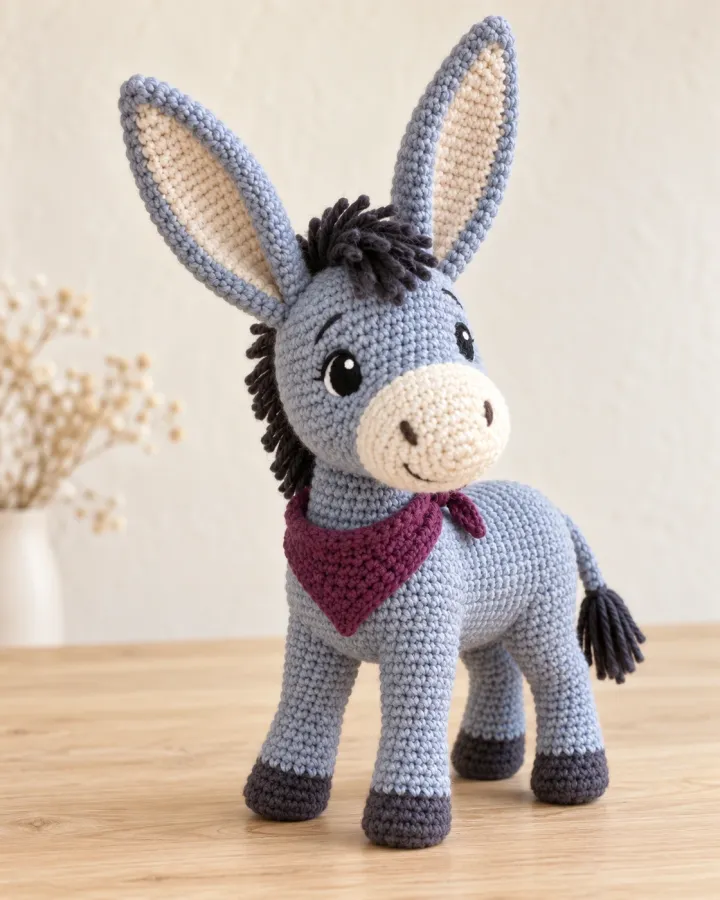
A blue-gray donkey has tall cream-lined ears, a tiny dark mane and a plum neck scarf. The contrast between its long ears and compact body creates an endearing silhouette, with soft colors that complement the other barnyard animals.
- LEVEL
- Intermediate
- TRY IT WITH
- DK cotton: blue-gray 210 yd, cream 65 yd, charcoal 35 yd, plum 25 yd; 2.75 mm hook; filling
- FINISHING NOTE
- Approx. 11 in tall including ears.
Short Pattern
Abbreviations: MR magic ring · ch chain · sc single crochet · inc 2 sc in one stitch · dec invisible decrease over 2 stitches · BLO back loop only · hdc half double crochet · dc double crochet · sl st slip stitch
- Horizontal body: make 6 sc in MR and increase by 6 each round to 42. Work 10 rounds at 42, then decrease by 6 per round to 36, 30, 24, 18 and 12. Add filling gradually, keep the underside slightly flatter and close the remaining opening; position the body lengthwise.
- Head: in the blue-gray, make 6 sc in MR. R2: inc around (12). R3–6: add 6 evenly spaced increases each round to reach 18, 24, 30 and 36 stitches. Work 7 rounds at 36. Decrease by 6 per round to 30, 24, 18 and 12, stuffing before the opening narrows. Fasten off with a long sewing tail.
- Four legs: start each hoof with 6 sc in MR, increase to 12 and work 1 BLO round plus 2 plain rounds. Change to the blue-gray and work 6 rounds at 12. Stuff the lower half firmly, flatten the open top and leave a sewing tail. Make all four to the same length.
- Muzzle: crochet a cream oval from ch 8, adding end increases for 3 rounds, then work 3 straight rounds for a deeper muzzle. Embroider dark nostrils and sew to the lower front of the head with a little stuffing.
- Long ears: MR 4 in blue-gray, increase to 8 then 12. Work 8 rounds at 12, decrease to 10 and work 3 more rounds. Flatten each ear and sew a cream narrow oval onto the front; pinch the lower inch and anchor upright to the crown.
- Mane: ch 15 in charcoal, sc back along the chain, then add tightly formed ch-4 loops along one edge. Sew the strip between the ears and down the upper neck. Make a short gray tail with a compact charcoal loop tuft.
- Embroider the eyes and a tiny white yarn highlight before sewing the head down. Stitch the neck across several rounds of body stitches, then anchor the legs in matched front and back pairs. Set the animal on a flat surface and adjust placement before completing the seams.
- Scarf: crochet a plum rectangle 5 sc wide and long enough to fit the neck with a short overlap. Add a neat sc edge, overlap the ends at one side and sew through both layers; anchor the lower tip to the chest.
Assembly: Keep the ears unstuffed so they remain light. Stitch their bases through more than one head round to hold the tall silhouette.
Sage Wing Farmyard Goose
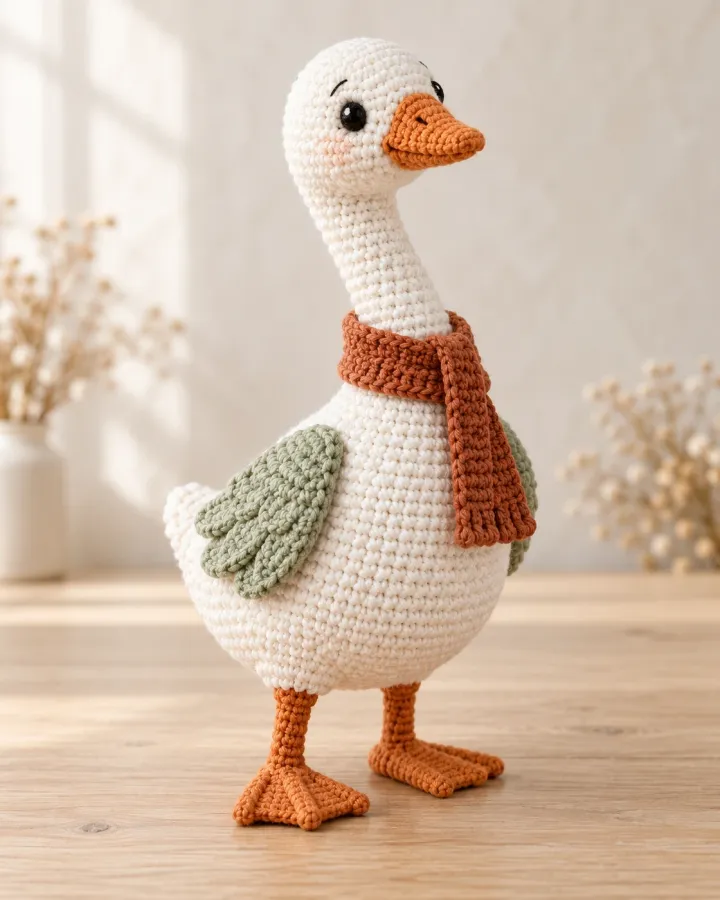
A white goose pairs a long curved neck with sage wings and a warm rust scarf. Its clean silhouette and contrasting beak make the details stand out, bringing a graceful touch to a shelf of handmade countryside companions.
- LEVEL
- Intermediate
- TRY IT WITH
- DK cotton: white 200 yd, sage 60 yd, orange 35 yd, rust 30 yd; 2.75 mm hook; filling
- FINISHING NOTE
- Approx. 11 in tall.
Short Pattern
Abbreviations: MR magic ring · ch chain · sc single crochet · inc 2 sc in one stitch · dec invisible decrease over 2 stitches · BLO back loop only · hdc half double crochet · dc double crochet · sl st slip stitch
- Body: start at the lower base with MR 6 in white; increase by 6 each round to 48. Work 7 rounds at 48, decrease to 42, 36 and 30 with 1 plain round between decrease rounds. Decrease to 24 then 18, stuffing the lower body well.
- Neck: continue for 12 rounds at 18. Fill in small amounts to avoid lumps, then increase to 24 and 30 for the head. Work 5 rounds at 30, decrease to 24, 18, 12 and 6, embroidering the face before closing.
- Curve the neck gently with a long white shaping thread passed inside the back of the neck. Tighten only enough to tip the head slightly forward and secure the thread through several neck stitches.
- Beak: MR 4 in orange; increase to 6, 8 and 10, then work 3 rounds at 10. Flatten the back edge and sew it to the face. Embroider a shallow mouth line rather than leaving an open gap.
- Wings: make two sage ovals starting at ch 10, using sc at the tips and hdc/dc along the middle. Add one sc edging round, then surface-stitch two feather curves. Sew the upper halves to the sides so the lower edges rest against the body.
- Feet: make two orange 18-stitch circles, fold and join their edges, then add shallow webbing stitches. Sew them under the broad base. Make a small white pointed tail from MR 6 to 12, work 2 rounds, flatten and attach.
- Crochet a rust scarf 5 sc wide, fit around the neck with two short ends and sew at the overlap. Tack both ends down to preserve the curve of the neck.
Assembly: Check the goose can rest on its stuffed base as well as its feet. The neck should be soft and curved using yarn only.
Carrot Patch Floppy Bunny
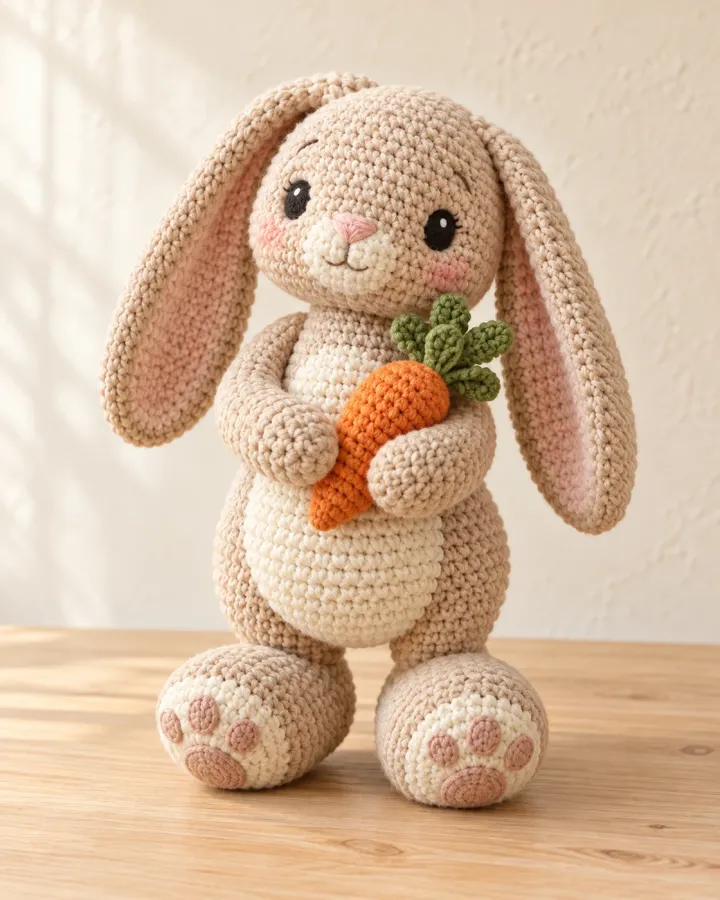
An oatmeal bunny holds a bright carrot between its paws beneath long floppy ears. Its soft neutral colors, rounded feet and gently embroidered features create a charming garden companion, while the orange carrot adds a cheerful pop of color.
- LEVEL
- Intermediate
- TRY IT WITH
- DK cotton: oatmeal 200 yd, cream 60 yd, orange 35 yd, leaf green 15 yd, blush scraps; 2.75 mm hook; filling
- FINISHING NOTE
- Approx. 9 in seated, excluding hanging ears.
Short Pattern
Abbreviations: MR magic ring · ch chain · sc single crochet · inc 2 sc in one stitch · dec invisible decrease over 2 stitches · BLO back loop only · hdc half double crochet · dc double crochet · sl st slip stitch
- Body: MR 6 in oatmeal; increase by 6 per round to 42. Work 10 rounds at 42, decrease to 36, 30, 24 and 18 while stuffing, leaving a long tail at the neck.
- Head: in the oatmeal, make 6 sc in MR. R2: inc around (12). R3–6: add 6 evenly spaced increases each round to reach 18, 24, 30 and 36 stitches. Work 7 rounds at 36. Decrease by 6 per round to 30, 24, 18 and 12, stuffing before the opening narrows. Fasten off with a long sewing tail.
- Ears: MR 6, increase to 12 then 18. Work 12 rounds at 18, decrease to 12 and work 3 more rounds. Leave unstuffed, flatten the tops and sew beside the head. Add smaller cream inner-ear ovals before attachment.
- Arms: MR 6 to 12 sc; work 9 rounds at 12 and fill the paws only. Hind paws: MR 6 to 12 then 18; work 4 rounds at 18, decrease to 12 and close. Sew the hind paws forward on the base and the arms on the upper sides.
- Crochet a cream belly oval and two small cream paw ovals, sew each edge flat and embroider blush toe marks. Add a small stuffed 12-stitch tail behind the seated base.
- Carrot: MR 4 in orange, then 6, 8, 10 and 12 sc over four rounds. Work 4 rounds at 12, fill lightly and decrease to 6. Add three short green leaf chains at the top and stitch their bases firmly.
- Embroider the eyes and blush nose, sew the head to the open neck, then position the carrot between the front paws. Stitch through the carrot and both paws so the accessory stays in place.
Assembly: Let the ears fall naturally; avoid heavy stuffing in them. Pin the feet and tail as a three-point seated support before sewing.
Harvest Fan-Tail Turkey
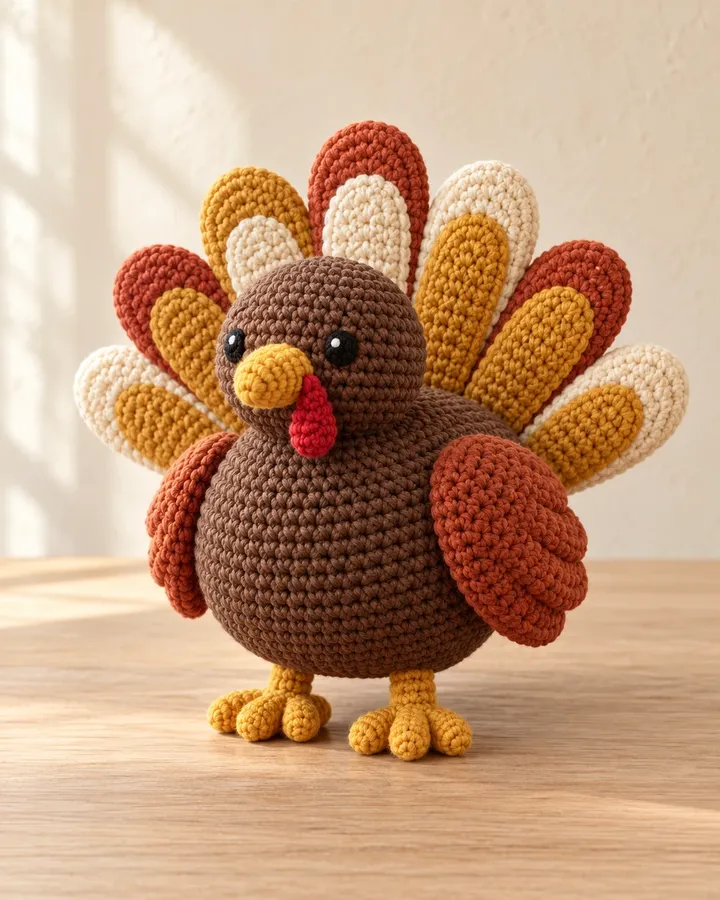
A cocoa turkey fans out layered cream, mustard and terracotta feathers above orange feet. The broad tail creates a striking backdrop for its rounded body, bringing autumn warmth and a distinctive silhouette to your collection of crocheted farm animals.
- LEVEL
- Intermediate
- TRY IT WITH
- DK cotton: cocoa 170 yd, terracotta 90 yd, mustard 70 yd, cream 65 yd, red scraps; 2.75 mm hook; filling
- FINISHING NOTE
- Approx. 9 in high and 10 in wide.
Short Pattern
Abbreviations: MR magic ring · ch chain · sc single crochet · inc 2 sc in one stitch · dec invisible decrease over 2 stitches · BLO back loop only · hdc half double crochet · dc double crochet · sl st slip stitch
- Body: MR 6 in cocoa; increase by 6 per round to 48. Work 10 rounds at 48, decrease to 42, 36, 30 and 24, then stuff. Continue at 24 for 3 rounds, decrease to 18, 12 and 6 and close.
- Tail feathers: make 14 flat panels in pairs. For each panel, MR 6, then 12 and 18 sc; work 4 rounds at 18, decrease to 12 and work 3 rounds. Flatten into a long rounded oval. Match pairs and join their edges to create seven firm double-layer feathers.
- Arrange the seven feathers in a fan with mustard, rust and cream alternating. Overlap the lower third of each feather and sew through adjoining layers. Stitch the completed fan across a broad area on the rear body, not just a single center point.
- Wings: make two rust 24-stitch circles, work 2 plain rounds, fold and close the edges with sc. Sew them to the sides with the tips angled down.
- Beak: MR 4 in mustard, work 6 sc for 2 rounds and flatten into a short cone. Wattle: ch 6 in red, sc back and round the end with 3 sc; sew it under one side of the beak.
- Feet: crochet three mustard ch-5 toes per foot, returning with sl st and joining them at the base. Sew the feet under the front of the body and embroider the eyes.
- Place the turkey on a level surface and adjust the lower tail edges so they help support the back. Add hidden stitches where the fan touches the body to prevent tipping.
Assembly: The double-layer feathers need no wire or exposed support. Keep the fan balanced left to right and the feet aligned.
Teal Bandana Border Collie
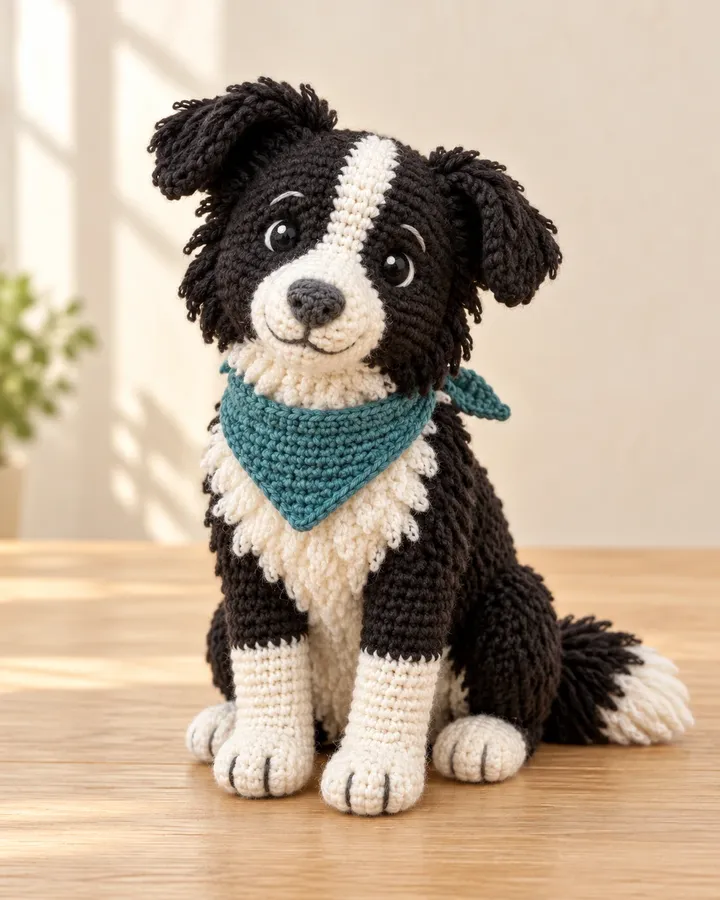
A bright-eyed black-and-white farm dog sits neatly with a teal bandana and soft floppy ears. Contrasting face patches and a cream chest give this border collie its recognizable look, adding a loyal little guardian to the crochet barnyard.
- LEVEL
- Intermediate
- TRY IT WITH
- DK cotton: charcoal 180 yd, cream 100 yd, teal 25 yd, gray scraps; 2.75 mm hook; filling
- FINISHING NOTE
- Approx. 9 in seated.
Short Pattern
Abbreviations: MR magic ring · ch chain · sc single crochet · inc 2 sc in one stitch · dec invisible decrease over 2 stitches · BLO back loop only · hdc half double crochet · dc double crochet · sl st slip stitch
- Seated body: MR 6 in charcoal; increase by 6 per round to 42. Work 9 rounds, decrease to 36 and work 2 rounds; decrease to 30, 24 and 18, filling the base firmly and the shoulders lightly.
- Head: in the charcoal, make 6 sc in MR. R2: inc around (12). R3–6: add 6 evenly spaced increases each round to reach 18, 24, 30 and 36 stitches. Work 7 rounds at 36. Decrease by 6 per round to 30, 24, 18 and 12, stuffing before the opening narrows. Fasten off with a long sewing tail.
- Muzzle: make two cream 12-stitch circles, work 1 plain round, stuff lightly and sew side by side on the lower face. Embroider a gray nose over their center and a short vertical mouth line. Crochet a narrow cream forehead blaze and sew up between the eyes.
- Front legs: start cream paws at MR 6, increase to 12, work 3 rounds and change to charcoal for 8 rounds. Fill the paws firmly. Make larger bent hind paws from 18-stitch ovals and attach them to either side of the seated base.
- Ears: make two charcoal 18-stitch ovals, work 3 rounds and flatten. Sew them high on the sides so the tips flop forward. Add a cream triangular chest patch from increasing sc rows and sew it flat.
- Tail: MR 6 in cream, work 3 rounds, change to charcoal and increase to 9. Work 8 rounds, fill lightly and attach behind the body so the tail curves beside one hind paw.
- Embroider the eyes before joining the head to the neck; attach front legs beside the chest patch and hind paws at matching height. Sew through the complete tops of the limbs for sturdy joins.
- Teal neckerchief: ch 2, work 2 sc in the second chain, ch 1 and turn. Increase at both ends of each row until the triangle measures about 2.5 in across. Add a narrow sc edge and sew the short ends together at the back of the neck; tack the point flat.
Assembly: Pin the sitting pose first. A short cream chin and carefully centered blaze give the dog its collie expression without extra hard components.
Sage Scarf Ginger Barn Cat
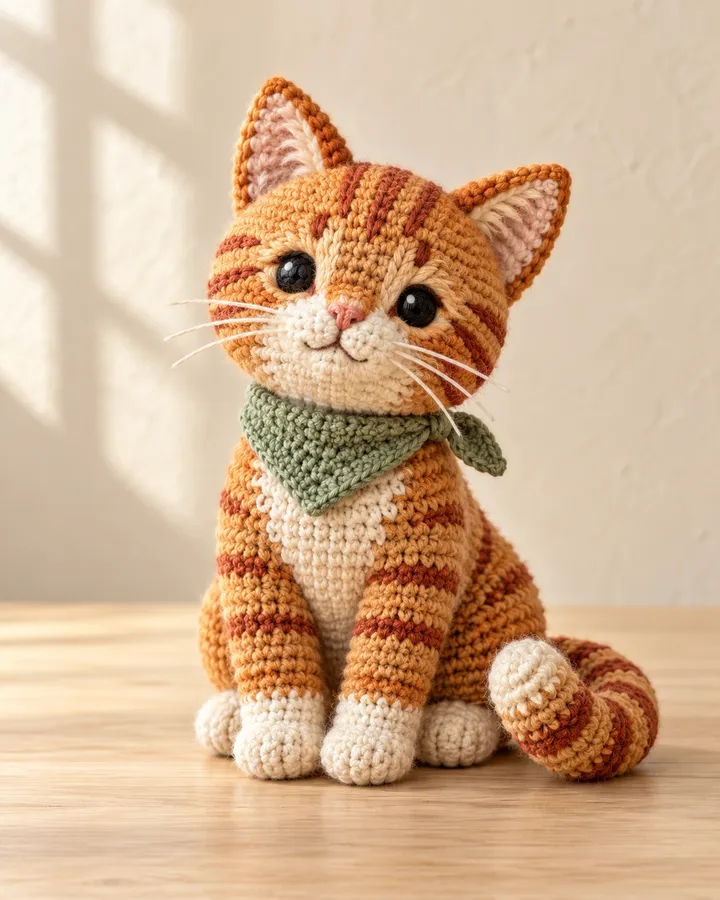
A ginger tabby sits with cream paws, embroidered stripes and a softly curled tail. Its warm coloring and upright ears give it a curious expression, making this small barn cat a lovely companion for the other crocheted farm friends.
- LEVEL
- Intermediate
- TRY IT WITH
- DK cotton: ginger 180 yd, cream 80 yd, rust 30 yd, sage 25 yd; 2.75 mm hook; filling
- FINISHING NOTE
- Approx. 8.5 in seated.
Short Pattern
Abbreviations: MR magic ring · ch chain · sc single crochet · inc 2 sc in one stitch · dec invisible decrease over 2 stitches · BLO back loop only · hdc half double crochet · dc double crochet · sl st slip stitch
- Body: MR 6 in ginger; increase by 6 per round to 42. Work 9 rounds at 42, decrease to 36, 30, 24 and 18, working 1 plain round between decreases. Fill the lower body more firmly than the shoulders.
- Head: in the ginger, make 6 sc in MR. R2: inc around (12). R3–6: add 6 evenly spaced increases each round to reach 18, 24, 30 and 36 stitches. Work 7 rounds at 36. Decrease by 6 per round to 30, 24, 18 and 12, stuffing before the opening narrows. Fasten off with a long sewing tail.
- Ears: MR 4 in ginger, then 6, 8, 10 and 12 sc; flatten each triangle and insert a smaller cream triangle. Join the edges and sew the bases wide apart on the top of the head.
- Make two small cream muzzle circles from MR 6 to 12, add minimal filling and sew side by side. Embroider a pink or rust nose, short smile and whiskers with straight stitches; leave no loose whisker strands.
- Front paws: MR 6 in cream, increase to 12 and work 3 rounds; change to ginger for 7 rounds. Make two 18-stitch cream hind paws and sew them against the base. Add an elongated cream chest oval.
- Tail: MR 6 in cream for 3 rounds, change to ginger, increase to 9 and work 13 rounds. Add rust stripe rounds at intervals. Stuff softly, sew to the rear and tack its curve around the seated side.
- Surface-stitch three short rust forehead stripes, cheek marks and several back stripes. Bury every stripe end inside the body. Embroider eyes and sew the head and paws in place.
- Sage neckerchief: ch 2, work 2 sc in the second chain, ch 1 and turn. Increase at both ends of each row until the triangle measures about 2.5 in across. Add a narrow sc edge and sew the short ends together at the back of the neck; tack the point flat.
Assembly: Keep the tail curled with two concealed attachment stitches. Make the muzzle halves equal and center the nose between them.
Saddle Blanket Honey Alpaca
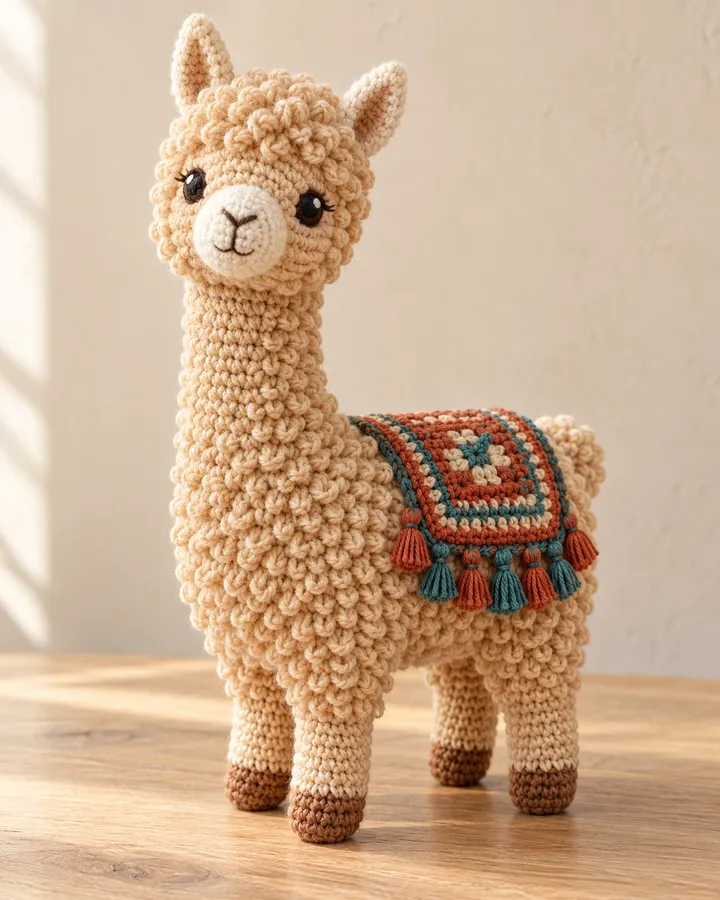
A honey-colored alpaca carries a tiny rust-and-teal saddle blanket over a fluffy looped coat. Its long neck, upright ears and rounded muzzle create a distinctive profile, while the colorful blanket adds a playful accent to the textured fleece.
- LEVEL
- Intermediate
- TRY IT WITH
- DK cotton: honey 260 yd, cream 65 yd, cocoa 20 yd, teal 25 yd, rust 25 yd; 2.75 mm hook; filling
- FINISHING NOTE
- Approx. 11 in tall.
Short Pattern
Abbreviations: MR magic ring · ch chain · sc single crochet · inc 2 sc in one stitch · dec invisible decrease over 2 stitches · BLO back loop only · hdc half double crochet · dc double crochet · sl st slip stitch
- Horizontal body: make 6 sc in MR and increase by 6 each round to 42. Work 10 rounds at 42, then decrease by 6 per round to 36, 30, 24, 18 and 12. Add filling gradually, keep the underside slightly flatter and close the remaining opening; position the body lengthwise.
- Four legs: start each hoof with 6 sc in MR, increase to 12 and work 1 BLO round plus 2 plain rounds. Change to the honey and work 6 rounds at 12. Stuff the lower half firmly, flatten the open top and leave a sewing tail. Make all four to the same length.
- Neck: MR 6 in honey, increase to 12 then 18; work 14 rounds at 18. Stuff in small portions, keeping the tube even. Sew the lower opening across a wide circular area on the upper front of the body.
- Head: make a smaller 30-stitch sphere, starting at MR 6 and adding 6 per round to 30. Work 6 plain rounds, then decrease to 24, 18, 12 and 6. Add a cream 12-stitch muzzle disk, embroider nose and eyes and join the head to the neck.
- Ears: MR 4, increase to 6 and 8, then work 4 rounds at 8; flatten and sew upright. Add a short stuffed honey tail from 6 sc over 5 rounds.
- Fleece: attach honey yarn to surface stitches on the stuffed body and crown. Work short ch-3 loops secured with sl st to adjacent base stitches, spacing rows so the original fabric stays visible at the legs and lower neck.
- Blanket: ch 17 in teal and sc 16 across. Work 14 rows, changing rust and cream every 2 rows, then add a teal sc border. Add a simple rust surface-stitch diamond to the center.
- Sew the legs in balanced pairs, drape the blanket across the back and tack all four corners. Add short compact loop edging to the blanket if desired, securing every loop base.
Assembly: Keep the blanket sewn in place. The neck needs firm, even filling and a broad seam rather than an internal rod.
Pocket Chick and Cracked Eggshell
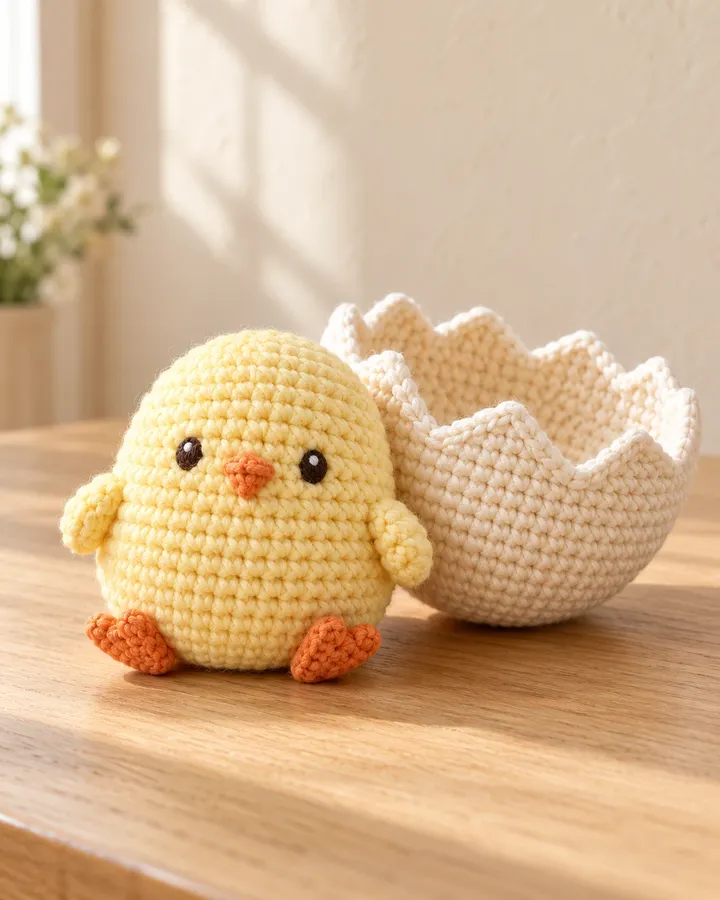
A tiny butter-yellow chick rests beside a cream eggshell with a softly scalloped rim. Its compact wings and little orange beak keep the design simple and expressive, creating a sweet springtime accent for a handmade barnyard scene.
- LEVEL
- Intermediate
- TRY IT WITH
- DK cotton: butter yellow 85 yd, cream 65 yd, orange 15 yd; 2.5–2.75 mm hook; filling
- FINISHING NOTE
- Chick approx. 4.5 in; shell approx. 3.5 in wide.
Short Pattern
Abbreviations: MR magic ring · ch chain · sc single crochet · inc 2 sc in one stitch · dec invisible decrease over 2 stitches · BLO back loop only · hdc half double crochet · dc double crochet · sl st slip stitch
- Chick: MR 6 in yellow; increase by 6 each round to 36. Work 7 rounds at 36, decrease to 30, 24 and 18, fill well, then decrease to 12 and 6. Close neatly underneath.
- Wings: MR 6, increase to 12 and work 1 plain round. Fold each disk and join the edges. Sew one wing to each side with a slight upward angle.
- Beak: ch 3 in orange, sc in the second chain and hdc in the last; fasten off with a sewing tail. Fold gently into a tiny triangle and sew centered below the embroidered eyes.
- Feet: make two flat orange ovals from ch 4, working around both sides. Add one round with increases at the ends and sew beneath the body so the toes peek out.
- Eggshell outer cup: MR 6 in cream; increase to 12, 18, 24 and 30, then work 6 rounds at 30. For the cracked edge, repeat sc, hdc, dc, hdc, sc around the 30 stitches to make six soft points.
- Make a second cream cup to the same size, stopping with a plain sc edge. Nest it inside the first and join both rims with sl st, working loosely around the pointed outer edge to retain its shape.
- Add two or three short yellow crown loops, secure their ends and check the chick sits flat. Display the shell beside the chick or place the chick partly inside it.
Assembly: The shell should be soft and double-layered. These two display pieces are separate; sew them together if you want a single keepsake.
Moss Bandana Curly-Horn Ram
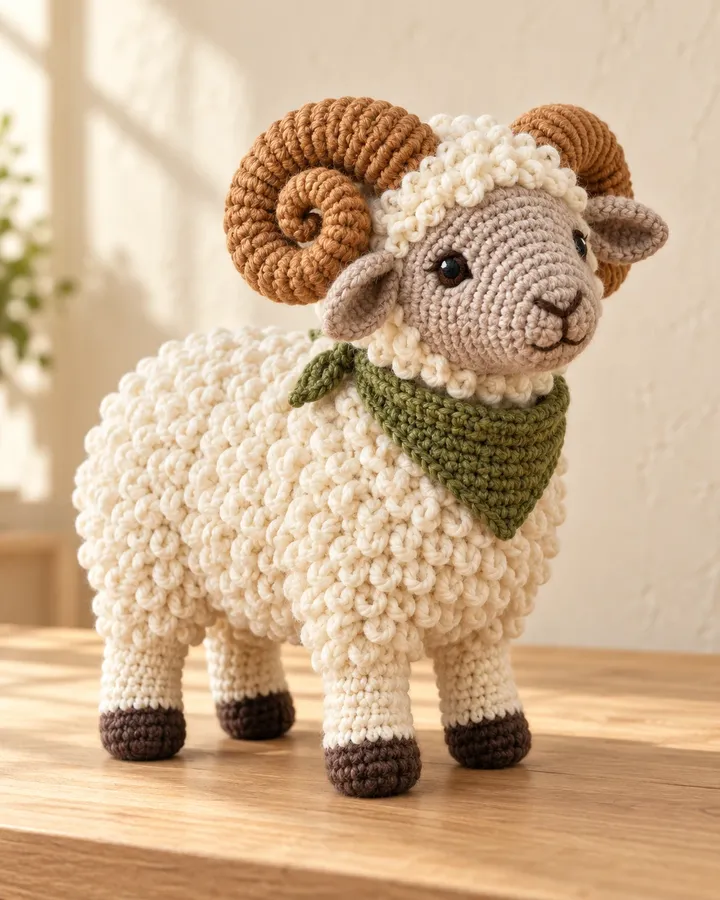
A cream ram shows off tightly curled caramel horns, a taupe face and a moss-green bandana. The sculpted horns frame its gentle expression, while the pale fleece and earthy accents create a handsome companion for the curly lamb.
- LEVEL
- Intermediate
- TRY IT WITH
- DK cotton: ivory 240 yd, taupe 65 yd, caramel 70 yd, moss green 25 yd, cocoa 20 yd; 2.75 mm hook; filling
- FINISHING NOTE
- Approx. 9 in tall.
Short Pattern
Abbreviations: MR magic ring · ch chain · sc single crochet · inc 2 sc in one stitch · dec invisible decrease over 2 stitches · BLO back loop only · hdc half double crochet · dc double crochet · sl st slip stitch
- Horizontal body: make 6 sc in MR and increase by 6 each round to 42. Work 10 rounds at 42, then decrease by 6 per round to 36, 30, 24, 18 and 12. Add filling gradually, keep the underside slightly flatter and close the remaining opening; position the body lengthwise.
- Head: in the taupe, make 6 sc in MR. R2: inc around (12). R3–6: add 6 evenly spaced increases each round to reach 18, 24, 30 and 36 stitches. Work 7 rounds at 36. Decrease by 6 per round to 30, 24, 18 and 12, stuffing before the opening narrows. Fasten off with a long sewing tail.
- Four legs: start each hoof with 6 sc in MR, increase to 12 and work 1 BLO round plus 2 plain rounds. Change to the ivory and work 6 rounds at 12. Stuff the lower half firmly, flatten the open top and leave a sewing tail. Make all four to the same length.
- Fleece: work ivory ch-4 loops anchored with sl st over the stuffed body and crown. Space the loops evenly, keep the taupe face clear and leave attachment areas open for the horns and ears.
- Horns: make two caramel tubes. Start MR 6, increase to 9 and work 20 rounds at 9, stuffing lightly every few rounds. Decrease to 6, close the tip and coil each tube into a tight spiral.
- Stitch across each spiral at several points with matching yarn so it holds its curl. Sew the wider horn base firmly to the side of the head and anchor the outer coil back to the head with an additional concealed stitch.
- Ears: make two small taupe ovals from ch 6, add cream inner pieces and pinch the bases. Sew them below the horns, angled outward. Add a taupe muzzle disk and embroider nose, mouth and eyes.
- Embroider the eyes and a tiny white yarn highlight before sewing the head down. Stitch the neck across several rounds of body stitches, then anchor the legs in matched front and back pairs. Set the animal on a flat surface and adjust placement before completing the seams.
- Moss-green neckerchief: ch 2, work 2 sc in the second chain, ch 1 and turn. Increase at both ends of each row until the triangle measures about 2.5 in across. Add a narrow sc edge and sew the short ends together at the back of the neck; tack the point flat.
Assembly: Make the horns as a mirrored pair before attachment. Keep the curls compact, soft and secured through several head stitches.
Make thoughtfully and check as you go.
Yarn, hook size and personal tension can change the finished scale. Count every round, stuff gradually and use embroidered features instead of safety eyes when making toys for children under three.