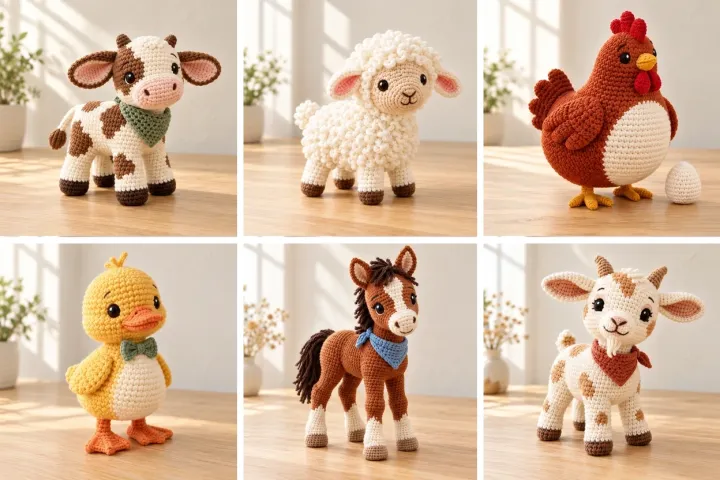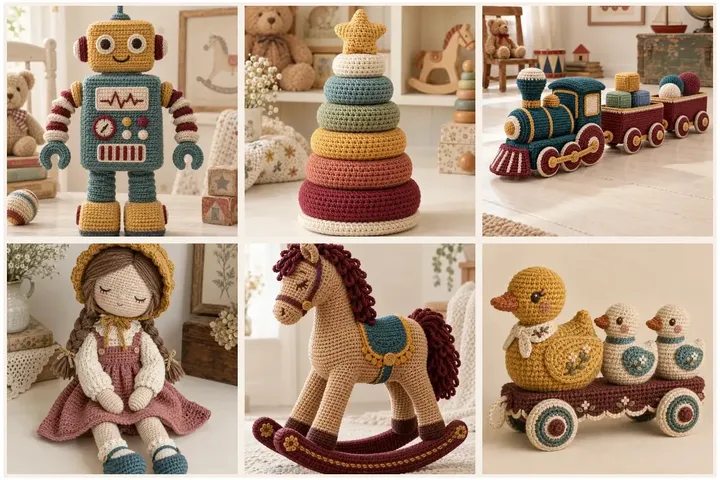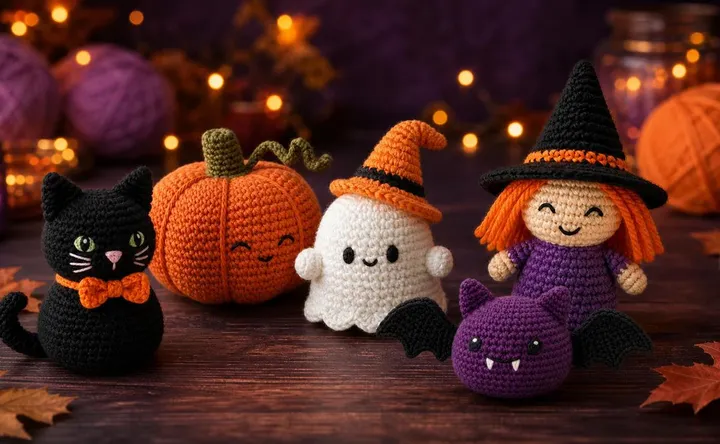
This collection was designed for Hunerli Parmaklar around simple shapes, short rounds and friendly embroidered faces. Every mini pattern uses US crochet terminology and continuous rounds unless noted. The samples are shown as creative references; check your stitch count at the end of each round and adjust hook size if stuffing shows through.
Pocket Boo Ghost
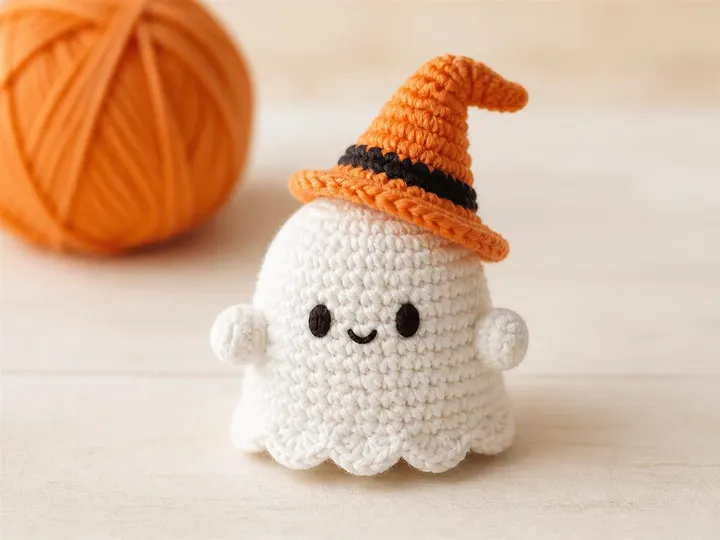
A one-piece ghost with a softly scalloped hem and a removable crooked hat. The uncomplicated body is a comfortable first amigurumi project.
- LEVEL
- Beginner
- TRY IT WITH
- White, orange and black DK cotton; 3 mm hook; stuffing
- FINISHING NOTE
- Embroider the face before the final decreases.
Short Pattern
Abbreviations: MR magic ring · sc single crochet · inc increase · dec invisible decrease · FLO front loop only
- Body — R1: 6 sc in MR. R2: inc ×6 [12]. R3: (sc, inc) ×6 [18]. R4: (2 sc, inc) ×6 [24]. R5–11: 24 sc.
- R12: 24 sc in back loops. Stuff. R13: (2 sc, dec) ×6 [18]. R14: (sc, dec) ×6 [12]. R15: dec ×6 [6]; close.
- Hem — Join white yarn to the unused front loops of R12. Repeat (sc, hdc, dc, hdc) six times; join.
- Hat — With orange: R1 4 sc in MR; R2–3 4 sc; R4 inc ×4 [8]; R5 8 sc; R6 (sc, inc) ×4 [12]; R7 12 sc. Brim: FLO inc ×12 [24]. Add a black chain band.
Assembly: Sew two tiny flattened 6-sc arms at R8. Add the embroidered eyes and smile, then place the hat slightly off-center.
Sleepy Pip Pumpkin
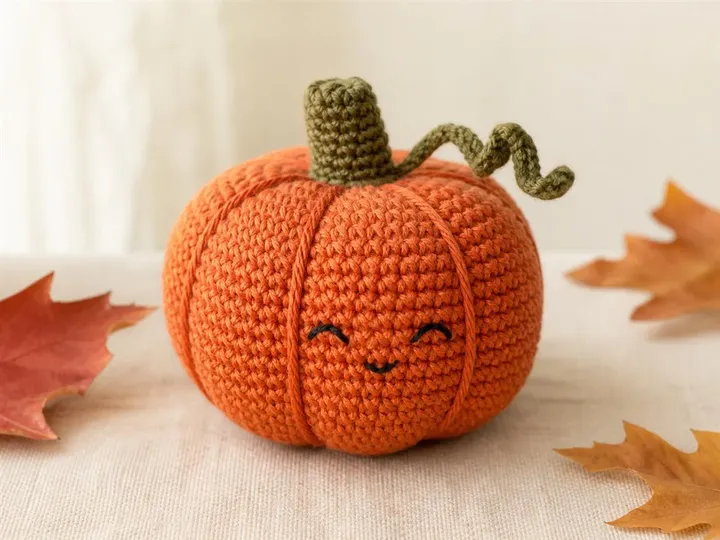
A classic stuffed sphere becomes a convincing pumpkin when six long yarn wraps pull it into deep ribs.
- LEVEL
- Beginner
- TRY IT WITH
- Burnt-orange and olive DK cotton; 3 mm hook; stuffing
- FINISHING NOTE
- Do not overstuff; a little softness makes the ribs easier to shape.
Short Pattern
Abbreviations: MR magic ring · sc single crochet · inc increase · dec invisible decrease · ch chain
- Pumpkin — R1: 6 sc in MR. R2: inc ×6 [12]. R3: (sc, inc) ×6 [18]. R4: (2 sc, inc) ×6 [24]. R5: (3 sc, inc) ×6 [30]. R6: (4 sc, inc) ×6 [36].
- R7–11: 36 sc. R12: (4 sc, dec) ×6 [30]. R13: (3 sc, dec) ×6 [24]. R14: (2 sc, dec) ×6 [18]. Stuff. R15: (sc, dec) ×6 [12]. R16: dec ×6 [6]; close.
- Stem — In olive, 6 sc in MR; R2–5: 6 sc. Vine — ch 13, make 2 sc in each chain back.
Assembly: Run a long orange strand from top to bottom six times, spacing the wraps evenly and pulling gently. Sew on the stem and vine; embroider sleepy eyes.
Berry Bat
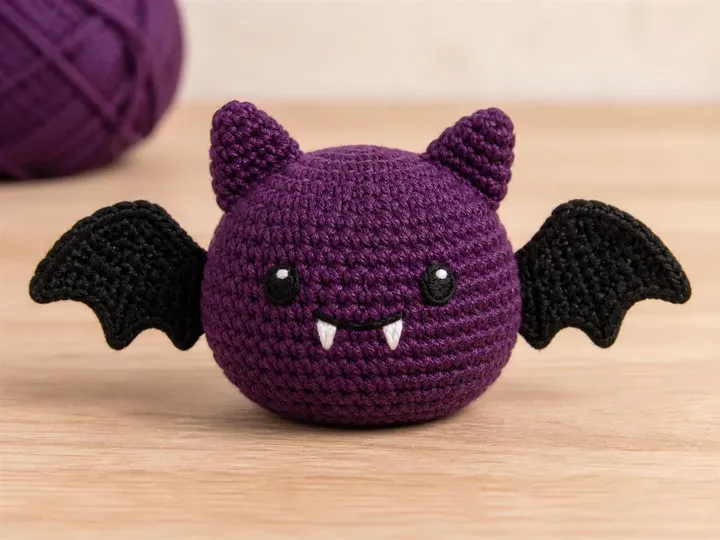
A round plum body and two flat black wings create a bold bat using only small, repeatable pieces.
- LEVEL
- Advanced beginner
- TRY IT WITH
- Plum, black and white DK cotton; 3 mm hook; stuffing
- FINISHING NOTE
- Block the wings flat before attaching them.
Short Pattern
Abbreviations: MR magic ring · sc single crochet · inc increase · dec decrease · ch chain · hdc half double crochet · dc double crochet
- Body — R1 6 sc in MR; R2 inc ×6 [12]; R3 (sc, inc) ×6 [18]; R4 (2 sc, inc) ×6 [24]; R5 (3 sc, inc) ×6 [30]; R6–10 30 sc.
- R11 (3 sc, dec) ×6 [24]; R12 (2 sc, dec) ×6 [18]. Stuff. R13 (sc, dec) ×6 [12]; R14 dec ×6 [6]; close.
- Each wing — ch 8. Starting in second chain: sc, hdc, dc, dc, hdc, sc, sl st. Turn and work back along the other side in reverse. Make two.
- Each ear — 4 sc in MR; R2 (sc, inc) ×2 [6]; R3 6 sc. Flatten.
Assembly: Sew ears between R3–5 and wings across R7–10. Embroider eyes, smile and two tiny white fangs.
Midnight Mini Cat
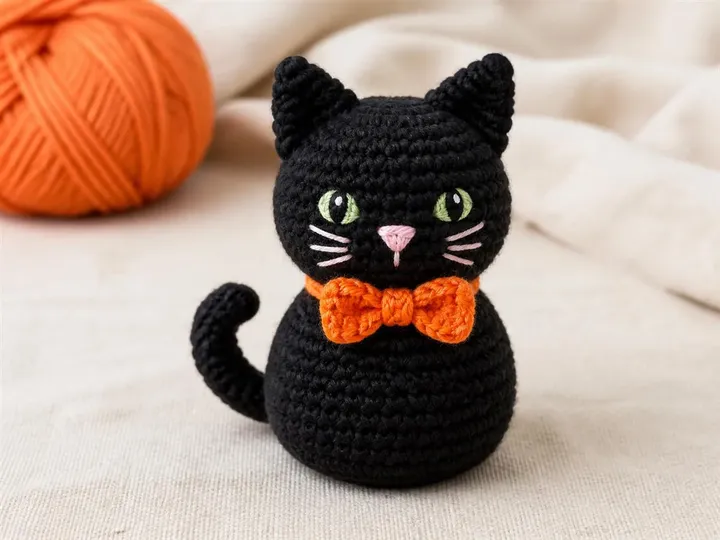
This black cat uses one pear-shaped body, two ears and a short curled tail, finished with a bright orange bow.
- LEVEL
- Advanced beginner
- TRY IT WITH
- Black DK cotton plus green, pink and orange scraps; 3 mm hook
- FINISHING NOTE
- Use pale embroidery first to mark the eye positions on black yarn.
Short Pattern
Abbreviations: MR magic ring · sc single crochet · inc increase · dec decrease · ch chain · sl st slip stitch
- Body — R1 6 sc in MR; R2 inc ×6 [12]; R3 (sc, inc) ×6 [18]; R4 (2 sc, inc) ×6 [24]; R5–8 24 sc; R9 (3 sc, inc) ×6 [30]; R10–13 30 sc.
- R14 (3 sc, dec) ×6 [24]; R15 (2 sc, dec) ×6 [18]. Stuff. R16 (sc, dec) ×6 [12]; R17 dec ×6 [6]; close.
- Ears — ch 5; sc in second chain, hdc, dc, tr. Fasten off and make two. Tail — ch 18; work 2 sc in each chain back.
- Bow — ch 6, join. Work (ch 3, 3 dc, ch 3, sl st) twice into the ring. Wrap the center.
Assembly: Sew ears to the top and tail to the lower back. Embroider green eyes, nose and whiskers; tie or sew the bow below the face.
Cornelius Candy Corn
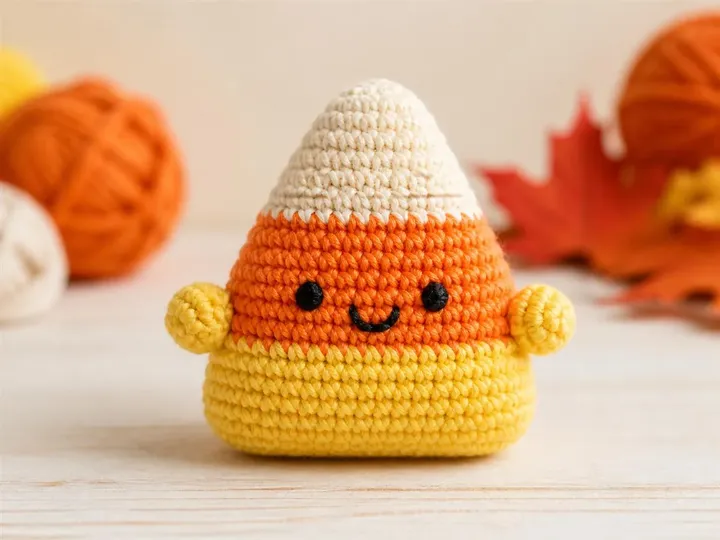
Three cheerful color bands grow from a narrow cream point into a softly rounded yellow base.
- LEVEL
- Beginner
- TRY IT WITH
- Cream, orange and yellow DK cotton; 3 mm hook; stuffing
- FINISHING NOTE
- Change color on the final yarn-over of the previous round.
Short Pattern
Abbreviations: MR magic ring · sc single crochet · inc increase · dec decrease
- Start cream — R1: 6 sc in MR. R2: 6 sc. R3: inc ×6 [12]. R4: 12 sc. R5: (sc, inc) ×6 [18]. R6: 18 sc.
- Change orange — R7: (2 sc, inc) ×6 [24]. R8–10: 24 sc.
- Change yellow — R11–13: 24 sc. R14: (2 sc, dec) ×6 [18]. Stuff. R15: (sc, dec) ×6 [12]. R16: dec ×6 [6]; close.
- Arms — Make two: 6 sc in MR; R2 6 sc. Flatten and fasten off.
Assembly: Sew the arms at the middle orange band. Embroider the eyes and smile before stuffing the final rounds.
Little Reap
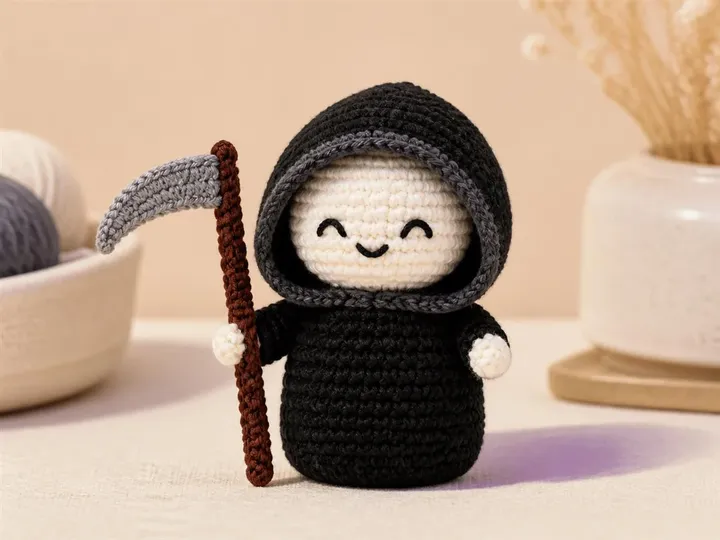
A happy face framed by a deep hood turns this tiny reaper into a friendly desk companion.
- LEVEL
- Advanced beginner
- TRY IT WITH
- Black, charcoal, cream, brown and gray DK cotton; 3 mm hook
- FINISHING NOTE
- Keep the hood slightly loose so it frames rather than hides the face.
Short Pattern
Abbreviations: MR magic ring · sc single crochet · inc increase · dec decrease · ch chain
- Body in black — R1 6 sc in MR; R2 inc ×6 [12]; R3 (sc, inc) ×6 [18]; R4 (2 sc, inc) ×6 [24]; R5–11 24 sc; R12 (2 sc, dec) ×6 [18]. Stuff; R13 (sc, dec) ×6 [12]; R14 dec ×6 [6].
- Face in cream — R1 6 sc in MR; R2 inc ×6 [12]; R3 (sc, inc) ×6 [18]; R4–6 18 sc; R7 (sc, dec) ×6 [12]. Stuff lightly and close.
- Hood in charcoal — ch 25, join; R1–7 25 sc. Flatten the top and sc through both layers to close.
- Staff — ch 24 in brown and sl st back. Blade — ch 7 in gray; sc, hdc, 3 dc, hdc.
Assembly: Place the face inside the hood, sew securely, then attach to the body. Add two 6-sc hands and secure the staff to one hand.
Dotty No-Sew Spider
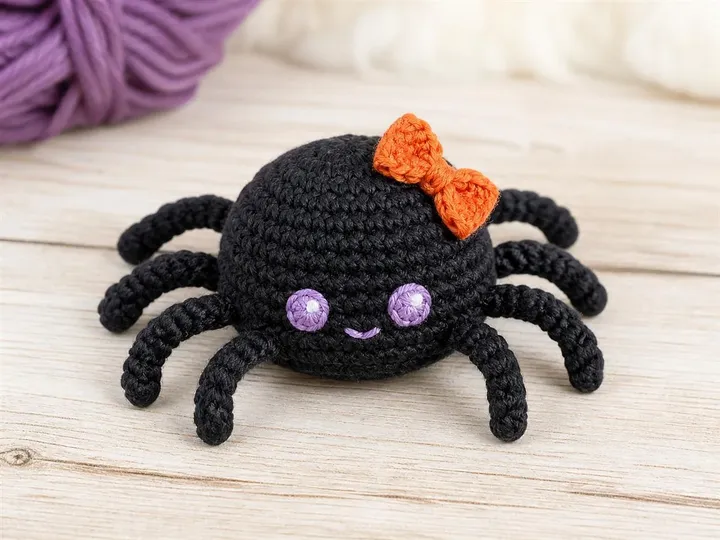
A round body and chain legs make this the fastest project in the set; the orange bow keeps it playful.
- LEVEL
- Beginner
- TRY IT WITH
- Charcoal, lavender and orange DK cotton; 3 mm hook; stuffing
- FINISHING NOTE
- Make the legs during one body round so there is no sewing.
Short Pattern
Abbreviations: MR magic ring · sc single crochet · inc increase · dec decrease · ch chain · sl st slip stitch
- Body — R1 6 sc in MR; R2 inc ×6 [12]; R3 (sc, inc) ×6 [18]; R4 (2 sc, inc) ×6 [24]; R5–7 24 sc.
- R8 legs — *3 sc, ch 9, sl st back along chain*; repeat eight times around [24 body sc plus 8 legs].
- R9 (2 sc, dec) ×6 [18]. Stuff. R10 (sc, dec) ×6 [12]. R11 dec ×6 [6]; close.
- Bow — ch 5, join. Work (ch 2, 3 hdc, ch 2, sl st) twice into the ring. Wrap center with yarn.
Assembly: Curve each chain leg gently with your fingers. Sew on the bow and embroider lavender eyes and a tiny smile.
Bubble Brew Cauldron
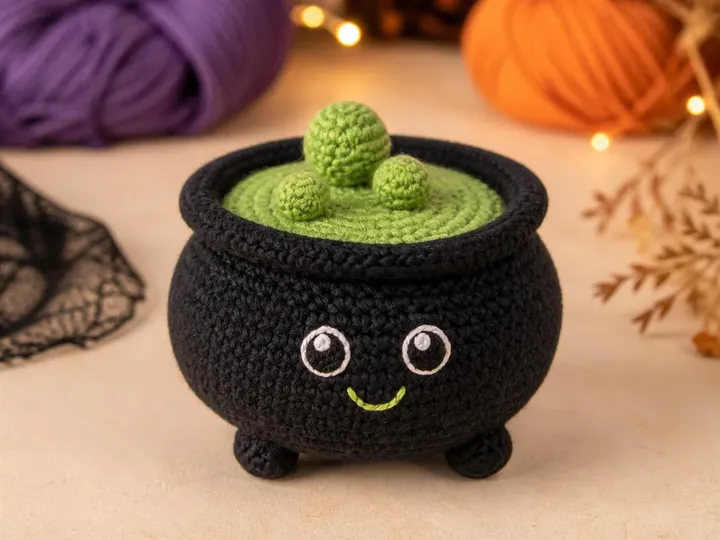
A round black bowl, flat green potion disc and three tiny bubbles create a charming mini cauldron.
- LEVEL
- Advanced beginner
- TRY IT WITH
- Black and lime DK cotton; 3 mm hook; stuffing
- FINISHING NOTE
- Stuff the bowl firmly before sewing in the potion disc.
Short Pattern
Abbreviations: MR magic ring · sc single crochet · inc increase · dec decrease · BLO back loop only
- Bowl in black — R1 6 sc in MR; R2 inc ×6 [12]; R3 (sc, inc) ×6 [18]; R4 (2 sc, inc) ×6 [24]; R5 (3 sc, inc) ×6 [30]; R6 BLO 30 sc; R7–10 30 sc.
- R11 (3 sc, dec) ×6 [24]. R12 24 sc. Rim — R13 FLO inc ×24 [48]; fasten off. Stuff bowl below the rim.
- Potion disc in lime — R1 6 sc in MR; R2 inc ×6 [12]; R3 (sc, inc) ×6 [18]; R4 (2 sc, inc) ×6 [24].
- Bubbles — Make three lime balls: 6 sc in MR; R2 6 sc; lightly stuff and close. Feet — three black 6-sc balls.
Assembly: Sew the potion disc just inside the rim, then attach bubbles on top and feet underneath. Embroider a friendly face on the bowl.
Milo Mini Mummy
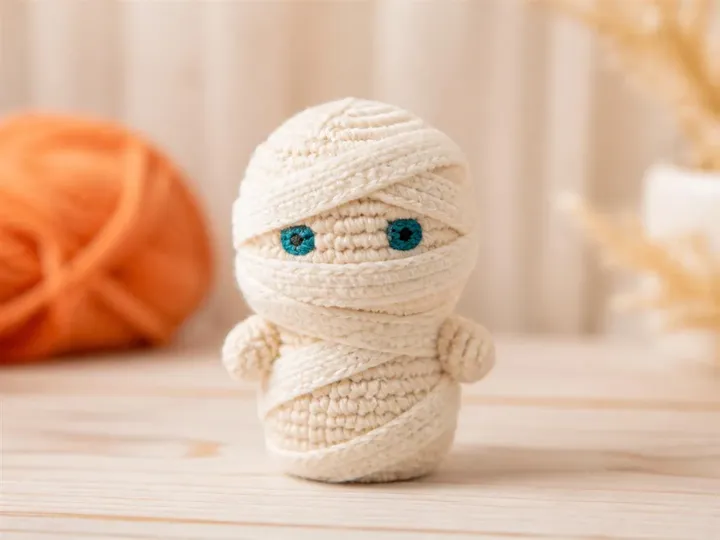
A one-piece cream body becomes a friendly mummy when wrapped with a few narrow crochet bandages.
- LEVEL
- Advanced beginner
- TRY IT WITH
- Cream and off-white DK cotton plus teal scraps; 3 mm hook
- FINISHING NOTE
- Leave a clear opening around the embroidered eyes.
Short Pattern
Abbreviations: MR magic ring · sc single crochet · inc increase · dec decrease · ch chain · hdc half double crochet
- Body — R1 6 sc in MR; R2 inc ×6 [12]; R3 (sc, inc) ×6 [18]; R4 (2 sc, inc) ×6 [24]; R5–13 24 sc.
- R14 (2 sc, dec) ×6 [18]. Stuff. R15 (sc, dec) ×6 [12]; R16 dec ×6 [6]; close.
- Bandages — Make three strips in off-white: ch 35, then hdc back from the second chain. Make one shorter strip with ch 24.
- Arms — Make two: 6 sc in MR; R2–3 6 sc. Flatten and fasten off.
Assembly: Embroider teal eyes, sew on the arms and wrap the strips diagonally. Tack each strip at several points so it cannot unwind.
Winnie Pocket Witch
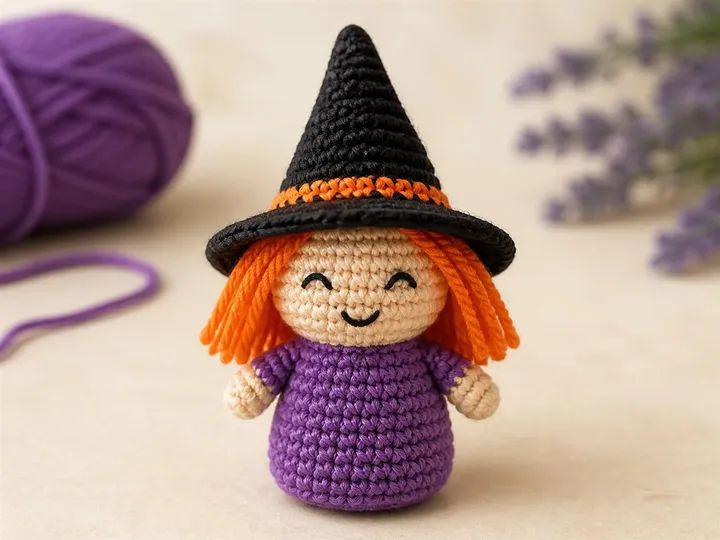
A simple purple body, round face and tall cone hat make a colorful little witch without complicated shaping.
- LEVEL
- Intermediate
- TRY IT WITH
- Purple, peach, orange and black DK cotton; 3 mm hook
- FINISHING NOTE
- Add the hair before attaching the hat.
Short Pattern
Abbreviations: MR magic ring · sc single crochet · inc increase · dec decrease · FLO front loop only
- Body in purple — R1 6 sc in MR; R2 inc ×6 [12]; R3 (sc, inc) ×6 [18]; R4 (2 sc, inc) ×6 [24]; R5–10 24 sc; R11 (2 sc, dec) ×6 [18]. Stuff; R12 (sc, dec) ×6 [12]; close.
- Head in peach — R1 6 sc; R2 12; R3 18; R4 24; R5–8 24; R9 18; stuff; R10 12; close.
- Hat in black — R1 4 sc; R2–3 4; R4 8; R5 8; R6 12; R7 12; R8 18; R9 18. Brim: FLO inc ×18 [36].
- Arms — Two peach 6-sc balls. Cut twelve short orange strands for hair.
Assembly: Sew head to body, knot hair around the lower head, add arms and hat, then embroider the face.
Sugar Dot Skull
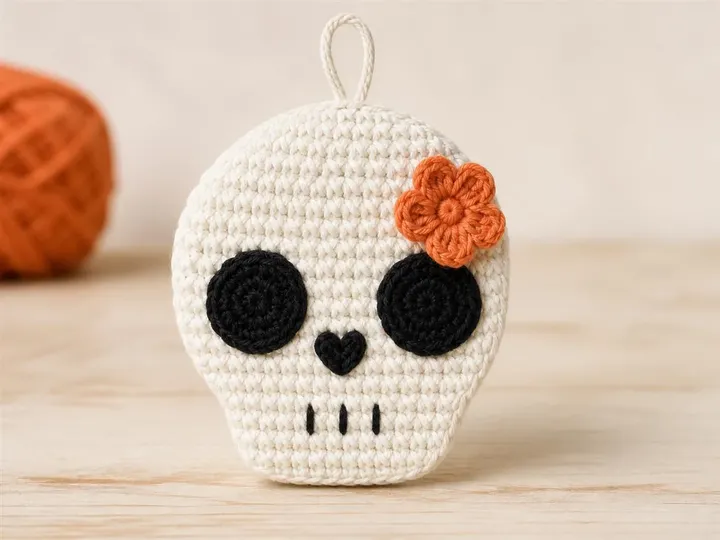
A lightly stuffed oval with bold embroidered features becomes a quick Halloween ornament or bag charm.
- LEVEL
- Advanced beginner
- TRY IT WITH
- Ivory, black and orange DK cotton; 3 mm hook; light stuffing
- FINISHING NOTE
- Keep the piece lightly stuffed so it remains ornament-flat.
Short Pattern
Abbreviations: MR magic ring · sc single crochet · inc increase · dec decrease · ch chain · dc double crochet
- Skull — R1 6 sc in MR; R2 inc ×6 [12]; R3 (sc, inc) ×6 [18]; R4 (2 sc, inc) ×6 [24]; R5–8 24 sc.
- R9: 6 sc, dec ×6, 6 sc [18]. R10–11 18 sc. Stuff lightly. R12 (sc, dec) ×6 [12]; R13 dec ×6 [6]; close.
- Flower in orange — In MR repeat (ch 2, 2 dc, ch 2, sl st) five times; close ring.
- Hanger — Join ivory at top, ch 18 and sl st into the same stitch.
Assembly: Flatten gently. Embroider two large black eye circles, heart-shaped nose and three mouth bars; sew flower near one temple.
Mossy One-Eye Monster
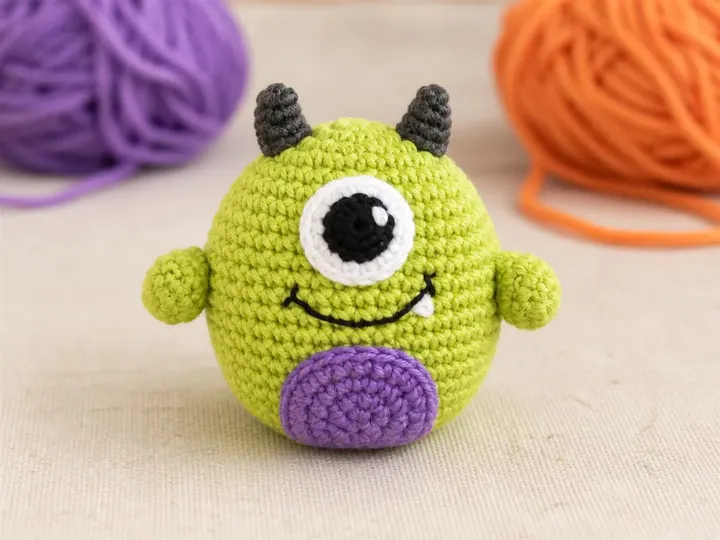
A lime round body, one oversized eye and tiny horns make this playful monster an easy color-pop project.
- LEVEL
- Advanced beginner
- TRY IT WITH
- Lime, charcoal, white, black and purple DK cotton; 3 mm hook
- FINISHING NOTE
- Pin the large eye and belly patch before sewing so both stay centered.
Short Pattern
Abbreviations: MR magic ring · sc single crochet · inc increase · dec decrease
- Body — R1 6 sc; R2 12; R3 18; R4 24; R5 30; R6–11 30 sc; R12 24; R13 18. Stuff; R14 12; R15 6; close.
- Eye — White: R1 6 sc; R2 inc ×6 [12]; R3 (sc, inc) ×6 [18]. Black pupil: R1 6 sc; R2 inc ×6 [12].
- Horns — Make two in charcoal: R1 4 sc; R2 4 sc; R3 (sc, inc) ×2 [6]. Arms — two lime 6-sc balls.
- Belly patch in purple — R1 6 sc; R2 12; R3 18. Fasten off leaving a sewing tail.
Assembly: Layer pupil onto eye and sew it to the body. Add horns, arms and belly patch; embroider a crooked smile and one white tooth.
Make thoughtfully and check as you go.
Yarn, hook size and personal tension can change the finished scale. Count every round, stuff gradually and use embroidered features instead of safety eyes when making toys for children under three.