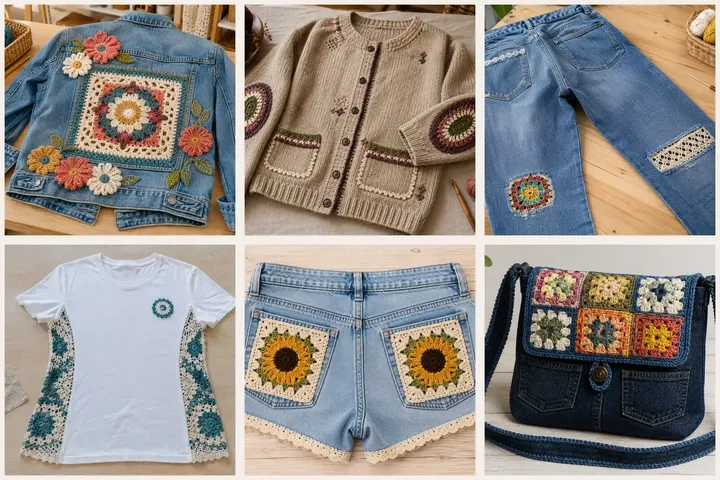
Before discarding a stained, torn or tired garment, look at the strong fabric that remains. These fifteen original Hunerli Parmaklar projects use crochet patches, lace inserts, borders and replacement panels to turn existing clothes into useful statement pieces. Instructions use US terms. Wash every garment first, stabilize weak fabric with matching sewing thread and test colorfastness. Crochet improves appearance but cannot restore fabric that is structurally unsafe or badly degraded.
Floral Granny-Panel Denim Jacket
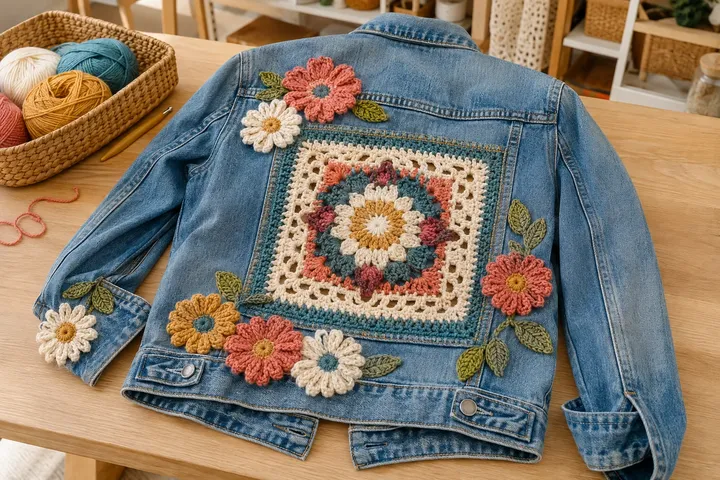
A faded denim jacket becomes wearable folk art with a large flower square and dimensional crochet blooms.
- LEVEL
- Intermediate
- TRY IT WITH
- DK cotton in cream, teal, coral, mustard, berry and olive; 4 mm hook; strong sewing thread
- FINISHING NOTE
- Measure the clear back panel before making the central square.
Short Pattern
Abbreviations: MR magic ring · ch chain · sc single crochet · dc double crochet · sl st slip stitch
- Measure between the jacket seams and crochet a flower granny square about 1 in smaller on every side. Block it square.
- Make 7–9 flowers: work 12 dc in a MR, then one petal of ch 3, 2 dc, ch 3 and sl st in each pair of stitches. Crochet pointed leaves separately.
- Pin the large panel centered and hand-sew around its outer edge and through several inner rounds so it cannot sag.
- Arrange flowers away from buttons and arm movement; stitch every petal center and each leaf securely to the denim.
Assembly: Knot sewing thread between the denim layers, remove all pins and flex the jacket to check that no motif catches or pulls.
Visible-Mend Elbow Cardigan
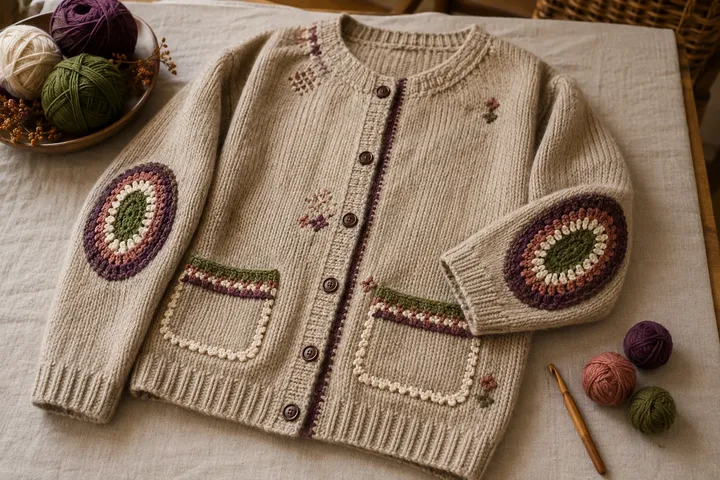
Coordinated elbow medallions and pocket edging turn a worn neutral cardigan into an intentional autumn layer.
- LEVEL
- Advanced beginner
- TRY IT WITH
- Sport cotton in plum, olive, blush and cream; 3.5 mm hook; darning thread
- FINISHING NOTE
- Make each elbow patch large enough to extend 1 in beyond the worn area.
Short Pattern
Abbreviations: MR magic ring · sc single crochet · hdc half double crochet · inc increase
- Put on the cardigan, mark each elbow center with removable thread and reinforce thin knit fabric from the reverse.
- Crochet two flat ovals by chaining 12, working around both sides and increasing evenly at each end for 5–7 rounds.
- Block both patches to identical measurements, pin over the marked elbows and sew with small stretch-friendly stitches.
- Join yarn to each pocket edge and work one sc row followed by a narrow contrasting slip-stitch line.
Assembly: Keep the garment relaxed while sewing so the patches do not tighten the sleeves; steam lightly from the reverse.
Lace-and-Granny Mended Jeans
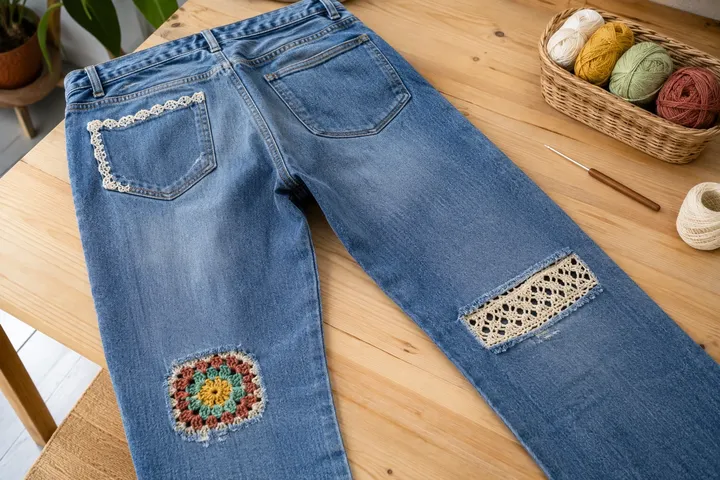
Two different repairs—an inset lace window and a colorful granny patch—make damaged jeans look deliberately designed.
- LEVEL
- Intermediate
- TRY IT WITH
- Sport cotton in cream, rust, teal and mustard; 3 mm hook; denim needle
- FINISHING NOTE
- Each repair should overlap sound denim by at least 1/2 in.
Short Pattern
Abbreviations: ch chain · sc single crochet · dc double crochet · sl st slip stitch
- Trim loose threads without enlarging the holes, then sew a tight running stitch around each damaged area.
- For the long opening, crochet a lace rectangle to overlap the hole; for the smaller knee, make a dense granny square.
- Slide each patch inside the leg, pin flat and backstitch around the denim opening before securing the patch outer edge.
- Add a tiny cream crochet edging to one pocket, sewing through the pocket layer only.
Assembly: Turn the jeans inside out, cover rough repair edges with soft cotton bias tape and wash inside out on a gentle cycle.
Lace-Yoke Utility Shirt
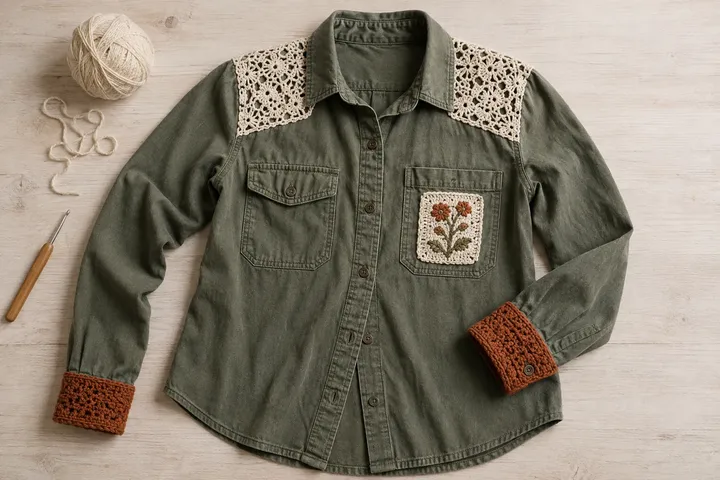
Cream shoulder lace and rust cuffs soften an old utility shirt while a botanical patch conceals pocket wear.
- LEVEL
- Intermediate
- TRY IT WITH
- Fingering cotton in cream, rust and olive; 2.75 mm hook
- FINISHING NOTE
- Draft each shoulder piece from a paper tracing of the garment.
Short Pattern
Abbreviations: ch chain · sc single crochet · dc double crochet · picot ch 3 and sl st
- Trace both shoulder sections, subtract 1/4 in around the edge and crochet two mirrored lace panels to fit.
- Work rust cuff bands in rows of textured sc, matching each closed band to the sleeve circumference without stretching.
- Make a small cream square, surface-stitch an olive stem and rust flowers, then block all crochet pieces.
- Sew the yokes inside the shoulder seams, attach cuffs above the original buttons and place the botanical patch over sound pocket fabric.
Assembly: Preserve full shoulder and wrist movement; reinforce each corner with several small stitches.
Sunburst Granny-Pocket Tote
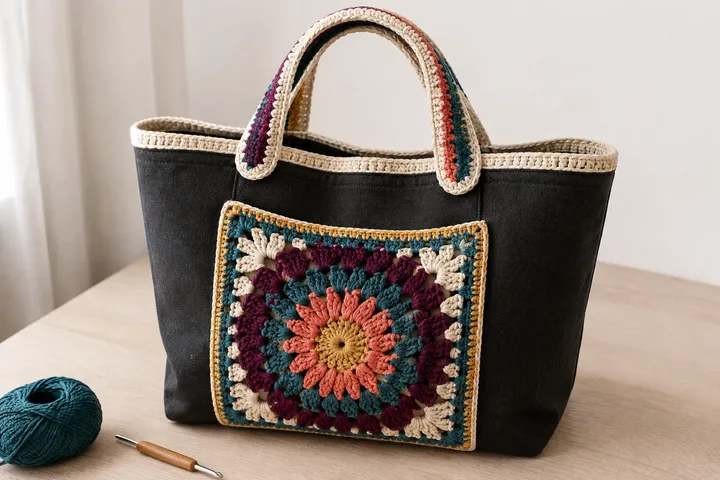
A plain canvas tote gains a dramatic granny-square pocket, wrapped handles and a durable crochet rim.
- LEVEL
- Advanced beginner
- TRY IT WITH
- Worsted cotton in teal, berry, coral, mustard and cream; 4.5 mm hook
- FINISHING NOTE
- Pocket: about 12 × 10 in, adjusted to fit the tote front.
Short Pattern
Abbreviations: MR magic ring · ch chain · sc single crochet · dc double crochet
- Crochet a sunburst center with puff stitches, square it with dc clusters and continue rounds until the pocket fits the bag.
- Add two firm sc rounds and block flat. Mark a centered pocket position at least 2 in above the tote base.
- Sew along the sides and lower edge twice, leaving the top open and reinforcing both upper corners.
- Work a cream blanket stitch around the tote rim, crochet into it for two rounds and wrap each handle with a narrow striped crochet strip.
Assembly: Test the pocket with a small load; add a fabric lining behind it if the crochet stretches.
Heirloom-Lace Pullover Refresh
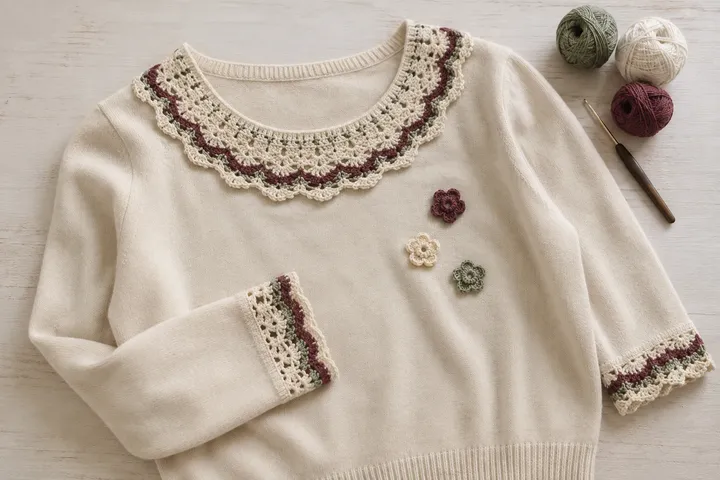
A scalloped crochet neckline, coordinated cuffs and tiny flowers disguise wear on a simple cream pullover.
- LEVEL
- Intermediate
- TRY IT WITH
- Fingering cotton in cream, sage and berry; 2.5 mm hook
- FINISHING NOTE
- Make the collar to the measured neckline, not a standard pattern size.
Short Pattern
Abbreviations: ch chain · sc single crochet · dc double crochet · picot ch 3 and sl st
- Stabilize the neckline with tiny blanket stitches spaced 1/4 in apart. Crochet one sc into every stitch loop.
- Build 4–6 lace rounds, increasing only where the collar must lie flat across the shoulders, then finish with picots.
- Repeat a simplified two-round version at each cuff, counting carefully so both sleeves match.
- Crochet three small flowers and sew them over stains or repairs, anchoring every petal center.
Assembly: Hand-wash and block the collar on the garment so its outer edge stays flat.
Boho Crochet-Hem Denim Skirt
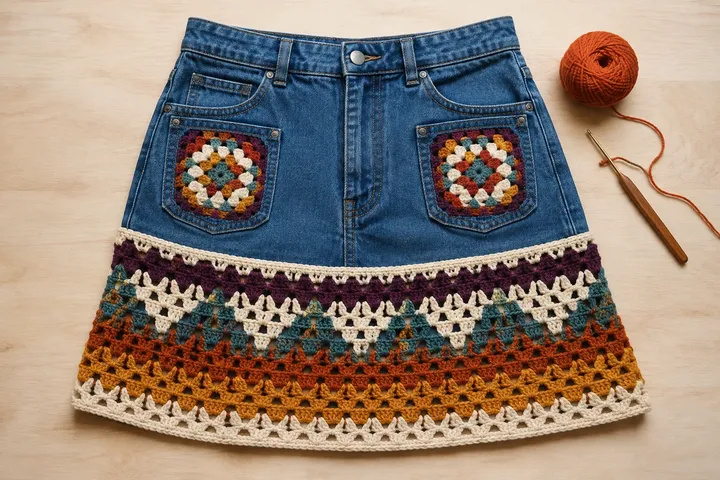
A geometric lace extension and granny-covered pockets add length, movement and color to an old denim skirt.
- LEVEL
- Intermediate
- TRY IT WITH
- DK cotton in cream, plum, teal, rust and mustard; 4 mm hook
- FINISHING NOTE
- Plan a 7–9 in hem extension plus two pocket-size squares.
Short Pattern
Abbreviations: ch chain · sc single crochet · dc double crochet · sl st slip stitch
- Remove the original hem below sound denim and work an even blanket stitch around the cut edge.
- Join yarn and crochet one firm sc foundation round; adjust stitch count to a multiple required by the chosen shell repeat.
- Work alternating open shell bands, keeping the first rounds close-fitting and adding small increases toward the lower edge.
- Crochet two flat granny squares, block to pocket size and sew them completely over the existing pockets.
Assembly: Hang the skirt overnight before measuring the final length; add the last cream edge only after the lace settles.
Crochet-Lace Side Panel T-Shirt
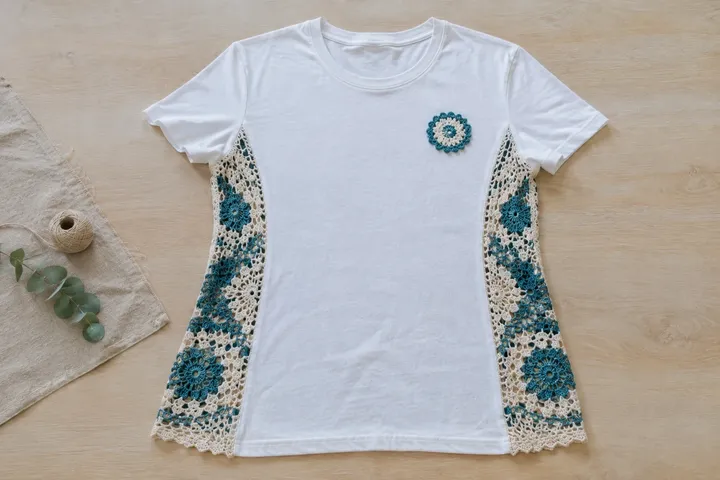
Teal floral lace panels give a plain white tee more room and a fresh boutique silhouette.
- LEVEL
- Intermediate
- TRY IT WITH
- Sport cotton in teal and cream; 3 mm hook; matching sewing thread
- FINISHING NOTE
- Panel length: underarm to hem; width depends on the desired added ease.
Short Pattern
Abbreviations: ch chain · sc single crochet · dc double crochet · sl st slip stitch
- Cut straight up each side seam, stopping 1 in below the sleeve seam, and stabilize raw edges with a narrow zigzag.
- Crochet two matching tapered lace panels from the hem upward, decreasing until each top narrows to the underarm.
- Block the panels, sandwich each between the shirt edges and sew with two parallel rows using a stretch stitch.
- Finish the lower panel edges with a tiny scallop and add one optional matching flower near the chest.
Assembly: Try on before final stitching; both panels must add equal width and leave the armhole comfortable.
Crochet-Hood Sweatshirt Makeover
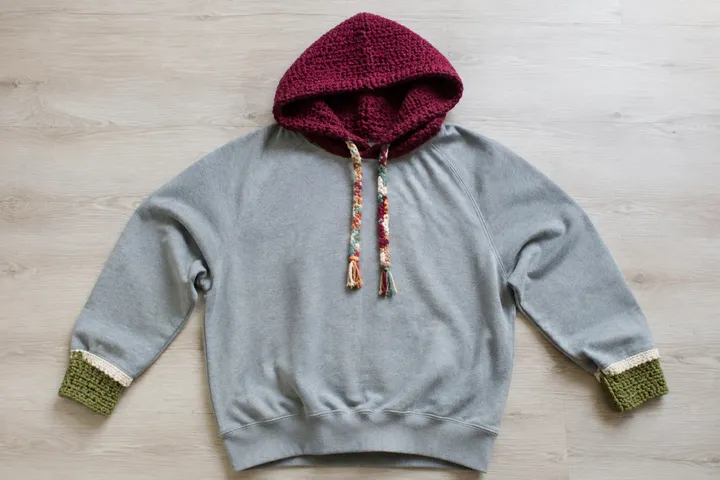
A berry crochet hood, olive cuffs and a scrap-yarn drawcord give a tired sweatshirt a bold second life.
- LEVEL
- Intermediate
- TRY IT WITH
- Worsted washable yarn in berry, olive, cream and scraps; 5 mm hook
- FINISHING NOTE
- Use the original hood pieces as a size guide if available.
Short Pattern
Abbreviations: ch chain · sc single crochet · hdc half double crochet · BLO back loop only
- Remove a damaged hood at its neckline seam while leaving a 1/2 in fabric allowance. Measure the neckline opening.
- Crochet two berry hood halves in hdc, shaping the crown with decreases; seam the back and add a doubled front band.
- Clip the hood evenly to the neckline and stitch twice through the crochet foundation row and sweatshirt allowance.
- Crochet two olive BLO ribbed cuffs and a firm multicolor drawcord; securely stitch cuffs above the original sleeve edge.
Assembly: Keep drawcord ends short and knotted; omit the cord entirely for children’s garments.
Sunflower-Pocket Denim Shorts
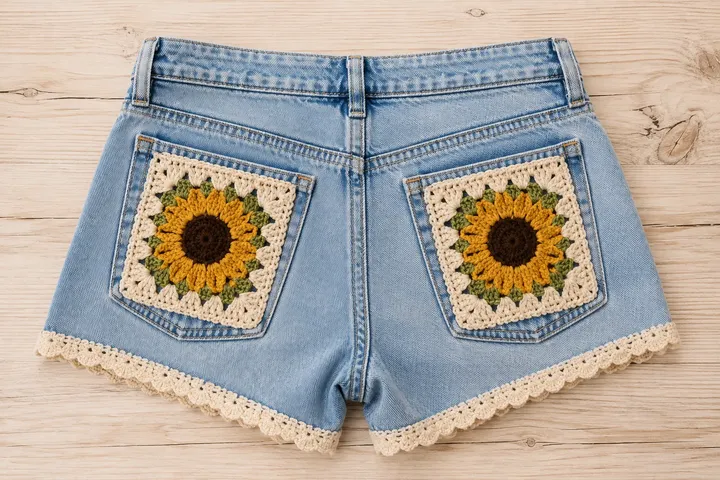
Sunflower granny pockets and a delicate cream hem turn worn shorts into an upbeat warm-weather favorite.
- LEVEL
- Advanced beginner
- TRY IT WITH
- DK cotton in brown, mustard, olive and cream; 4 mm hook
- FINISHING NOTE
- Match squares to the usable surface of the existing back pockets.
Short Pattern
Abbreviations: MR magic ring · ch chain · sc single crochet · dc double crochet
- Make two identical sunflower squares: brown center, mustard petal round, olive corner leaves and cream square border.
- Wet-block the squares, pin each over a back pocket and stitch around all sides while leaving the pocket mouth open.
- Blanket-stitch around both leg openings at even 1/4 in spacing.
- Crochet one sc round into the blanket stitches, followed by compact cream shells that do not restrict the leg opening.
Assembly: Reinforce the upper pocket corners and confirm the hem edging remains loose enough for comfortable movement.
Crochet-Back Oxford Shirt
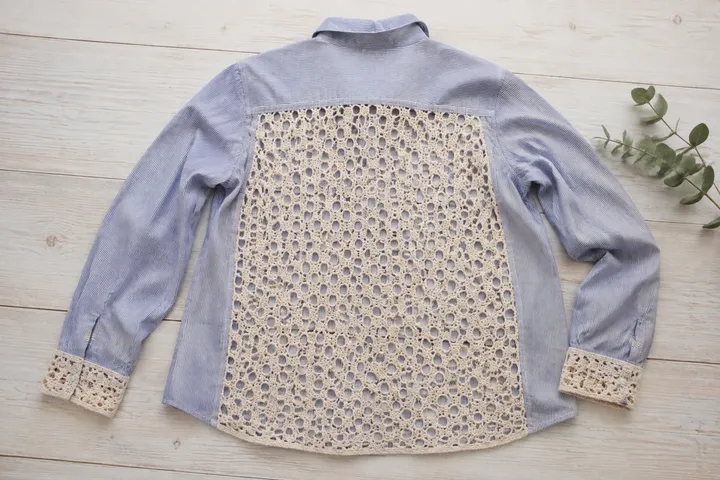
A large airy lace insert replaces damaged back fabric and turns a conventional striped shirt into a light statement layer.
- LEVEL
- Advanced
- TRY IT WITH
- Fingering mercerized cotton in cream; 2.5 mm hook
- FINISHING NOTE
- Insert should finish 1/2 in larger than the planned opening.
Short Pattern
Abbreviations: ch chain · sc single crochet · dc double crochet · tr treble crochet
- Mark a rectangle below the back yoke, reinforce outside the line with two machine-stitch rows, then cut inside them.
- Crochet a lace rectangle from a measured swatch, adding complete pattern repeats until it overlaps the opening.
- Block accurately, pin the lace behind the shirt and sew around the opening with two narrow rows.
- Trim excess fabric allowance, bind the raw edge on the inside and add matching lace strips above both cuffs.
Assembly: The back yoke and side seams must remain intact because they carry the garment’s structural stress.
Sweater-to-Cushion Keepsake
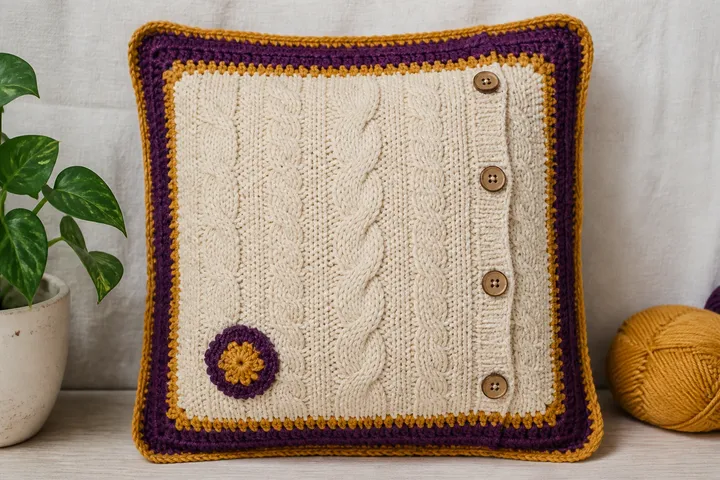
The best section of an old cable sweater becomes a cozy cushion framed with plum and mustard crochet.
- LEVEL
- Advanced beginner
- TRY IT WITH
- Old sweater front; worsted yarn in plum and mustard; 5 mm hook; fabric backing; cushion insert
- FINISHING NOTE
- Finished cover: about 18 × 18 in.
Short Pattern
Abbreviations: ch chain · sc single crochet · hdc half double crochet · sl st slip stitch
- Fuse lightweight knit interfacing behind the chosen sweater section and cut a 19 in square, keeping cables centered.
- Blanket-stitch around the square, then work one mustard sc round and 4–6 plum hdc rounds to reach 21 in.
- Cut a matching fabric back with an envelope or zipper opening and sew it to the crochet border from the reverse.
- Use a spare button band as decoration and cover any tiny flaw with a small flat crochet flower.
Assembly: Insert an 18–20 in cushion form for a full shape; remove the insert before gentle washing.
Granny-Flap Denim Crossbody
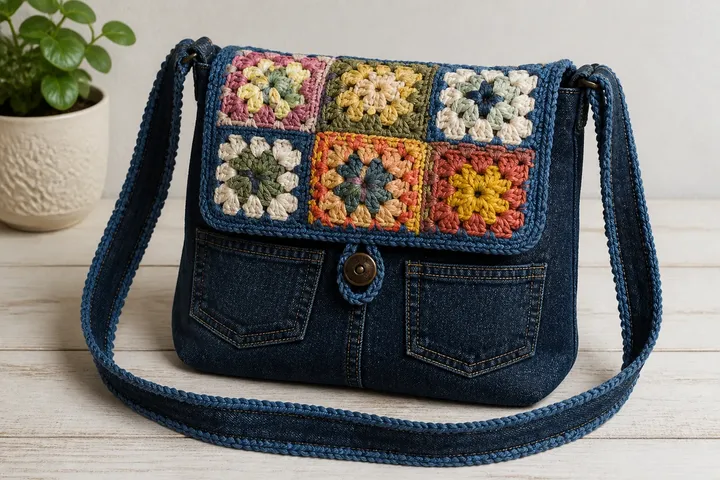
Strong denim cut from old jeans forms the body while scrap-yarn granny squares create a colorful statement flap.
- LEVEL
- Intermediate
- TRY IT WITH
- Jeans legs and pockets; DK cotton scraps; 4 mm hook; lining; magnetic snap and D-rings
- FINISHING NOTE
- Finished bag: about 11 × 9 in with a 3 in gusset.
Short Pattern
Abbreviations: MR magic ring · ch chain · sc single crochet · dc double crochet
- Cut two denim rectangles and one gusset, preserving useful pockets; stabilize all pieces and sew the bag body.
- Make six 4 in flower granny squares, block them evenly and join as a 3 × 2 flap with a firm denim-colored border.
- Line the crochet flap with denim, install the snap, then stitch the flap securely across the bag back.
- Make an adjustable denim strap and crochet one tight sc edging along both sides before attaching it to D-rings.
Assembly: Line the bag fully and reinforce strap anchors with boxed stitching; crochet alone should not carry the load.
Crochet-Pocket Maker Apron
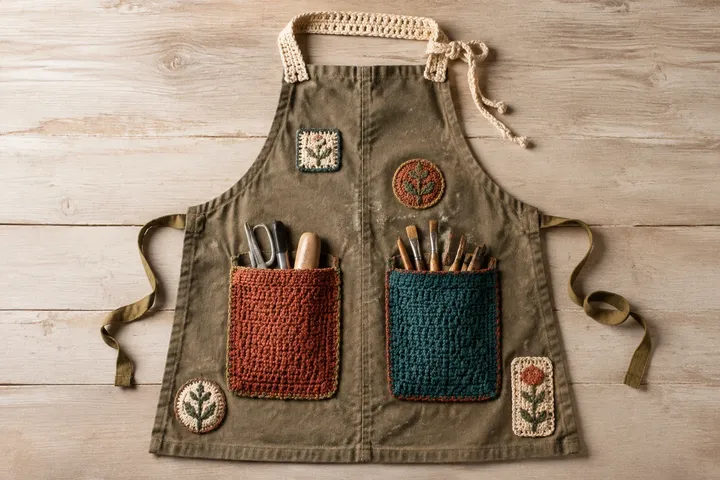
Deep textured crochet pockets and small botanical repairs make a stained work apron useful and beautiful again.
- LEVEL
- Advanced beginner
- TRY IT WITH
- Worsted cotton in rust, teal, cream and olive; 4.5 mm hook; sturdy apron
- FINISHING NOTE
- Each main pocket: approximately 8 × 9 in.
Short Pattern
Abbreviations: ch chain · sc single crochet · hdc half double crochet · sl st slip stitch
- Patch weak apron fabric from behind, then crochet two dense pocket rectangles in textured sc to the required size.
- Add one contrasting sc edge, block flat and line each pocket with cotton fabric to prevent tools snagging.
- Pin pockets at equal height and sew sides and bases twice, adding triangle reinforcement at all upper corners.
- Cover permanent stains with small flat botanical motifs and wrap the neck strap with a removable cream crochet sleeve.
Assembly: Use pockets only for lightweight tools; keep scissors closed or in a rigid sheath.
Lace-Yoke Knit Dress Renewal
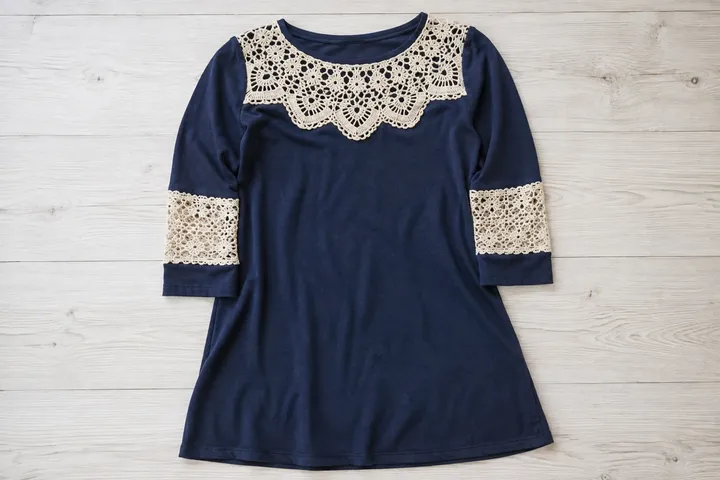
A cream fan-lace yoke and sleeve inserts give a plain navy knit dress a graceful vintage-modern finish.
- LEVEL
- Advanced
- TRY IT WITH
- Fingering cotton in cream; 2.5 mm hook; stretch sewing thread
- FINISHING NOTE
- Trace the neckline and sleeve insert areas before altering the dress.
Short Pattern
Abbreviations: ch chain · sc single crochet · dc double crochet · tr treble crochet · picot ch 3 and sl st
- Draft a paper yoke that extends from the neckline across the shoulders; crochet joined fan motifs to match the template.
- Make two identical rectangular lace inserts for the sleeves and wet-block all pieces to exact measurements.
- Pin crochet on top of the dress, sew around every outer edge, then carefully remove only the covered knit fabric from behind.
- Bind exposed fabric edges, add a final picot around the yoke and reinforce the shoulder and sleeve junctions.
Assembly: Try the dress on before cutting fabric; the crochet must stretch enough for dressing and normal arm movement.
Make thoughtfully and check as you go.
Yarn, hook size and personal tension can change the finished scale. Count every round, stuff gradually and use embroidered features instead of safety eyes when making toys for children under three.