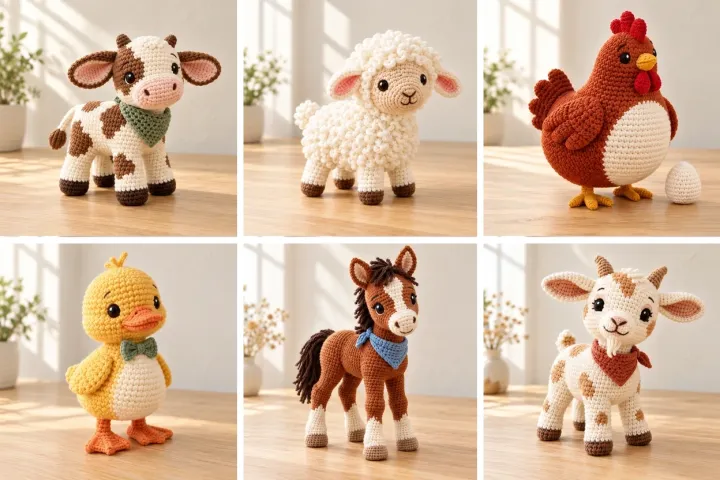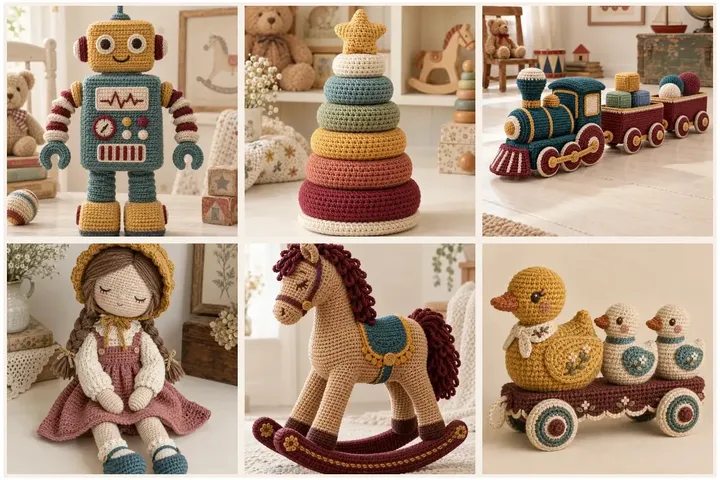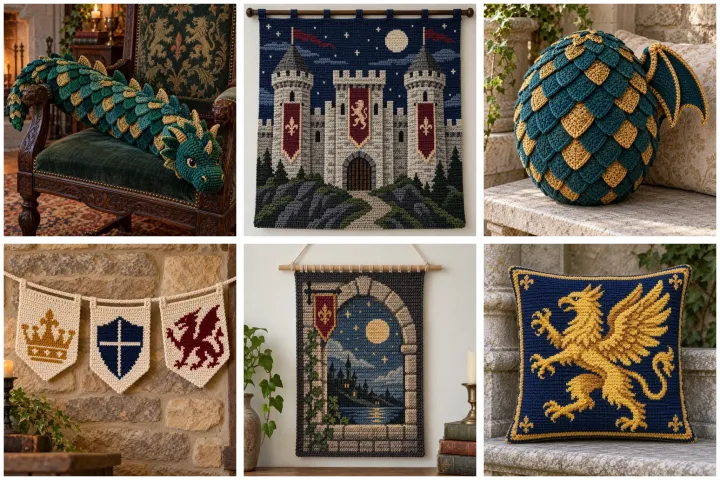
Bring a little storybook atmosphere to your space with dragon-scale cushions, heraldic motifs, castle silhouettes and tapestry-like colorwork. These original concept patterns are detailed starting guides rather than gauge-tested commercial patterns: make a small swatch first, adjust hook size for a firm fabric, and secure every appliqué and yarn tail. Wall hangings and pillows are decorative pieces; keep cords, small embellishments and loose parts away from young children and pets.
Dragon-Scale Bolster Pillow
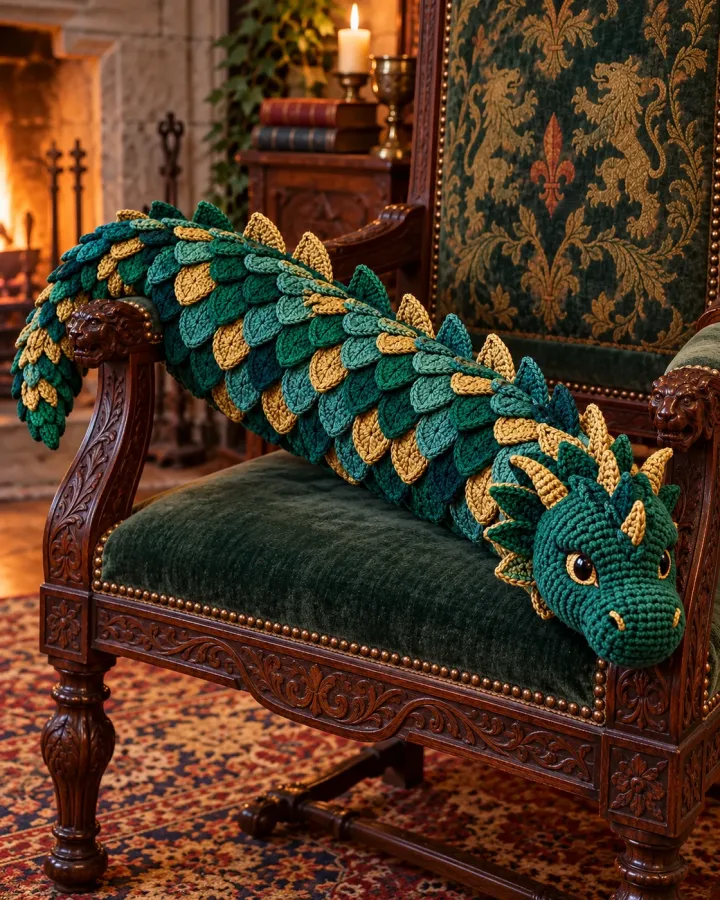
A long forest-green bolster is covered with overlapping jewel-toned crochet scales, while a sculpted tail curves around one end. The tactile, dragon-inspired shape makes a dramatic accent for a reading nook, window seat or fantasy-themed bedroom.
- LEVEL
- Intermediate
- TRY IT WITH
- Worsted acrylic or cotton: 450 yd green, 90 yd teal, 60 yd gold; 5 mm hook; pillow insert
- FINISHING NOTE
- Approx. 18 in long by 7 in diameter.
Short Pattern
Abbreviations: ch chain · sc single crochet · hdc half double crochet · dc double crochet · sl st slip stitch · inc increase · dec decrease
- Work two circles: make a magic ring, 6 sc, then increase evenly to 48 stitches. Continue even rounds until each end matches the bolster insert diameter.
- For the body, ch enough to fit the insert length and join into a ring. Work sc rounds until the tube is 1 in shorter than the insert.
- Make scales separately: ch 5, work hdc and dc into the chain, then add a curved sc edge. Make about 40 scales in alternating teal, green and gold.
- Pin scales in staggered rows, overlapping each upper edge by about one third. Sew around the top curved edge of each scale only.
- Join one circle to the tube, insert the pillow form, then sew on the second circle. Shape a short tapered tail from decreasing sc rounds.
Assembly: Keep scale edges securely sewn and avoid loose ties. Use a washable insert and hand wash the cover gently.
Golden Royal Crown Circlet
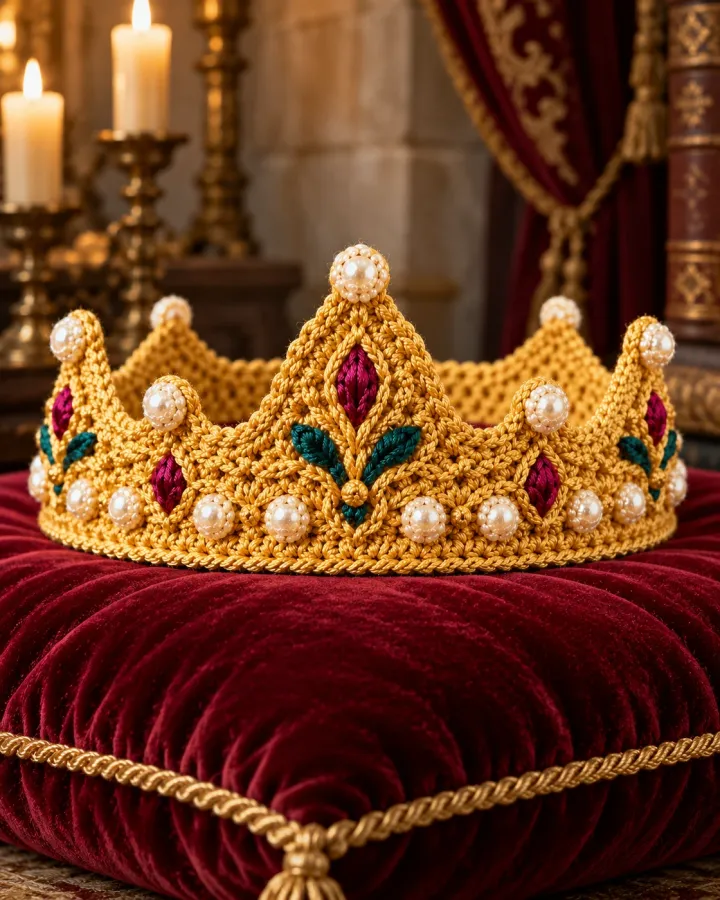
A softly structured golden crown combines a narrow ribbed band with five rounded points and tiny jewel-like stitches. It reads as a wearable costume accessory while remaining light enough for a festival outfit, dress-up chest or carefully sized display form.
- LEVEL
- Confident beginner
- TRY IT WITH
- Worsted cotton: 120 yd gold, scraps of ruby and teal; 4 mm hook; thin felt for optional lining
- FINISHING NOTE
- Approx. 22 in circumference; resize to wearer.
Short Pattern
Abbreviations: ch chain · sc single crochet · hdc half double crochet · sl st slip stitch · dec decrease · BLO back loop only
- Measure the intended head circumference. Ch to that length, join without twisting and work 5 rounds of sc in BLO for a firm band.
- Mark five evenly spaced points around the upper edge. At each mark, work a crown peak over 6 stitches: sc, hdc, dc, ch 2, dc, hdc, sc.
- Work a finishing round of sl st around each peak, placing 2 sl st in each point chain space to soften the edges.
- Embroider small ruby and teal jewel shapes on the front using short satin stitches. Keep the stitches flat and secure.
- Add an optional felt backing by hand sewing around its edge, leaving the lower band unlined for comfort.
Assembly: Check the band fits comfortably and has no sharp wire or detachable decorations. This is costume wear, not protective headgear.
Moonlit Castle Tapestry
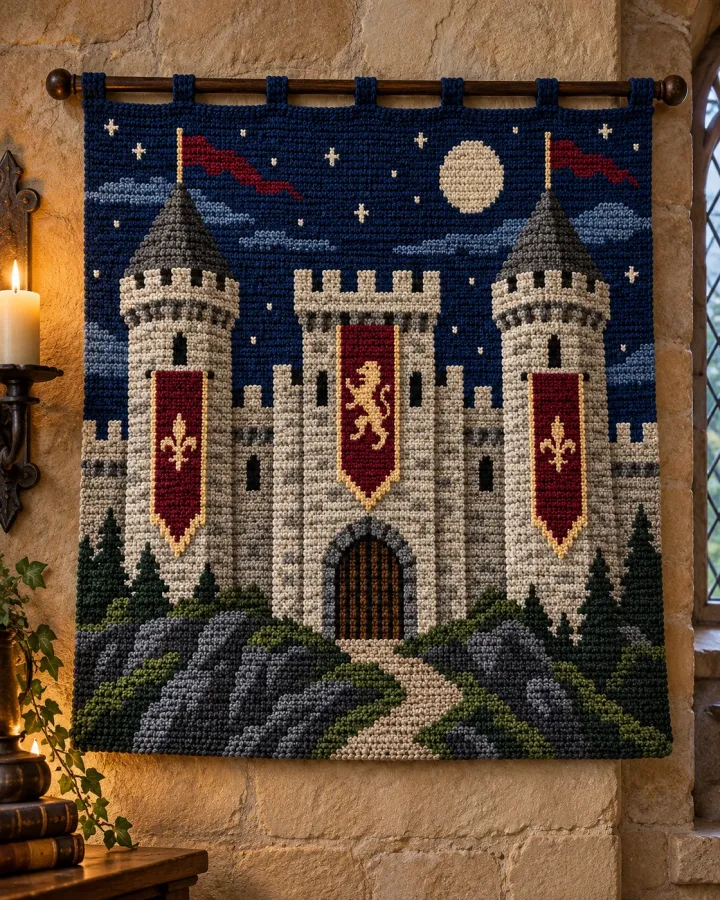
A midnight-blue wall panel depicts a pale stone castle beneath a moon, with small golden windows picked out in clean colorwork. The rectangular tapestry brings a storybook focal point to a craft room, hallway or reading corner.
- LEVEL
- Intermediate
- TRY IT WITH
- Worsted cotton: 250 yd navy, 120 yd stone, 25 yd gold; 4 mm hook; dowel
- FINISHING NOTE
- Approx. 16 by 22 in before blocking.
Short Pattern
Abbreviations: ch chain · sc single crochet · color change on final yarn-over · sl st slip stitch · BLO back loop only
- Ch 61. Work 60 sc for 4 rows in navy to establish a firm border.
- Follow a simple chart or paper grid: use stone blocks for the central keep, stepped towers and battlements; carry navy yarn behind short color sections.
- Work the castle silhouette in tapestry sc, changing colors on the final yarn-over before each new block. Keep carried floats loose but no longer than 5 stitches.
- Add a full navy border of 4 sc rows. Surface embroider gold window squares and a crescent moon after the panel is blocked.
- Fold the top edge over a dowel, stitch a casing, and add a hanging cord at both ends.
Assembly: Steam-block gently without flattening the stitches. Secure the dowel and hanging cord to a suitable wall hook.
Heraldic Shield Cushion
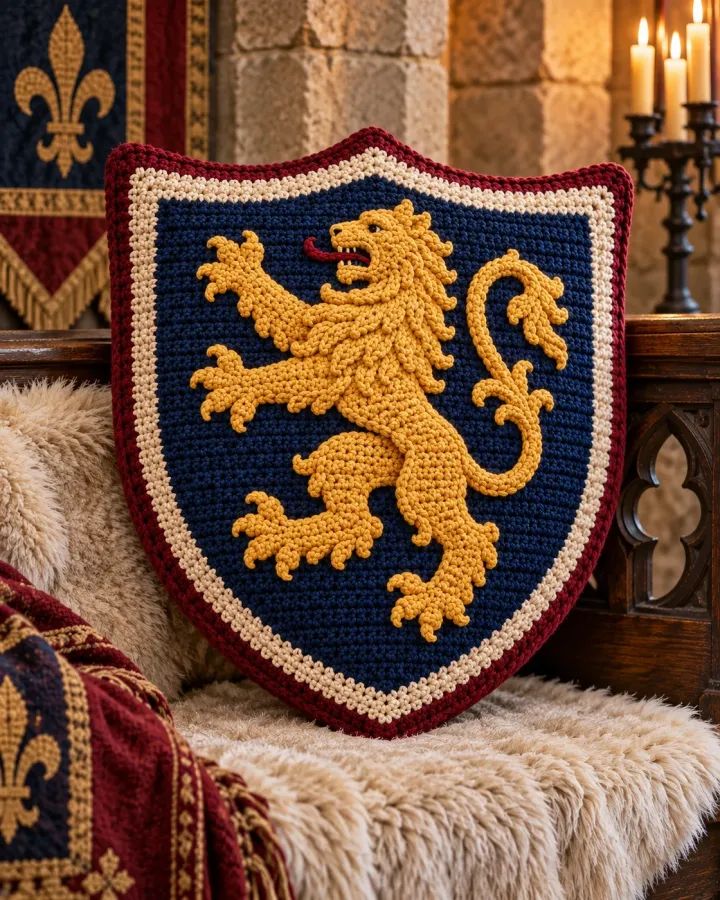
A bold shield-shaped cushion uses deep wine, cream and muted gold panels to suggest a classic heraldic emblem. A raised center motif and neatly outlined edge give the design a crafted, heirloom feel without relying on stiff or uncomfortable materials.
- LEVEL
- Intermediate
- TRY IT WITH
- Worsted cotton: 220 yd burgundy, 110 yd cream, 60 yd gold; 5 mm hook; cushion filling
- FINISHING NOTE
- Approx. 16 by 19 in.
Short Pattern
Abbreviations: ch chain · sc single crochet · hdc half double crochet · inc increase · dec decrease · sl st slip stitch
- Make two shield panels: ch 41 and work 40 sc for 8 rows. Decrease one stitch at both ends every other row to shape the upper shoulders.
- Continue straight for 8 rows, then decrease one stitch at each end every row until 4 stitches remain. Fasten off the first panel.
- Work the second panel in the same dimensions. Add a cream center stripe or simple gold chevron using surface slip stitches.
- Place panels together and join with sc around the edge, adding extra stitches at the shoulders and keeping the bottom point neat.
- Stuff gradually before closing the final side; do not overfill the pointed tip.
Assembly: Use embroidered motifs rather than hard plastic ornaments. This is a decorative cushion, not a toy for unsupervised young children.
Dragon Egg Scale Cushion
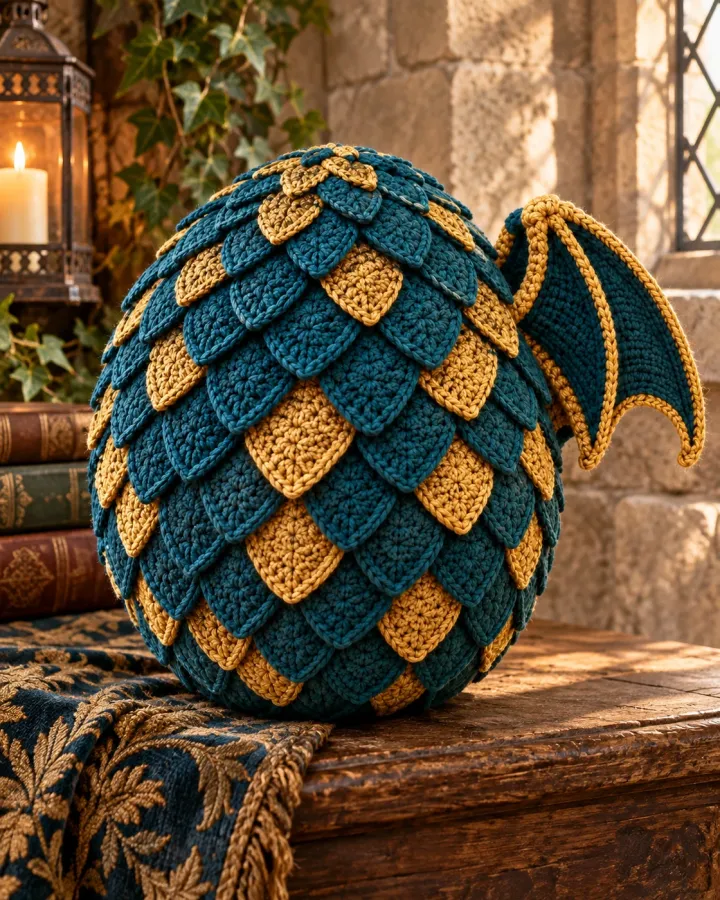
An oval teal cushion is layered with small overlapping scales and crowned by a subtle gold crest. The egg-like silhouette feels whimsical but polished, making it an appealing accent for a fantasy shelf, reading chair or handmade gift display.
- LEVEL
- Intermediate
- TRY IT WITH
- Worsted cotton: 240 yd teal, 80 yd forest, 20 yd gold; 4.5 mm hook; fiberfill
- FINISHING NOTE
- Approx. 14 by 10 in.
Short Pattern
Abbreviations: ch chain · sc single crochet · hdc half double crochet · dc double crochet · inc increase · dec decrease · sl st slip stitch
- Make two oval panels: ch 16, work around both sides of the chain, adding 3 sc at each end. Increase evenly at the ends until the oval measures about 10 in wide.
- Work even rounds until the oval reaches 14 in long. Repeat for the back panel, matching stitch counts.
- For each scale, ch 4 and work 2 dc, 2 hdc and 1 sc back along the chain. Make about 30 scales in two teal shades.
- Arrange scales in curved rows from the lower edge upward, overlapping the top of each lower scale. Sew the upper edge of each scale to the front panel.
- Join front and back with sc, stuff evenly and close. Add a small gold crest motif at the top.
Assembly: Use washable fiberfill and stitch every scale down firmly to prevent snagging.
Castle Turret Plush Pair
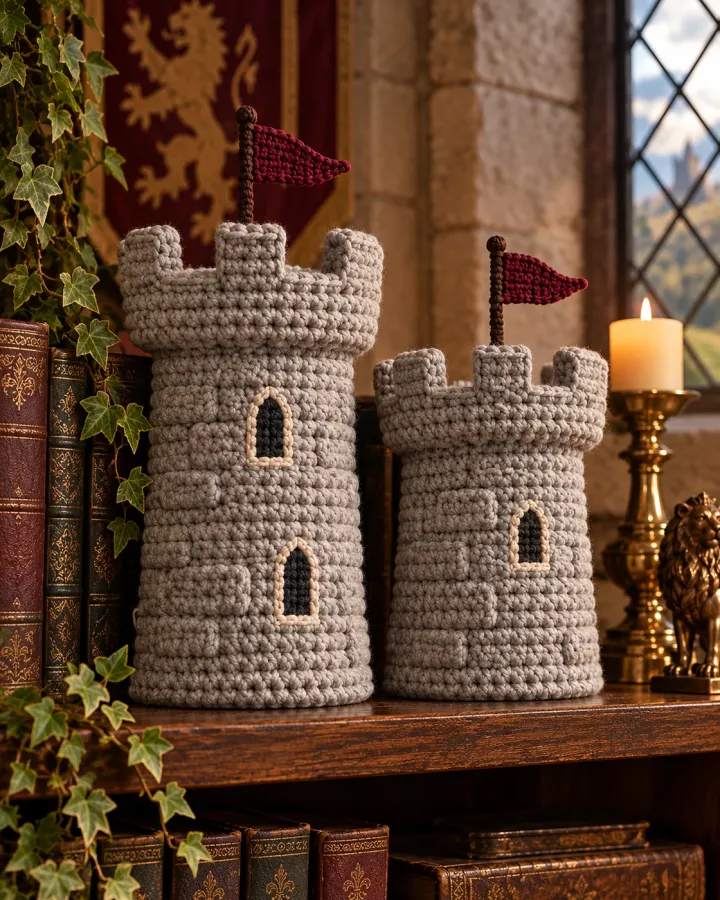
Two soft gray castle turrets feature crenellated rims, arched window details and contrasting conical roofs. Display them together on a bookshelf or mantel for a playful architectural accent that coordinates easily with a handmade tapestry.
- LEVEL
- Confident beginner
- TRY IT WITH
- Worsted cotton: 180 yd stone, 60 yd slate, 35 yd charcoal; 4.5 mm hook; fiberfill
- FINISHING NOTE
- Each turret approx. 9 in tall by 4 in wide.
Short Pattern
Abbreviations: ch chain · sc single crochet · hdc half double crochet · inc increase · dec decrease · sl st slip stitch
- For each tower, make a flat circular base, increasing from 6 sc in a magic ring to 36 stitches.
- Work 16 rounds of sc in BLO to form a sturdy cylinder. Add two charcoal embroidered window arches on the front.
- For the battlement rim, alternate ch 3 skips and 3 sc groups around the top; work one final sc round to secure the openings.
- Make a cone roof by starting with 6 sc in a ring and increasing every other round until 30 stitches, then work even for 5 rounds.
- Stuff the tower lightly, sew the base closed and attach the roof securely. Make a second turret with a slightly different roof color.
Assembly: Embroider windows with yarn instead of adding small buttons. Keep the pair as shelf decor around small children.
Three-Emblem Pennant Banner
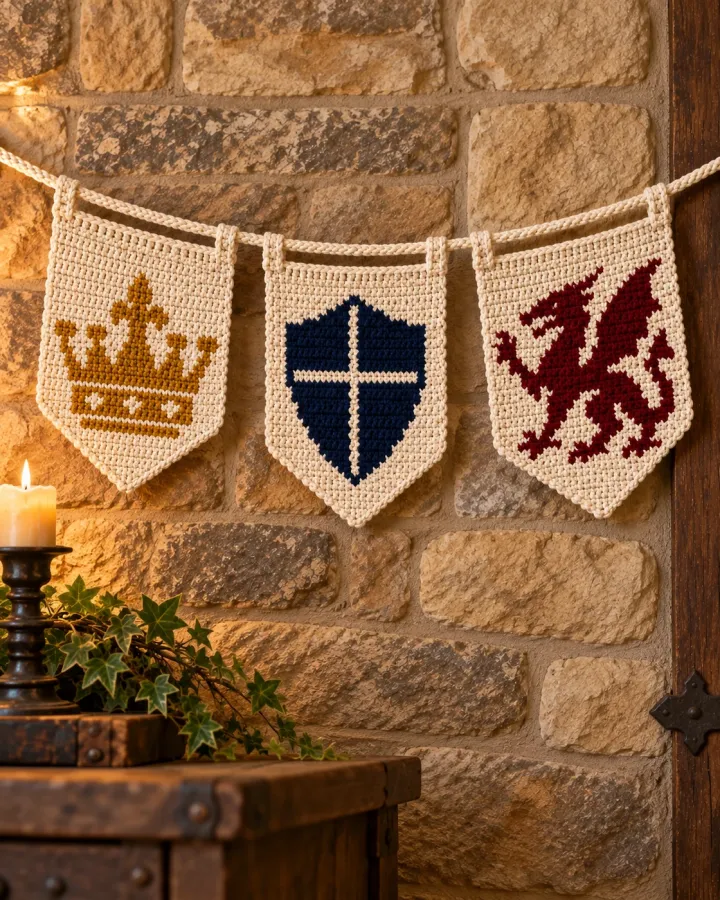
A row of navy and burgundy crochet pennants displays a crown, shield and dragon-scale emblem in warm gold and cream. The compact banner adds a medieval festival touch above a desk, doorway or party table.
- LEVEL
- Confident beginner
- TRY IT WITH
- Worsted cotton: 160 yd navy, 80 yd burgundy, 45 yd gold, 25 yd cream; 4 mm hook
- FINISHING NOTE
- Three pennants, each approx. 8 by 10 in; 36 in cord.
Short Pattern
Abbreviations: ch chain · sc single crochet · hdc half double crochet · dec decrease · sl st slip stitch
- For each pennant, ch 27 and work 26 sc for 2 rows. Decrease one stitch at each end every row until 2 stitches remain.
- Make two pennants in navy and one in burgundy, keeping the row count identical so their points align.
- Surface embroider a simple crown, shield and three curved scale marks on the panels using gold and cream yarn.
- Work a firm sc border around each triangle, adding 2 sc at each upper corner.
- Ch 45 for the hanging cord and attach pennants evenly with sl st, leaving about 2 in between.
Assembly: Hang securely and keep the cord out of reach of children and pets.
Chainmail-Inspired Cowl
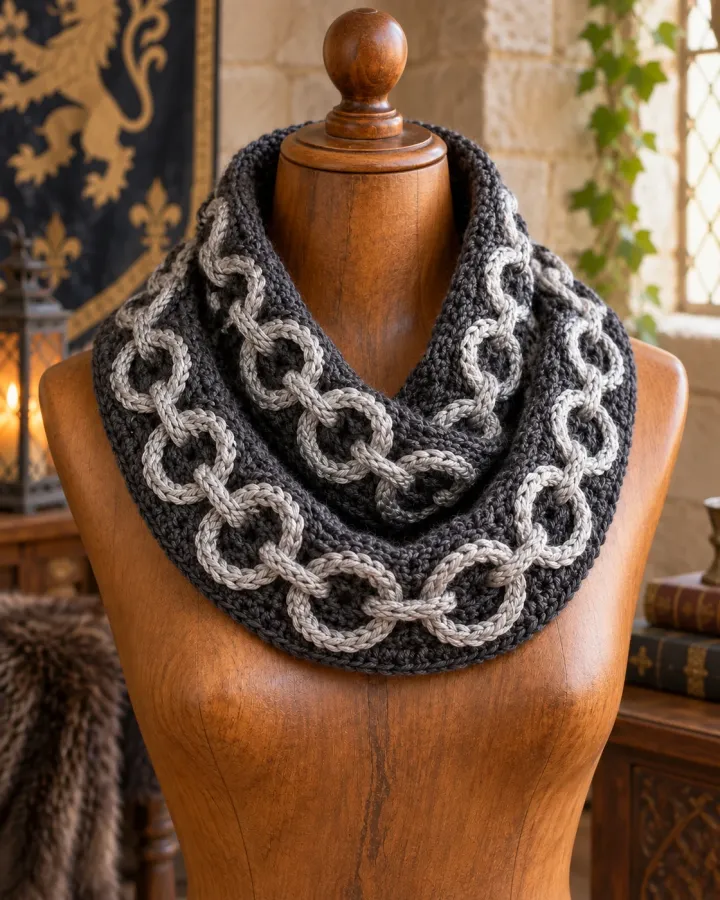
Alternating charcoal and silver crochet stitches create a linked, chainmail-like texture on this soft cowl. The layered surface suggests medieval armor while the flexible fabric remains a comfortable fashion accessory for cool-weather outfits and costume styling.
- LEVEL
- Intermediate
- TRY IT WITH
- Worsted merino blend: 170 yd charcoal, 110 yd silver; 5 mm hook
- FINISHING NOTE
- Approx. 28 in circumference by 9 in tall.
Short Pattern
Abbreviations: ch chain · sc single crochet · dc double crochet · FPdc front-post double crochet · sl st slip stitch · BLO back loop only
- Ch 96 and join without twisting. Work 2 rounds of sc in charcoal for a stable lower edge.
- Repeat a texture round: *dc in silver, FPdc around the next post in charcoal* around, changing yarn at the final yarn-over and carrying the inactive strand loosely.
- On the following round, offset the stitches so the silver links appear staggered. Keep the fabric flexible and avoid pulling color floats tight.
- Continue the two-round texture repeat until the cowl measures 9 in tall.
- Finish with 2 rounds of charcoal sc and weave in every yarn tail on the inside.
Assembly: Check that the cowl slips over the head comfortably. It is a fashion accessory, not protective armor.
Stone Arch Window Wall Hanging
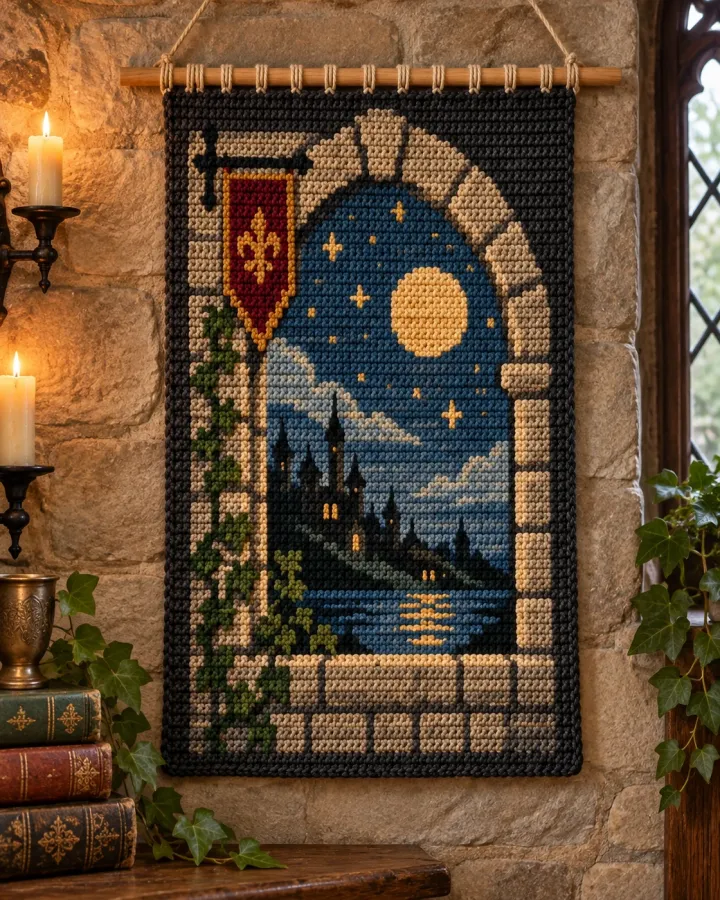
A tall stone-colored crochet arch frames a deep blue window with a tiny golden star, creating the look of an old castle passage. Clean geometric lines and a narrow border make this wall hanging an elegant small-scale tapestry project.
- LEVEL
- Intermediate
- TRY IT WITH
- Worsted cotton: 180 yd stone, 70 yd midnight, 12 yd gold; 4 mm hook; dowel
- FINISHING NOTE
- Approx. 12 by 18 in.
Short Pattern
Abbreviations: ch chain · sc single crochet · hdc half double crochet · dec decrease · color change on final yarn-over · sl st slip stitch
- Ch 45 and work 44 sc for 5 rows in stone to create the lower frame.
- Work the center 24 stitches in midnight for the window, keeping stone columns on each side. Change to stone above the window and shape the arch with decreases at both ends.
- Add a narrow gold star using surface embroidery or a small flat appliqué stitched securely in place.
- Work 3 rows of stone sc around the whole panel, placing 3 sc in each outer corner.
- Fold the upper edge over a slim dowel to make a casing and add a short hanging loop at each end.
Assembly: Block flat and hang from a secure wall fitting.
Burgundy Crown Throw Pillow
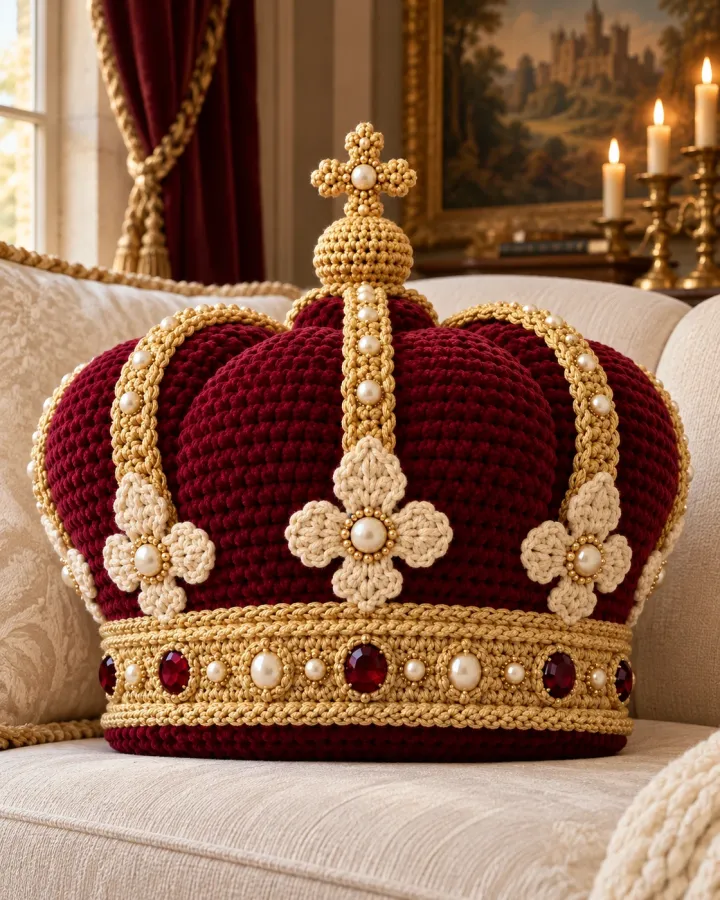
A plush burgundy cushion rises into five soft crown points edged with antique gold. The sculptural silhouette makes a regal accent for a favorite chair, nursery shelf or seasonal display, while its simple color blocking keeps the shape readable.
- LEVEL
- Intermediate
- TRY IT WITH
- Bulky cotton blend: 300 yd burgundy, 85 yd gold; 6 mm hook; cushion filling
- FINISHING NOTE
- Approx. 16 in wide by 13 in tall.
Short Pattern
Abbreviations: ch chain · sc single crochet · inc increase · dec decrease · sl st slip stitch · BLO back loop only
- Make two matching crown panels. Ch 49 and work 48 sc for 8 rows to form the lower band.
- Shape five peaks by dividing the top edge into five marked sections. Work each section separately, decreasing at both edges every other row until the point is 4 rows tall.
- Join burgundy yarn around the full panel and work one gold sc border, placing 2 sc at each valley and 3 sc at each point.
- Join the two panels with sc around the sides, keeping the lower edge open for stuffing.
- Fill the band and each crown point gradually, then close the bottom with mattress stitch.
Assembly: Stuff the points lightly so the crown keeps its shape without becoming rigid.
Griffin Heraldic Tapestry Pillow
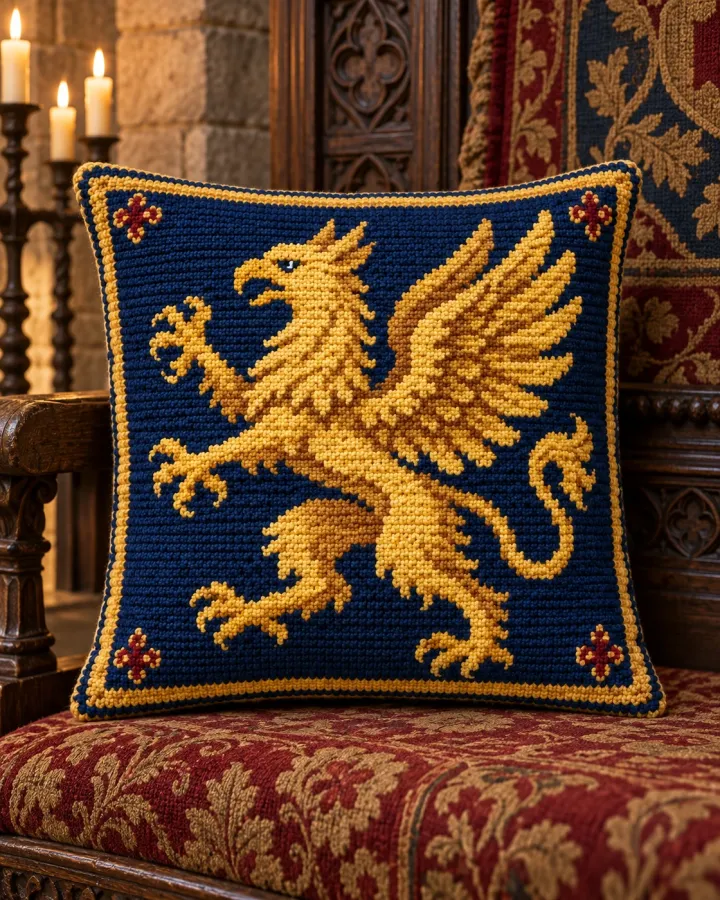
A golden griffin motif stands out against a deep navy crochet pillow front, framed by a restrained tapestry border. The heraldic image feels bold and traditional, while a plain back panel keeps the finished cushion practical and comfortable.
- LEVEL
- Intermediate
- TRY IT WITH
- Worsted cotton: 260 yd navy, 95 yd gold, 35 yd cream; 4 mm hook; 16 in insert
- FINISHING NOTE
- Approx. 17 by 17 in.
Short Pattern
Abbreviations: ch chain · sc single crochet · color change on final yarn-over · sl st slip stitch · BLO back loop only
- Ch 57 and work 56 sc for 5 rows in navy. Use a simple graph to mark a centered griffin silhouette in gold and cream.
- Work tapestry sc from the graph, changing colors on the final yarn-over. Carry yarn behind the work and catch long floats every 4 stitches.
- Add 5 navy rows above and below the motif, then work 3 border rows along each side.
- Make a plain navy back panel the same size. Join panels on three sides with sc, right sides outward.
- Insert the cushion form and close the fourth side with a neat mattress stitch or a concealed buttonless envelope overlap.
Assembly: Keep colorwork floats relaxed so the pillow front remains smooth.
Castlecore Window Bunting
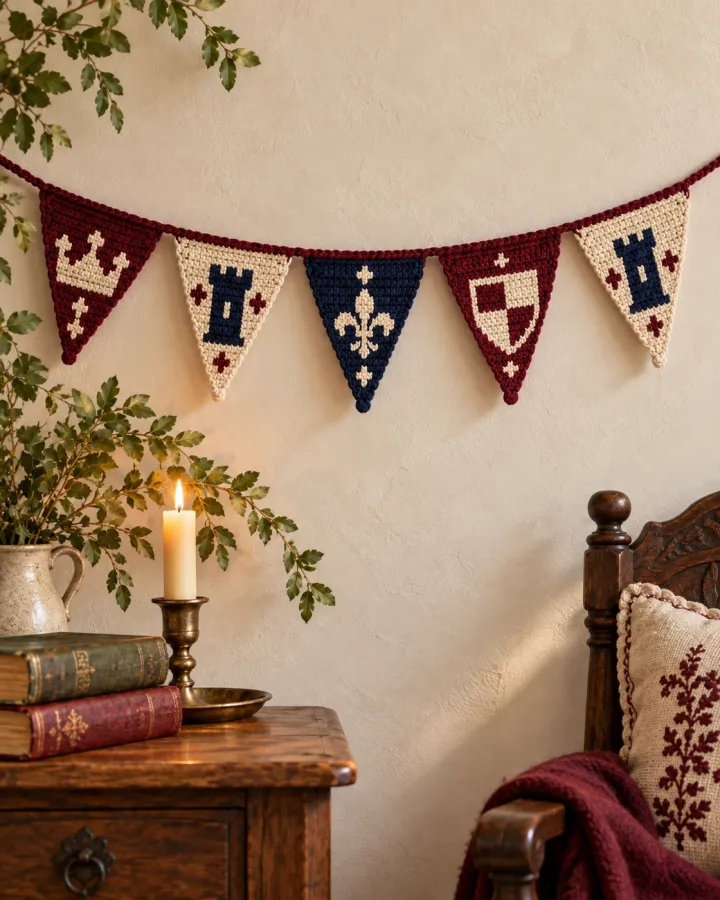
Cream, sage and dusty blue crochet flags are decorated with small arch and turret appliqués for a gentler castlecore look. The coordinated bunting brings a soft storybook accent to a reading nook, craft room or bedroom wall.
- LEVEL
- Confident beginner
- TRY IT WITH
- DK cotton: 120 yd cream, 45 yd sage, 35 yd dusty blue, 20 yd gold; 3.5 mm hook
- FINISHING NOTE
- Five flags, each approx. 6 by 7 in; 40 in cord.
Short Pattern
Abbreviations: ch chain · sc single crochet · hdc half double crochet · dec decrease · sl st slip stitch
- Make five flags: ch 21 and work 20 sc for 2 rows, then decrease one stitch at each end every row until 2 remain.
- Alternate cream, sage and dusty blue, keeping each flag the same height. Add one sc border around each triangle.
- Crochet tiny window arches from a 5-stitch base, working hdc and dc in the center stitches. Make one small turret shape from a narrow rectangle.
- Sew one motif securely to each flag, spacing the designs consistently and hiding all tails on the reverse.
- Ch 55 for the cord and attach the flags evenly with sl st, leaving a short tie at each end.
Assembly: Hang the bunting well away from cribs, heaters and open flames; keep cords safely out of reach.
Royal Goblet Cozy Pair
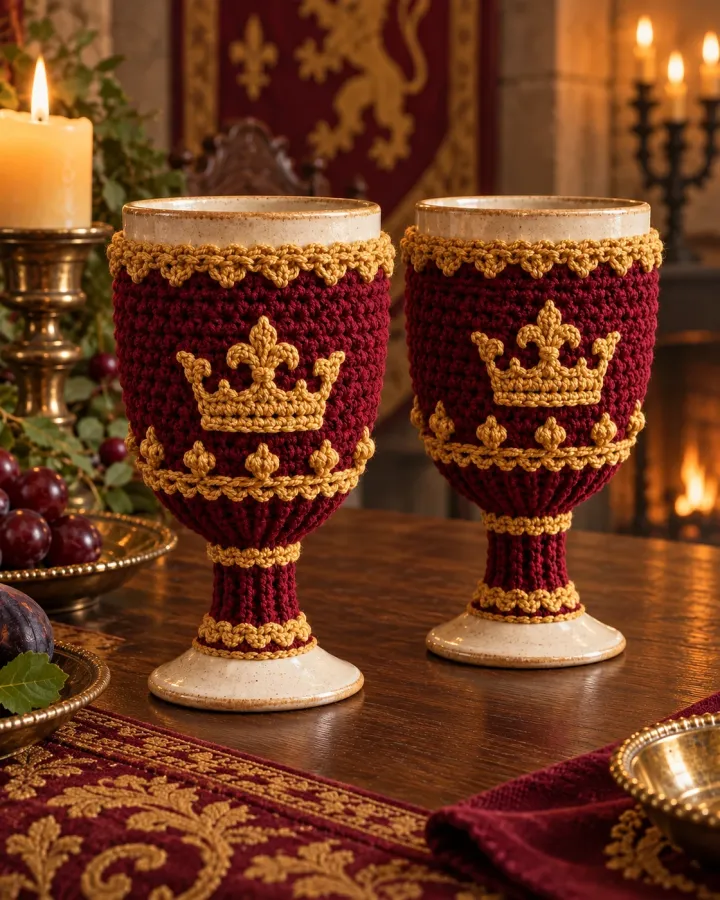
Two deep red crochet goblet sleeves are finished with gold bands and tiny heraldic motifs. They dress up a medieval-themed table setting while helping protect a glass surface from light scratches and condensation rings.
- LEVEL
- Confident beginner
- TRY IT WITH
- DK cotton: 90 yd burgundy, 25 yd gold, small cream scrap; 3.5 mm hook
- FINISHING NOTE
- Sized to fit a straight-sided cup base about 3 in wide.
Short Pattern
Abbreviations: ch chain · sc single crochet · hdc half double crochet · sl st slip stitch · inc increase
- For each base, make a magic ring and work 6 sc. Increase evenly to 36 stitches, checking against the cup base as you go.
- Work 2 rounds of sc in BLO to create a shallow cup lip, then continue even rounds until the sleeve reaches the desired height.
- Add one narrow gold round near the top and one near the base using surface slip stitches or a simple color change.
- Embroider a small cream shield or crown on the front with flat satin stitches.
- Make a second sleeve to match, adjusting the starting increases for the second vessel if needed.
Assembly: Use only on cool, stable drinkware and remove before washing the vessel. These are decorative sleeves, not heat protection.
Castle Tower Bookend Covers
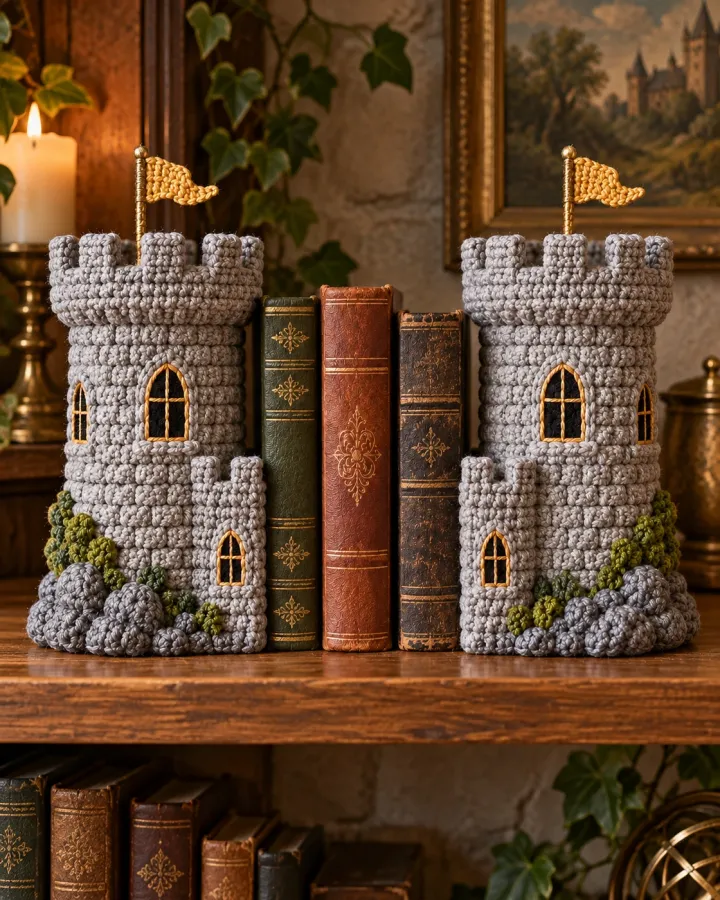
Soft gray turret-shaped covers fit over simple weighted bookends, adding battlements and tiny arched windows to a bookcase. Their stone-like texture brings castle architecture into a study without requiring a large wall display.
- LEVEL
- Intermediate
- TRY IT WITH
- Worsted cotton: 210 yd gray, 35 yd charcoal; 4.5 mm hook; two existing bookends
- FINISHING NOTE
- Measure each bookend; sample shown approx. 6 by 6 by 8 in.
Short Pattern
Abbreviations: ch chain · sc single crochet · hdc half double crochet · inc increase · dec decrease · sl st slip stitch
- Measure each bookend on all faces. Crochet a flat base rectangle to the exact footprint, adding 1 stitch at each corner when working the first side round.
- Work sc in joined rounds, checking height every few rounds so the cover reaches just below the top edge of the bookend.
- For a crenellated top, alternate ch 3 spaces with 3 sc groups around the upper edge; add one final sc round to stabilize.
- Embroider small dark windows on the front and side using short vertical stitches.
- Slide the cover over the weighted bookend and close the base opening with a removable whipstitch if needed.
Assembly: Do not cover bookends with sharp or fragile cores. Keep the covers fitted so they cannot slide onto a child.
Teal Dragon Tail Bolster
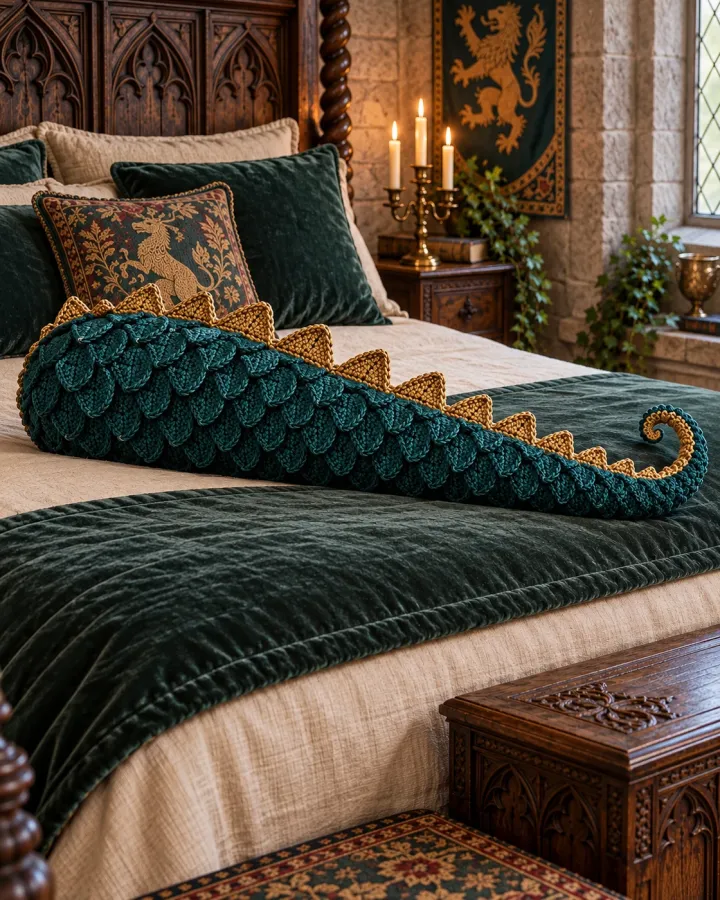
A curled teal dragon tail pillow tapers from a rounded base to a playful point, with a row of soft gold spikes along its curve. It works as a whimsical lumbar cushion or a standout accent on a fantasy reading chair.
- LEVEL
- Intermediate
- TRY IT WITH
- Worsted cotton: 280 yd teal, 45 yd gold; 5 mm hook; fiberfill
- FINISHING NOTE
- Approx. 24 in long by 8 in at widest point.
Short Pattern
Abbreviations: ch chain · sc single crochet · inc increase · dec decrease · sl st slip stitch · MR magic ring
- Start at the wide end: make a magic ring with 6 sc, increasing evenly every round until the tube reaches 48 stitches.
- Work even rounds for 7 in, then decrease 2 stitches evenly every third round to create a gradual taper.
- Stuff the tail firmly at the base and more lightly toward the tip as you continue crocheting; close the final 6 stitches.
- Make small triangular spikes in gold: ch 5, sc, hdc, dc, then sl st back to the base. Make 8–10 spikes.
- Pin spikes along the outer curve and sew each base down with several passes of matching yarn.
Assembly: Use embroidered details only and secure every spike firmly.
Antique Royal Key Wall Ornament
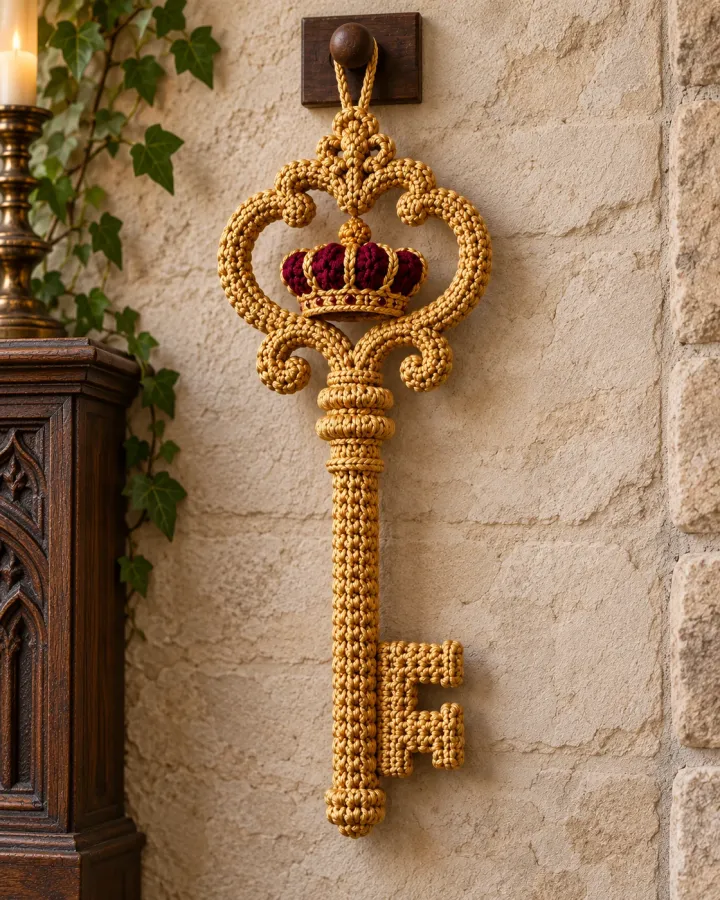
A large golden crochet key combines a round openwork bow, a sturdy stem and two simple teeth. Hung alone or beside a tapestry, it adds an antique storybook accent while remaining lightweight and easy to customize in length.
- LEVEL
- Confident beginner
- TRY IT WITH
- Worsted cotton: 100 yd antique gold; 4 mm hook; tapestry needle; optional felt backing
- FINISHING NOTE
- Approx. 18 in long by 7 in wide.
Short Pattern
Abbreviations: ch chain · sc single crochet · hdc half double crochet · dc double crochet · sl st slip stitch · MR magic ring
- Make the bow ring: ch 24 and join, then work 2 rounds of sc around the chain. Add a second matching ring and join them at the base.
- For the stem, ch 46 and work 3 rows of sc, making a narrow flat strip. Sew one end securely to the bottom center of the bow.
- Create two teeth from small rectangles of 5 sc by 5 rows. Attach one near the lower stem and one at the tip, offset to opposite sides.
- Outline the entire key with a round of gold sl st, adding 3 stitches at each corner to keep the shape flat.
- Add a small hanging loop at the top of the bow and weave in all tails.
Assembly: Hang from a secure wall hook; do not use as a toy or teether.
Storybook Realm Map Tapestry
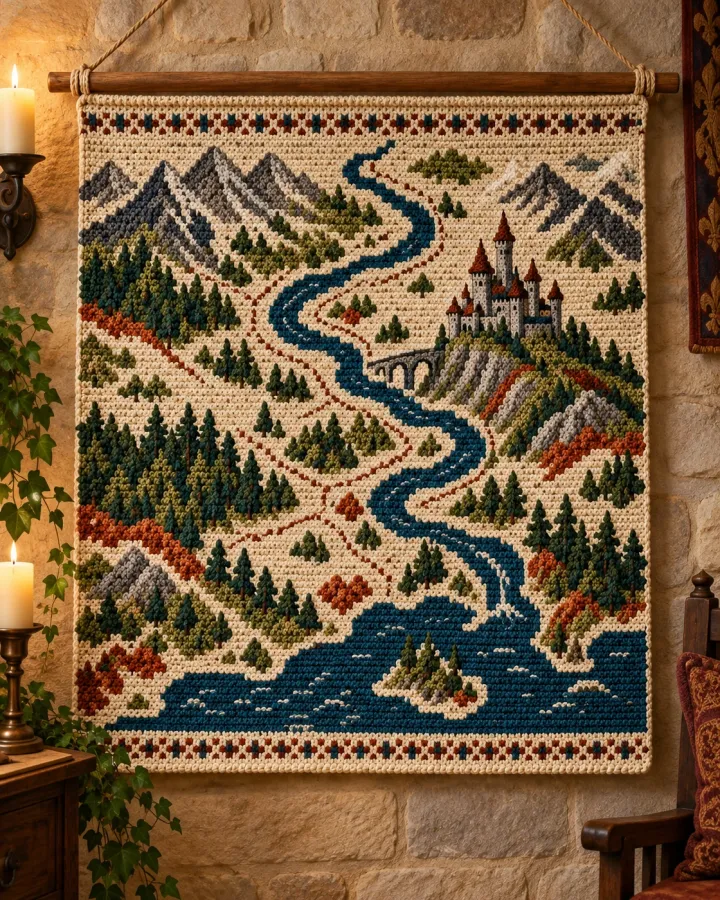
A colorful crochet wall map traces a winding river through forest, hills and a tiny central keep. Its simplified, hand-planned landscape invites imaginative storytelling and gives a craft room a unique medieval-inspired focal point.
- LEVEL
- Intermediate
- TRY IT WITH
- Worsted cotton: 230 yd parchment, 70 yd forest, 45 yd blue, 35 yd stone, 20 yd gold; 4 mm hook
- FINISHING NOTE
- Approx. 18 by 22 in.
Short Pattern
Abbreviations: ch chain · sc single crochet · color change on final yarn-over · sl st slip stitch · BLO back loop only
- Ch 61 and work 60 sc for 4 rows in parchment to create a border. Mark a loose 50-by-50 stitch area for the map.
- Work broad color blocks in tapestry sc: forest patches, blue winding river, stone hills and a small gold keep. Use a paper grid to plan the layout.
- Change colors on the final yarn-over and catch carried floats every 4 stitches. Keep the back tidy but prioritize a flat, flexible front.
- Work 4 more parchment rows at the top and bottom, then add 3 border rows around the panel.
- Embroider a few simple paths and windows with surface stitches after blocking. Add a top casing for a dowel.
Assembly: Use a smooth dowel and secure wall mounting. Keep the tapestry away from moisture and direct high heat.
Make thoughtfully and check as you go.
Yarn, hook size and personal tension can change the finished scale. Count every round, stuff gradually and use embroidered features instead of safety eyes when making toys for children under three.