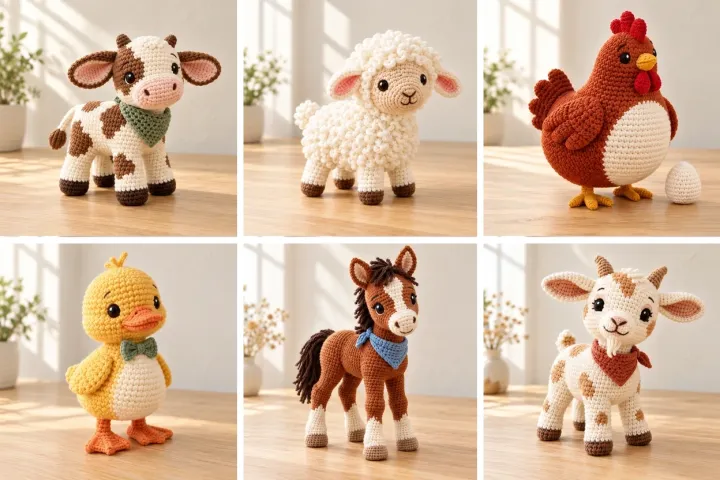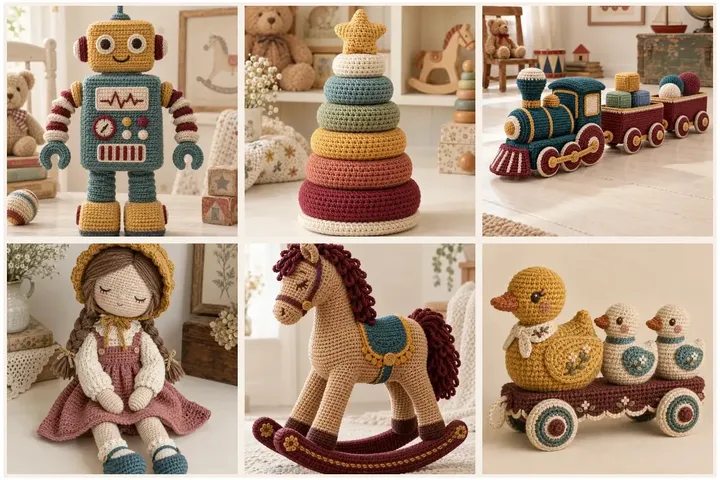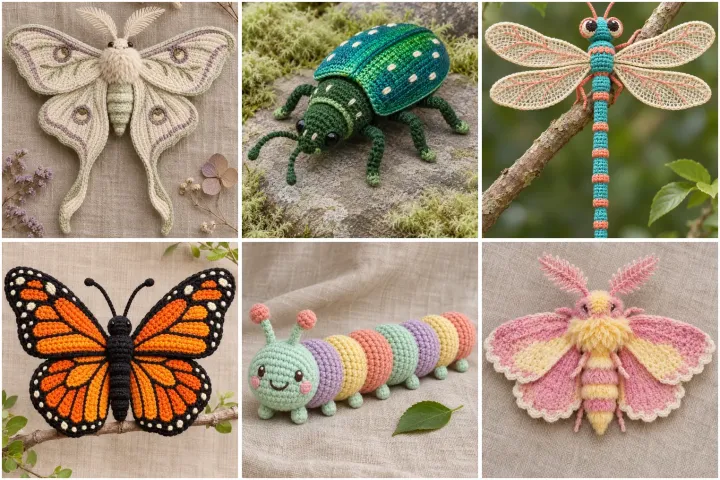
Trade familiar plush animals for tiny fiber-art insects with expressive shapes, embroidered details and imaginative colors. This collection includes luna moths, beetles, dragonflies, butterflies and other garden visitors. The instructions use US crochet terms and are original design drafts, not sample-tested patterns; stitch counts may need adjustment for your yarn, hook and tension. Amigurumi pieces are made in continuous rounds unless noted. Use embroidered features for a soft finish, sew every wing and appendage down firmly, and keep loose parts away from young children. These are decorative craft projects, not toys tested to child-safety standards. The AI-created photos are visual references; use the written construction notes to adapt the shapes as you crochet.
Ivory and Sage Luna Moth
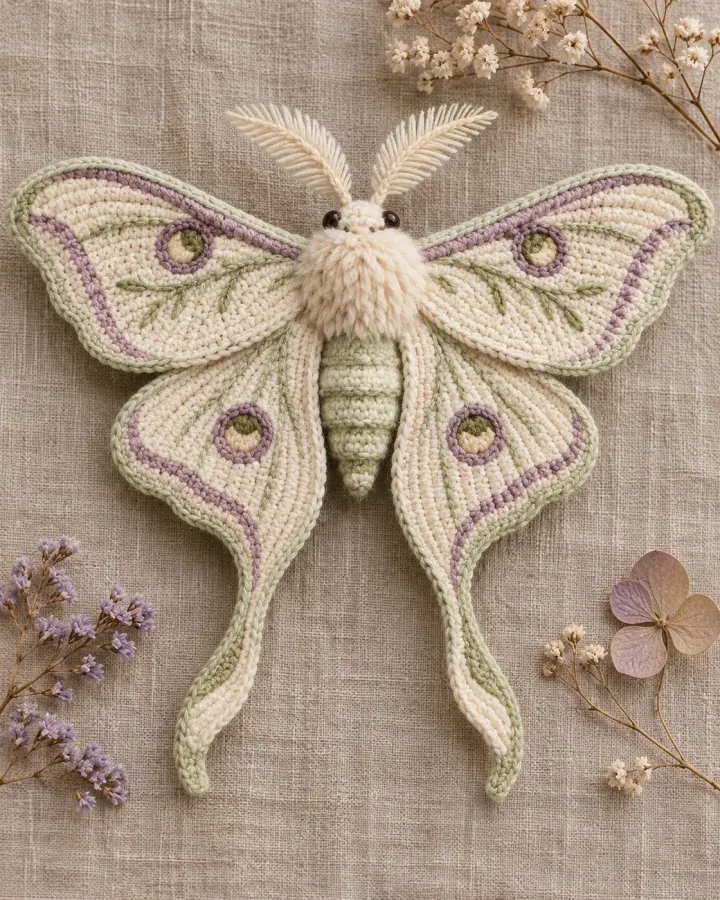
An ivory moth with sage bands and muted lilac eye spots brings a gentle botanical palette to a striking winged amigurumi. Long tail-like hindwings and soft antennae give the familiar luna shape a whimsical, collectible finish.
- LEVEL
- Intermediate
- TRY IT WITH
- DK cotton: ivory 70 yd, sage 25 yd, lilac 10 yd; 3 mm hook; fiberfill; tapestry needle; embroidery thread
- FINISHING NOTE
- About 8 in across the wings; adjust wing panels for scale.
Short Pattern
Abbreviations: MR magic ring · ch chain · sc single crochet · hdc half double crochet · dc double crochet · inc 2 stitches in one stitch · dec invisible decrease over 2 stitches · sl st slip stitch · FO fasten off
- Body: with sage, make a small oval in continuous sc rounds, beginning with 6 sc in a MR and increasing to 18 stitches. Work 8 rounds even, stuff lightly, then decrease at both ends to close. Add ivory and sage bands with color changes every 2 rounds.
- Upper wings: make two ivory panels. Ch 8, work sc along the chain, place 3 sc in the final chain, then work back along the underside. Increase at the outer curve on each row until each wing is about 3 in wide; finish with a sage edge.
- Lower wings: make two smaller ivory ovals, tapering each into a narrow tail by decreasing along one edge for the final rows. Embroider lilac and sage eye spots with satin stitches before attaching them.
- Sew upper and lower wings to the body sides, positioning the long tails downward. Anchor each wing across its full base with several passes of matching yarn so the moth holds its spread shape.
- Make two antennae with a short chain and a row of sl st, then sew them to the head. Embroider small eyes and a center line; weave in ends and check all joints.
Assembly: Keep stuffing the body firm but flexible. Sew the wing bases securely and embroider the face rather than adding loose plastic pieces.
Emerald Jewel Beetle
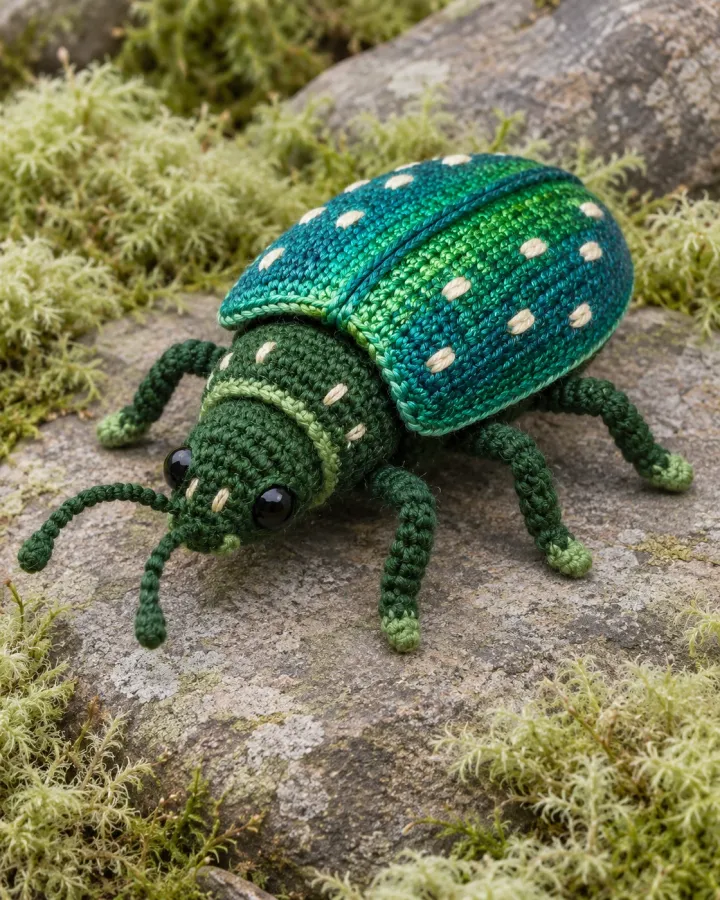
A domed emerald shell with teal highlights and tiny cream spots gives this jewel beetle a polished, gem-like look. Six soft legs and a rounded body keep the amigurumi recognizable while its layered shell adds dimensional crochet texture.
- LEVEL
- Confident beginner
- TRY IT WITH
- Worsted cotton: forest 45 yd, teal 25 yd, cream 5 yd; 3.5 mm hook; fiberfill; tapestry needle
- FINISHING NOTE
- About 5 in long; shell width about 3 in.
Short Pattern
Abbreviations: MR magic ring · ch chain · sc single crochet · hdc half double crochet · inc increase · dec invisible decrease · sl st slip stitch · FO fasten off
- Body: with forest yarn, begin with 6 sc in a MR and increase evenly to 30 stitches. Work 7 rounds even, then decrease evenly over 3 rounds. Stuff firmly before the final opening becomes too small and close with the yarn tail.
- Shell: in teal, make a separate oval by working around a foundation chain. Increase at both ends for 4 rounds, then work 3 rounds even. The oval should cover the upper half of the body without reaching the head or tail.
- Add a raised shell ridge by surface stitching a line down the center in darker teal. Embroider small cream dots along both sides; space them evenly and secure the thread inside the shell.
- Make six short legs in forest: ch 6, sl st back along the chain, and leave a sewing tail. Attach three to each side beneath the shell, placing the front pair near the head and rear pair near the tail.
- Sew the shell to the body along its center and outer edges, leaving the lower rim slightly raised. Add two short antennae and embroider small eyes on the head.
Assembly: Stuff the body before attaching the shell. Sew legs through several stitches each and keep the shell rim smooth so it does not snag.
Turquoise and Coral Dragonfly
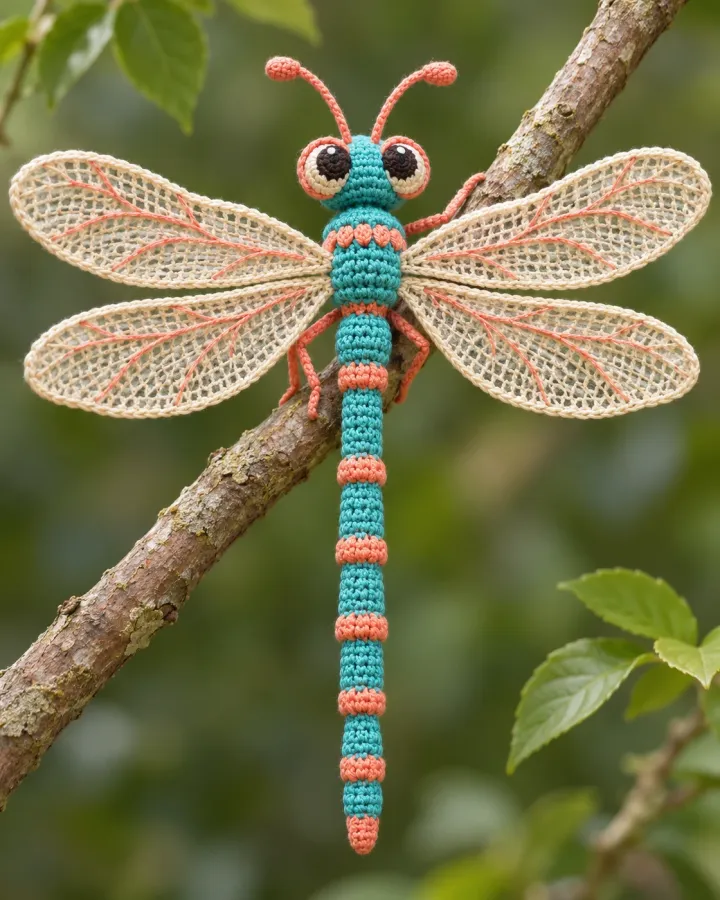
A slim turquoise body with coral segments is paired with four airy cream wings traced in coral. This dragonfly amigurumi feels light and playful, with delicate wing shapes balanced by a sturdy, softly stuffed body.
- LEVEL
- Intermediate
- TRY IT WITH
- DK cotton: turquoise 30 yd, coral 12 yd, cream 20 yd; 2.75 mm hook; fiberfill; tapestry needle
- FINISHING NOTE
- About 7 in long and 6 in across the wings.
Short Pattern
Abbreviations: MR magic ring · ch chain · sc single crochet · hdc half double crochet · dc double crochet · inc increase · dec decrease · sl st slip stitch · FO fasten off
- Body: with turquoise, ch 4 and work sc around both sides of the chain to form a narrow tube. Increase to 8 stitches, work 10 rounds, and add coral for every third round. Stuff lightly as you go; taper the tail with two decrease rounds.
- Head: make a small sphere in turquoise, beginning with 6 sc in a MR and increasing to 18. Work 3 rounds even, embroider two eyes, lightly stuff, and sew to the thicker end of the body.
- Wings: make four narrow pointed panels in cream. Ch 12, work sc along both sides of the chain and place 3 stitches at each end. Work 4 rounds, increasing at both tips; finish each panel with a coral surface-stitch vein.
- Pair one large and one small wing on each side of the thorax. Sew each pair at its base, then attach the base securely to the body just behind the head. Shape the wings outward and tack them once near the middle.
- Add two short antennae and embroider short coral segment lines across the body. Weave in all ends and check that the wings are balanced from side to side.
Assembly: Use a fine hook for the wings so the fabric holds its shape. Stitch the wing bases firmly and keep decorative veins flat.
Cherry-Red Ladybug
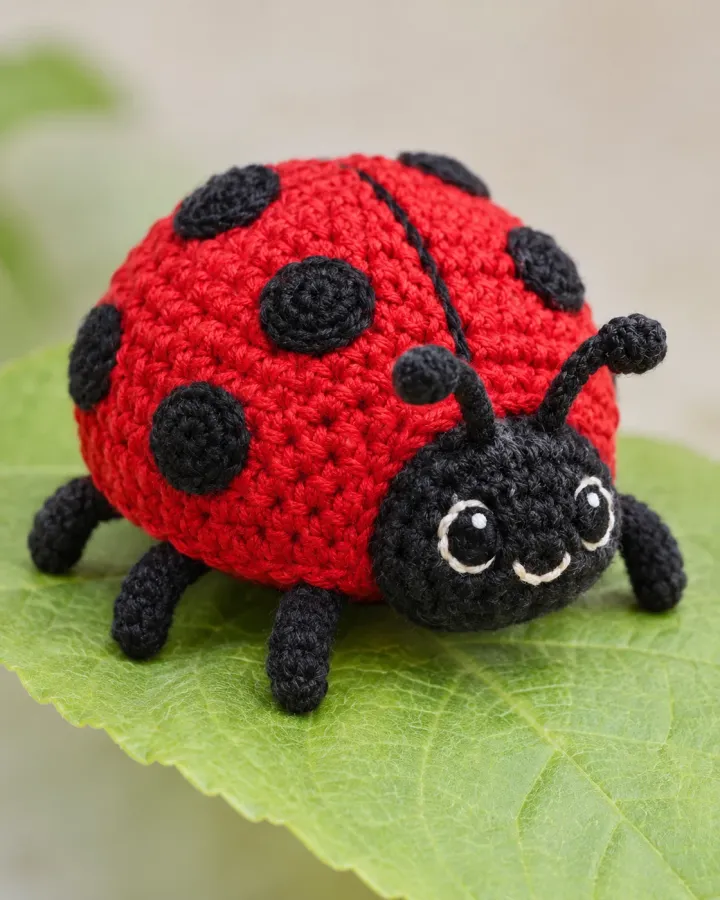
A bright cherry-red domed shell, black spots and a sweet embroidered face make this ladybug a cheerful garden-inspired amigurumi. Its compact oval body and six little legs are beginner-friendly shapes with a polished, recognizable finish.
- LEVEL
- Beginner
- TRY IT WITH
- Worsted cotton: red 35 yd, black 15 yd; 3.5 mm hook; fiberfill; tapestry needle; embroidery thread
- FINISHING NOTE
- About 4.5 in long and 3.5 in wide.
Short Pattern
Abbreviations: MR magic ring · ch chain · sc single crochet · inc increase · dec invisible decrease · sl st slip stitch · FO fasten off
- Body: with black, begin with 6 sc in a MR and increase evenly to 30 stitches. Work 5 rounds even for the underside, then change to red and work 5 rounds for the domed shell. Stuff before the opening narrows.
- Shape the shell by decreasing evenly around over 3 rounds. Add more stuffing as needed, keeping the top rounded, then close the opening with a yarn needle.
- Make 7 small black spots: work 6 sc into a MR, join and fasten off with a tail. Flatten each circle and sew them across the red shell in a balanced pattern.
- Make six legs by chaining 5 in black and slip stitching back along the chain. Attach three legs to each side under the shell, angling the front pair slightly forward.
- Embroider two eyes and a small curved smile on the head. Add a short center seam line down the shell using black embroidery thread and secure all ends inside.
Assembly: Keep the spots flat and firmly sewn. The embroidered face avoids small hard parts; check every leg attachment before using the insect as decor.
Honey-Gold Bumblebee
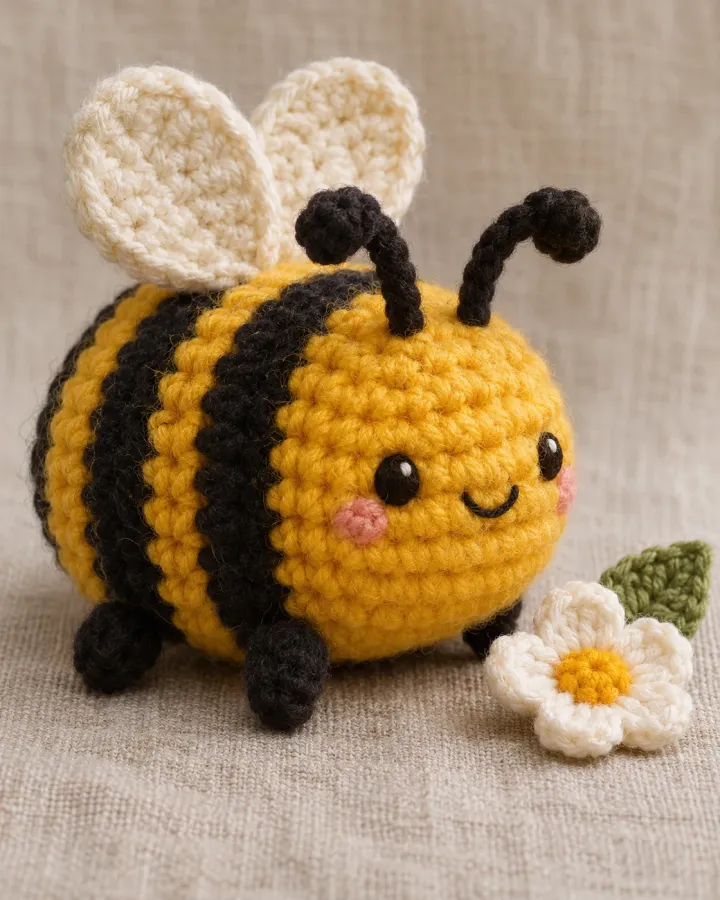
Golden-yellow and black stripes, cream wings and curved antennae give this bumblebee a soft, friendly silhouette. Plush shaping and a simple embroidered face make it a charming crochet insect for a shelf, craft room or spring display.
- LEVEL
- Beginner
- TRY IT WITH
- Worsted cotton: golden yellow 35 yd, black 20 yd, cream 10 yd; 3.5 mm hook; fiberfill; tapestry needle
- FINISHING NOTE
- About 5 in long and 4 in high including antennae.
Short Pattern
Abbreviations: MR magic ring · ch chain · sc single crochet · hdc half double crochet · inc increase · dec invisible decrease · sl st slip stitch · FO fasten off
- Body: with yellow, begin with 6 sc in a MR and increase evenly to 30 stitches. Work 3 rounds, change to black for 2 rounds, yellow for 3, black for 2 and yellow for 2. Stuff as the oval grows.
- Taper the tail with evenly spaced decreases over 3 rounds. Add stuffing until the body is plump but not stretched, then close the opening and weave the tail inside.
- Wings: make two cream ovals by working around a short foundation chain. Increase at both ends for 3 rounds, then work one round even. Flatten and sew them side by side across the upper back.
- Make two antennae by chaining 5 in black and working sl st back. Attach them to the head with several stitches. Embroider eyes and a small smile in black thread.
- Add six tiny black legs using short chains, three on each side. Secure the base of each leg through the body fabric and hide the knots inside.
Assembly: Stuff firmly enough for the bee to sit upright. Sew wings and legs down at multiple points so they remain secure.
Blue Morpho Butterfly
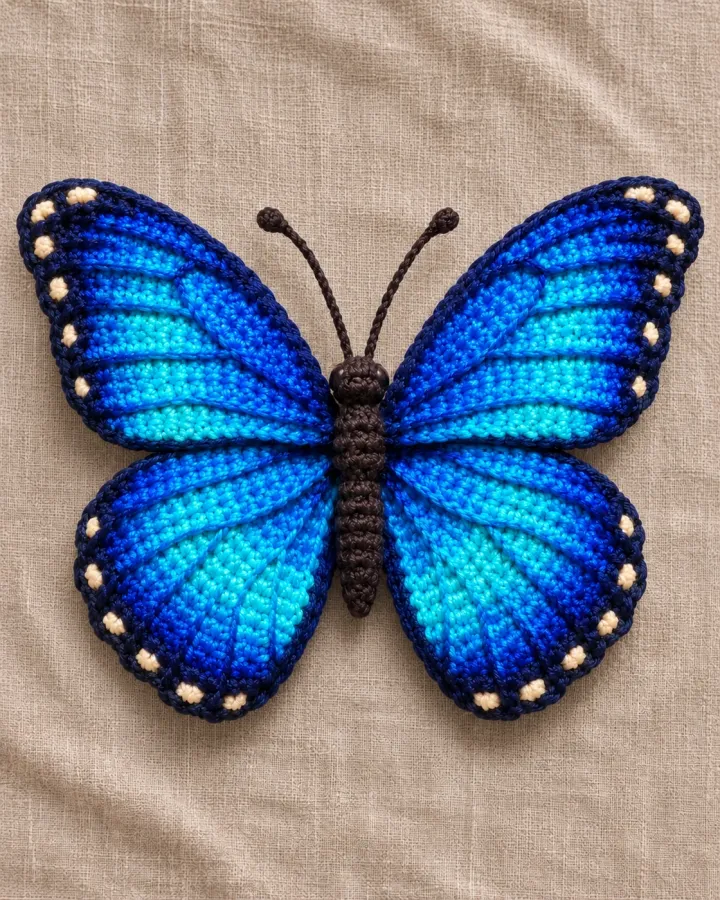
Vivid cobalt and turquoise wings with cream edge spots make this butterfly a striking piece of fiber art. A small dark body and symmetrical wing panels give the amigurumi its familiar shape while the bright yarn creates a jewel-like effect.
- LEVEL
- Intermediate
- TRY IT WITH
- DK cotton: cobalt 30 yd, turquoise 25 yd, navy 10 yd, cream 5 yd; 2.75 mm hook; tapestry needle
- FINISHING NOTE
- About 6 in across the wings and 4 in tall.
Short Pattern
Abbreviations: MR magic ring · ch chain · sc single crochet · hdc half double crochet · dc double crochet · inc increase · sl st slip stitch · FO fasten off
- Body: with navy, work a narrow stuffed tube from a chain, using sc around both sides. Increase to 8 stitches, work 8 rounds, then decrease at the tail. Add light stuffing and embroider two small eyes at the head.
- Upper wings: make two wide cobalt panels. Ch 10 and work around the foundation chain, placing 3 sc in each end. Increase at the rounded outer edge on 4 rows, then finish the inner edge straight for joining to the body.
- Lower wings: make two smaller turquoise panels with the same oval method, stopping after 3 increase rounds. Add a cream border with sc and embroider short navy vein lines from the wing base outward.
- Position upper and lower wings on each side of the body, overlapping slightly. Sew each base to the thorax with several passes of yarn and tack the wing tips lightly so they hold a symmetrical spread.
- Make two navy chain antennae and attach to the head. Add cream dots along the outer wing border with embroidery, then secure all ends on the underside.
Assembly: Block the wing panels lightly before joining so both sides match. Keep the embroidered veins short and flat to avoid catching.
Leaf-Green Grasshopper
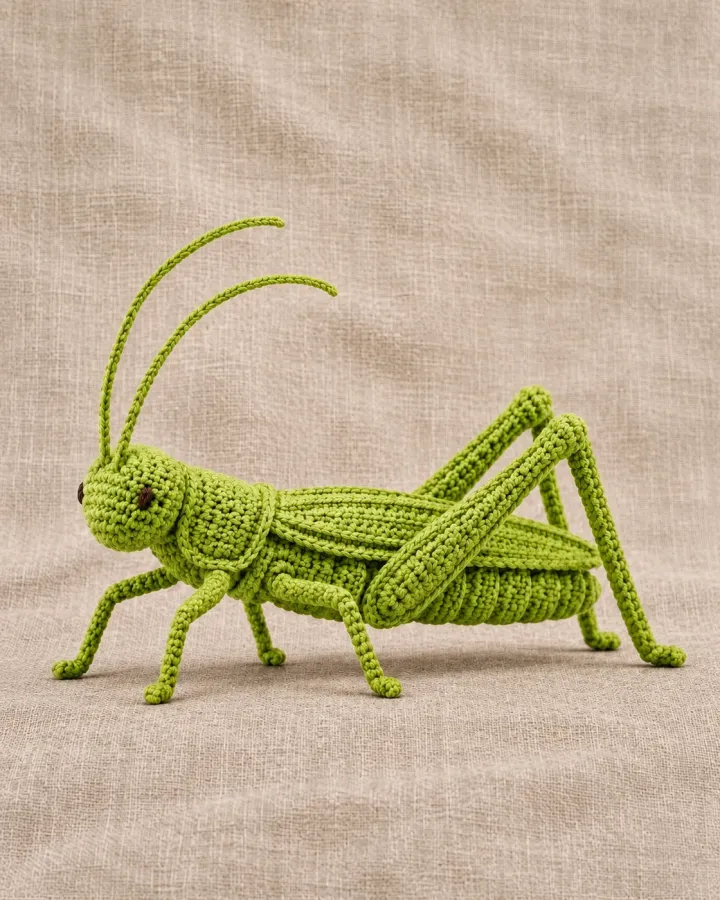
A slender leaf-green body, long curved antennae and folded hind legs give this grasshopper its lively profile. Small embroidered details and gentle shaping keep the crochet figure whimsical without making its delicate limbs overly complicated.
- LEVEL
- Intermediate
- TRY IT WITH
- DK cotton: leaf green 35 yd, pale green 10 yd, black embroidery thread; 3 mm hook; small amount of fiberfill
- FINISHING NOTE
- About 6 in long including antennae; legs add about 3 in.
Short Pattern
Abbreviations: MR magic ring · ch chain · sc single crochet · hdc half double crochet · inc increase · dec invisible decrease · sl st slip stitch · FO fasten off
- Body: with leaf green, begin with 6 sc in a MR and increase to 18 stitches. Work 10 rounds even, adding a small amount of stuffing through the open end. Decrease to 6 stitches over the final rounds and close.
- Head: make a small sphere in pale green, work 3 even rounds, lightly stuff and sew to the front of the body. Embroider two small eyes and a short mouth line before attaching fully.
- Make four short legs with green chains worked back in sl st. For the long hind legs, chain 12, work sc back along the chain, then fold the middle into an angled joint and sew it securely.
- Attach two legs near the front and two at the middle underside. Sew the hind legs farther back and angle them outward. Keep each leg joint anchored across several body stitches.
- Make two long antennae with a chain and sl st back; sew them to the head and curve them gently. Add a pale-green surface stitch along the back as a subtle wing line.
Assembly: Use yarn rather than wire for soft legs and antennae. Reinforce each limb base and embroider the eyes for a smooth finish.
Burgundy Stag Beetle
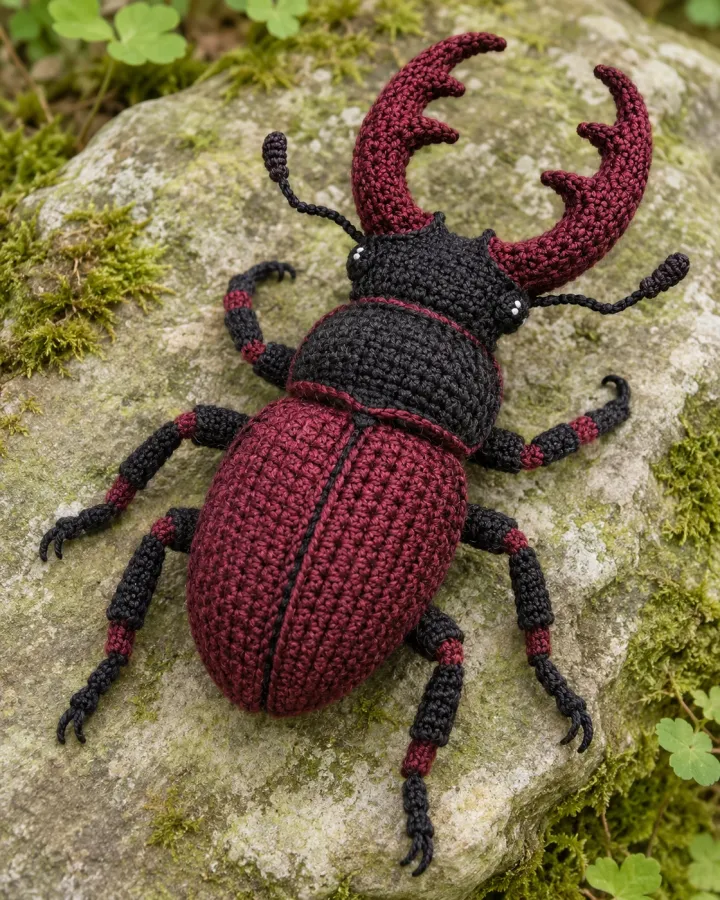
Deep burgundy and black yarn give this stag beetle a dramatic, sculptural shell, while curved crochet mandibles create its signature silhouette. Six sturdy legs and a rounded body help this unusual insect amigurumi stand out in a collection.
- LEVEL
- Intermediate
- TRY IT WITH
- Worsted cotton: burgundy 40 yd, black 25 yd; 3.5 mm hook; fiberfill; tapestry needle
- FINISHING NOTE
- About 5 in long including mandibles; shell about 3 in wide.
Short Pattern
Abbreviations: MR magic ring · ch chain · sc single crochet · hdc half double crochet · inc increase · dec invisible decrease · sl st slip stitch · FO fasten off
- Body: with black, work an oval amigurumi shape from 6 sc in a MR, increasing to 30. Work 6 rounds even, stuff firmly, then decrease over 3 rounds and close. Add a burgundy head sphere and sew it to the front.
- Shell: make a burgundy oval around a foundation chain, increasing at both ends until it covers the upper body. Work 2 rounds even, then add a black surface-stitch center line to divide the wing cases.
- Mandibles: chain 9 in black, work sl st back, then make a second shorter chain from the side near the tip to form a fork. Make two and sew to the head, curving them gently outward.
- Make six black legs with short chains worked back in sc. Attach three to each side under the shell, placing the front legs near the head and the rear pair near the tail.
- Embroider small eyes and short burgundy highlights on the shell. Sew the shell around its outer edge, leaving a slight dome, and secure all limb and mandible bases.
Assembly: Keep mandibles soft and rounded rather than stiff. Stitch the shell and legs securely; use embroidery for facial details.
Monarch Butterfly
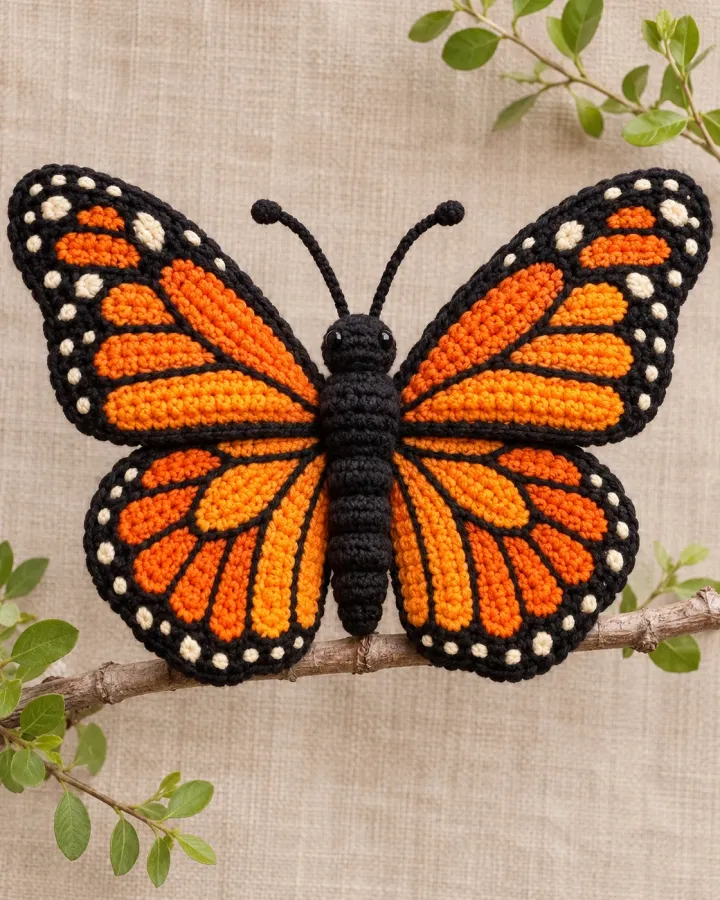
Orange wings outlined in black with cream spots evoke the classic monarch pattern in a soft crochet form. A plush dark body and carefully placed wing veins create a recognizable butterfly that looks lovely as a handmade display piece.
- LEVEL
- Intermediate
- TRY IT WITH
- DK cotton: orange 30 yd, black 25 yd, cream 8 yd; 2.75 mm hook; tapestry needle
- FINISHING NOTE
- About 6 in wingspan; adjust wing panels for a larger wall display.
Short Pattern
Abbreviations: MR magic ring · ch chain · sc single crochet · hdc half double crochet · dc double crochet · inc increase · sl st slip stitch · FO fasten off
- Make a slim black body as a stuffed tube, tapering one end. Embroider two eyes at the head and add short black chain antennae before the wings are attached.
- Upper wings: crochet two orange fan panels from a short foundation chain, increasing at the outer edge each row to form a rounded triangle. Make matching smaller lower-wing fans, keeping both pairs symmetrical.
- Edge each wing in black sc. Embroider black vein lines from the inner base toward the outer edge, dividing each orange panel into sections. Add small cream spots around the outer black border.
- Pair one upper and one lower wing on each side of the body. Sew the wing bases to the thorax with matching black yarn and tack each panel at one point to keep it spread.
- Add a short black center stripe over the wing joins, weave in all embroidery ends and block the wings lightly so the butterfly lies flat.
Assembly: Mirror the vein pattern and spot placement on both sides. Keep the wings flexible and reinforce the body join with several stitches.
Golden Firefly
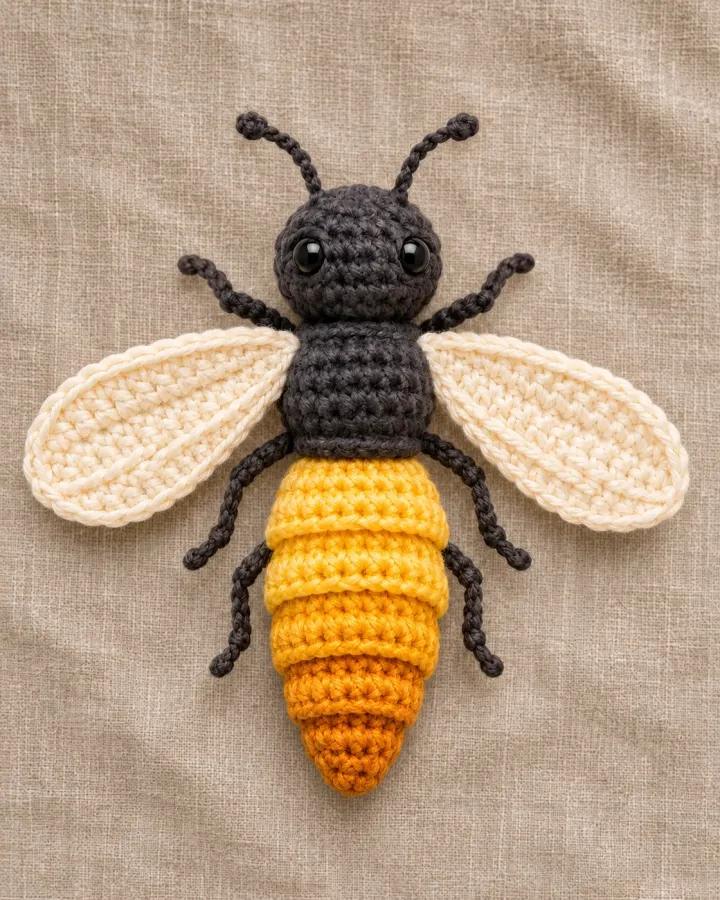
A warm golden abdomen, charcoal head and delicate cream wings make this firefly feel bright and charming without relying on glow effects. The segmented body and embroidered face create a simple, distinctive amigurumi for a summer-themed display.
- LEVEL
- Beginner
- TRY IT WITH
- DK cotton: golden yellow 30 yd, charcoal 18 yd, cream 10 yd, amber 8 yd; 3 mm hook; fiberfill; tapestry needle
- FINISHING NOTE
- About 4.5 in long; wingspan about 3.5 in.
Short Pattern
Abbreviations: MR magic ring · ch chain · sc single crochet · inc increase · dec invisible decrease · sl st slip stitch · FO fasten off
- Body: with golden yarn, begin with 6 sc in a MR and increase to 24 stitches. Work 4 rounds even, change to amber for 2 rounds, then return to gold for 3 rounds. Stuff lightly to keep the segmented oval soft.
- Make the head in charcoal: start with 6 sc in a MR, increase to 18, work 3 rounds, then decrease to 12. Add embroidery eyes, stuff lightly and sew to the front of the abdomen.
- Make two cream wings as narrow ovals around a foundation chain. Increase at both ends for 3 rounds and finish with one charcoal edge round. Embroider a few short vein lines in cream thread.
- Sew the wings to the upper back, one on each side. Add six small charcoal legs beneath the body using short chains worked back in sl st.
- Make two short charcoal antennae, attach to the head and curve them outward. Weave in ends and check all appendages are firmly sewn.
Assembly: The abdomen is decorative and does not contain a light. Secure the wings and legs carefully, especially if the piece will be handled.
Pastel Segmented Caterpillar
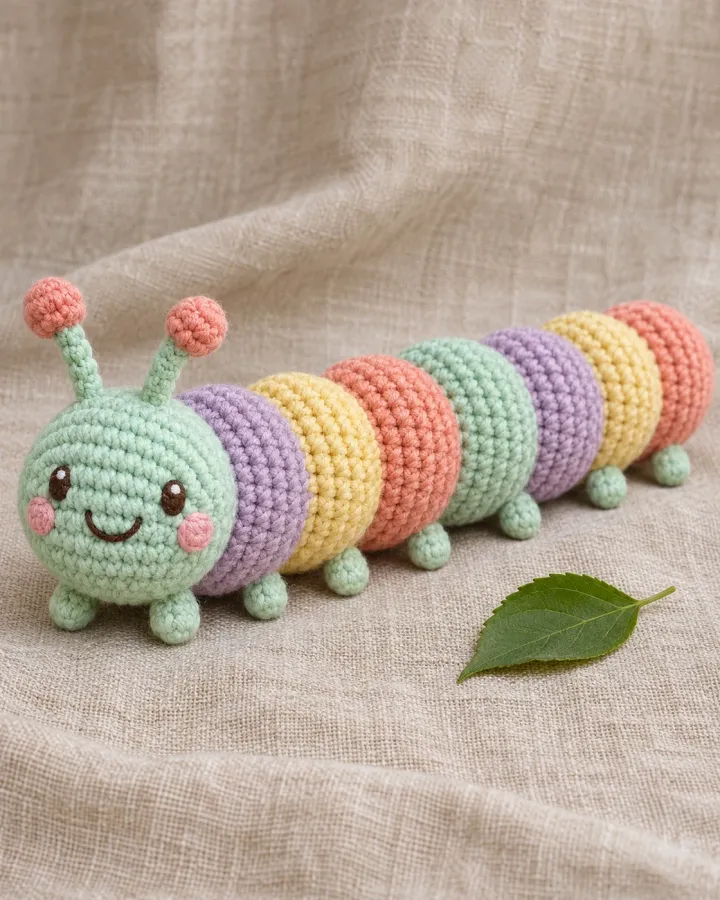
Mint, lavender, butter-yellow and coral crochet segments form a cheerful caterpillar with tiny feet and soft antennae. Its rounded, modular shape makes the project approachable, while the pastel sequence adds a playful garden-inspired look.
- LEVEL
- Beginner
- TRY IT WITH
- DK cotton: mint 20 yd, lavender 20 yd, butter 20 yd, coral 20 yd; 3 mm hook; fiberfill; tapestry needle
- FINISHING NOTE
- About 7 in long; add or remove segments to change length.
Short Pattern
Abbreviations: MR magic ring · ch chain · sc single crochet · inc increase · dec invisible decrease · sl st slip stitch · FO fasten off
- Make six small spheres in alternating colors. For each, work 6 sc in a MR, increase to 18, work 3 rounds even, then decrease to 6. Stuff firmly before closing so each segment keeps its round shape.
- Arrange the spheres in a gentle curve with the coral segment at the head. Join each pair by sewing through several stitches at the contact points; keep the seams hidden between the rounded sections.
- Make a slightly larger mint head sphere and sew it to the front segment. Embroider two eyes and a smile, or use small embroidered circles for a softer look.
- Add four tiny feet underneath by making short chains in mint, working sl st back and sewing two feet to each side of the middle segments.
- Make two short antennae with coral chains and attach to the head. Weave all ends inside and check that the caterpillar rests steadily on a flat surface.
Assembly: Sew each segment together firmly so the caterpillar holds its curved shape. Embroidered details are preferred over hard components for a soft decorative finish.
Pink Orchid Mantis
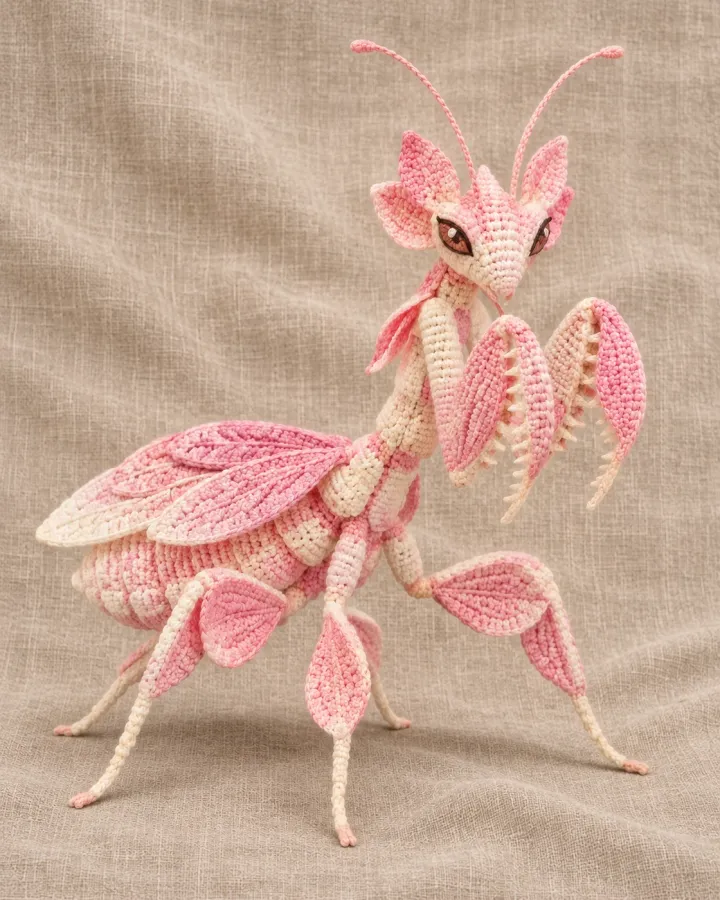
Soft pink and ivory yarn shape this orchid mantis with petal-like limbs and delicate folded wings. Its graceful pose feels more like a tiny botanical sculpture than a standard bug, making it an especially unusual crochet insect project.
- LEVEL
- Advanced
- TRY IT WITH
- DK cotton: pale pink 35 yd, ivory 20 yd, blush 10 yd; 2.5 mm hook; small amount of fiberfill; tapestry needle
- FINISHING NOTE
- About 6 in tall in a seated pose; limbs are adjustable before sewing.
Short Pattern
Abbreviations: MR magic ring · ch chain · sc single crochet · hdc half double crochet · inc increase · dec invisible decrease · sl st slip stitch · FO fasten off
- Body: crochet a narrow pale-pink tube from a MR, increasing to 12 stitches and working 8 rounds. Stuff lightly and taper the lower abdomen with 2 decrease rounds. Make a small head sphere and embroider the eyes before joining.
- Make four petal-like limbs in blush: chain 8, work sc back, then add 3 sc at the end and return along the underside for a narrow oval. Add a second smaller ivory oval on top and sew the layers together.
- Create two folded forelegs by chaining 10, working sl st back, then folding the strip at the midpoint and sewing the bend securely. Attach one on each side of the head, angled inward.
- Sew the petal limbs at the thorax and abdomen, keeping the pose balanced. Add two pale-pink wings on the back as small pointed ovals with a blush edge.
- Join head to body and add two curved antennae made from short chains. Secure each limb base through several stitches and weave the ends inside the body.
Assembly: Keep the mantis pose soft and flexible; do not insert sharp wire. Reinforce the folded forelegs and embroidered features for durability.
Rosy Maple Moth
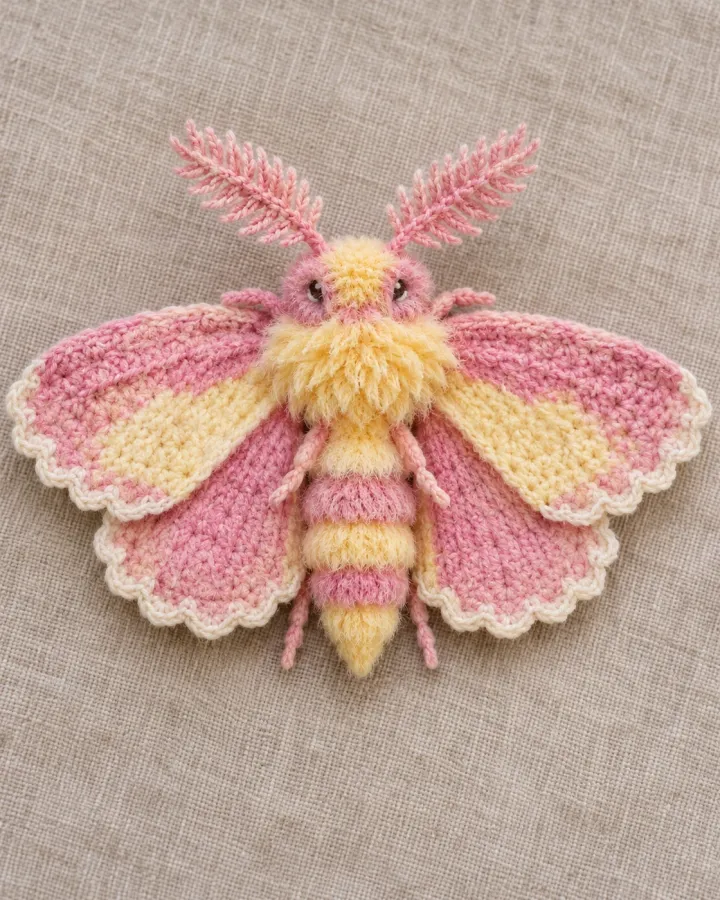
Pastel pink and buttery-yellow wings give this rosy maple moth a soft, plush look, with feathery antennae and a striped body. Rounded wing shapes and a gentle color palette make it a sweet companion to the more dramatic luna moth.
- LEVEL
- Intermediate
- TRY IT WITH
- DK cotton: pink 40 yd, butter yellow 25 yd, cream 15 yd; 3 mm hook; fiberfill; tapestry needle
- FINISHING NOTE
- About 5 in across the wings and 4 in long.
Short Pattern
Abbreviations: MR magic ring · ch chain · sc single crochet · hdc half double crochet · dc double crochet · inc increase · dec invisible decrease · sl st slip stitch · FO fasten off
- Body: with butter yellow, make a narrow stuffed tube in sc rounds, adding one pink band near the middle. Taper the tail with decreases and sew a small pink head sphere to the front.
- Upper wings: make two rounded pink panels by working around a short foundation chain. Increase at both ends for 4 rounds, then work an even round. Add a cream border and a yellow center stripe with surface sl st.
- Lower wings: crochet two smaller pink ovals and add a butter-yellow inner patch. Use cream embroidery to trace a short vein line from each base toward the outer edge.
- Arrange the four wings in pairs and sew them to the thorax, overlapping the upper and lower bases slightly. Tack each wing near its center so the edges remain gently curved.
- Make feathery antennae by chaining 6 and working several short chain loops along one side. Attach them above the head, embroider the eyes and secure all tails.
Assembly: Lightly stuff the body only; keep wings flat and flexible. Secure antennae and wing bases with matching yarn rather than glue.
Violet Lace Dragonfly
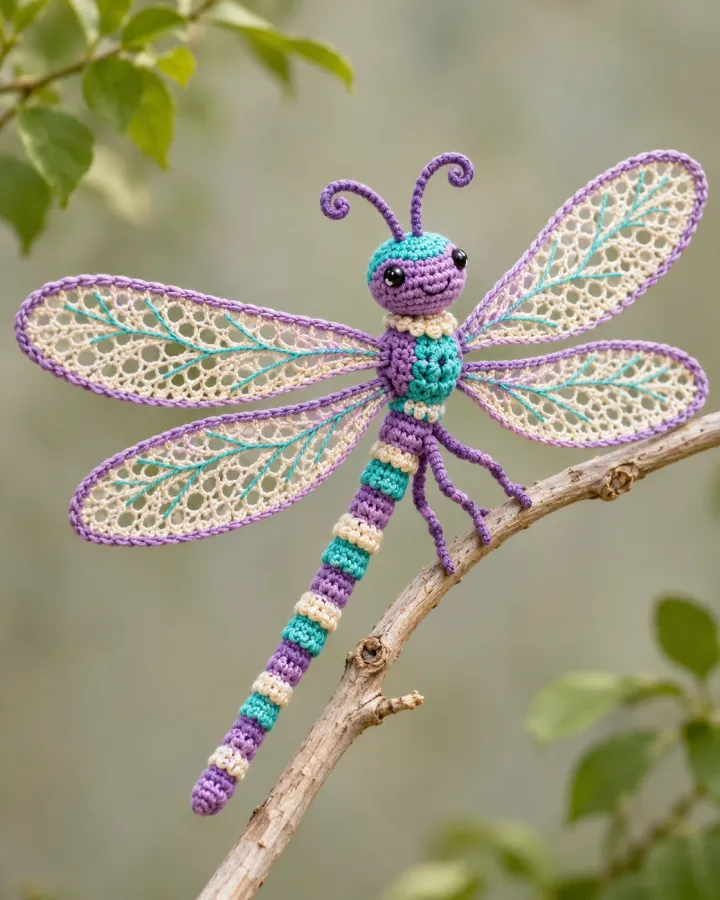
Violet, turquoise and pearl cream yarn create a second dragonfly with long lace-like wings and a slender striped body. Fine embroidered veins and a jewel-toned palette distinguish this airy design from the bolder turquoise-and-coral version.
- LEVEL
- Intermediate
- TRY IT WITH
- DK cotton: violet 20 yd, turquoise 20 yd, pearl cream 25 yd; 2.5 mm hook; fiberfill; tapestry needle
- FINISHING NOTE
- About 7 in long and 6 in across the wings.
Short Pattern
Abbreviations: MR magic ring · ch chain · sc single crochet · hdc half double crochet · dc double crochet · inc increase · sl st slip stitch · FO fasten off
- Crochet a slender body in alternating violet and turquoise rounds. Begin with 6 sc in a MR, increase to 10, work 12 rounds even and stuff lightly. Decrease toward the tail and close; add an embroidered face to the head.
- For each wing, chain 16 in pearl cream and work dc along one side, 3 dc in the end, then dc back along the other side. Work 2 more rounds, adding small ch-1 spaces along the outer edge for an airy lace effect.
- Make four wings, two slightly longer than the others. Embroider a thin turquoise vein from each wing base toward its tip, keeping the stitches loose enough not to pucker the lace.
- Sew the longer wings at the upper thorax and the shorter wings just below them. Secure each base with several passes of matching yarn and tack the wings once near the middle for a spread pose.
- Add two violet chain antennae, embroider the body segments and weave in ends. Shape the wings symmetrically and check the dragonfly lies or perches evenly.
Assembly: Use a smaller hook for open lace wings so the stitches stay defined. Keep the body stuffing light to preserve a slender silhouette.
Leaf-Green Katydid
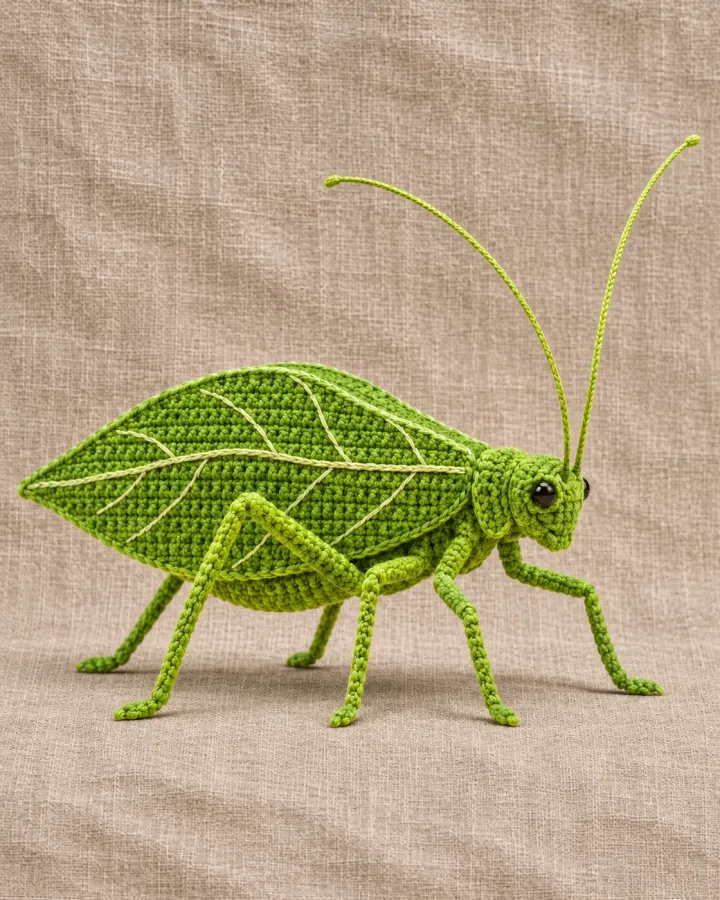
A leaf-green body with embroidered vein lines helps this katydid blend into a botanical display. Long antennae and delicate legs give the slender amigurumi its distinctive outline while keeping the design focused on simple, soft yarn shapes.
- LEVEL
- Intermediate
- TRY IT WITH
- DK cotton: leaf green 35 yd, pale green 10 yd; 3 mm hook; small amount of fiberfill; tapestry needle; embroidery thread
- FINISHING NOTE
- About 6 in long including antennae; legs about 2 in wide.
Short Pattern
Abbreviations: MR magic ring · ch chain · sc single crochet · hdc half double crochet · inc increase · dec invisible decrease · sl st slip stitch · FO fasten off
- Body: with leaf green, begin with 6 sc in a MR and increase to 18 stitches. Work 8 rounds, adding a little fiberfill as you go, then taper the rear end with evenly spaced decreases and close.
- Make two leaf-shaped wings by chaining 12 and working sc around both sides of the chain. Increase at the tips for 3 rounds, then add a pale-green embroidered center vein and short diagonal lines.
- Sew the wings along the upper back, overlapping slightly. Add two small front legs and four longer walking legs from short chains worked in sl st; attach them underneath with the longer pair toward the rear.
- Make two long antennae with a chain of 18 and sl st back along it. Sew them to the head and curve them outward. Embroider small eyes and a subtle mouth line.
- Check the katydid sits steadily, then weave in all ends and reinforce each leg base. Adjust the wing tips so they lie close to the body like folded leaves.
Assembly: Use soft yarn for antennae and limbs, and attach them through multiple body stitches. Embroidered leaf veins keep the wing surface smooth.
Make thoughtfully and check as you go.
Yarn, hook size and personal tension can change the finished scale. Count every round, stuff gradually and use embroidered features instead of safety eyes when making toys for children under three.