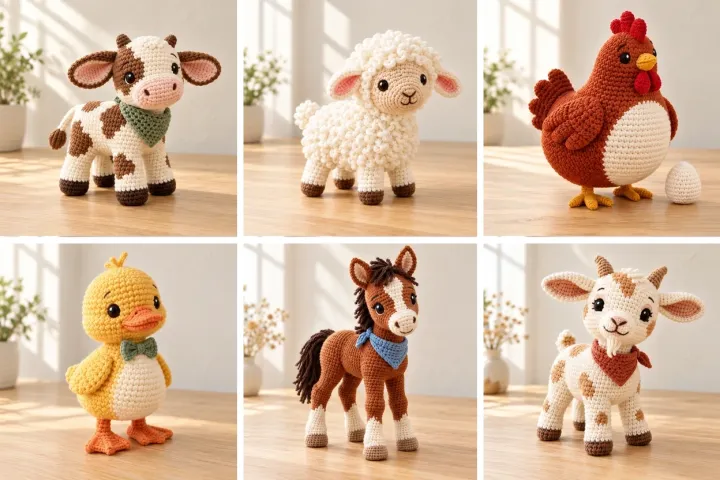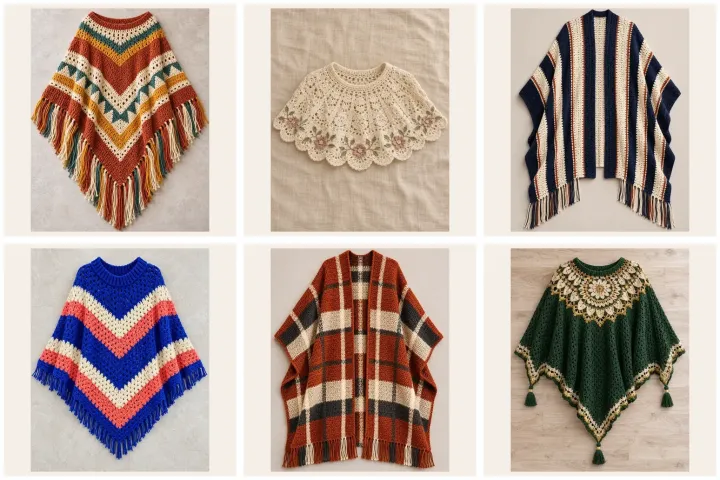
Layer handmade texture over everyday outfits with a flowing poncho, a short shoulder-covering capelet or an open-front ruana. These fifteen original design drafts explore different shapes, stitch patterns, color stories and fringe finishes. Instructions use US crochet terms and flexible made-to-measure dimensions; they are not sample-tested or graded patterns. Check your gauge, measure the wearer and compare the finished width with a favorite wrap before joining seams. For a poncho, keep the neckline roomy; for a ruana, leave the front opening unsewn; and for a capelet, try on the yoke as it grows. Choose a yarn with suitable drape so the finished layer hangs comfortably rather than feeling stiff.
Terracotta Geometric Fringe Poncho
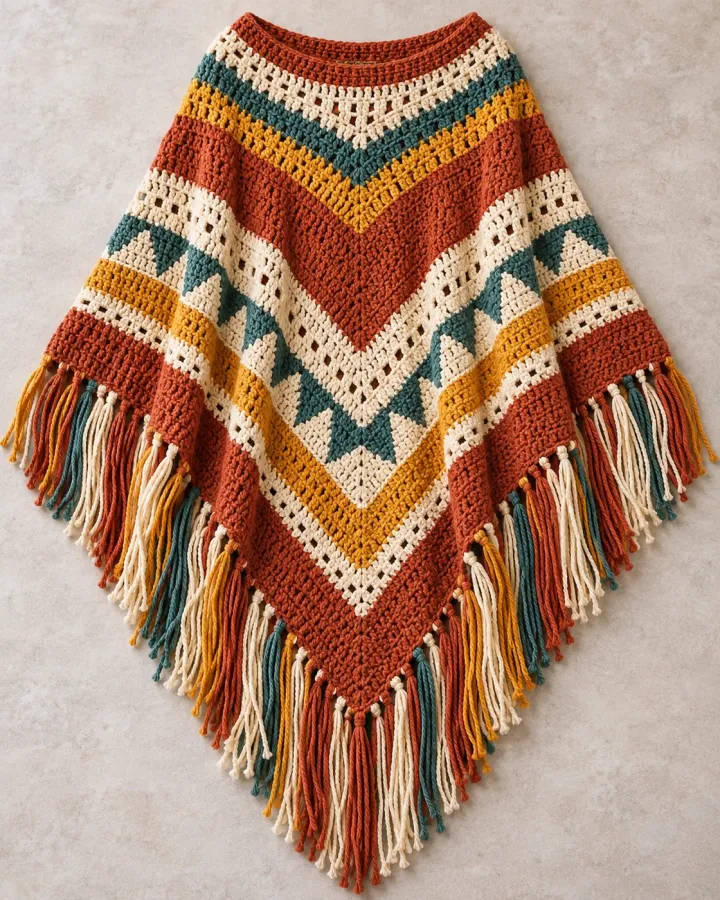
Terracotta, teal, cream and mustard chevrons create a warm geometric poncho with long colorful fringe. The generous triangular drape makes it an eye-catching layer, while the familiar neckline and bold stripes keep the handmade design easy to style.
- LEVEL
- Confident beginner
- TRY IT WITH
- Worsted wool blend: terracotta 260 yd, cream 130 yd, teal 90 yd, mustard 60 yd; 5.5 mm hook; tapestry needle
- FINISHING NOTE
- Adult medium reference: 28–30 in from neck to point; customize overall width.
Short Pattern
Abbreviations: ch chain · sl st slip stitch · sc single crochet · hdc half double crochet · dc double crochet · inc increase · sk skip · BLO back loop only
- Gauge: work a 4 in swatch in hdc with the main yarn. For a two-panel poncho, make two matching rectangles, each about 22 in wide and 30 in long, or adjust to the desired shoulder-to-point drape.
- Work the first panel in turned hdc rows. Add terracotta, cream, teal and mustard bands; change colors at row ends and carry only short distances. To create a chevron stripe, work 3 dc in one center stitch at the point and skip 2 stitches on either side on the next stripe row.
- Make the second panel to match. Join the top edges at the center, leaving a 10–12 in opening for the head. Join the outer shoulder edges partway down, leaving enough room for the arms to move freely.
- Edge the neckline with 2 rounds of sc, keeping it loose. Add one round of sc along the lower edges, placing 3 sc at each point so the corners lie flat.
- Cut fringe strands in all four colors, fold each bundle in half and attach along the lower edges at even intervals. Trim the fringe ends level and weave in the panel tails.
Assembly: Try the poncho on before completing shoulder seams; extend the opening if it feels tight. Keep fringe bundles securely knotted and evenly spaced.
Ivory Floral Scallop Capelet
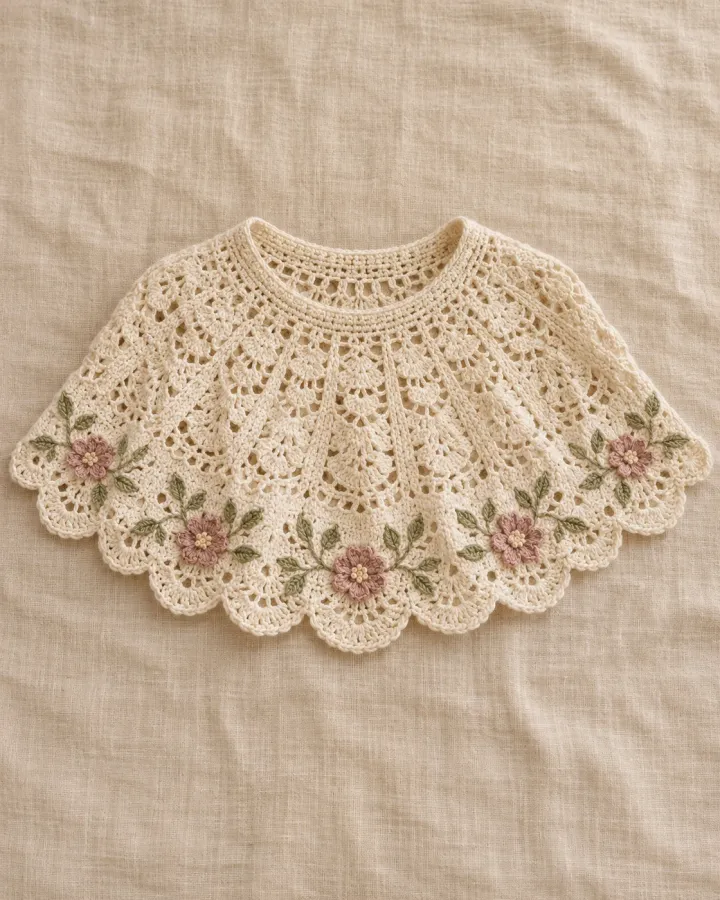
An ivory lace capelet is finished with dusty-rose flowers and a soft scalloped edge. Its short shoulder-covering shape adds a delicate layer without overwhelming an outfit, making it a pretty option for celebrations or cool indoor evenings.
- LEVEL
- Intermediate
- TRY IT WITH
- DK cotton blend: ivory 260 yd, dusty rose 25 yd, sage 20 yd; 4 mm hook; tapestry needle
- FINISHING NOTE
- Adult medium reference: 14–16 in shoulder depth; adjust yoke circumference as you go.
Short Pattern
Abbreviations: ch chain · sl st slip stitch · sc single crochet · hdc half double crochet · dc double crochet · inc increase · sk skip · BLO back loop only
- Yoke: measure around the shoulders over the clothing it will cover. Ch a multiple of 6 to fit loosely and join without twisting. Work 4 rounds of sc, increasing evenly at four points on each round to create a gentle circular yoke.
- Lace body: repeat *dc, ch 1, skip 1* around for 5 rounds, placing the increases above the previous increase points. Add 2 rounds of hdc to give the lower edge a little weight.
- Scallop edge: repeat *sl st, skip 1, 5 dc in next stitch, skip 1* around. Adjust the skipped stitches at the end so the final shells meet evenly.
- Make small flowers with a cream or rose center ring and 5 petals of ch 3, 2 dc, ch 3, sl st into the ring. Add a sage surface-stitched stem to each flower and sew them flat near the lower edge.
- Finish the neck opening with 2 loose rounds of sc. Block the lace gently over a towel, shaping each scallop and flower placement.
Assembly: Keep the neckline stretchy enough to pass comfortably over the head. Sew flowers down across their centers and petals so the edges do not curl.
Navy Striped Fringe Ruana
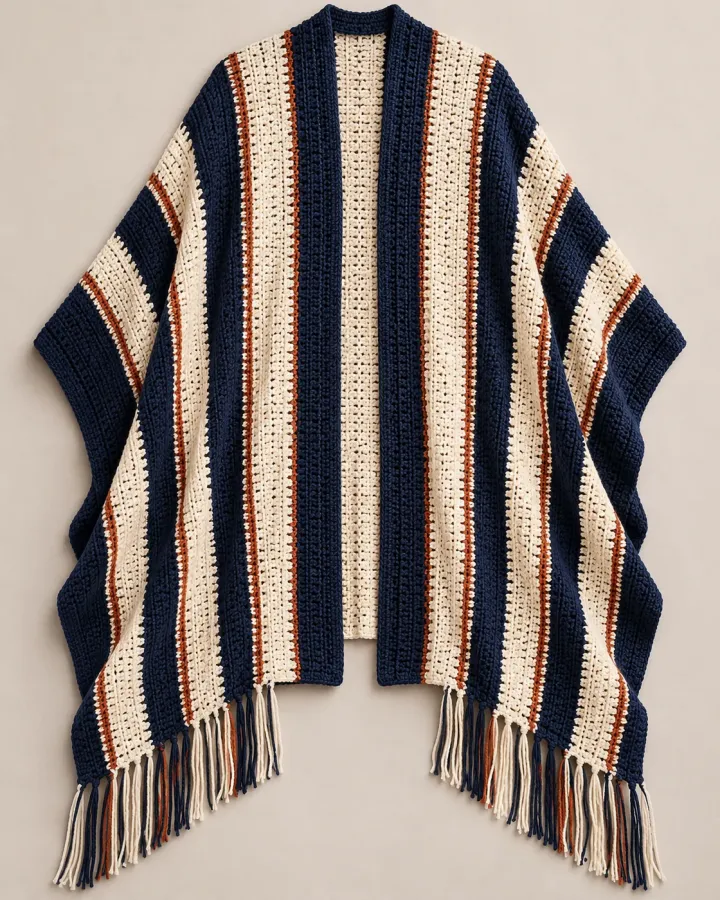
Navy and ivory vertical stripes give this open-front ruana a classic tailored look, with rust accents and soft fringe at the lower corners. Two long panels create graceful drape while leaving the front open for easy layering.
- LEVEL
- Beginner
- TRY IT WITH
- Worsted wool blend: navy 360 yd, ivory 240 yd, rust 45 yd; 5.5 mm hook; tapestry needle
- FINISHING NOTE
- Adult medium reference: each panel 22–24 in wide and 65–70 in long.
Short Pattern
Abbreviations: ch chain · sl st slip stitch · sc single crochet · hdc half double crochet · dc double crochet · BLO back loop only
- Make two long panels in hdc. For each, chain to 22–24 in at your gauge and work rows to the desired length, alternating 8-row navy bands with 4-row ivory bands. Add a narrow rust row between selected bands.
- Keep the stripe order identical on both panels. Weave in ends at each color change or carry yarn only up the side edge, keeping it loose so the panels do not draw inward.
- Lay panels side by side with right sides facing up. Join them along the upper center back for about 10–12 in, leaving the remainder open as the front slit. Check that the opening sits centered at the neck.
- Work 2 rounds of sc around the neckline and front edges, placing 2 sc at each lower corner. Add one relaxed sc round around the bottom hem to stabilize the panels.
- Attach short fringe bundles along the lower edges, alternating navy, ivory and rust. Trim ends evenly and block the ruana flat to let the stripes hang straight.
Assembly: The center-back seam should be secure but not bulky. Leave the front opening fully unsewn below the neck join so the ruana can drape naturally.
Sage and Ivory Striped Ruana
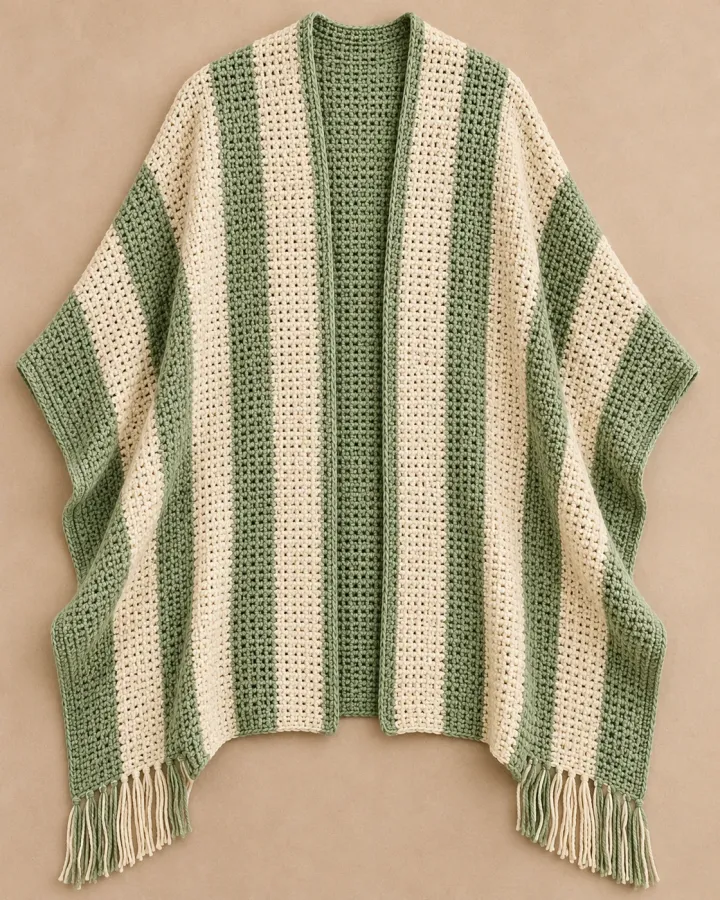
Soft sage and ivory stripes give this open-front ruana a calm, versatile look with a long, flowing drape. The simple rectangular construction and subtle fringe make it a comfortable layering piece for transitional weather.
- LEVEL
- Beginner
- TRY IT WITH
- Worsted cotton-wool blend: sage 300 yd, ivory 260 yd; 5 mm hook; tapestry needle
- FINISHING NOTE
- Adult medium reference: two panels about 22–24 in wide by 64–68 in long.
Short Pattern
Abbreviations: ch chain · sl st slip stitch · sc single crochet · hdc half double crochet · dc double crochet · BLO back loop only
- Make two matching panels in hdc, each about 22–24 in wide and 64–68 in long. Alternate 8-row sage bands with 4-row ivory bands; keep both panels identical and fasten off each color at the edge for a tidy finish.
- Lay the panels side by side with right sides facing up. Join them along the upper center back for 10–12 in, leaving the rest open as the front slit. Check that the neck opening sits centered and comfortably over the shoulders.
- Work 2 rounds of sc around the neckline and open front edges in sage, placing 2 sc at each lower corner. Add one relaxed sc round along the bottom edge to stabilize the long panels.
- Attach short sage fringe at the lower corners and along the bottom edge, spacing bundles evenly. Trim strands to a uniform length and weave in all color tails.
- Block the ruana flat, aligning the vertical stripes so they hang straight. Try it on and shorten or lengthen the panels to suit your preferred drape.
Assembly: Leave the front fully open below the short center-back seam so the wrap can fall naturally. Keep the neck edge loose enough to sit comfortably.
Dusty-Rose Flower Capelet
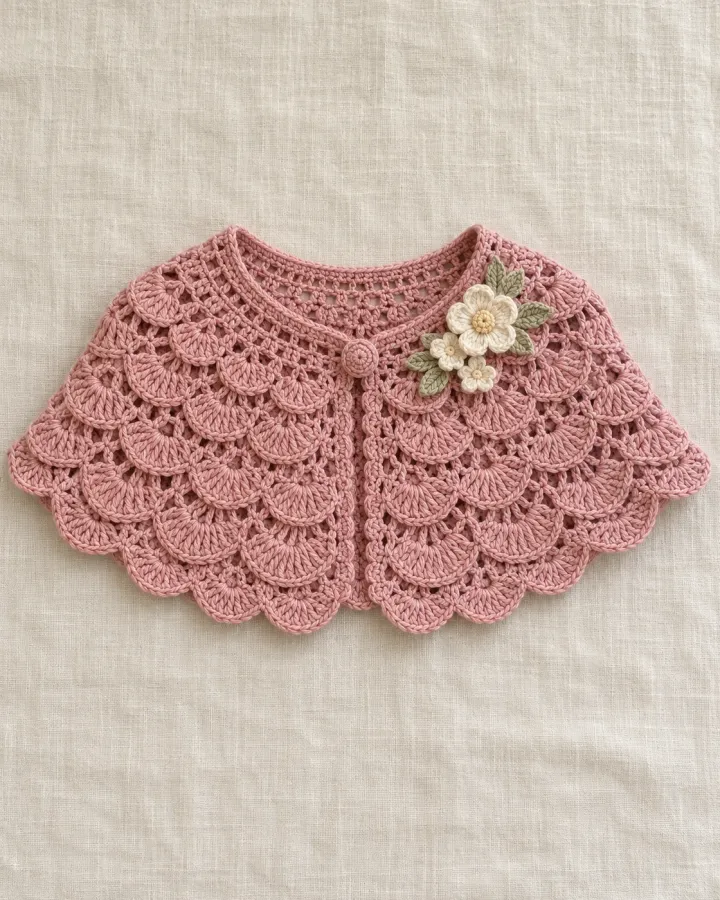
Dusty-rose yarn and small cream flowers create a softly romantic capelet with a scalloped edge. Its short, curved shape sits neatly over the shoulders, offering a light decorative layer that works beautifully over simple dresses or tops.
- LEVEL
- Intermediate
- TRY IT WITH
- DK cotton: dusty rose 250 yd, cream 20 yd, sage 15 yd; 4 mm hook; stitch markers
- FINISHING NOTE
- Adult medium reference: 15 in shoulder depth; adjust yoke rounds for a comfortable fit.
Short Pattern
Abbreviations: ch chain · sl st slip stitch · sc single crochet · hdc half double crochet · dc double crochet · inc increase · sk skip · BLO back loop only
- Ch a multiple that fits loosely around the shoulders and join. Work 5 rounds of sc, placing increases at four evenly spaced markers on every other round to shape a shallow circular yoke.
- Continue with 6 rounds of hdc, increasing at the markers every second round. Try the capelet on; the shoulder edge should sit comfortably without riding up or slipping forward.
- Work a lace band by repeating *ch 2, skip 2, sc in next* around for 3 rounds, placing increases above the markers. Finish with a shell edge of 5 dc in each marked chain space.
- Make five-petal cream flowers with a small ring and repeated ch-3 petal loops. Add a short sage stem to each flower with surface sl st and sew the motifs along one side of the scalloped edge.
- Edge the neckline in 2 rounds of sc and weave the tails inside. Lightly block the capelet, pinning the shells into an even curve.
Assembly: Distribute the increases evenly to keep the yoke flat. Secure the flower centers and each petal base so the appliques remain smooth.
Cobalt Chevron Fringe Poncho
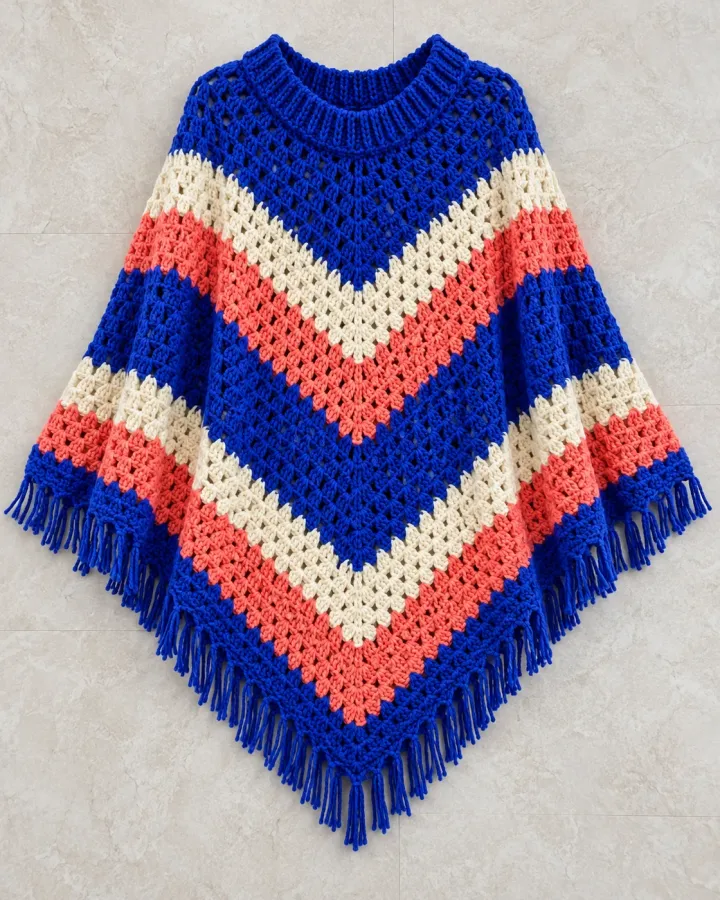
Cobalt blue chevrons alternate with ivory and coral bands in this bold triangular poncho. Long fringe emphasizes the pointed drape, creating a bright statement layer that feels energetic while remaining simple to throw on.
- LEVEL
- Beginner
- TRY IT WITH
- Worsted acrylic-wool blend: cobalt 300 yd, ivory 100 yd, coral 70 yd; 5.5 mm hook; tapestry needle
- FINISHING NOTE
- Adult medium reference: 26–30 in from neckline to point; adjust width to taste.
Short Pattern
Abbreviations: ch chain · sl st slip stitch · sc single crochet · hdc half double crochet · dc double crochet · inc increase · sk skip · BLO back loop only
- Work two matching triangular panels from the neckline outward. Begin each with a short foundation chain, work hdc rows and increase one stitch at both outer edges every row until the panel is wide enough to cover half the body.
- Alternate cobalt bands with ivory and coral chevron rows. On each accent row, work 3 dc in the center point and skip 2 stitches on both sides of the point to form a crisp V; keep the row edges straight with one increase at each outer edge.
- Make the second triangle to match. Join the upper edges at the shoulders, leaving an opening for the head, then seam the outer shoulder edges partway down to form a loose poncho shape.
- Edge the neckline with 2 rounds of cobalt sc. Work one round of sc around the lower points, placing 3 stitches into each point so the shape stays flat.
- Add cobalt fringe along both lower edges, then block the panels to sharpen the chevrons and let the points settle.
Assembly: Use stitch markers at the center point of each panel to keep the chevrons aligned. Keep the neckline opening generous and comfortable.
Ivory Lace Fan Capelet
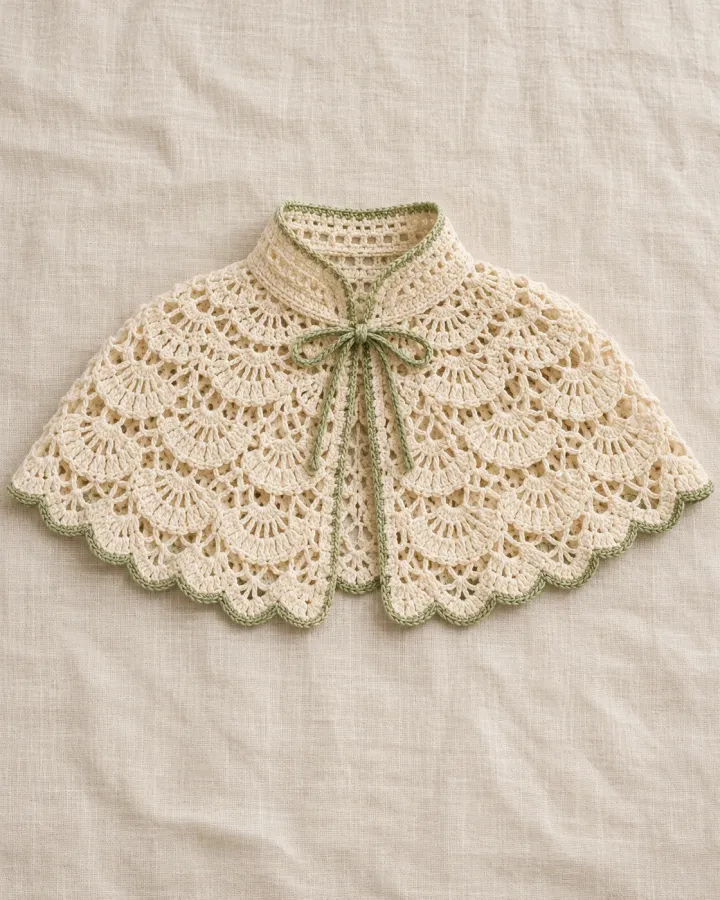
A soft ivory capelet uses airy fan stitches and a narrow sage edge for a graceful, understated finish. The short shoulder wrap layers easily over a blouse or dress, adding handmade texture without the weight of a full poncho.
- LEVEL
- Intermediate
- TRY IT WITH
- DK cotton blend: ivory 280 yd, sage 25 yd; 4 mm hook; tapestry needle
- FINISHING NOTE
- Adult medium reference: 14–16 in shoulder depth; try on as the lace grows.
Short Pattern
Abbreviations: ch chain · sl st slip stitch · sc single crochet · hdc half double crochet · dc double crochet · sk skip · inc increase · BLO back loop only
- Make a loose foundation chain to fit around the shoulders and join. Work 3 rounds of sc, placing markers at the front, back and both shoulders. Increase 2 stitches near each marker on every second round.
- Begin the fan pattern: repeat *sc in next space, skip 2 stitches, 5 dc in next space, skip 2* around. On increase rounds, add one extra fan at each marker to expand the shoulder drape.
- Continue the fan repeat until the capelet reaches the desired shoulder depth, checking that it lies flat. Add 2 rounds of hdc to stabilize the lower edge without losing the open lace look.
- Join sage and work one round of sc around the lower edge, then repeat *sl st, ch 3, skip 1* for a delicate picot-like finish. Add a simple sage neck edge with 2 rounds of sc.
- Block over a towel, opening the fan stitches with pins and smoothing the neckline. Weave in all ends on the inside of the yoke.
Assembly: Use a light touch when blocking so the lace opens without stretching out of shape. Keep the neckline firm enough to sit on the shoulders.
Rust Plaid Ruana Wrap
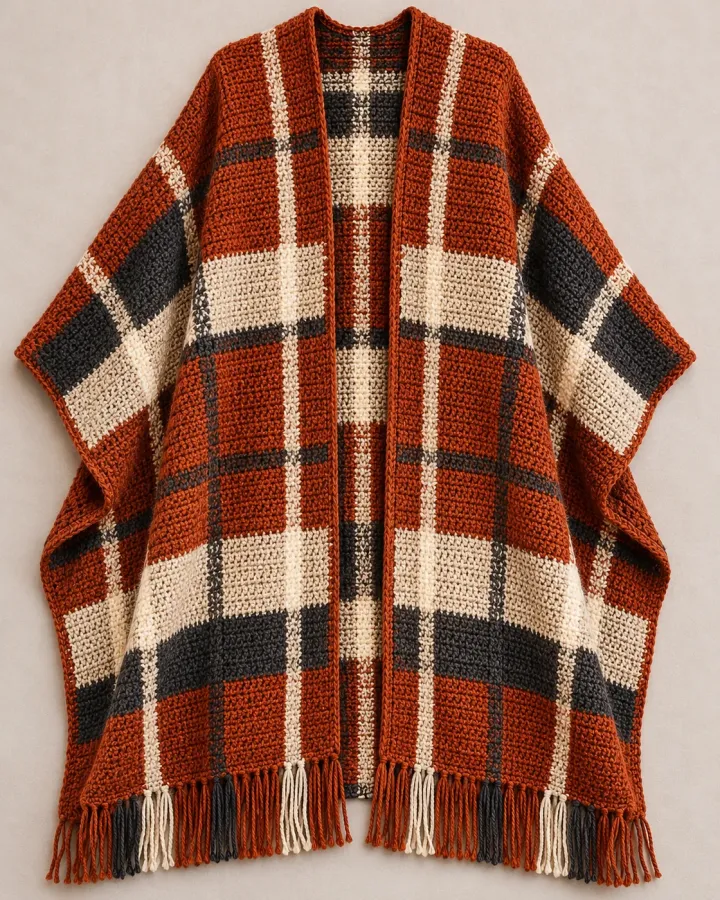
Rust, cream and charcoal checks give this long ruana a cozy cabin-inspired look. The open-front panels create an easy drape, while the fringe and bold windowpane pattern make it a warm statement layer for crisp days.
- LEVEL
- Intermediate
- TRY IT WITH
- Worsted wool: rust 300 yd, cream 180 yd, charcoal 120 yd; 5.5 mm hook; tapestry needle
- FINISHING NOTE
- Adult medium reference: two panels about 23 in wide by 66 in long.
Short Pattern
Abbreviations: ch chain · sl st slip stitch · sc single crochet · hdc half double crochet · dc double crochet · BLO back loop only
- Work two identical panels in hdc, each about 23 in wide and 66 in long. Use rust as the ground color. Add broad cream bands every 12 rows and a narrow charcoal stripe through the middle of each cream band.
- Create vertical check lines by working surface sl st in cream and charcoal from top to bottom, using a ruler or marked tape to keep the spacing even. Secure the ends at the top and bottom edges.
- Place the panels side by side and seam only the upper center-back section for 10–12 in. Leave the front edges open from neckline to hem, then fold the top corners slightly inward to form a soft shoulder line.
- Work 2 rounds of sc around the neck and front opening, then one sc round along the lower edges. Add 2 sc at each lower corner to keep the ruana flat.
- Attach rust, cream and charcoal fringe along the hem and trim the strands evenly. Steam-block from a distance to relax the panels and straighten the plaid lines.
Assembly: Surface stripes should be stitched loosely so they do not pucker the base fabric. Leave a clear, centered front opening for natural drape.
Forest Yoke Tassel Poncho
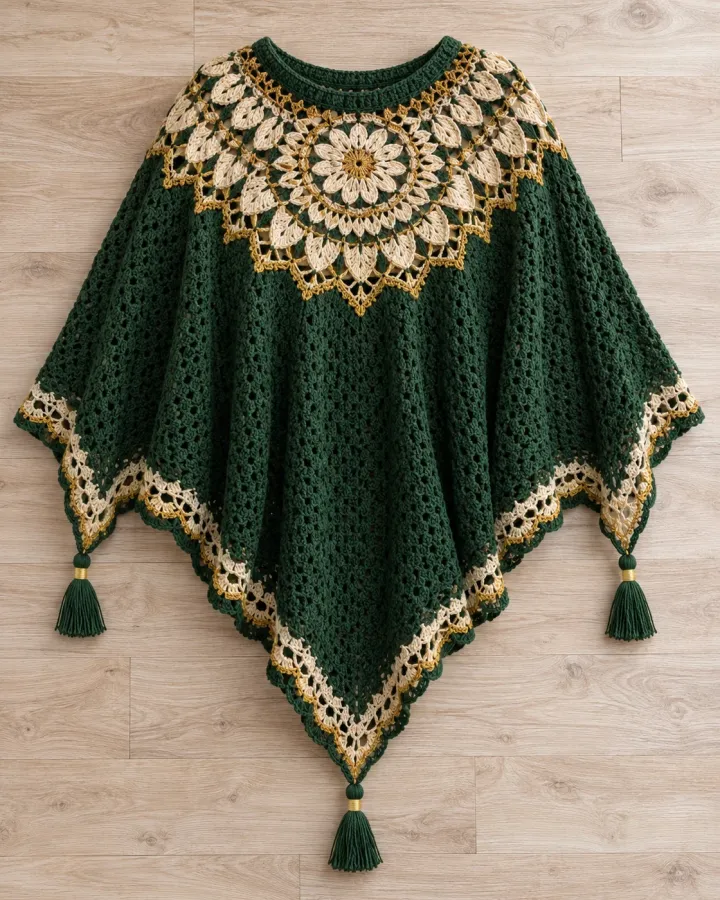
A cream-and-gold floral yoke blooms above a deep forest-green poncho, finished with small tassels at the pointed corners. The rich contrast and circular motif create a polished folk-inspired layer with a graceful, generous drape.
- LEVEL
- Intermediate
- TRY IT WITH
- Worsted wool blend: forest 320 yd, cream 100 yd, gold 45 yd; 5 mm hook; tapestry needle; stitch markers
- FINISHING NOTE
- Adult medium reference: yoke circumference 24–26 in; body length 25–28 in.
Short Pattern
Abbreviations: ch chain · sl st slip stitch · sc single crochet · hdc half double crochet · dc double crochet · inc increase · sk skip · BLO back loop only
- Yoke: with cream, work a circular granny medallion from a small ring, placing 3-dc clusters in each corner space. Change to gold for the final motif round and continue until the yoke reaches the shoulder width.
- Join forest yarn at the yoke edge. Work hdc in the round, increasing at four evenly spaced points every other round so the fabric expands over the shoulders. Continue until the poncho reaches the desired length.
- For a pointed drape, move the four increase points slightly toward the front and back center lines over the final 6 rounds. Work one round of forest sc to stabilize the hem.
- Add a cream-and-gold edging by repeating *sc, ch 3, skip 2* around the lower edge. Keep the repeat consistent and add extra chains at the four points.
- Make four small tassels in forest yarn and attach one at each poncho point. Finish the neckline with 2 rounds of forest sc and weave in the yoke color tails.
Assembly: Try the yoke on before extending the body; add or remove increase rounds to suit shoulder width. Keep tassels lightweight so the points do not pull down.
Teal and Plum Scallop Capelet
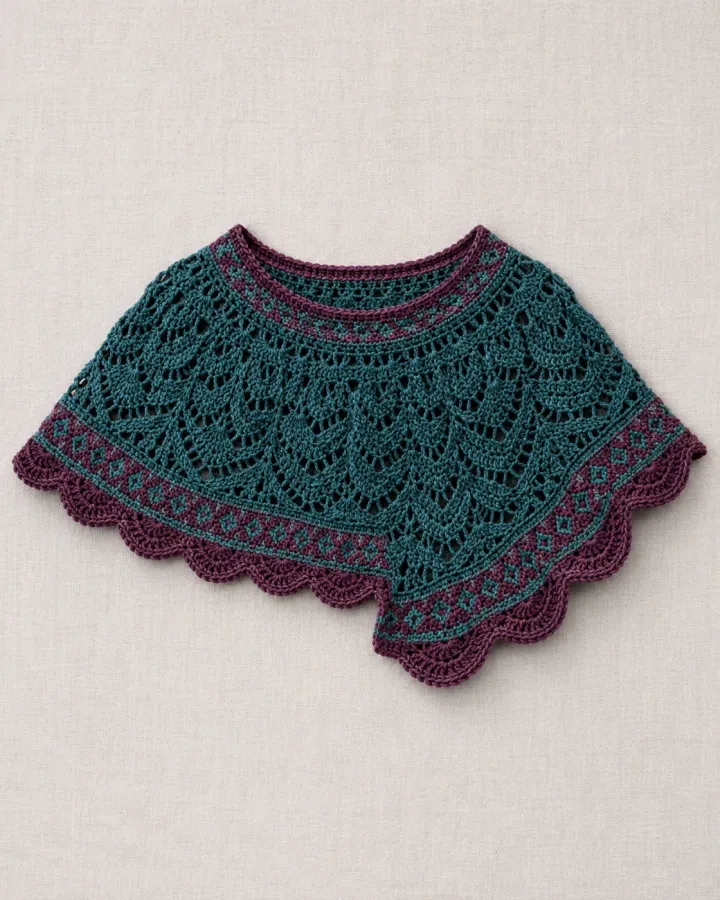
Deep teal and plum form a graceful short capelet with a geometric border and softly scalloped edge. The rich jewel tones feel dramatic but wearable, and the curved shoulder shape makes a lighter alternative to a full wrap.
- LEVEL
- Confident beginner
- TRY IT WITH
- DK cotton-wool blend: teal 220 yd, plum 65 yd; 4.5 mm hook; tapestry needle; markers
- FINISHING NOTE
- Adult medium reference: 13–15 in shoulder depth; adjust yoke circumference to fit.
Short Pattern
Abbreviations: ch chain · sl st slip stitch · sc single crochet · hdc half double crochet · dc double crochet · inc increase · sk skip · BLO back loop only
- Measure the shoulder circumference and make a teal foundation chain that fits loosely. Join and work 4 rounds of sc, placing markers at four equal points. Increase 2 stitches near each marker every other round.
- Work 7 rounds of teal hdc, continuing the four-point increases to shape the capelet. Try it on and add rounds until the lower edge reaches just below the shoulder blades.
- Add a plum geometric band by repeating *sc, ch 2, skip 2* around for 2 rounds. On the next round, work 3 dc into each chain space to make small raised blocks.
- Finish the edge with a teal shell repeat of *sl st, skip 1, 5 dc in next stitch, skip 1*. Adjust the stitch count at the back neck so shells remain evenly spaced.
- Work 2 rounds of teal sc around the neckline and weave in all ends. Block the scallops over a towel, pinning them into a smooth curve.
Assembly: The yoke should rest on the shoulders without sliding. If the shell edge waves, reduce the number of dc in each scallop or use a smaller hook.
Mustard and Navy Color-Block Ruana
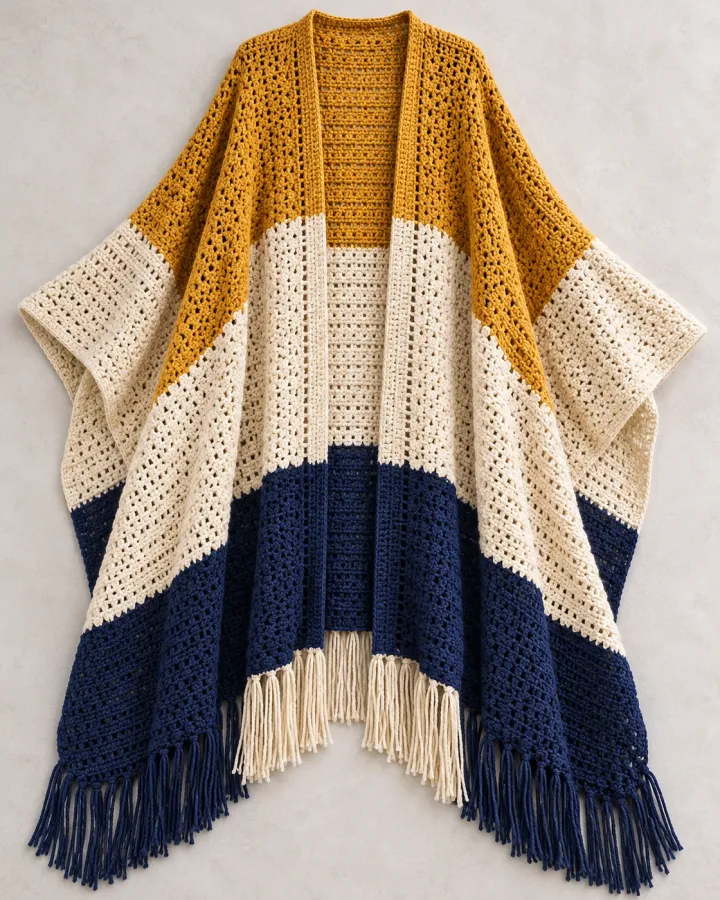
Mustard, cream and navy panels create a modern color-block ruana with dramatic fringe and an open front. Its long rectangular drape feels polished over simple outfits, while the strong contrast gives the handmade wrap a contemporary look.
- LEVEL
- Beginner
- TRY IT WITH
- Worsted acrylic-wool blend: mustard 250 yd, cream 180 yd, navy 220 yd; 5.5 mm hook; tapestry needle
- FINISHING NOTE
- Adult medium reference: panels 22–24 in wide and 64–68 in long.
Short Pattern
Abbreviations: ch chain · sl st slip stitch · sc single crochet · hdc half double crochet · dc double crochet · BLO back loop only
- Make two long panels in hdc, each 22–24 in wide. Work the upper third in mustard, the middle third in cream and the lower third in navy, or reverse the order for a personalized layout.
- For a clean color-block edge, fasten off each color at the side and rejoin at the next section rather than carrying yarn across the full width. Weave ends into the matching-color rows.
- Lay the panels together and seam the top center-back for 10–12 in, leaving the entire front open. Check that the color bands align across the back seam before fastening off.
- Work 2 rounds of sc around the neckline and front edges in navy. Add one sc round along the bottom, placing 2 extra stitches at each lower corner to keep the ruana square.
- Attach navy fringe along the lower edge and cream fringe at the outer corners. Trim evenly and block the panels flat so the color sections hang straight.
Assembly: Keep the ruana opening centered and unobstructed. Use the same color order on both panels for a balanced back and matching front drape.
Oatmeal Cable-Fringe Poncho
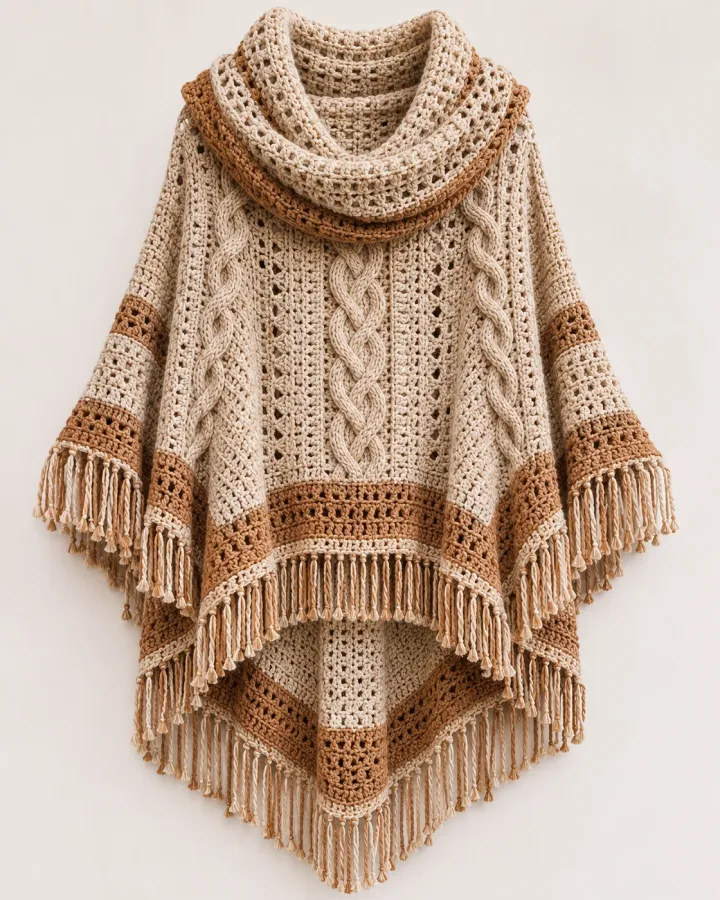
Oatmeal yarn and raised cable-like stitches give this poncho a quiet, textured elegance. A generous collar and soft fringe add cozy detail, making the neutral wrap a versatile layer that pairs easily with colorful or simple outfits.
- LEVEL
- Intermediate
- TRY IT WITH
- Bulky wool blend: oatmeal 500 yd; 6 mm hook; tapestry needle; stitch markers
- FINISHING NOTE
- Adult medium reference: 25–28 in shoulder-to-hem; collar depth about 4 in.
Short Pattern
Abbreviations: ch chain · sl st slip stitch · sc single crochet · hdc half double crochet · dc double crochet · FPdc front-post double crochet · inc increase · BLO back loop only
- Make two oatmeal panels in hdc, each about 22 in wide and 28 in long. Work a raised cable-like column down the center of each panel by alternating 2 hdc with 2 FPdc over the next stitches every fourth row.
- Join the upper edges at the shoulders, leaving a roomy neck opening. Seam the upper outer edges partway down, leaving generous side openings for arms to move freely.
- Pick up stitches around the neckline and work 6 rounds of hdc in the round for a soft collar. Fold the final 2 rounds outward and tack the fold at the shoulder seams with hidden stitches.
- Work 2 rounds of sc around the lower edges and side openings. Add fringe in oatmeal along the lower points, spacing bundles evenly and trimming to the same length.
- Block lightly from the wrong side to relax the cable columns. Try on and adjust collar depth or shoulder seam length before weaving in the final tails.
Assembly: Use a hook size that keeps the bulky fabric flexible. Avoid heavy fringe if the shoulder seams feel strained, and keep the collar loose enough for comfortable wear.
Plum Floral Scallop Capelet
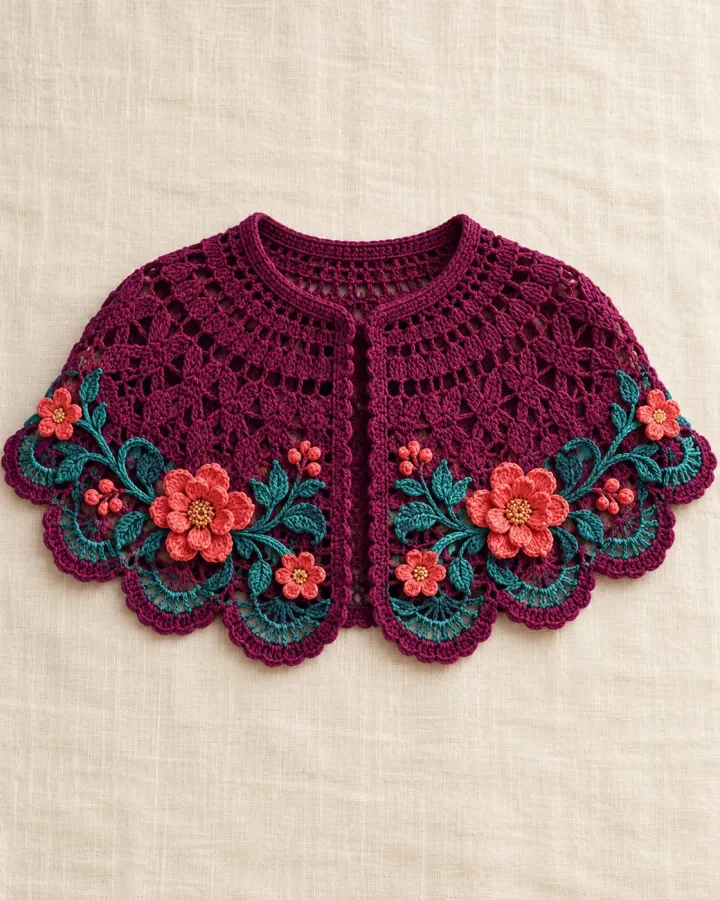
A plum capelet is edged with small teal and coral flowers, turning a simple shoulder wrap into a colorful statement accessory. Its scalloped outline and compact shape make it easy to layer without hiding the outfit beneath.
- LEVEL
- Intermediate
- TRY IT WITH
- DK cotton: plum 240 yd, teal 25 yd, coral 25 yd; 4 mm hook; tapestry needle; markers
- FINISHING NOTE
- Adult medium reference: 14 in shoulder depth; customize yoke circumference before edging.
Short Pattern
Abbreviations: ch chain · sl st slip stitch · sc single crochet · hdc half double crochet · dc double crochet · inc increase · sk skip · BLO back loop only
- With plum, chain loosely to fit around the shoulders and join. Work 5 rounds of hdc, increasing at four markers every second round. Continue until the yoke reaches the desired shoulder depth.
- Add a lace lower band by repeating *dc, ch 1, skip 1* for 3 rounds, increasing at the markers to maintain a flat drape. Finish with a shell edge of 5 dc in every fourth stitch.
- Make small flowers with teal centers and coral petals: work a ring, then repeat *ch 3, 2 dc, ch 3, sl st* five times into it. Make 6–8 flowers depending on capelet circumference.
- Sew flowers along the scalloped edge, spacing them evenly and keeping each center flat. Add a short plum surface-stitched stem or leaf between selected flowers for extra detail.
- Edge the neckline in 2 rounds of plum sc and weave in tails. Block the shells gently, pinning the floral border so it follows the curve.
Assembly: Attach every flower through its center and petal bases. Keep the motif border lightweight so the capelet edge does not sag.
Blush and Mauve Striped Ruana
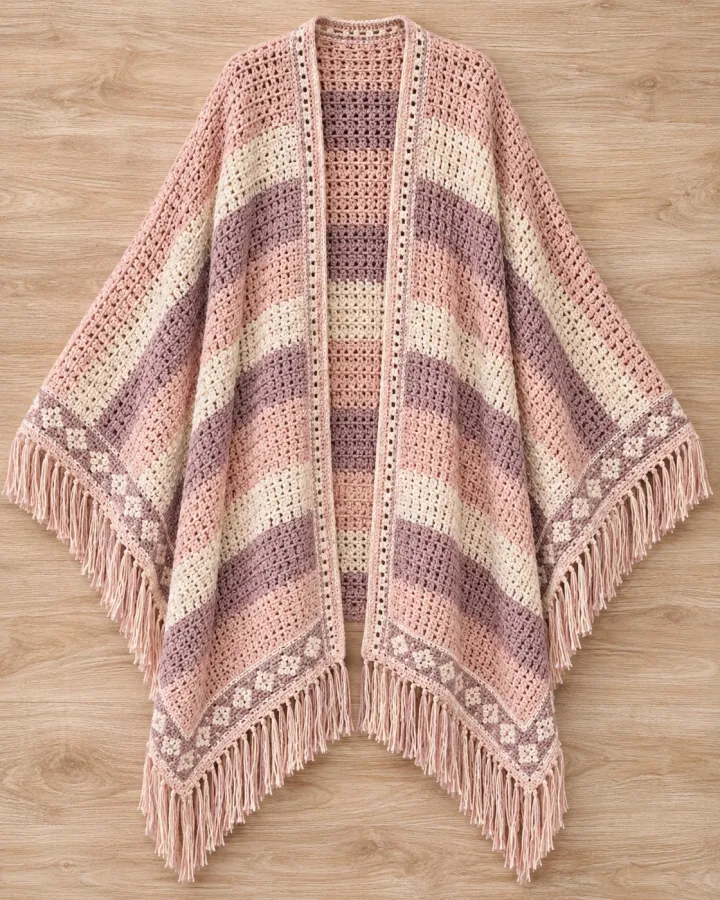
Blush, cream and muted mauve stripes give this ruana a soft, romantic look with a long flowing silhouette. Delicate fringe and a narrow geometric border add texture without distracting from the gentle colors or easy open-front shape.
- LEVEL
- Beginner
- TRY IT WITH
- Worsted cotton-wool blend: blush 260 yd, cream 180 yd, mauve 150 yd; 5 mm hook; tapestry needle
- FINISHING NOTE
- Adult medium reference: each panel about 23 in wide by 66 in long.
Short Pattern
Abbreviations: ch chain · sl st slip stitch · sc single crochet · hdc half double crochet · dc double crochet · BLO back loop only
- Crochet two matching hdc panels, each about 23 in wide and 66 in long. Alternate 8 rows blush, 4 rows cream and 6 rows mauve. Repeat the stripe sequence, ending both panels on the same color.
- Join the panels along the upper center-back for 10–12 in, leaving the front open from neckline to hem. Check the stripe sequence at the back seam and adjust the panel orientation so colors align.
- Work a narrow border around the front opening and neckline in mauve: 2 rounds of sc, placing 2 stitches at each lower corner. Add one cream surface-stitched line along each front edge if desired.
- Work one hdc round along the lower hem, then add a geometric border by repeating *sc, ch 2, skip 2* in mauve. Attach short fringe in blush and cream at even intervals.
- Block the wrap flat and straighten the stripe edges. Trim fringe to an even length and weave in all tails along their matching color bands.
Assembly: Keep the ruana long enough to drape but not drag. The back seam should stop below the neckline so the two front panels fall freely.
Plum and Blue Spiral Fringe Poncho
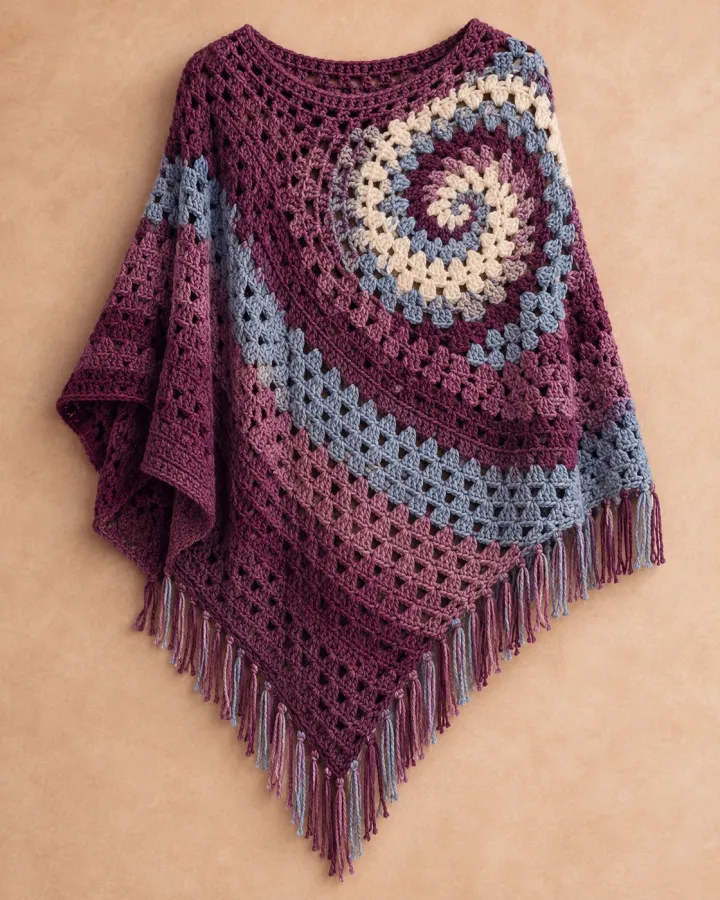
A dusty-blue and cream spiral blooms across a plum poncho, finished with fringe along the pointed hem. The asymmetrical motif creates an artful focal point, while the rich base color makes this dramatic layer easy to pair with neutrals.
- LEVEL
- Intermediate
- TRY IT WITH
- Worsted wool blend: plum 350 yd, dusty blue 100 yd, cream 75 yd; 5 mm hook; tapestry needle
- FINISHING NOTE
- Adult medium reference: 27 in shoulder-to-point; adjust panel width for coverage.
Short Pattern
Abbreviations: ch chain · sl st slip stitch · sc single crochet · hdc half double crochet · dc double crochet · inc increase · sk skip · BLO back loop only
- Make two plum hdc panels, each about 22 in wide and 28 in long. Shape each lower edge into a point by increasing 2 stitches at the center every other row for the last 8 rows, keeping the outer edges straight.
- Join panels at the shoulders, leaving a comfortable neckline opening. Seam the outer upper edges partway down so the pointed panels drape over the front and back while the arms remain free.
- Crochet a dusty-blue cord and a shorter cream cord by chaining loosely and working sc back along each chain. Coil them into an asymmetrical spiral across one front panel, beginning near the shoulder and widening toward the point.
- Sew the cords down securely with matching yarn, anchoring the curves every few stitches. Edge the neckline and points with plum sc, adding 3 stitches at each lower point.
- Attach plum and cream fringe along the pointed hem and block the panels flat. Weave in all tails and check that the spiral stays clear of the shoulder seam.
Assembly: Secure the spiral cords along both edges so they lie flat. Add fringe after blocking and keep the neckline roomy enough to pass comfortably over the head.
Make thoughtfully and check as you go.
Yarn, hook size and personal tension can change the finished scale. Count every round, stuff gradually and use embroidered features instead of safety eyes when making toys for children under three.