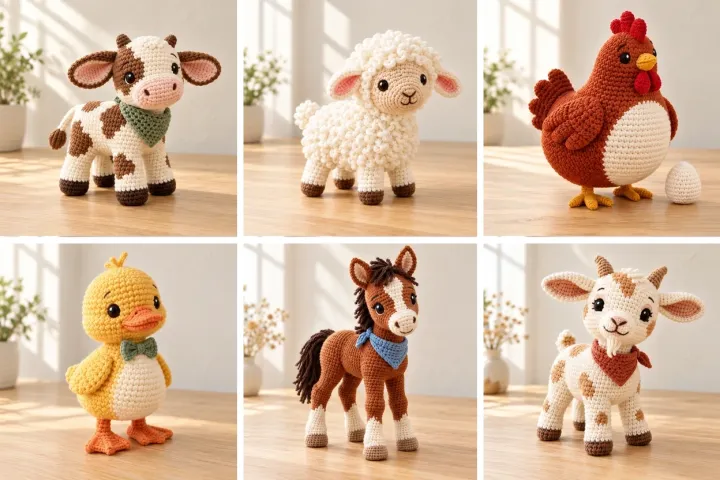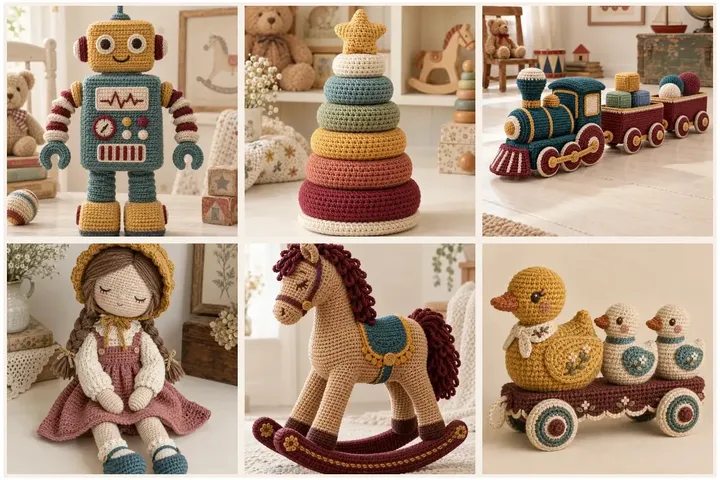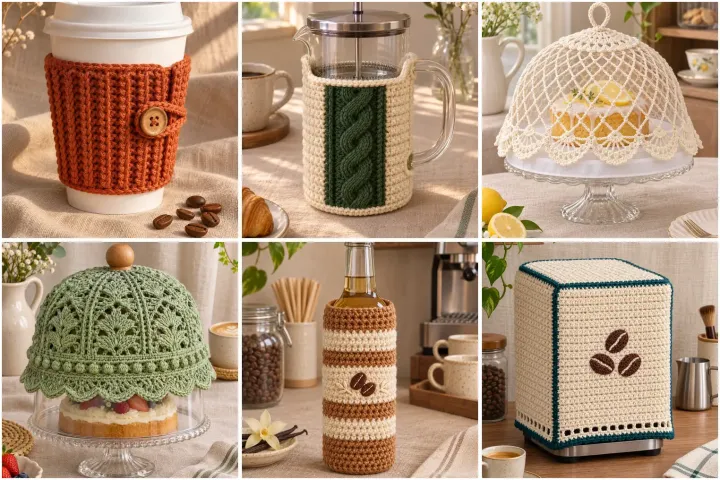
Give a coffee corner its own handmade character with practical crochet accessories rather than another coaster or mug rug. This collection focuses on fitted cup sleeves, French-press cozies, cake-cover canopies, bottle wraps and storage pieces. Measure your own cups and equipment because sizes vary. Use washable cotton for items handled near drinks, keep yarn away from hot plates and heating elements, and remove all cozies before microwaving or washing equipment. Cake covers should sit over a food-safe plate, liner or clear cloche so yarn never touches food directly. These original pattern drafts are not sample-tested; adjust stitch counts to your yarn, hook and gauge. The AI-created photographs are visual references, while the written instructions explain how to adapt each shape.
Rust Buttoned Takeaway Cup Sleeve
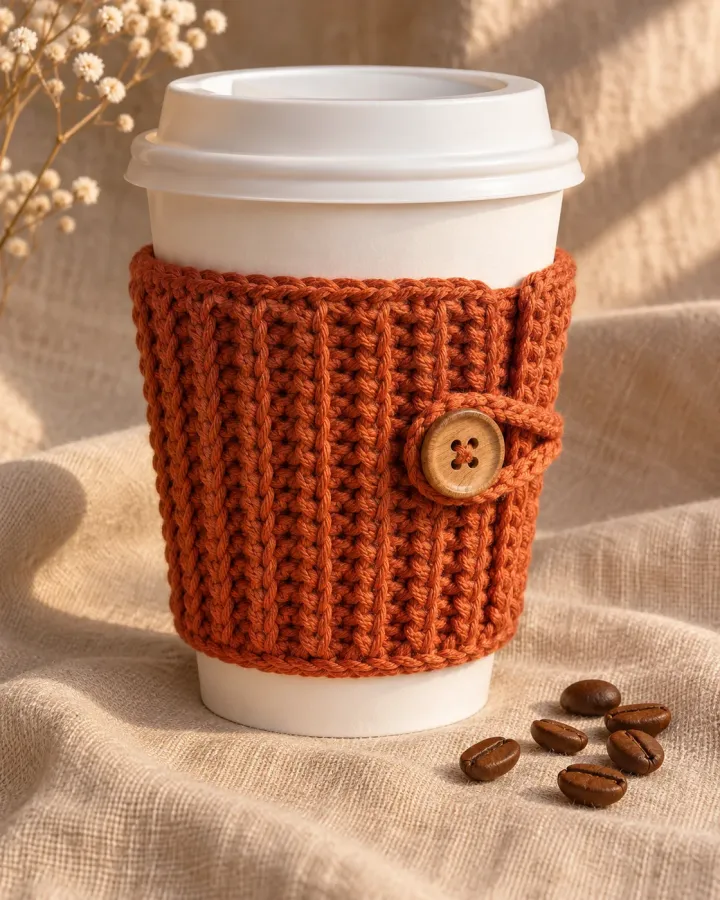
A ribbed rust-colored sleeve hugs a plain takeaway cup, with a wooden button and crochet loop for an adjustable fit. The textured fabric creates a warm handmade look while leaving the lid, base and drinking opening completely uncovered.
- LEVEL
- Confident beginner
- TRY IT WITH
- Worsted cotton: rust 35 yd; 4 mm hook; one smooth wooden button; tapestry needle
- FINISHING NOTE
- About 4 in tall; adjust circumference to the cup.
Short Pattern
Abbreviations: ch chain · sc single crochet · hdc half double crochet · BLO back loop only · sl st slip stitch · FO fasten off
- Measure the cup around its widest lower body and just below the lid. Chain to the smaller measurement, keeping the foundation slightly shorter so the sleeve stretches snugly.
- Join carefully without twisting. Work hdc in rounds, placing each stitch in the back loop for a ribbed texture, until the fabric reaches about 3.5 inches tall.
- For a button overlap, stop before joining the final few stitches on one round and work short rows across the gap to create a narrow tab. Sew the button opposite it.
- Try the sleeve on the cup and adjust the final round for a secure fit. Keep the rim and drinking lid clear, and remove the sleeve before washing or reheating the cup.
Assembly: Use cotton rather than acrylic around hot drinks. A crochet sleeve is an added grip layer, not a guarantee against heat.
Teal Basketweave Latte Mug Jacket
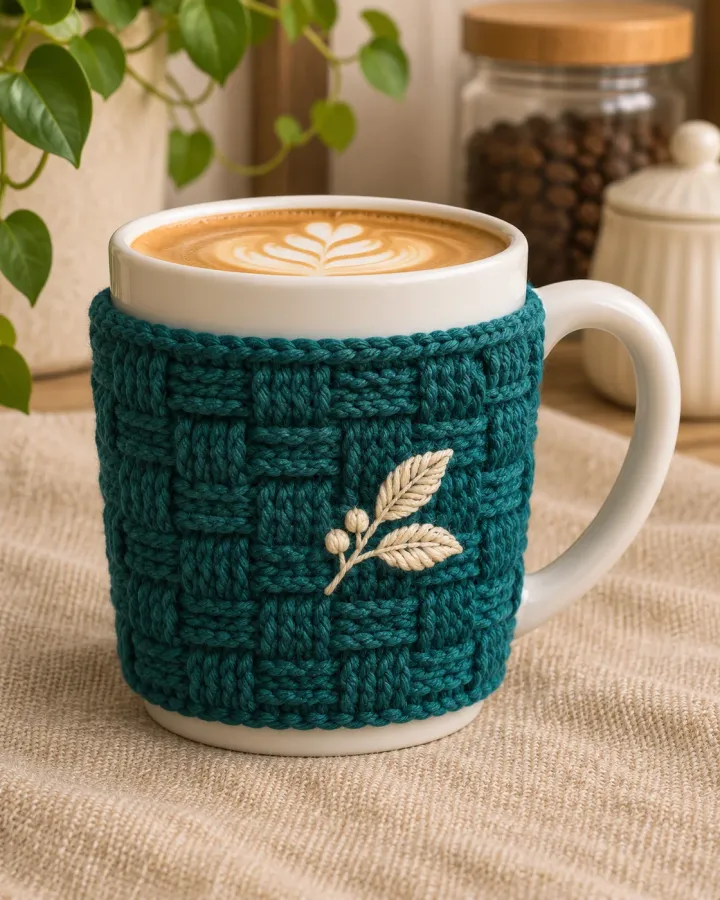
Deep teal basketweave stitches wrap a white ceramic latte mug, accented with a small cream coffee-leaf motif. The fitted jacket follows the mug body while a deliberate handle opening keeps the cup comfortable to lift and use.
- LEVEL
- Intermediate
- TRY IT WITH
- Worsted cotton: teal 45 yd, cream 8 yd; 4 mm hook; tapestry needle
- FINISHING NOTE
- Fit to a mug about 3.5 in tall; measure before starting.
Short Pattern
Abbreviations: ch chain · sc single crochet · dc double crochet · FPdc front-post double crochet · BPdc back-post double crochet · sl st slip stitch · FO fasten off
- Measure around the mug body below the handle and chain a little shorter than that circumference. Join into a ring, leaving a marked gap where the handle begins.
- Work alternating FPdc and BPdc rounds to make a basketweave panel. At the handle gap, turn and work back-and-forth rows only across the front section.
- Continue until the jacket covers the mug’s widest area but stays below the rim and above the base. Add a cream leaf with surface stitches or a small sewn applique.
- Finish the opening edges with one round of sc, checking that the handle passes freely. Weave in ends and test the fit on a cool, empty mug first.
Assembly: Keep the handle opening generous and the top edge below the drinking rim. Remove the jacket before putting the mug in a microwave or dishwasher.
Cream Cable French-Press Cozy
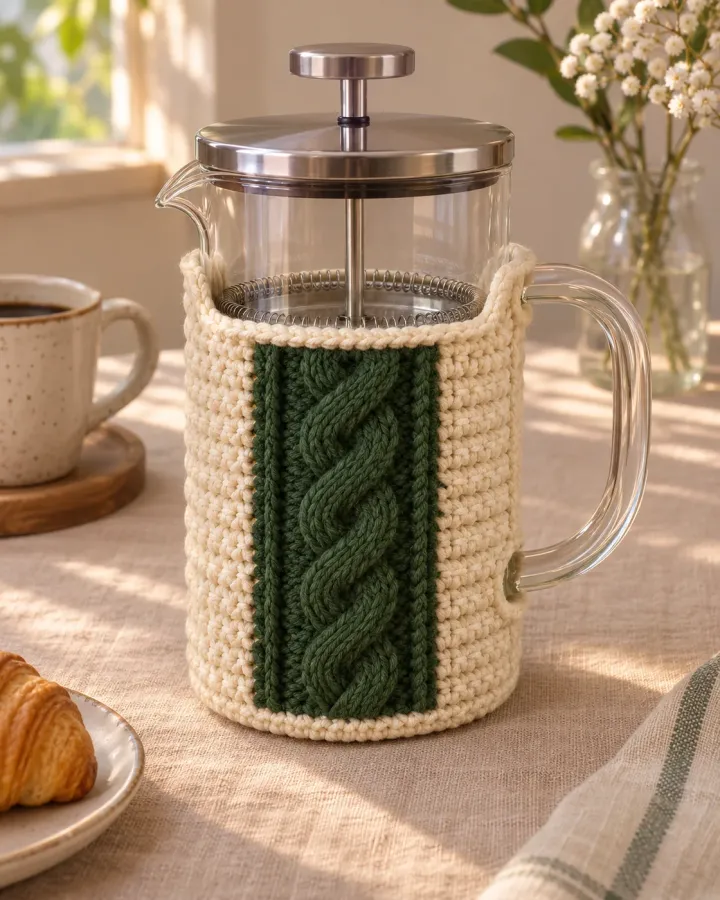
A cream sleeve with a forest-green cable panel wraps the glass body of a French press while leaving its handle, spout, lid and plunger exposed. The removable cozy adds a soft tactile accent to a manual coffee station.
- LEVEL
- Intermediate
- TRY IT WITH
- Worsted cotton: cream 75 yd, forest green 30 yd; 4 mm hook; tapestry needle
- FINISHING NOTE
- Sized for a press with a 9 in body circumference; customize to your glass carafe.
Short Pattern
Abbreviations: ch chain · sc single crochet · hdc half double crochet · FPdc front-post double crochet · BPdc back-post double crochet · sl st slip stitch · FO fasten off
- Measure the glass body circumference and height, avoiding the handle and spout. Crochet a cream rectangle in hdc rows to the measured length, using a snug gauge.
- For the cable panel, chain a separate strip in green. Work a central braid with alternating FPdc crossings over a base of sc; keep the strip slightly narrower than the rectangle.
- Sew the cable panel to the front of the rectangle. Join the short edges with mattress stitch, leaving a generous gap at the handle and a smaller opening aligned with the spout.
- Add a narrow top and bottom edging, then try the cozy on the empty press. The plunger and lid must move freely, and the glass should remain visible at the rim.
- Remove the cozy before brewing, pouring, washing or exposing the press to heat. Use it only as a decorative insulating layer after checking that it does not interfere with operation.
Assembly: Fit the cozy to the exact press model. Never let yarn obstruct the handle, spout, plunger or any hot surface.
Navy Diamond French-Press Cozy
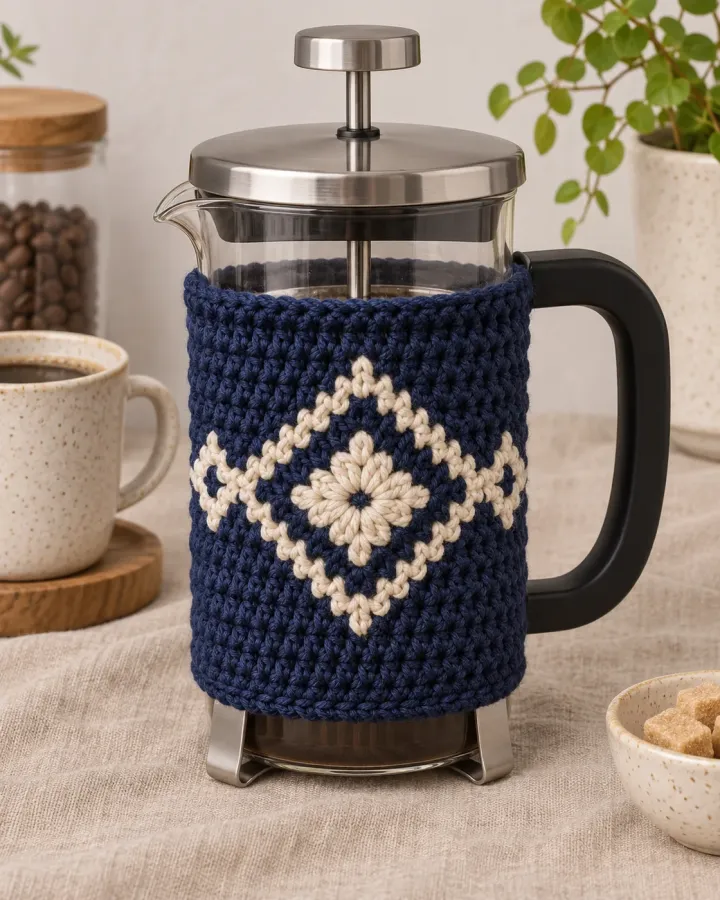
A navy French-press wrap features a cream diamond motif across its front panel, with the glass lid and plunger left clear. Its simple removable construction can be adapted to different press sizes without covering functional parts.
- LEVEL
- Intermediate
- TRY IT WITH
- Worsted cotton: navy 70 yd, cream 18 yd; 4 mm hook; tapestry needle
- FINISHING NOTE
- For a press about 9 in around and 5 in tall; measure your model.
Short Pattern
Abbreviations: ch chain · sc single crochet · hdc half double crochet · inc increase · sl st slip stitch · FO fasten off
- Make a navy rectangle in sc or hdc, matching the flat glass body rather than the full circumference so room remains for the handle and spout.
- Use cream yarn to surface-stitch a centered diamond. Add a small flower or star inside with short, secure stitches, keeping the reverse floats loose enough for the panel to flex.
- Join the short edges behind the press body, leaving openings at the handle and spout. Finish both edges with a firm round of sc so the cozy holds its shape.
- Test the fit on a cool, empty press. Make sure the lid, plunger and pouring path remain unobstructed and that the cozy can be removed without force.
- Take it off before brewing, pouring or washing. Do not place the wrapped press on a hot surface or use the yarn as a substitute for a heat-safe handle.
Assembly: The cozy is decorative and removable. Keep it away from hot glass, open flames and heating elements.
Lacy Food-Safe Cake-Stand Canopy
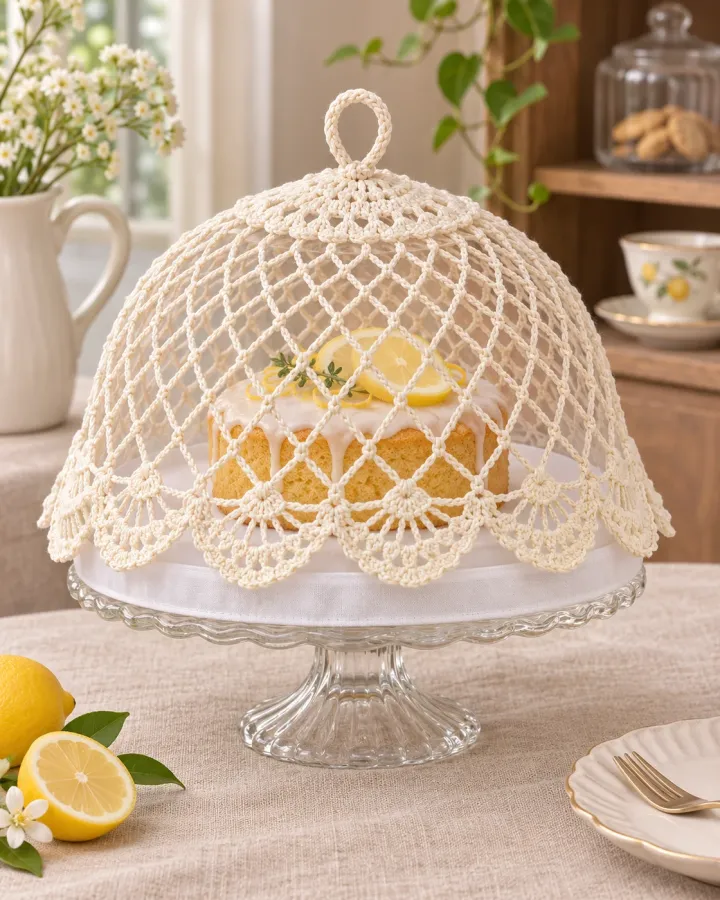
An airy cream crochet canopy drapes over a small cake stand, finished with scalloped edges and a loop at the crown. A separate food-safe liner sits between the openwork and cake for clean, practical display.
- LEVEL
- Intermediate
- TRY IT WITH
- DK cotton: cream 100 yd; 3.5 mm hook; smooth removable food-safe liner; stitch markers
- FINISHING NOTE
- About 14 in across when open; size to your cake stand.
Short Pattern
Abbreviations: MR magic ring · ch chain · sc single crochet · dc double crochet · ch-sp chain space · sl st slip stitch · FO fasten off
- Begin at the crown with 8 sc in a MR. Increase evenly in rounds, placing ch-1 spaces between dc clusters to create a light mesh canopy.
- Continue increasing until the circle reaches the top of the cake stand. Work several mesh rounds without increases so the fabric begins to curve downward.
- Add a scalloped border by working 5 dc in every third chain space, separated by sl st. Make a small loop at the crown for lifting the canopy.
- Block over a bowl or stand form to shape the dome. Place a removable food-safe liner or clear cloche underneath so yarn never touches food.
- Wash and dry the crochet cover separately. Do not use it as a fly screen outdoors or leave it over warm food.
Assembly: The crochet canopy is decorative only. Always use a clean food-safe barrier between the yarn and any food.
Sage Cloche Cake Cover
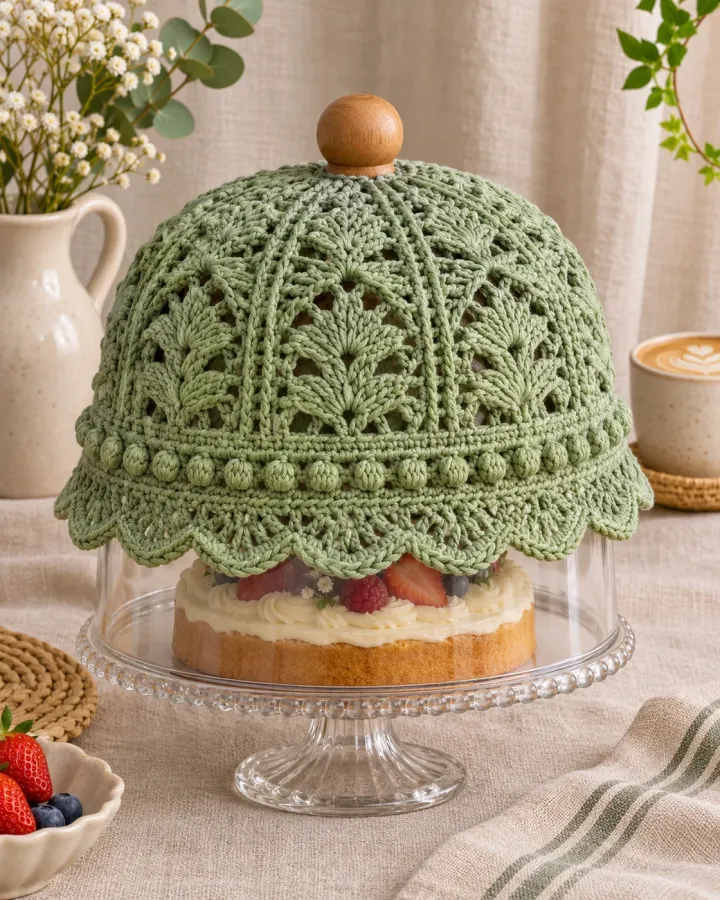
A sage-green dome with a wooden top knob sits over a clear glass cloche, creating a layered home-café display. The crochet piece remains outside the food-safe cover, adding texture without touching pastries or interfering with the stand.
- LEVEL
- Intermediate
- TRY IT WITH
- Worsted cotton: sage 120 yd; 4 mm hook; clear food-safe cake cloche; removable wooden knob or fabric loop
- FINISHING NOTE
- About 12 in across; measure the outside of your cloche.
Short Pattern
Abbreviations: MR magic ring · ch chain · sc single crochet · hdc half double crochet · dc double crochet · inc increase · sl st slip stitch · FO fasten off
- Start at the crown with 8 sc in a MR. Increase evenly in rounds until the circle matches the top diameter of the cloche.
- Work a few rounds even, then begin alternating dc clusters and chain spaces. Continue the openwork down the dome, trying it over the cool, empty cloche as you go.
- Add a dense band of sc near the bottom, followed by a scalloped edge. Leave a small opening at the crown for the cloche knob or add a soft crochet loop.
- Check that the cozy lifts off without pulling the cloche or catching on the stand. Keep the clear cloche as the food-contact surface beneath it.
- Remove the crochet layer before cleaning the glass. Do not place it near a flame, hot oven or heated food.
Assembly: Use the crochet dome only as an outer decorative cover over a clean, food-safe cloche.
Espresso Bean Jar Cozy
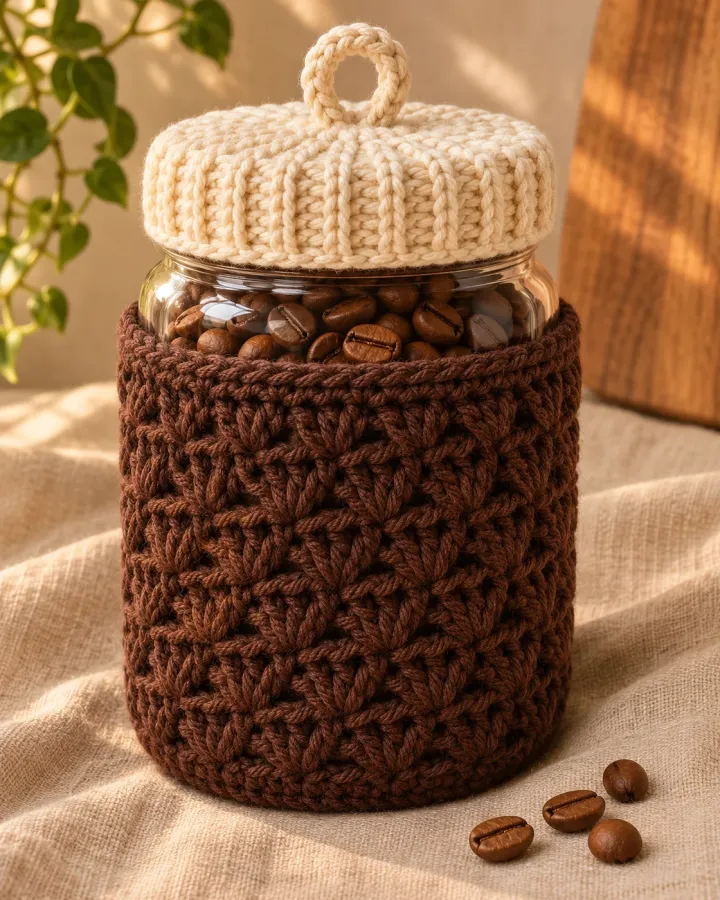
A dark espresso-brown wrap gives a clear coffee-bean jar a textured sleeve, topped with a cream lid cover and loop. The removable design lets the jar remain easy to open while coordinating with a warm, neutral coffee station.
- LEVEL
- Confident beginner
- TRY IT WITH
- Worsted cotton: espresso 55 yd, cream 18 yd; 4 mm hook; elastic thread optional
- FINISHING NOTE
- Fits a jar about 10 in around; measure the vessel first.
Short Pattern
Abbreviations: ch chain · sc single crochet · hdc half double crochet · BLO back loop only · inc increase · sl st slip stitch · FO fasten off
- Measure the jar circumference and height. Chain to a snug fit, join without twisting, and work hdc rounds until the sleeve reaches just below the lid.
- Add texture with alternating front- and back-loop rounds. Keep the top edge low enough that the lid can twist off freely.
- For the lid cap, crochet a flat circle to the lid diameter, then work one round in back loops only and a short side band. Finish with a small loop handle.
- Try both pieces on the clean, dry jar. The sleeve should slide off easily and must not cover the lid seam or interfere with opening.
- Remove before washing the jar and keep the yarn dry. Store coffee beans in the jar’s proper sealed interior, not in contact with the crochet.
Assembly: Keep the sleeve removable and clear of the lid threads. Wash the crochet separately and let it dry fully before reuse.
Coffee-Bean Syrup Bottle Sleeve
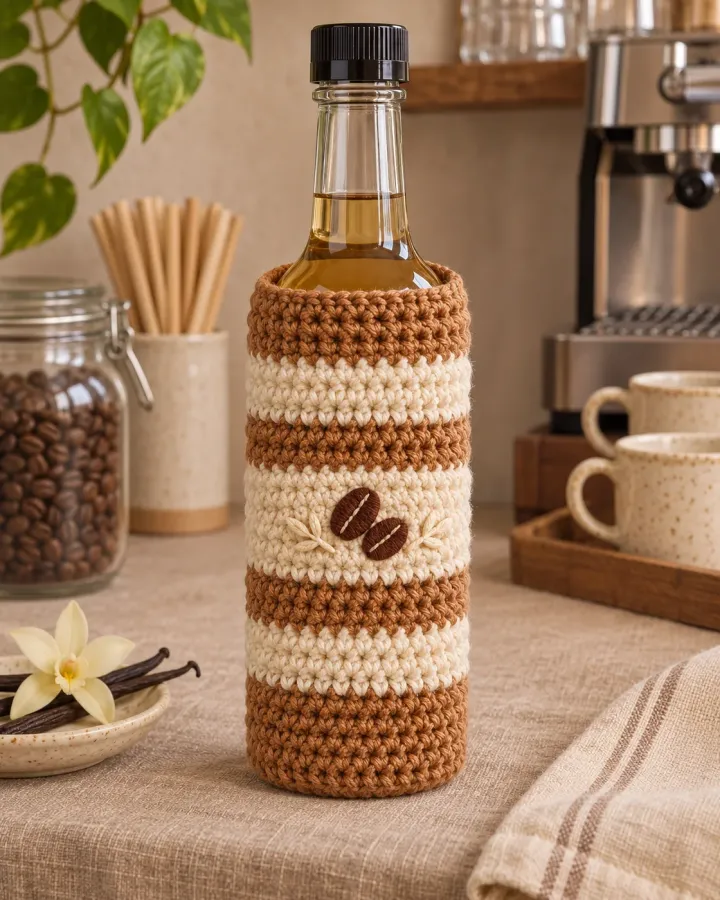
Caramel and cream stripes wrap a clear coffee-syrup bottle, finished with two embroidered coffee beans. The fitted sleeve stops below the neck and cap, so the bottle can still pour cleanly and labels remain easy to read.
- LEVEL
- Confident beginner
- TRY IT WITH
- DK cotton: caramel 35 yd, cream 25 yd, dark brown 5 yd; 3.5 mm hook; tapestry needle
- FINISHING NOTE
- About 5 in tall; adjust for your bottle’s lower body.
Short Pattern
Abbreviations: MR magic ring · sc single crochet · hdc half double crochet · inc increase · dec decrease · sl st slip stitch · FO fasten off
- Begin at the bottle base with 6 sc in a MR. Increase evenly until the circle matches the base, then work one round in back loops only to form a crisp corner.
- Work hdc rounds up the bottle body, alternating caramel and cream every three rounds. Try the sleeve on the empty bottle to check the fit.
- Decrease gradually near the shoulder so the sleeve ends below the bottle neck. Do not cover the cap, pour spout or any label information needed for use.
- Embroider two dark coffee beans on the cream stripe. Secure all ends inside and make sure the sleeve can slide off without stretching the bottle neck.
- Remove the sleeve before washing or refilling. Keep the yarn dry and away from sticky spills.
Assembly: The bottle sleeve is decorative and not insulated for hot liquids. Keep it below the neck and away from the pouring opening.
Hanging Coffee-Filter and Sachet Pocket
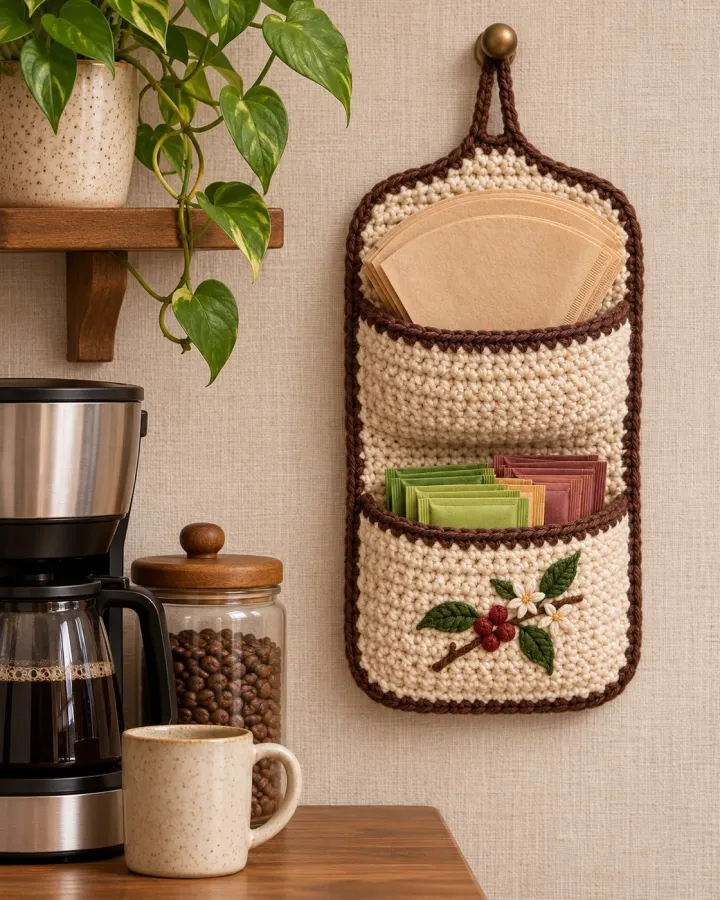
A cream wall pocket with espresso-brown edging stores paper filters and individually wrapped coffee or tea sachets. Two separate compartments keep supplies visible, while a small stitched coffee branch adds a botanical accent.
- LEVEL
- Intermediate
- TRY IT WITH
- Worsted cotton: cream 90 yd, espresso 30 yd, leaf green 12 yd; 4 mm hook; hanging loop or dowel
- FINISHING NOTE
- About 8 in wide and 12 in tall.
Short Pattern
Abbreviations: ch chain · sc single crochet · hdc half double crochet · inc increase · sl st slip stitch · FO fasten off
- Back panel: chain 29 and work 28 hdc across for 34 rows. Add an espresso border around the panel, placing 3 stitches in each corner.
- Large pocket: crochet a rectangle 28 stitches wide and 16 rows tall. Sew its sides and bottom to the lower half of the panel, leaving the top open.
- Small sachet pocket: make a second shorter rectangle and attach it over the first pocket, dividing the front into two storage sections.
- Add a hanging loop or a fabric sleeve for a small dowel. Embroider a simple green coffee branch on the lower pocket using surface stitches.
- Mount securely and use only for lightweight filters and packets. Do not store hot equipment or heavy jars in the pocket.
Assembly: Reinforce the top corners and hanging loop. Keep the organizer away from splashes and heat sources.
Teal Single-Serve Coffee Pod Basket
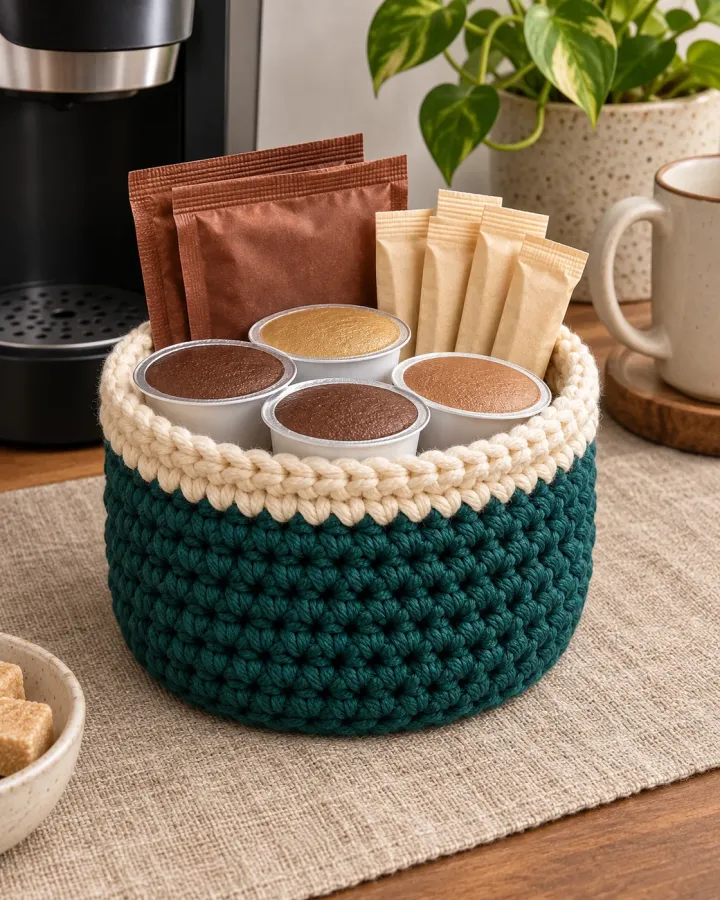
A sturdy teal crochet basket with a cream rim corrals single-serve pods, sugar packets and cocoa sachets beside the coffee maker. Its dense base and softly structured sides make everyday supplies easy to spot and restock.
- LEVEL
- Confident beginner
- TRY IT WITH
- Bulky cotton: teal 85 yd, cream 15 yd; 5 mm hook; optional washable fabric liner
- FINISHING NOTE
- About 7 in wide and 4 in tall.
Short Pattern
Abbreviations: MR magic ring · sc single crochet · inc 2 sc in one stitch · BLO back loop only · sl st slip stitch · FO fasten off
- Base: begin with 8 sc in a MR. Increase by 8 stitches on each round until the base measures about 7 inches or matches your storage needs.
- Work one round in back loops only, then crochet sc rounds without increases to build the basket walls. Keep the sides vertical by maintaining an even stitch count.
- Change to cream for the final two rounds and add a slightly thicker rim with reverse sc or a simple slip-stitch edge.
- Weave in ends and shape the basket over a box while it dries. Add a removable washable liner if small items might catch in the stitches.
- Use for dry, wrapped coffee pods or packets only. Keep it away from the hot plate and steam vent of the coffee maker.
Assembly: A firm base helps the basket stand. Do not store loose ground coffee or unwrapped food directly in the crochet.
Two-Cup Crochet Takeaway Carrier
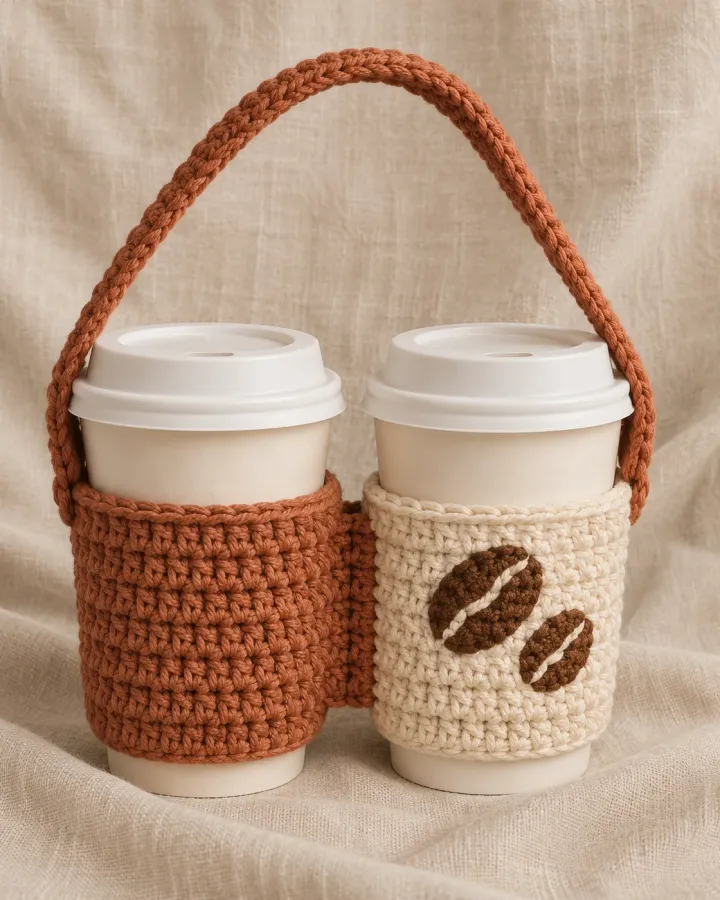
Two fitted crochet cup sleeves connect with a sturdy arched handle, making this carrier useful for bringing a pair of takeaway drinks to a desk or picnic. Contrasting rust and cream sleeves add a coordinated café-gift finish.
- LEVEL
- Intermediate
- TRY IT WITH
- Worsted cotton: rust 55 yd, cream 35 yd, dark brown 8 yd; 4 mm hook; tapestry needle
- FINISHING NOTE
- Sized for two standard cups; test with your own cup dimensions.
Short Pattern
Abbreviations: ch chain · sc single crochet · hdc half double crochet · sl st slip stitch · FO fasten off
- Make two sleeves as flat rectangles: chain to the cup circumference, work hdc rows to the desired height, then seam the short edges. Leave the lid and bottom uncovered.
- Add a cream panel to one sleeve and embroider a small coffee-bean motif. Make the second sleeve in rust, checking that both fit comparable cups.
- Crochet a broad handle strip about 2 inches wide and long enough to connect the sleeves with comfortable spacing. Work several rows of sc for strength.
- Sew each handle end to the outside upper edge of a sleeve using multiple passes through the fabric. Reinforce with a small square of matching yarn on the inside.
- Test with empty cups first, then with filled cups held low over a stable surface. Carry upright and do not use for uncovered or very hot drinks.
Assembly: This handmade carrier is not a spill-proof device. Keep cups upright, secure lids, and check the handle seams before each use.
Sage Milk-Carafe Cozy
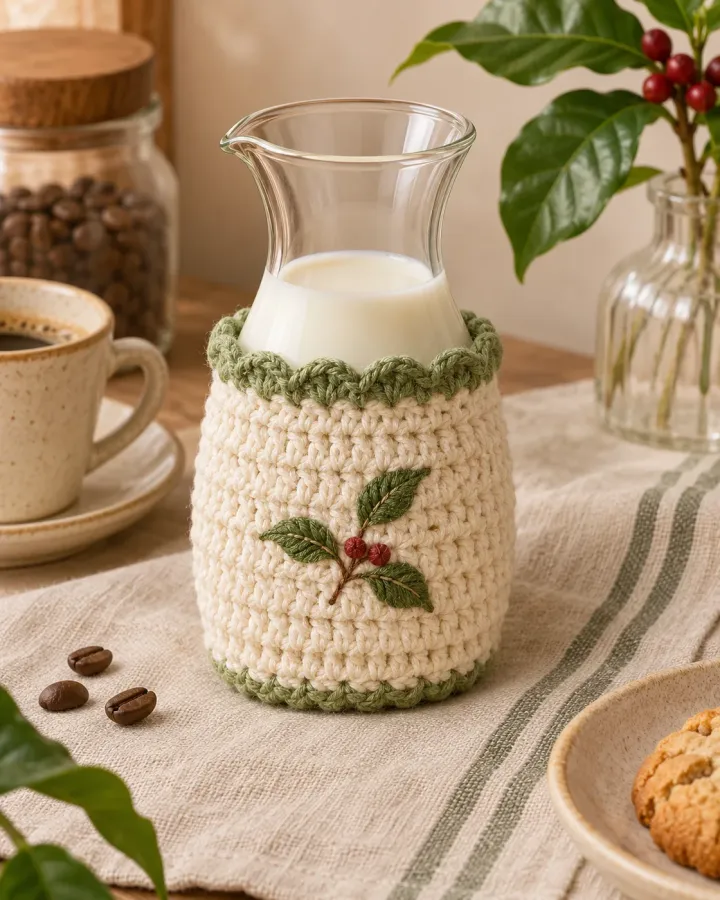
A cream sleeve with sage scallops and embroidered leaves dresses a small glass milk carafe while leaving its neck and pouring lip clear. The removable wrap adds color to a coffee station without contacting the liquid inside.
- LEVEL
- Confident beginner
- TRY IT WITH
- Worsted cotton: cream 45 yd, sage 18 yd, berry 5 yd; 4 mm hook; tapestry needle
- FINISHING NOTE
- About 4 in tall; customize to the lower body of your carafe.
Short Pattern
Abbreviations: ch chain · sc single crochet · hdc half double crochet · inc increase · sl st slip stitch · FO fasten off
- Measure the carafe around its widest lower body. Chain slightly shorter than this measurement, join carefully and work hdc rounds to form a snug tube.
- Stop well below the narrow neck and pouring lip. Work a sage scallop round by placing 5 dc in every third stitch, separated by sl st.
- Embroider a small leafy branch with sage surface stitches and two berry knots. Keep embellishments flat so the sleeve slides off easily.
- Try it on the clean, dry carafe and confirm the handle and pouring grip are unobstructed. Remove the cozy before filling, pouring or washing.
- Keep the crochet dry and away from the refrigerator interior if condensation forms. The sleeve is decorative, not food-safe or insulating.
Assembly: The glass vessel remains the only surface that contacts milk. Remove the crochet sleeve before cleaning or chilling.
Plum Cold-Brew Bottle Cozy
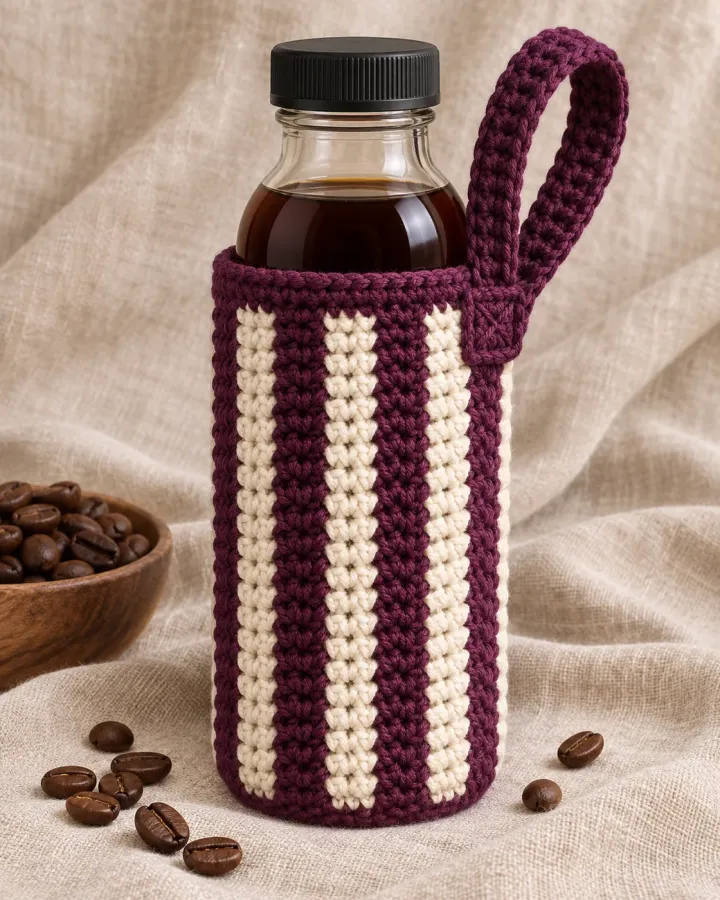
A plum-and-cream striped bottle sleeve adds a carry loop to a clear cold-brew bottle while leaving its cap and neck exposed. The sturdy crochet fabric gives the bottle a colorful grip for moving it around the kitchen or table.
- LEVEL
- Confident beginner
- TRY IT WITH
- Worsted cotton: plum 45 yd, cream 25 yd; 4 mm hook; tapestry needle
- FINISHING NOTE
- About 8 in tall; adapt to your bottle’s lower body.
Short Pattern
Abbreviations: MR magic ring · sc single crochet · hdc half double crochet · inc increase · dec decrease · sl st slip stitch · FO fasten off
- Start at the bottle base with 6 sc in a MR and increase evenly until the circle matches the bottom. Work one round in back loops only to form the base edge.
- Continue hdc rounds up the bottle, alternating plum and cream stripes. Check the fit often and stop below the shoulder and cap.
- Make a carry loop from a long chain reinforced with two rows of sc. Sew both ends to opposite sides of the upper sleeve with several strong passes.
- Slide the sleeve onto the empty bottle and confirm that it sits below the neck and does not cover the cap. Fill only after the sleeve is fitted.
- Carry upright and avoid lifting a heavy bottle by the crochet loop alone unless the seams have been thoroughly tested. Remove before washing.
Assembly: Keep the cap and bottle neck clear. Test the handle with an empty bottle first; do not rely on yarn as a safety strap.
Caramel Pour-Over Filter Holder
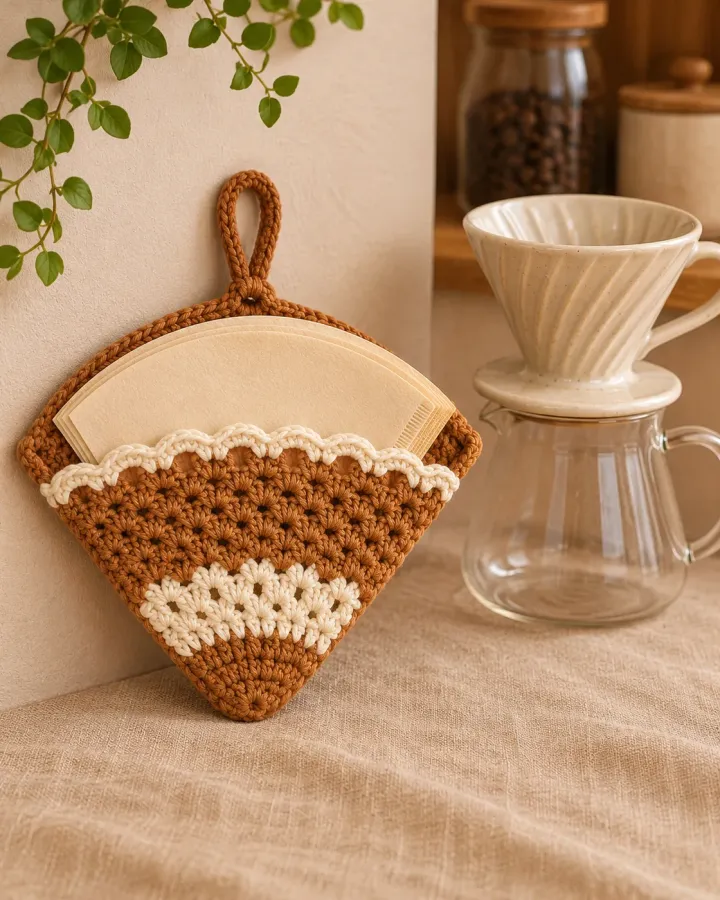
A small caramel-and-cream crochet pocket keeps paper pour-over filters together near a ceramic dripper. Its hanging loop and compact triangular shape make it easy to mount beside the coffee station without taking up counter space.
- LEVEL
- Confident beginner
- TRY IT WITH
- Worsted cotton: caramel 35 yd, cream 18 yd; 4 mm hook; tapestry needle
- FINISHING NOTE
- About 7 in tall and 8 in wide at the opening.
Short Pattern
Abbreviations: ch chain · sc single crochet · hdc half double crochet · inc increase · dec decrease · sl st slip stitch · FO fasten off
- Back panel: chain 27 and work 26 hdc rows. Decrease one stitch at each end on every other row for the final six rows to create a soft pointed base.
- Front pocket: crochet a second panel with the same width but half the height. Add a cream stripe near the top and a firm sc edging.
- Sew the pocket to the back along both sides and the bottom, leaving the top open. Keep the pocket wide enough for the filter shape you use.
- Crochet a sturdy loop at the top and reinforce it with several stitches. Store only clean, dry paper filters in the pocket.
- Hang away from steam and splashes. Remove filters before washing the organizer and let it dry completely before restocking.
Assembly: Measure your paper filters before sewing the pocket. Keep the holder dry to prevent paper filters from curling.
Espresso-Machine Dust Cover
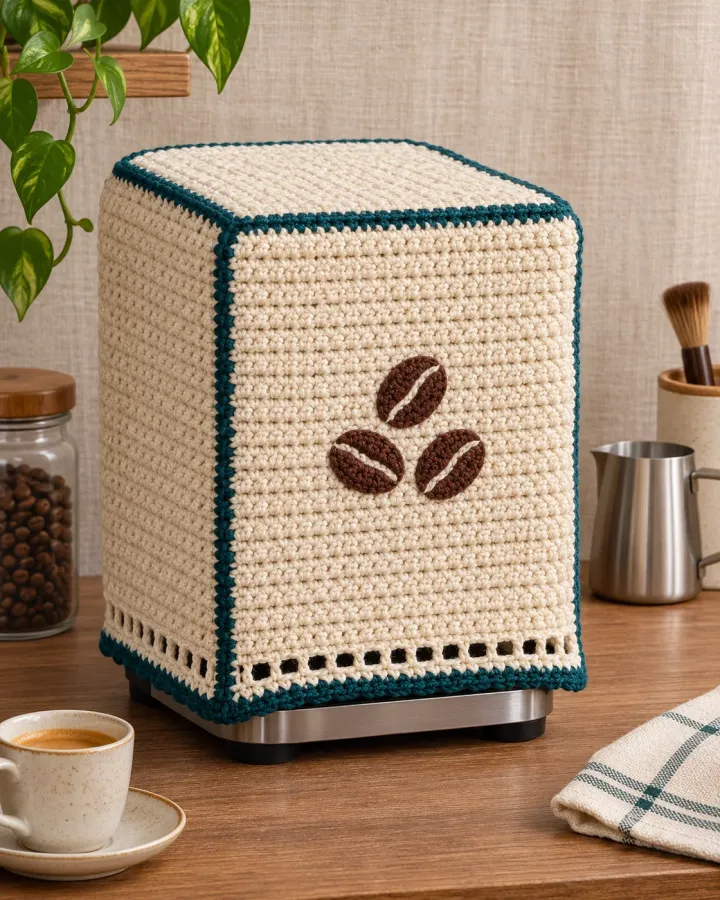
A cream crochet cover with teal edging and a coffee-bean motif protects a cool, switched-off espresso machine from dust. The open lower hem and ventilation gaps keep the cover decorative and easy to lift away before brewing.
- LEVEL
- Intermediate
- TRY IT WITH
- Worsted cotton: cream 130 yd, deep teal 35 yd, espresso 8 yd; 4 mm hook; tape measure
- FINISHING NOTE
- Custom-fit to your machine; sample shown for a compact countertop model.
Short Pattern
Abbreviations: ch chain · sc single crochet · hdc half double crochet · inc increase · dec decrease · sl st slip stitch · FO fasten off
- Measure the machine width, depth and height, excluding hot surfaces and removable parts. Crochet a top rectangle to the machine’s footprint, adding a small ease allowance.
- Work side panels downward from each edge, shaping corners with paired increases or by joining separate rectangles. Leave the back partly open for cords and ventilation.
- Add a teal edging around the lower hem and embroider three small coffee beans on the front. Avoid bulky appliques that could catch on controls.
- Fit the cover only when the machine is switched off, unplugged and completely cool. Make sure the fabric does not block vents, cords or buttons.
- Remove fully before every use. Never cover a warm appliance or leave yarn near a heating element.
Assembly: This is a dust cover for a cool, unplugged machine only. Remove before operation and preserve all ventilation openings.
Make thoughtfully and check as you go.
Yarn, hook size and personal tension can change the finished scale. Count every round, stuff gradually and use embroidered features instead of safety eyes when making toys for children under three.