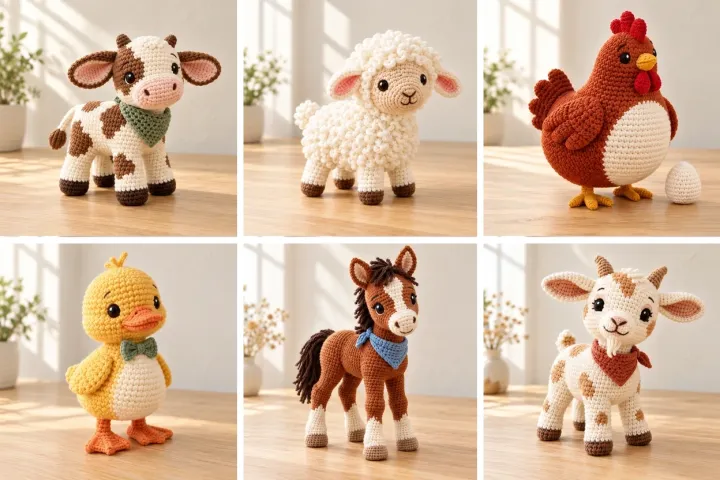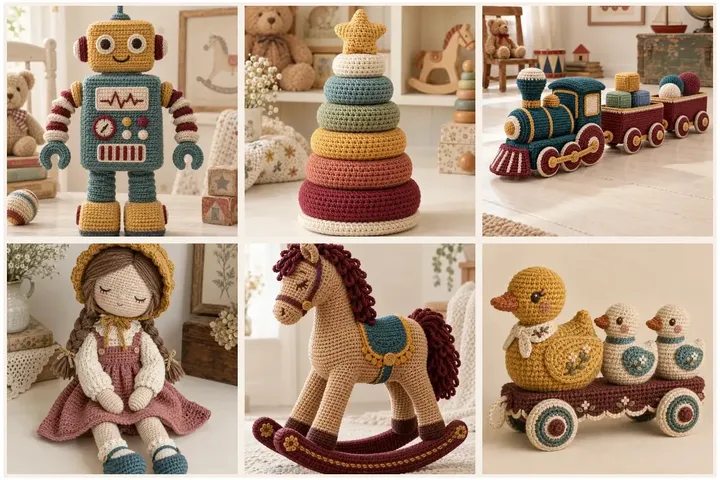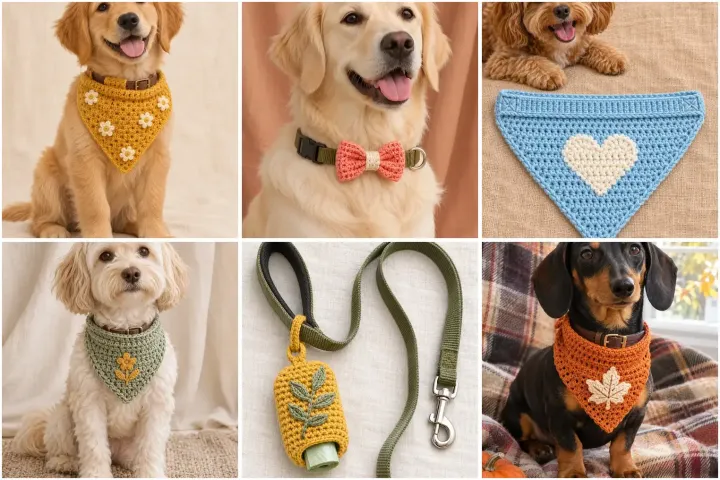
Add a handmade touch to a dog's wardrobe with lightweight bandanas, soft slide-on bow ties and small leash-side accessories. This collection is intentionally different from pet beds: every idea is a wearable accent or a decorative accessory for a regular commercial leash. These are original, AI-assisted pattern drafts and have not been sample-tested; swatch first, check fit often and adapt the stitch counts to your yarn and dog's measurements. Use smooth, washable yarn, secure every end, and avoid beads, buttons, bells, long ties and loose fringe that could be chewed or snagged. Crochet pieces are decorative only: never use them as a collar, harness, restraint, leash, or load-bearing attachment. Fit bandanas loosely over an ordinary flat collar, supervise wear, remove them if the dog mouths the fabric, and never leave an accessory on an unattended dog. The photographs are visual references, not safety testing.
Mustard Daisy Dog Bandana
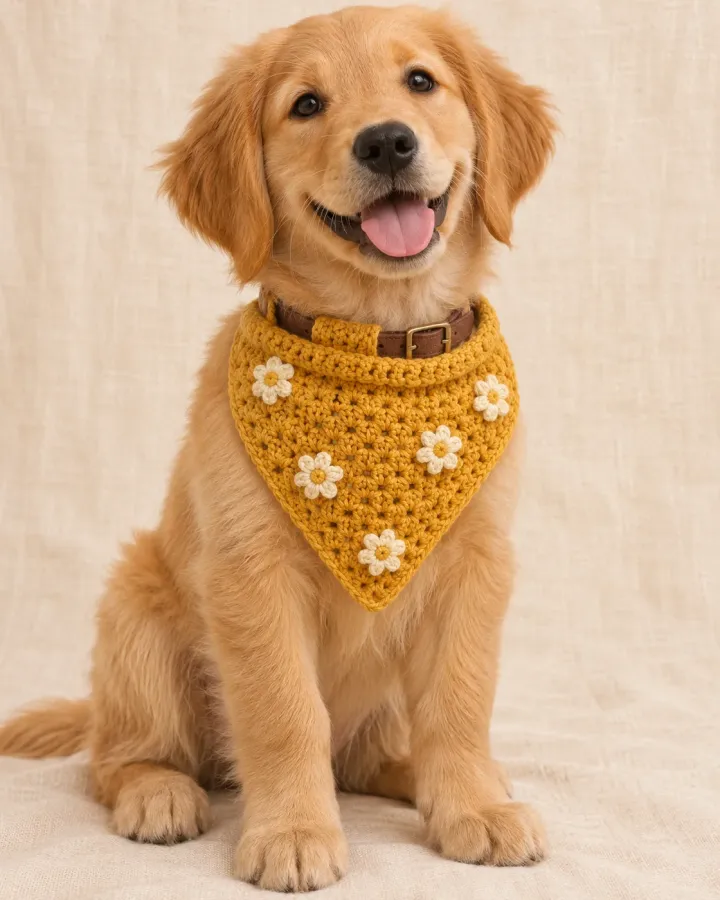
A warm mustard bandana with a small cream daisy gives a classic triangle scarf a cheerful handmade finish. The simple silhouette is easy to resize, and the flower can be embroidered directly onto the fabric to avoid loose appliqué pieces.
- LEVEL
- Confident beginner
- TRY IT WITH
- Worsted cotton: mustard 80 yd, cream 8 yd; 4 mm hook; tapestry needle; stitch markers
- FINISHING NOTE
- Custom triangular panel; sample about 9 in across the top
Short Pattern
Abbreviations: ch chain · sc single crochet · hdc half double crochet · sl st slip stitch · inc 2 stitches in one stitch · FO fasten off
- Measure the dog's ordinary flat collar and chest drop. Make a gauge swatch in sc, then choose a top edge that will sit comfortably below the collar without reaching the dog's front legs.
- Ch 2 and work 3 sc in the second ch. Turn, ch 1, inc in the first stitch, sc across, and inc in the last stitch on every row to build a centered triangle.
- Continue until the triangle reaches the measured depth. Work one even sc round around the sides, placing 3 sc in the lower point so it lies flat.
- Embroider a small daisy on the upper center using short satin stitches: make a compact center and five separate petals. Keep the back tidy and knot the yarn securely inside the fabric.
- Add a short collar channel across the top by folding a narrow band to the reverse and stitching the ends down. Slide the regular collar through, check clearance, and remove the accessory after supervised wear.
Assembly: Use smooth washable cotton and keep the collar opening loose enough to slide freely. The crochet bandana is not a collar or restraint.
Reversible Forest Check Bandana
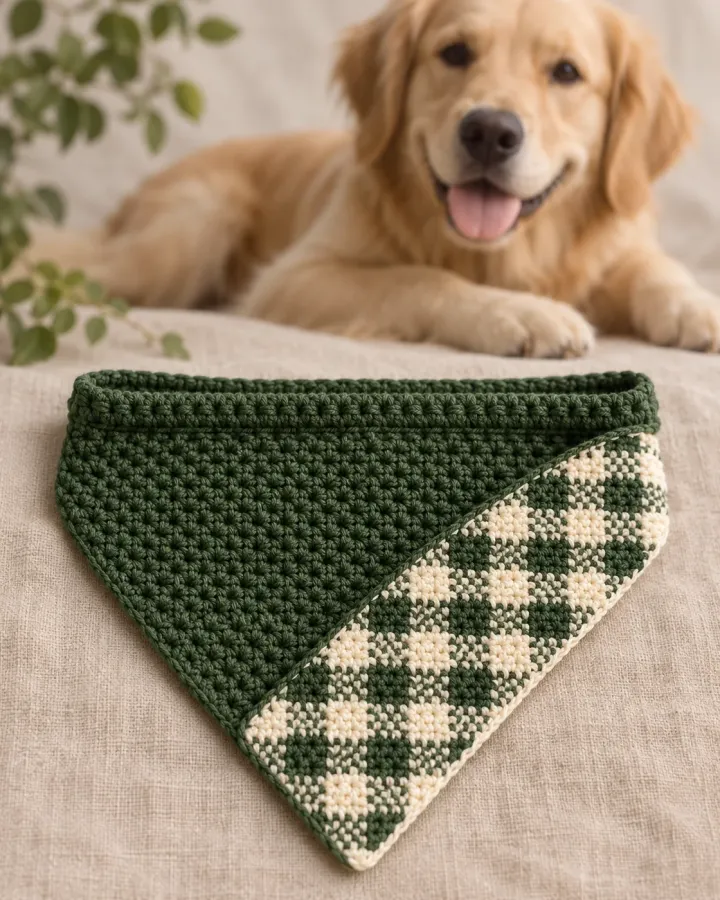
Forest green and oatmeal checks make this reversible scarf look polished from either side. Two lightweight panels are joined around the edges, creating a neat finish while keeping the fabric soft enough to drape without bulky seams.
- LEVEL
- Intermediate
- TRY IT WITH
- DK cotton: forest 75 yd, oatmeal 75 yd; 3.5 mm hook; tapestry needle; clips
- FINISHING NOTE
- Custom triangle; size from collar width and desired chest coverage
Short Pattern
Abbreviations: ch chain · sc single crochet · dc double crochet · sl st slip stitch · FO fasten off
- Measure the collar and desired bandana depth. Crochet a gauge swatch in the check pattern; plan the panel width in multiples of four stitches so color blocks align evenly.
- Make two matching triangles. On each row alternate blocks of four sc in forest and four sc in oatmeal, carrying the unused color loosely along the wrong side and changing colors in the final yarn-over.
- Increase at both ends of every row as for a standard triangle. Keep carried strands relaxed so neither layer puckers, and secure color changes at the edge rather than leaving long floats.
- Place the panels wrong sides together. Join around the sides with a tidy sc border, working 3 sc into the point and leaving the top edge open for the collar channel.
- Fold and sew a short top casing wide enough for the existing collar. Steam lightly through a cloth, slide the collar through, and test the fit before a brief supervised try-on.
Assembly: Keep both layers light and avoid long carried floats where claws or teeth could catch. Remove if the dog chews or paws at it.
Coral and Cream Stripe Bow Tie
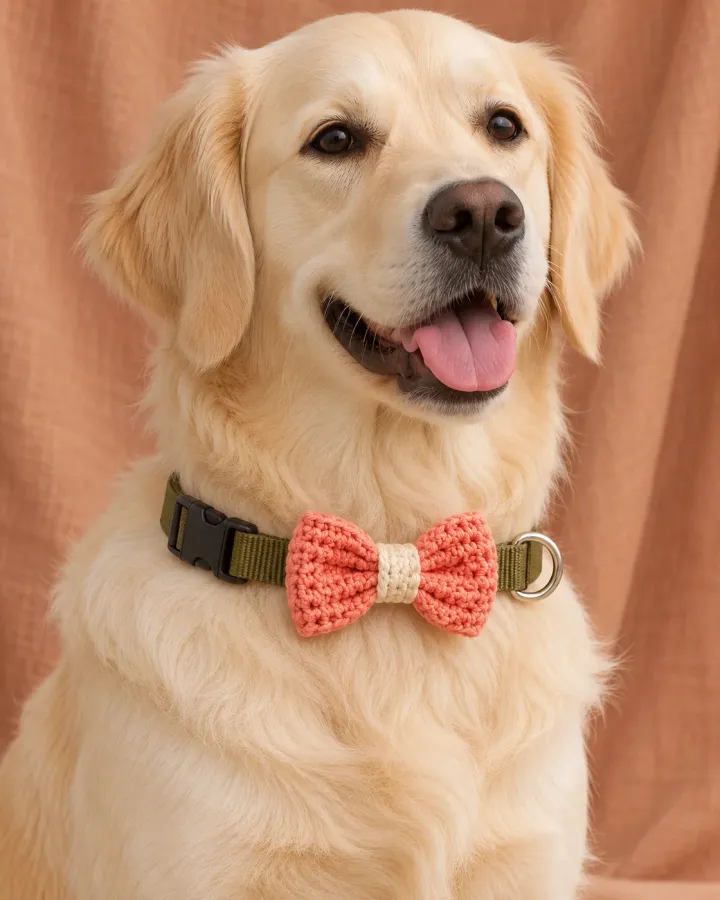
A coral-and-cream striped bow tie adds a bright accent without covering much of the dog's chest. Its soft center wrap creates the classic bow shape, while a wide sleeve on the back slides over an existing flat collar.
- LEVEL
- Confident beginner
- TRY IT WITH
- Worsted cotton: coral 25 yd, cream 20 yd; 4 mm hook; yarn needle
- FINISHING NOTE
- Bow about 4 × 2.5 in; adjust to collar width
Short Pattern
Abbreviations: ch chain · sc single crochet · sl st slip stitch · FO fasten off
- Measure the collar width and make a small gauge swatch. Choose a bow length that stays compact and will not extend past the dog's shoulders or interfere with movement.
- Ch to the desired bow length and work rows of sc, changing between coral and cream every two rows. Continue until the rectangle is about twice the planned bow height.
- Fold the rectangle lengthwise with right sides facing. Seam the long edge, turn right side out, and flatten the seam at the back. Fold the short ends inward and sew them closed.
- Pinch the center into even pleats. Wrap a narrow coral strip around the middle several times and sew it securely at the back, keeping all knots inside the wrap.
- Crochet a short flat sleeve to fit the existing collar, sew it to the bow's back, and slide the collar through. Check that the bow cannot twist over the dog's face.
Assembly: The sleeve is decorative and should slide over an intact commercial collar. Do not attach clips, pins or hard fasteners.
Three Soft Slide-On Bow Ties
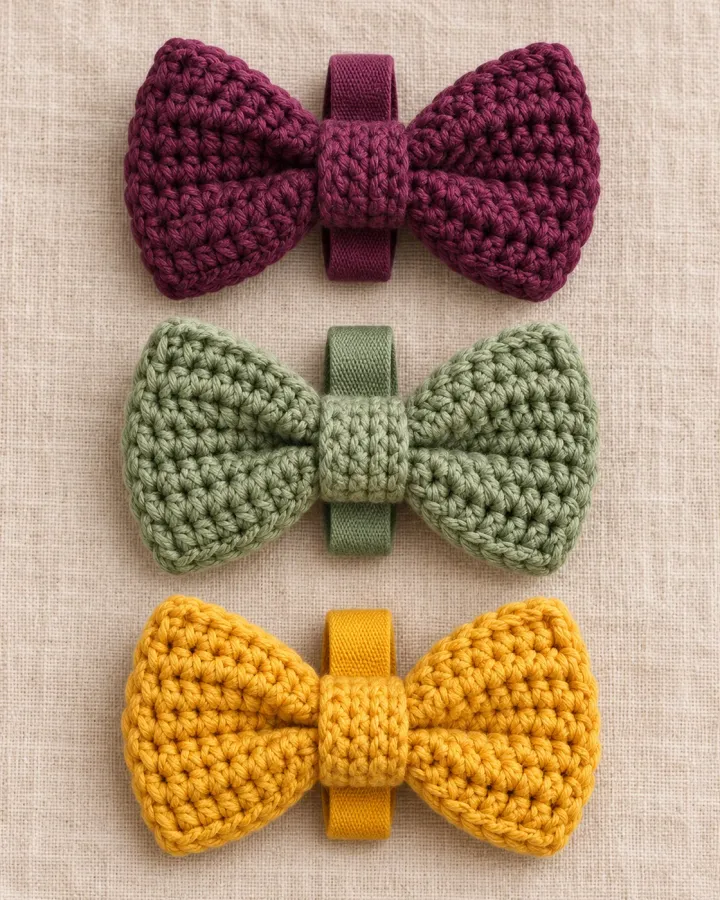
A small set of plum, sage and golden-yellow bows makes it easy to coordinate a pet accessory with different seasons. Each bow uses the same simple rectangle-and-center-wrap construction, scaled to fit a regular collar sleeve.
- LEVEL
- Confident beginner
- TRY IT WITH
- DK cotton in three colors: about 30 yd each; 3.5 mm hook; tapestry needle; measuring tape
- FINISHING NOTE
- Make small, medium and large bows; keep each proportionate to the dog
Short Pattern
Abbreviations: ch chain · sc single crochet · sl st slip stitch · FO fasten off
- Measure the flat collar and choose three bow widths that remain within the dog's chest profile. Swatch each yarn; consistent gauge helps the bows look like a matched set.
- For each bow, chain to the chosen width and work sc rows until the rectangle is about two times the desired height. Keep edges straight by counting stitches at every turn.
- Seam the rectangle into a tube, turn the seam inward and flatten. Fold the short ends to the center on the reverse and stitch them down to form a tidy bow body.
- Pinch the center and wrap with a narrow matching strip. Sew the wrap securely on the back, then crochet a separate flat sleeve sized to the collar width.
- Attach the sleeve across the back of each bow with reinforced stitches. Slide one over the ordinary collar and inspect for loose loops or edges before supervised use.
Assembly: Store unused bows away from pets. Remove immediately if a dog chews, scratches or becomes uncomfortable wearing an accessory.
Sky-Blue Heart Bandana
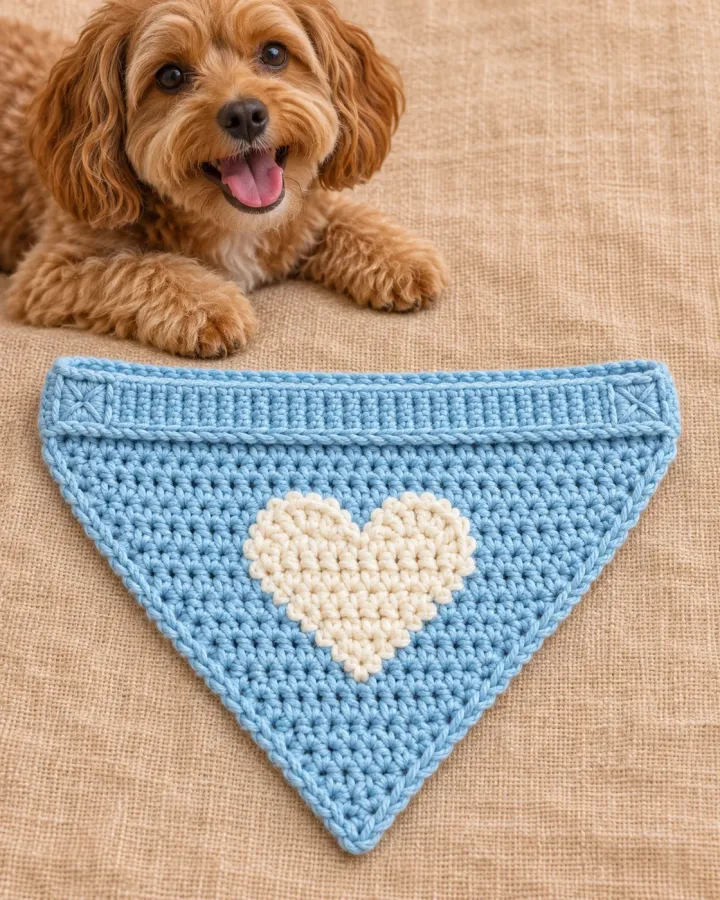
A soft blue triangle scattered with tiny cream hearts is a sweet everyday design with a crisp contrast. The small motifs are embroidered onto a dense cotton base, so there are no separate pieces to detach during supervised wear.
- LEVEL
- Confident beginner
- TRY IT WITH
- Worsted cotton: sky blue 85 yd, cream 8 yd; 4 mm hook; tapestry needle
- FINISHING NOTE
- Custom triangular scarf; sample about 10 in across
Short Pattern
Abbreviations: ch chain · sc single crochet · hdc half double crochet · sl st slip stitch · inc increase · FO fasten off
- Take collar width and chest-drop measurements. Work a small sc swatch in the blue yarn and calculate a top edge that will not hang between the dog's legs.
- Start with 3 sc in a short foundation and increase one stitch at each end on every row. Continue until the triangle reaches the planned drop, checking the width against your notes.
- Work a neat sc edging around the two sloping sides and point. At the point, place 3 stitches in one space to prevent curling; keep the top edge straight for a collar casing.
- Use cream yarn to embroider small hearts with two rounded top lobes and a tapered base. Space them before stitching and keep all duplicate stitches short and secure.
- Fold a narrow band along the top edge to form a passage for the existing collar. Sew only the ends and test the opening over the collar before fitting it loosely on the dog.
Assembly: Use embroidery rather than sewn-on buttons or beads. The bandana should be removed whenever the dog is unattended.
Rainbow Stripe Slip-Over Bandana
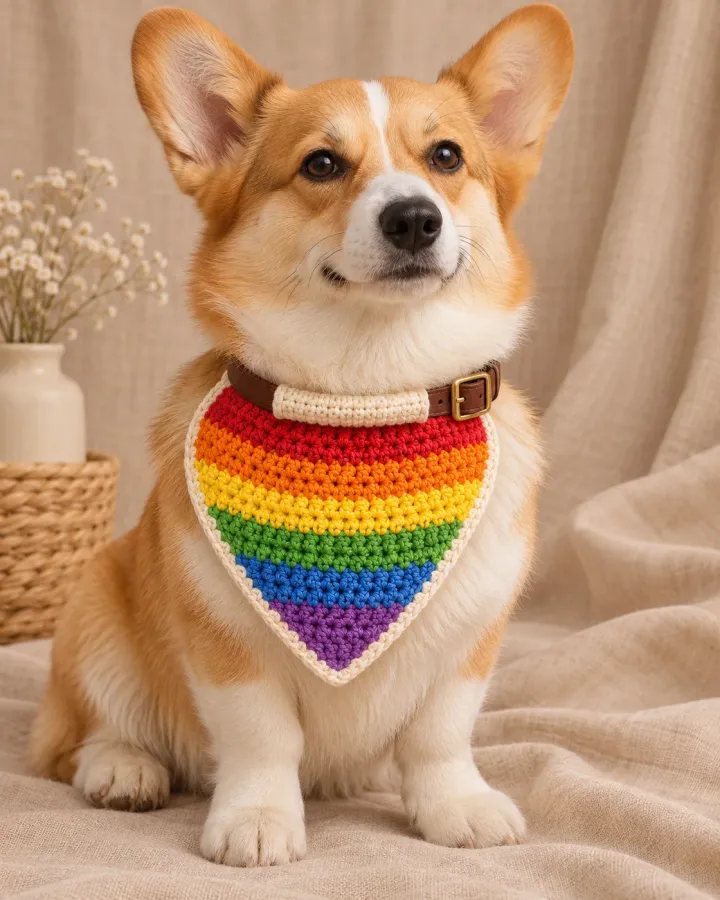
Bright rainbow bands turn a simple dog scarf into a playful statement piece. A dense stitch keeps the color changes tidy, while a broad top casing lets the bandana slip over an ordinary collar without ties around the dog's neck.
- LEVEL
- Confident beginner
- TRY IT WITH
- Worsted cotton in six colors: 20 yd each; 4 mm hook; tapestry needle; stitch markers
- FINISHING NOTE
- Custom triangle sized to the collar and chest drop
Short Pattern
Abbreviations: ch chain · sc single crochet · hdc half double crochet · sl st slip stitch · inc increase · FO fasten off
- Measure the collar and desired depth, then make a gauge swatch. Plan the triangle's row count so each rainbow color can form a band of equal height.
- Begin with 3 sc and increase at both row ends. Work several rows in each color, changing yarn on the final pull-through of the last stitch for a clean stripe.
- Continue the stripe sequence until the fabric reaches the planned depth. Weave in each color tail as you go, splitting the tail through several stitches on the reverse.
- Add a single-color sc border along both sides and around the point. Fold the top edge into a short casing, leaving enough room for the commercial collar to pass smoothly.
- Slide the collar through and check that the triangle rests on the chest without restricting the dog's front legs. Remove it after supervised use and wash according to the yarn label.
Assembly: Avoid long ties and fringe. The collar itself remains the only functional restraint; crochet is decorative.
Sage Flower Personalized Bandana
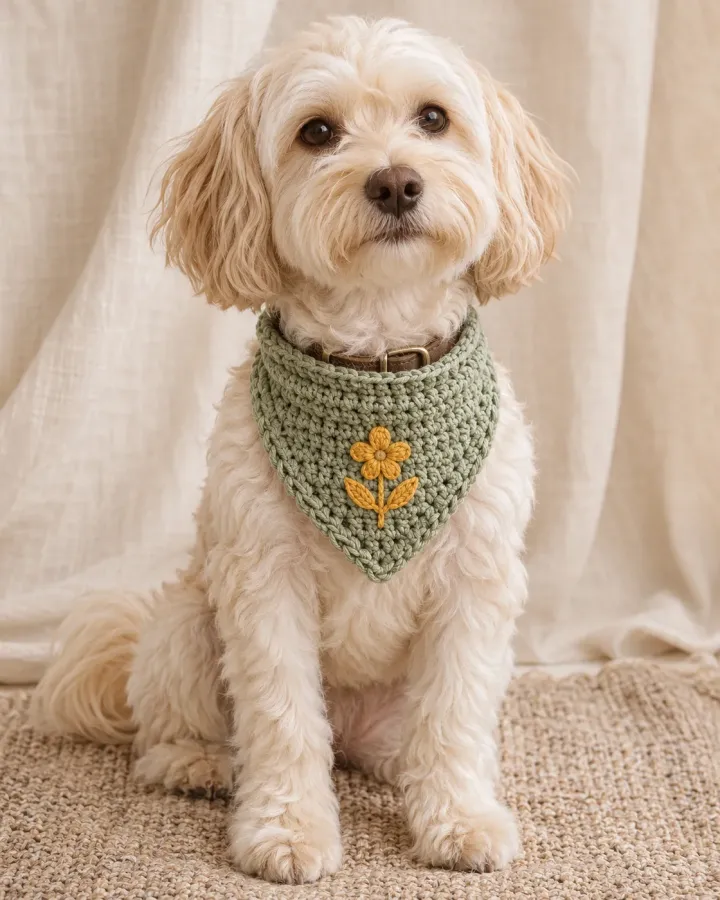
Sage cotton and a golden embroidered flower create a calm botanical look. The small blank accent area can be personalized with a securely stitched initial or name, making the design thoughtful without adding hard tags or dangling charms.
- LEVEL
- Intermediate
- TRY IT WITH
- Worsted cotton: sage 85 yd, gold 8 yd; 4 mm hook; tapestry needle; optional smooth embroidery cotton
- FINISHING NOTE
- Custom triangle; leave an approximately 2 in flat area for personalization
Short Pattern
Abbreviations: ch chain · sc single crochet · hdc half double crochet · sl st slip stitch · inc increase · FO fasten off
- Measure the collar and chest drop; swatch sage cotton in sc. Choose a compact triangle whose lower tip will not catch under the dog's paws when sitting or walking.
- Work a triangle from the lower point upward, increasing at each end every row. Stop at the planned width and finish with an even sc border around both sloping edges.
- Embroider a small flower at the center using gold yarn. Keep the stitches low-profile and anchor each petal through several fabric loops so no loose end remains on the reverse.
- For personalization, use surface embroidery on a dense central area. Stitch a simple initial or short name with smooth cotton, keeping letters small and every tail firmly woven into the fabric.
- Make a short collar channel along the top edge. Slide the regular collar through, check that the embroidery sits outward and verify the bandana remains loose and easy to remove.
Assembly: Personalization should be embroidered, never attached as a metal or plastic dangling tag. Remove if any stitch loosens.
Rust and Cream Striped Bow Tie
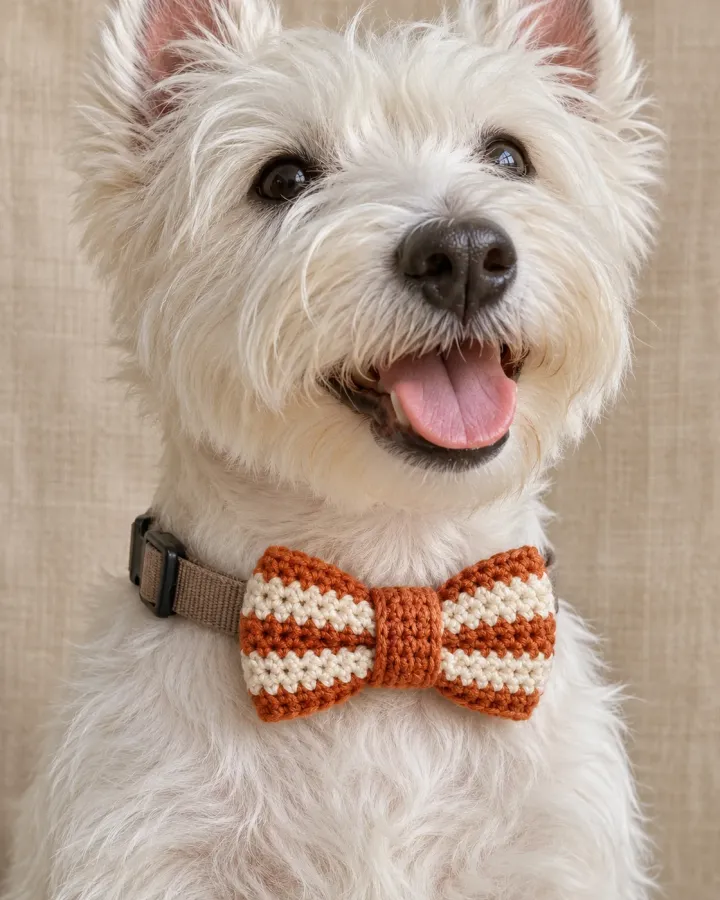
Rust and cream stripes give this compact bow tie a warm autumn palette that works beyond the season. The ribbed-looking rows add texture, and a matching center wrap hides the seam for a clean finished shape.
- LEVEL
- Confident beginner
- TRY IT WITH
- Worsted cotton: rust 25 yd, cream 20 yd; 4 mm hook; yarn needle
- FINISHING NOTE
- About 4 × 2.5 in; scale down for small dogs
Short Pattern
Abbreviations: ch chain · sc single crochet · blo back loop only · sl st slip stitch · FO fasten off
- Measure the collar width and choose a bow that will not press against the dog's jaw. Swatch sc in the chosen yarn to estimate a compact rectangle.
- Chain the planned bow width and work rows of blo sc, alternating rust and cream every two rows. Keep the turning chain consistent so the stripe edges stay square.
- When the rectangle is twice the intended height, seam the long edges with right sides together. Turn the tube, position the seam on the reverse and flatten evenly.
- Pleat the center with two shallow folds and wrap it with a narrow rust strip. Sew the strip ends at the back with multiple small stitches, hiding all tails inside the wrap.
- Add a wide crochet sleeve to the reverse, matched to the flat collar's width. Slide the collar through and check bow orientation during a short supervised fitting.
Assembly: Do not use safety pins, clips or buttons. A bow tie is an optional decorative accent, not required pet equipment.
Crochet Flower Collar Slides
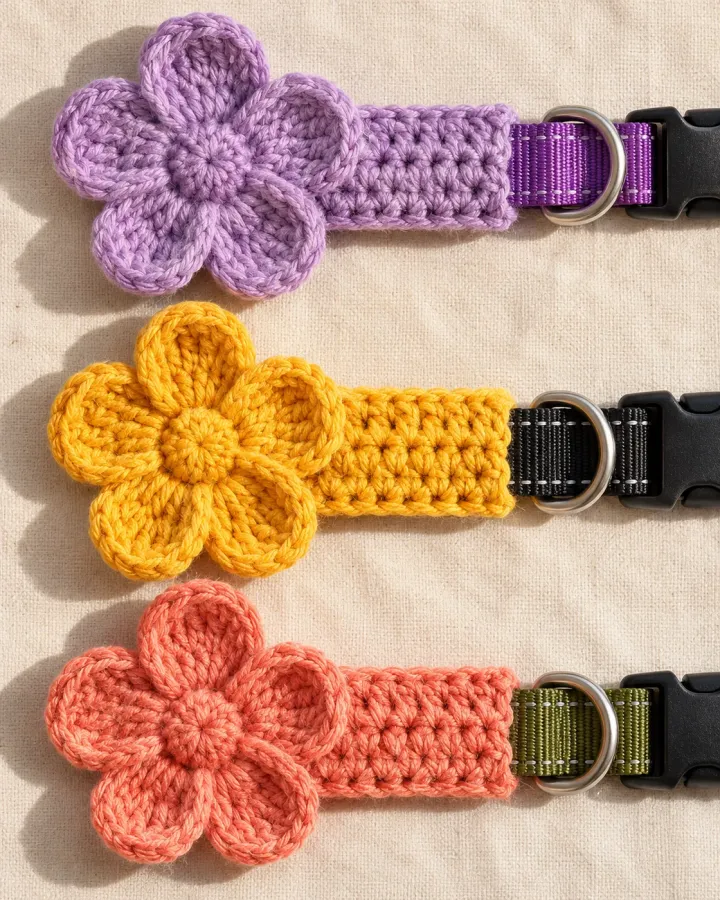
Three soft flower accents in lavender, golden yellow and coral slide over a regular collar using a wide crocheted sleeve. Their flat construction keeps the flowers lightweight and interchangeable for portraits or short supervised outings.
- LEVEL
- Intermediate
- TRY IT WITH
- DK cotton in three colors plus green: 25 yd each; 3.5 mm hook; tapestry needle
- FINISHING NOTE
- Flowers about 2.5–3 in across; size sleeve to the collar
Short Pattern
Abbreviations: ch chain · sc single crochet · hdc half double crochet · dc double crochet · sl st slip stitch · FO fasten off
- Measure the flat collar width and thickness. Make a test sleeve in sc, wide enough to slide along the collar but snug enough that the accent will not drift freely.
- For each flower, make a small adjustable ring and crochet a tight center. Work five evenly spaced petal groups of ch loops and hdc or dc stitches into the center ring.
- Close the ring securely and weave in the tail through the center several times. Add short embroidered leaf shapes if desired, keeping them flat and firmly attached.
- Crochet a short rectangular sleeve with sc rows. Fold lengthwise around the back of the flower and seam both side edges, leaving the center passage open for the collar.
- Test the slide on a spare collar segment and tug gently by hand to inspect the seams. Use one accent at a time and remove it if the dog mouths or paws at it.
Assembly: Skip beads, buttons, wire and long stems. These flower slides are decorative and should never obscure a collar buckle or ID tag.
Teal Leash-Grip Crochet Sleeve
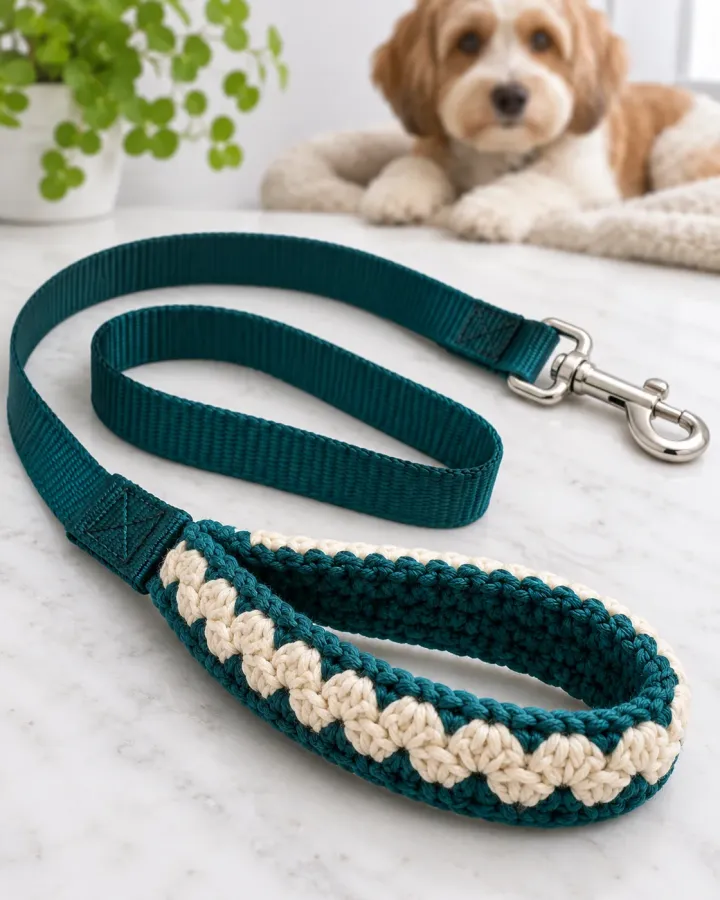
A teal-and-cream sleeve adds a softer visual finish to the hand-grip area of a standard leash. It is a removable cover only: the original webbing, stitching, handle loop and metal clasp remain completely intact and carry all force.
- LEVEL
- Intermediate
- TRY IT WITH
- Worsted cotton: teal 35 yd, cream 15 yd; 4 mm hook; tapestry needle; intact commercial leash for measuring
- FINISHING NOTE
- Length and circumference of the leash handle only
Short Pattern
Abbreviations: ch chain · sc single crochet · hdc half double crochet · sl st slip stitch · FO fasten off
- Measure only the hand-grip section of an intact leash. Add a small ease allowance so the sleeve can be removed for washing, and keep the leash's stitching and clasp fully exposed.
- Chain to the measured sleeve length and work sc rows until the rectangle wraps around the grip without stretching. Make a narrow cream stripe near each long edge if desired.
- Check the rectangle around the handle. The fabric should sit flat, not bunch under the hand, and must not hide any load-bearing seams, labels or hardware.
- Join the short ends to form a tube, then close the long edge with a loose seam that can be unpicked for cleaning. Do not sew through or modify the actual leash webbing.
- Slide the sleeve onto the handle and test grip with the leash unattached from the dog. Remove it if it slips, reduces secure grip, frays or interferes with the handle loop.
Assembly: Never crochet a replacement leash or add a load-bearing extension. The commercial leash alone must carry all pulling force.
Mustard Leaf Waste-Bag Pouch
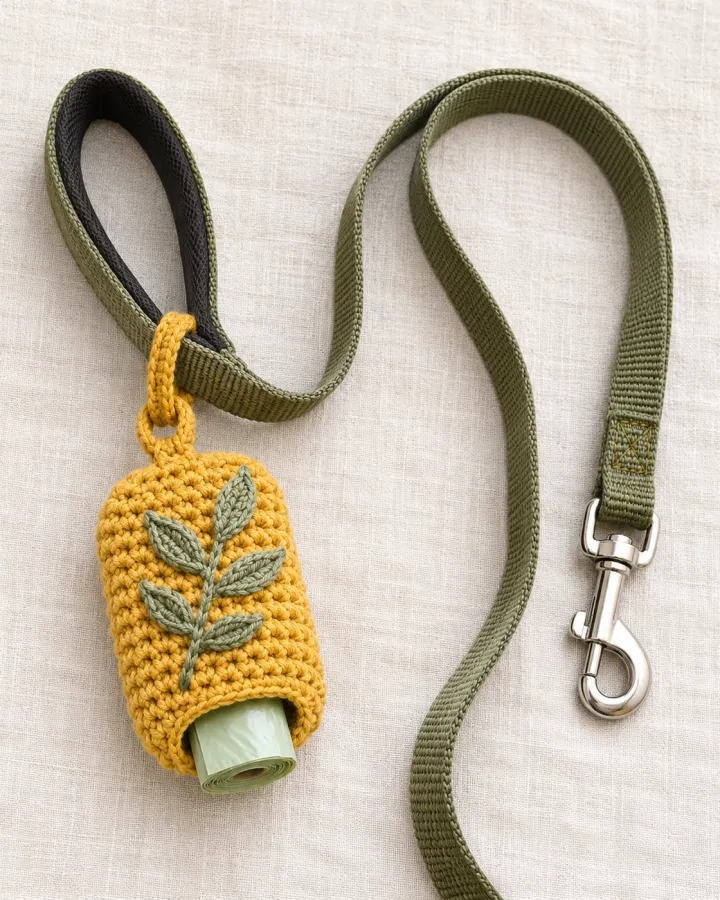
A mustard crochet pouch with a sage leaf keeps a waste-bag roll near the leash handle. A reinforced opening dispenses bags one at a time, and a short removable loop keeps the holder separate from the dog's neck.
- LEVEL
- Intermediate
- TRY IT WITH
- Worsted cotton: mustard 45 yd, sage 8 yd; 4 mm hook; tapestry needle; small bag roll for sizing
- FINISHING NOTE
- About 3 × 4 in; adjust to the roll diameter
Short Pattern
Abbreviations: ch chain · sc single crochet · hdc half double crochet · sl st slip stitch · FO fasten off
- Measure a waste-bag roll and make a gauge swatch. Plan a small rectangle that wraps around the roll with room for a short top flap, but not so loose that the roll falls out.
- Work the pouch body in joined sc rounds from an oval base, increasing evenly at both ends. Continue straight until the pouch reaches about three-quarters of the roll height.
- Crochet a short flap across half the opening and embroider a simple sage leaf on the front. Reinforce a small center dispensing slit with a tight round of slip stitches.
- Make a short removable loop from a firm chain reinforced with sc. Attach it to the pouch and close with a soft crocheted loop-and-tab; avoid a hard button or metal clip.
- Insert a roll and pull one bag through the opening to check movement. Hang the pouch from the leash handle only, never from the collar, and remove it when not in use.
Assembly: Keep the holder small and inspect its loop and seams before every use. It is a convenience pouch, not a toy or restraint.
Navy Starry-Night Bandana
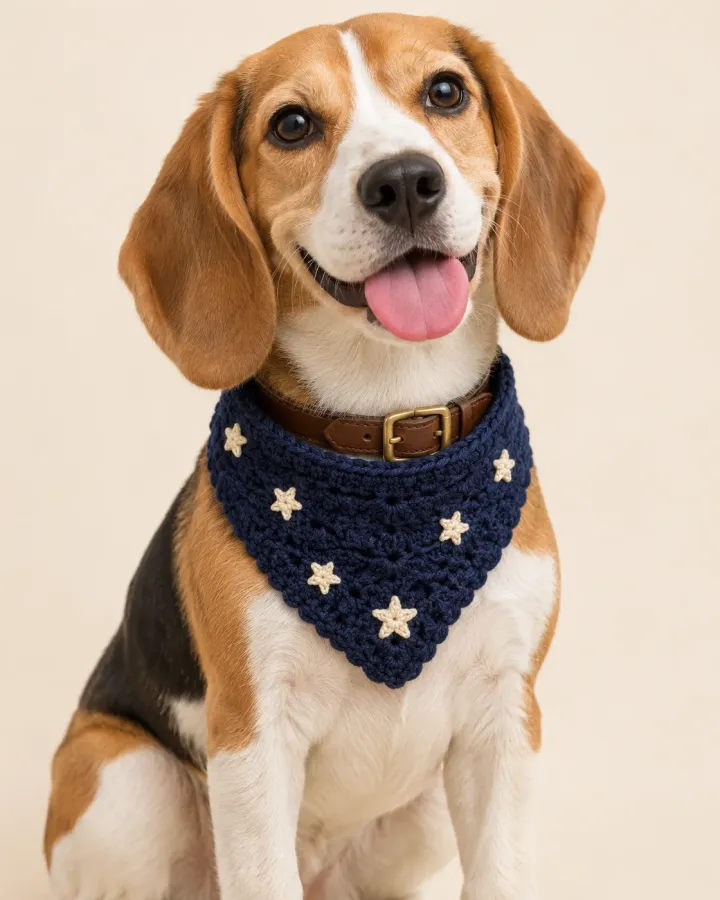
A deep navy triangle dotted with small cream stars feels playful without relying on dangling charms. Embroidered motifs keep the surface smooth, and the simple collar casing makes this design easy to remove for washing.
- LEVEL
- Confident beginner
- TRY IT WITH
- Worsted cotton: navy 90 yd, cream 10 yd; 4 mm hook; tapestry needle
- FINISHING NOTE
- Custom triangle; sample about 10 in wide
Short Pattern
Abbreviations: ch chain · sc single crochet · hdc half double crochet · sl st slip stitch · inc increase · FO fasten off
- Measure the dog's collar and chest drop. Swatch navy yarn in sc and calculate a bandana size that clears the front legs and does not drag on the ground.
- Begin at the lower point with 3 sc. Increase once at each edge every row, placing a marker at the center stitch so the triangle remains symmetrical.
- Finish the triangle with a firm sc border. Embroider small five-point stars using cream yarn: outline each point with short straight stitches and secure the center several times.
- Fold a short strip along the top edge and sew it into a channel sized for the existing flat collar. Keep the casing broad and smooth so the collar slides without snagging.
- Thread the collar through, check the decorative fabric sits on the chest, and confirm the fit is loose. Remove after use and wash gently according to the yarn label.
Assembly: Embroidery should be low-profile and secure. Do not add reflective claims or use this accessory in place of safety equipment.
Dusty-Rose and Teal Bow Pair
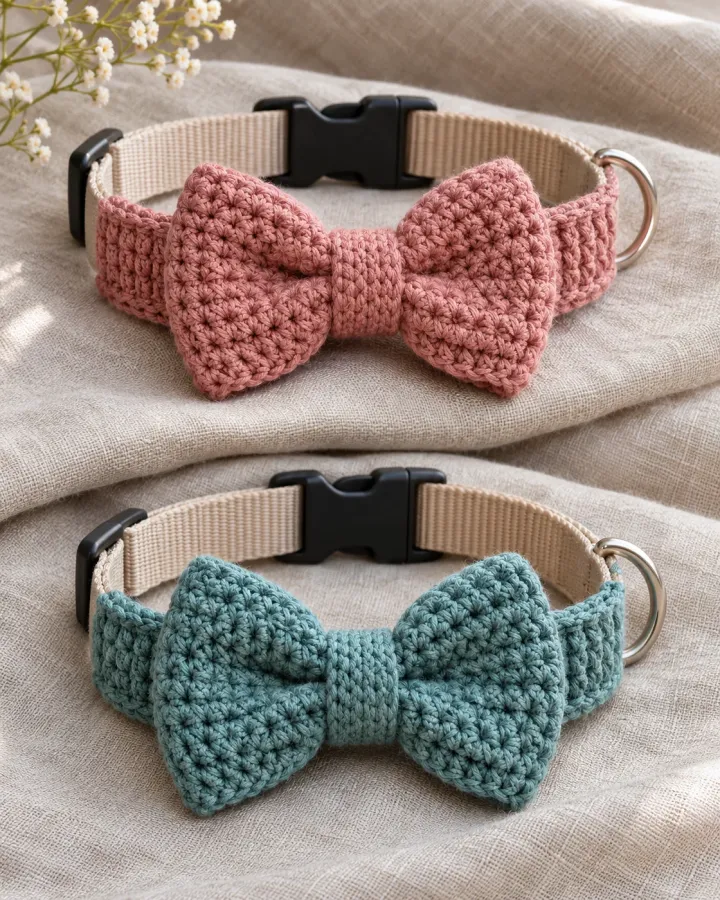
Dusty-rose and muted-teal bows offer a coordinated pair for portraits or special occasions. Each bow slides onto a standard flat collar through a soft crocheted sleeve, avoiding pins, clips and small detachable decorations.
- LEVEL
- Confident beginner
- TRY IT WITH
- DK cotton: dusty rose 25 yd, teal 25 yd; 3.5 mm hook; tapestry needle
- FINISHING NOTE
- Each bow about 3.5 × 2 in; adapt to collar width
Short Pattern
Abbreviations: ch chain · sc single crochet · sl st slip stitch · FO fasten off
- Measure the collar width and decide on a proportionate bow. Make one swatch in each color and use the same stitch count so the pair has matching dimensions.
- For each color, chain to the desired width and work sc rows until the piece reaches twice the planned height. Keep the fabric soft rather than stiff.
- Seam each rectangle into a tube with the join centered on the reverse. Flatten the tube and fold both short edges inward, overlapping them slightly at the middle.
- Wrap a narrow matching strip around the center and sew it down on the back. Crochet a separate collar sleeve with an opening just wider than the collar.
- Attach sleeve to bow with reinforced stitches, slide onto the collar and check that the bow remains upright. Use only for brief, supervised wear.
Assembly: Remove the bows before sleep, play with other dogs, or any time the pet tries to chew the yarn.
Plum Granny-Square Bag Dispenser
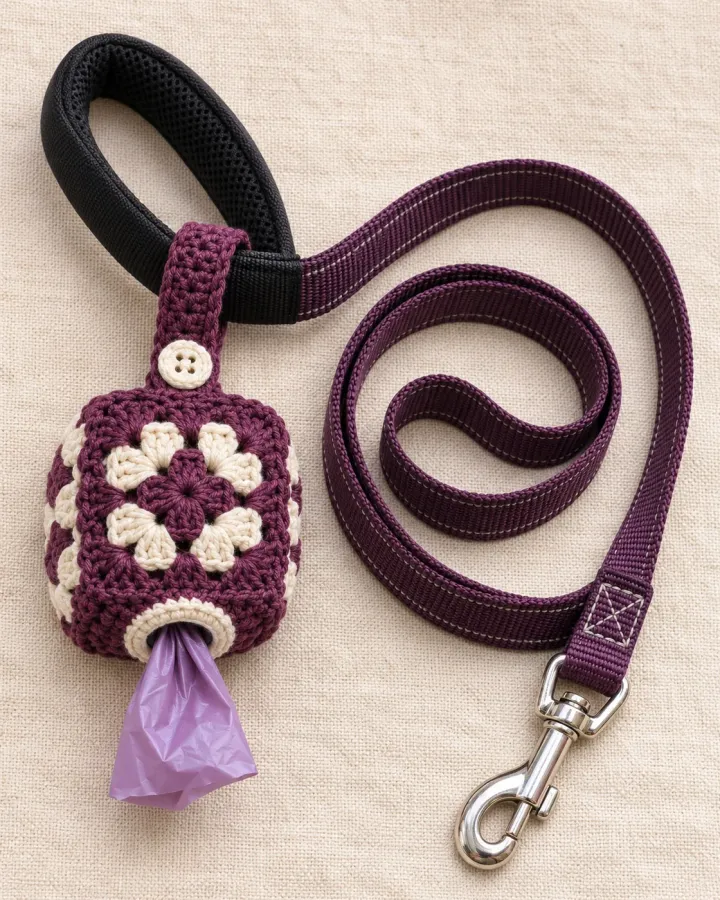
A plum-and-cream granny-square pouch turns a practical bag roll into a colorful leash accessory. The square construction creates a different look from the leaf pouch, with a central opening and simple back panel sized around the roll.
- LEVEL
- Intermediate
- TRY IT WITH
- Worsted cotton: plum 35 yd, cream 20 yd; 4 mm hook; tapestry needle; bag roll for fitting
- FINISHING NOTE
- About 3 × 3.5 in; custom fit around a standard small roll
Short Pattern
Abbreviations: ch chain · sc single crochet · dc double crochet · sl st slip stitch · FO fasten off
- Measure the roll circumference and height. Crochet a small two-color granny square, checking that its finished width will cover the front without stretching around the roll.
- Make a plain back panel in sc to match the square. Join the sides and bottom with sc, leaving the top open; keep the seam firm and weave tails securely inside.
- Reinforce a short central dispensing opening on the granny-square front with a round of sc. Test that one bag can pass through without pulling the stitches apart.
- Add a short top flap with a soft crocheted loop closure, then make a compact removable handle loop. Avoid buttons or hard clips that could detach or strike the dog.
- Insert a roll and test dispensing by hand. Attach only to the leash handle, away from the dog's body, and remove the pouch when the leash is stored.
Assembly: This pouch is not a chew toy. Check the opening and hanging loop regularly, and remove it if fibers fray.
Autumn Leaf Dog Bandana
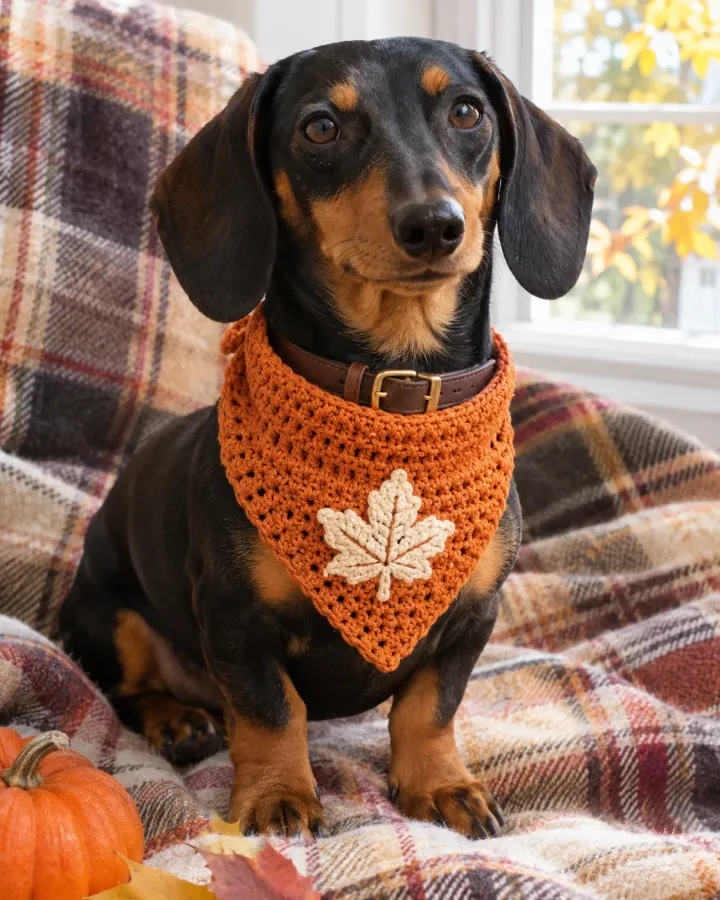
Pumpkin rust and a cream leaf motif give this bandana a cozy fall look on a dark or light coat. A smooth triangle and short collar channel keep the focus on color and texture rather than bulky embellishment.
- LEVEL
- Confident beginner
- TRY IT WITH
- Worsted cotton: rust 85 yd, cream 8 yd; 4 mm hook; tapestry needle
- FINISHING NOTE
- Custom triangle; sample about 10 in across top edge
Short Pattern
Abbreviations: ch chain · sc single crochet · hdc half double crochet · sl st slip stitch · inc increase · FO fasten off
- Measure collar width and chest drop, then swatch rust cotton in sc. Select a triangle depth that leaves the front legs free and sits above the dog's lower chest.
- Work the triangle from its point, increasing one stitch at both ends of every row. Count each row and place a center marker to keep the fabric balanced.
- Add an even sc edging along the sloping sides and point. Embroider a simple cream leaf near the center using a central stem and short paired diagonal stitches.
- Fold the top edge into a short casing for the existing collar and sew the ends down. Check the casing width on the collar before finishing the seam.
- Slide the collar through and inspect the fit with the dog standing and sitting. Remove the accessory if it bunches, catches on fur or attracts chewing.
Assembly: Use smooth washable yarn and no loose fringe. A decorative bandana should never replace an ID collar or harness.
Make thoughtfully and check as you go.
Yarn, hook size and personal tension can change the finished scale. Count every round, stuff gradually and use embroidered features instead of safety eyes when making toys for children under three.