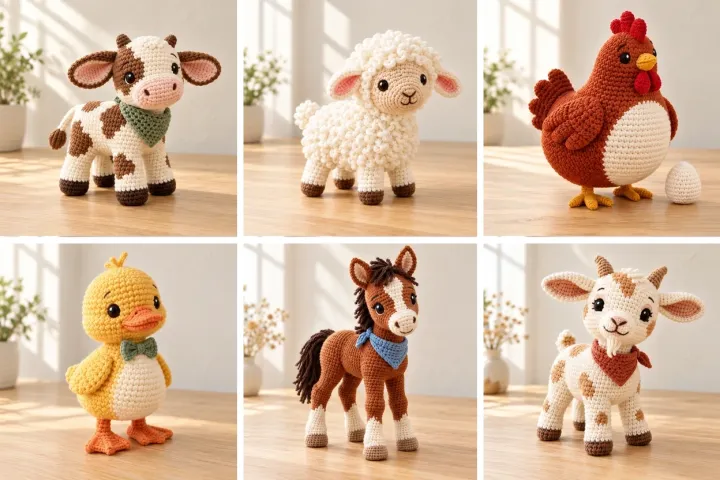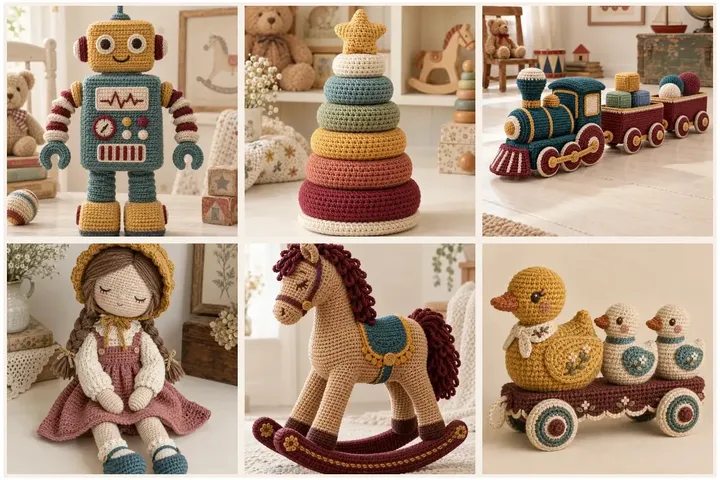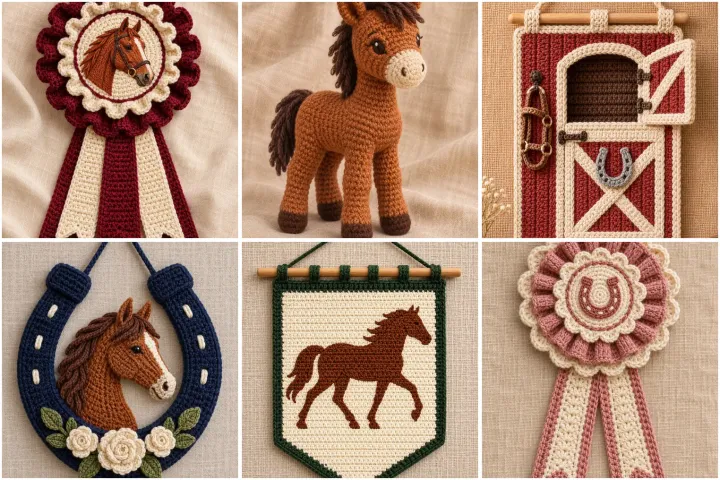
Inspired by the Weekend Equestrian mood in Pinterest’s 2026 Hobbies Trend Report, this collection turns rosette ribbons, horse motifs and stable style into original yarn projects. Pinterest reported a 3,816% rise in searches for “rosette ribbon”; that signal is a trend clue, not a guarantee of future popularity. These designs focus on decorative keepsakes and small craft-room accents rather than riding equipment. The patterns are original drafts, not sample-tested; stitch counts may need adjustment for yarn, hook and tension. Use embroidered features instead of loose plastic parts where practical, secure every applique carefully, and keep small accessories away from young children. The AI-created photographs are visual references; follow the written construction notes and adapt as you crochet.
Chestnut Horsehead Rosette Ribbon
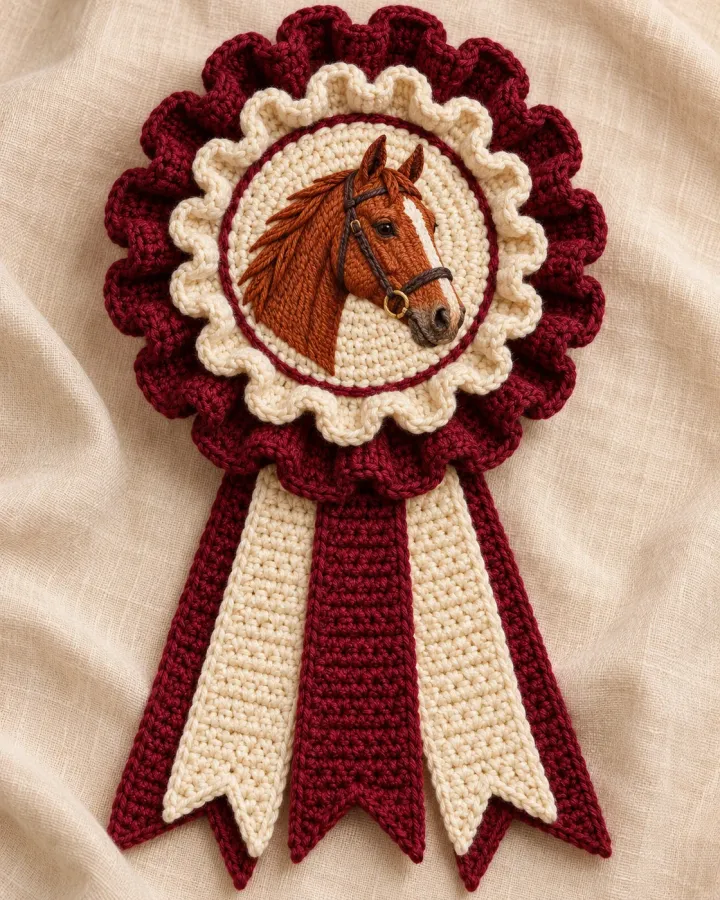
Layered burgundy and cream crochet frills frame an embroidered chestnut horse portrait, while long striped tails give this handmade rosette a classic show-ribbon silhouette. It makes a striking decorative keepsake for a craft room, shelf or equestrian-themed gift display.
- LEVEL
- Intermediate
- TRY IT WITH
- DK cotton: burgundy 55 yd, cream 35 yd, chestnut 12 yd; 3 mm hook; tapestry needle; felt backing
- FINISHING NOTE
- About 7 in tall including the tails.
Short Pattern
Abbreviations: MR magic ring · ch chain · sc single crochet · hdc half double crochet · dc double crochet · inc increase · sl st slip stitch · FO fasten off
- Center: with cream, make a flat circle starting with 6 sc in a MR. Increase evenly to 36 stitches, then work one round in back loops only to create a crisp rim. Add a burgundy surface-stitch outline.
- Frill: join burgundy in the unused front loops. Work 3 dc in each stitch around for a gathered ruffle. Make a second, smaller cream circle and attach it over the center to create a layered medallion.
- Portrait: embroider a chestnut horse profile using satin stitches for the face and short chain stitches for the mane. Keep the embroidery compact so it remains readable at the center of the rosette.
- Tails: crochet three tapered ribbons in burgundy and cream. Begin each with a foundation chain, work rows of sc, and decrease one stitch at each edge near the end to form a point.
- Assembly: sew the tails to the back of the medallion, add a felt circle for stability, and weave in every end. This is decorative; do not attach a pin where it could be reached by a child.
Assembly: Block the tails flat before sewing them on. If making a wearable brooch, use a securely attached commercial clasp and keep it away from children.
Little Chestnut Crochet Foal
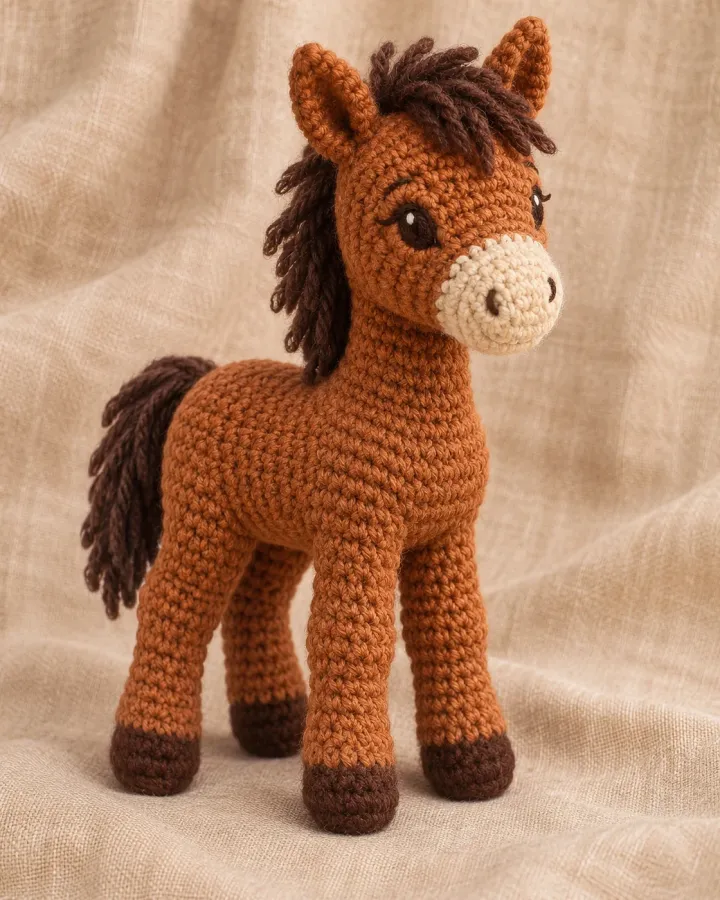
A warm chestnut body, cream muzzle and tousled dark mane give this small crochet foal a gentle stable-inspired look. Separate legs and a shaped head create a collectible figure with clear construction stages and embroidered facial details.
- LEVEL
- Intermediate
- TRY IT WITH
- Worsted cotton: chestnut 90 yd, dark brown 25 yd, cream 12 yd; 3.5 mm hook; fiberfill; tapestry needle; embroidery floss
- FINISHING NOTE
- About 8 in tall when seated upright.
Short Pattern
Abbreviations: MR magic ring · sc single crochet · inc 2 sc in one stitch · dec invisible decrease · ch chain · sl st slip stitch · FO fasten off
- Body: begin with 6 sc in a MR and increase to 30 stitches. Work 12 rounds even, stuff firmly, then decrease over several rounds to close. Keep the back slightly rounded and the chest narrower.
- Head and muzzle: crochet the head as an oval, increasing to 24 stitches before working 7 rounds even. Change to cream for the final muzzle rounds, stuff lightly, and embroider two nostrils with brown yarn.
- Legs: make four short tubes, beginning with 6 sc and increasing to 12. Work even for 8 rounds, stuff only the lower half, and flatten the open edge. Sew two legs to each side of the body with the hooves aligned.
- Ears: crochet two small pointed cones in chestnut and sew them to the crown. Add a dark mane with short lengths of yarn secured down the neck; trim evenly rather than leaving long loops.
- Join the head to the body with several firm passes of yarn. Embroider the eyes and check that all limbs are secure. This decorative figure is not a safety-tested toy.
Assembly: Pin the head and legs in place before sewing. Use embroidered eyes and securely anchored mane strands for a neat finish.
Two Horsehead Crochet Appliques
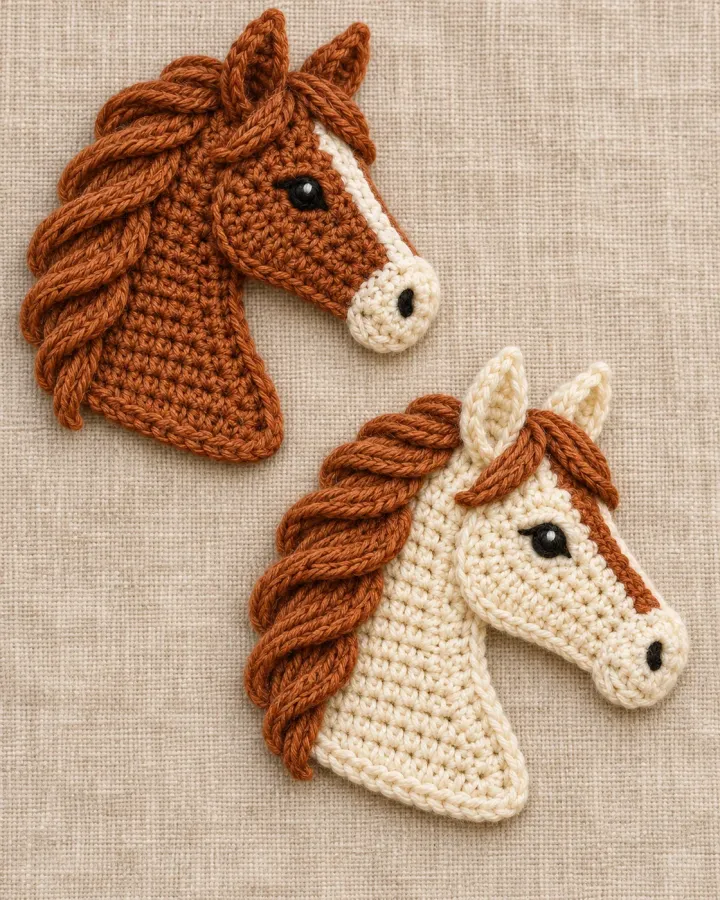
These companion horsehead motifs pair a chestnut profile with a cream version accented by a flowing rust-colored mane. Their compact shapes work well as patches for blankets, bags, bunting or handmade stable-themed accessories.
- LEVEL
- Confident beginner
- TRY IT WITH
- DK cotton: cream 20 yd, chestnut 25 yd, rust 12 yd, dark brown 5 yd; 3 mm hook; tapestry needle
- FINISHING NOTE
- Each motif is about 5 in tall.
Short Pattern
Abbreviations: ch chain · sc single crochet · hdc half double crochet · dc double crochet · inc increase · sl st slip stitch · FO fasten off
- Base shape: chain 13. Work sc along one side, place 3 sc in the final chain, then continue along the underside. Increase at the rounded end and decrease gradually toward the narrow poll to suggest a horse profile.
- Shape the forehead with short rows: work across the upper edge, turn, and decrease one stitch at the front on each of the next three rows. Keep the muzzle broad enough to remain recognizable when the motif is sewn down.
- Make a second matching layer in the alternate base color. Join the two shapes with a round of sc, adding extra stitches around the cheek and fewer along the crown so the edge lies flat.
- Add a mane with surface slip stitches or a slim crocheted chain sewn in a curve from poll to neck. Embroider a small eye and nostril; use short, secure stitches rather than beads.
- Weave ends to the back and lightly block. Tack the applique around its entire outline when attaching it to fabric so the edges do not lift or curl.
Assembly: Use a firm cotton and a slightly smaller hook for stable motifs. Test the applique on a swatch before sewing it to a finished project.
Red Stable Door Wall Hanging
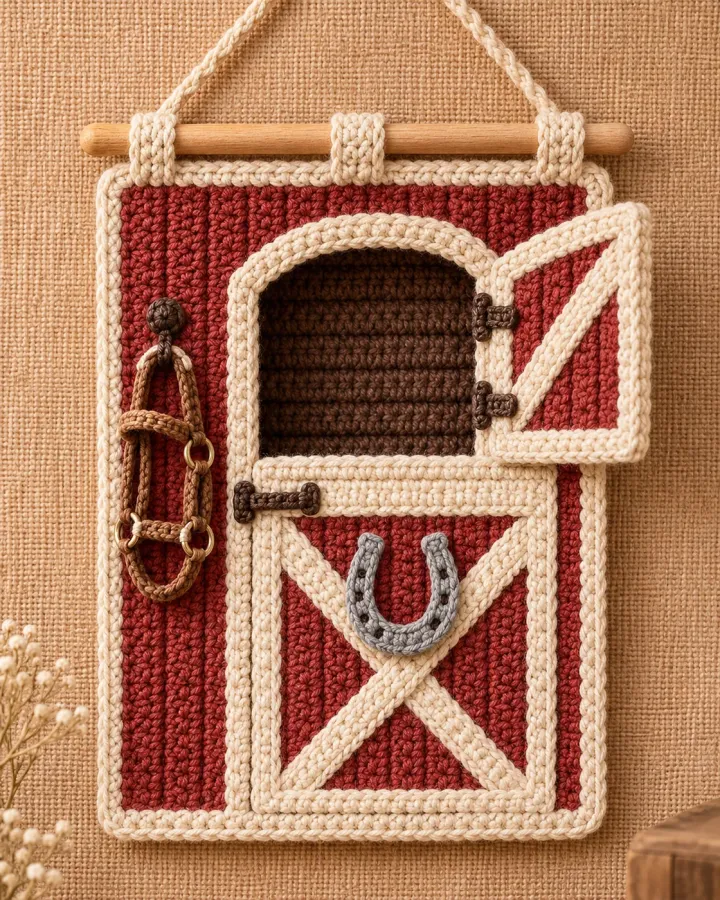
A miniature barn-red stable door combines cream trim, a raised horseshoe and tiny bridle-inspired details. This small wall hanging translates familiar stable shapes into soft crochet texture while keeping the design entirely decorative.
- LEVEL
- Intermediate
- TRY IT WITH
- Worsted cotton: barn red 70 yd, cream 45 yd, brown 18 yd, gray 8 yd; 3.5 mm hook; 8 in dowel; tapestry needle
- FINISHING NOTE
- About 10 in tall, excluding the hanging cord.
Short Pattern
Abbreviations: ch chain · sc single crochet · hdc half double crochet · inc increase · dec decrease · sl st slip stitch · FO fasten off
- Door panel: chain 31 in barn red. Work 30 sc across for 34 rows, changing to cream for a narrow border on the final round. Keep tension even so the rectangle does not bow.
- Door boards: surface-stitch a cream frame around the panel. Add two diagonal cream bands across the lower half, crossing them at the center to create a stable-door pattern.
- Horseshoe: crochet a narrow gray strip, about 24 stitches long, then work several rows to make it sturdy. Shape it into a U and sew it to the lower center with small matching stitches.
- Top sleeve: fold the upper edge over the dowel and sew a channel wide enough for it to slide through. Add a braided cord at both ends and reinforce each attachment point.
- Embroider small dark hinge and latch marks. Hang from a suitable wall hook; this is decor only and should not be used as a functional stable fixture.
Assembly: Keep all surface details flat and secure. Choose a lightweight dowel and mount the finished hanging away from damp areas.
Navy Horseshoe and Rose Wreath
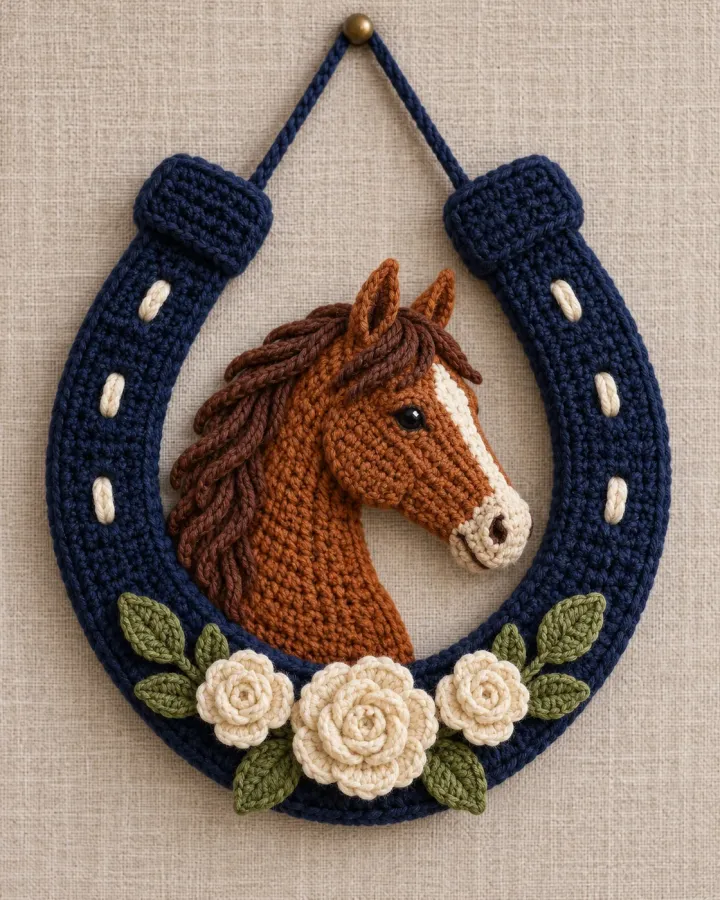
A deep navy horseshoe frame, cream crochet roses and leafy green accents create a polished stable-door wreath. The raised chestnut horse centerpiece adds a focal point while the rounded yarn form stays lightweight enough for indoor display.
- LEVEL
- Intermediate
- TRY IT WITH
- Worsted cotton: navy 65 yd, cream 30 yd, chestnut 20 yd, sage 12 yd; 3.5 mm hook; fiberfill; tapestry needle
- FINISHING NOTE
- About 9 in across.
Short Pattern
Abbreviations: MR magic ring · sc single crochet · hdc half double crochet · dc double crochet · inc increase · dec decrease · sl st slip stitch · FO fasten off
- Frame: crochet a long navy tube in continuous rounds, stuffing lightly as you go. Make it long enough to curve into a broad U with a small gap at the top; close both ends neatly.
- Shape the horseshoe: pin the tube into a U and sew the curve to hold its outline. Add short cream bars across the sides with surface slip stitches to echo horseshoe nail marks.
- Roses: make a chain of small dc clusters, roll it into a spiral, and sew the base firmly. Crochet three roses in cream and several leaves in sage using pointed oval shapes.
- Center motif: crochet a small chestnut horsehead applique and embroider the mane in darker brown. Sew it within the lower curve, then arrange the roses and leaves around the base.
- Add a sturdy hanging loop at the top and weave in all ends. Keep the wreath indoors and away from high heat or moisture.
Assembly: Distribute flowers evenly so the U remains visible. Stitch through the wreath frame several times to secure the centerpiece and leaves.
Mini Bridle Crochet Key Fob
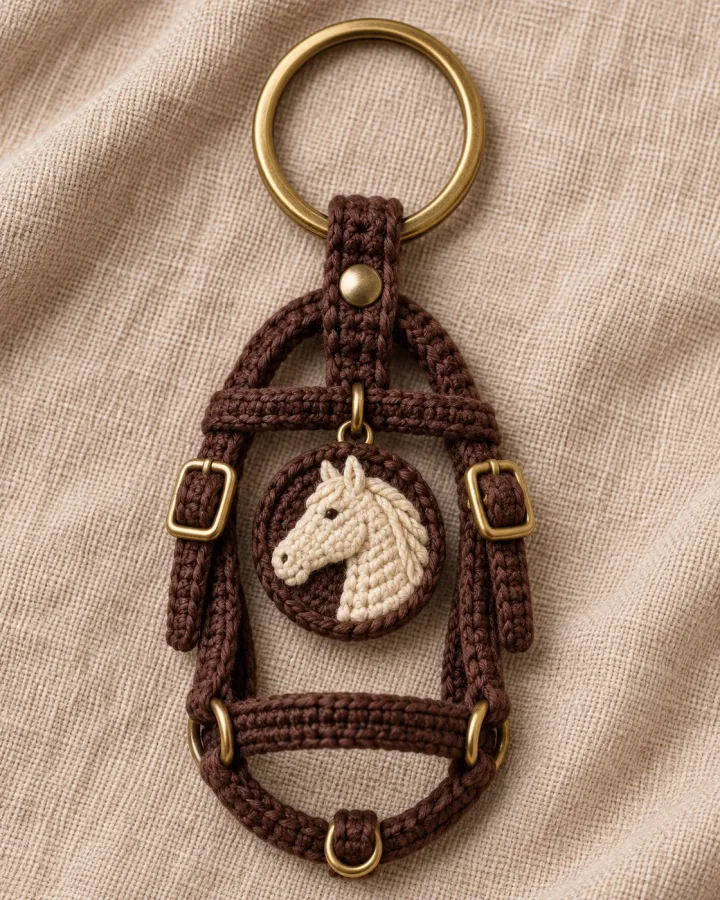
A miniature brown bridle silhouette is built from narrow crochet straps and a cream horsehead medallion. Brass-tone rings provide a practical finishing detail, turning equestrian tack imagery into a compact handmade key fob.
- LEVEL
- Intermediate
- TRY IT WITH
- Sport cotton: dark brown 25 yd, cream 8 yd; 2.5 mm hook; small metal key ring; tapestry needle; optional fabric stiffener
- FINISHING NOTE
- About 4 in long, not including the key ring.
Short Pattern
Abbreviations: ch chain · sc single crochet · sl st slip stitch · FO fasten off
- Straps: make four narrow chains in brown yarn and work a row of sl st back along each. Keep the strips firm and consistent; these become the noseband, cheek pieces and lower curve.
- Medallion: crochet a small brown oval with a cream horsehead applique in the center. Embroider a tiny eye and mane detail, keeping all ends secured on the reverse.
- Shape the bridle: lay the straps over a paper template in a simple headstall outline. Sew intersections with several passes, then attach the medallion at the center of the noseband.
- Wrap the top strap around a metal key ring and stitch it closed. Add small stitched loops to suggest buckles without using sharp or oversized hardware.
- Check every seam with a gentle pull. This miniature is decorative and should not be used on an animal or left within reach of a young child.
Assembly: Use sturdy cotton and reinforce the ring attachment. Keep the finished piece away from animal tack; it is a novelty accessory only.
Three Equestrian Motif Squares
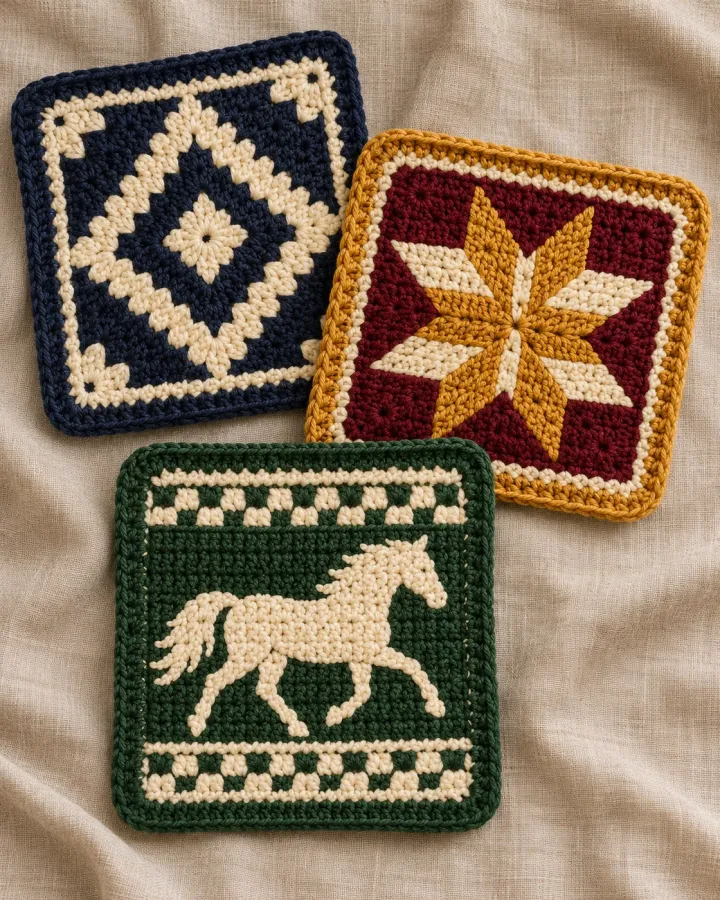
A navy diamond, a burgundy star and a forest-green horse silhouette give this trio of crochet squares a collected blanket-panel look. Their coordinated borders make them easy to combine while each square keeps its own graphic identity.
- LEVEL
- Intermediate
- TRY IT WITH
- Worsted cotton: navy 35 yd, cream 40 yd, burgundy 25 yd, gold 20 yd, forest 30 yd; 4 mm hook; tapestry needle
- FINISHING NOTE
- Each square measures about 6 in before blocking.
Short Pattern
Abbreviations: MR magic ring · ch chain · sc single crochet · hdc half double crochet · dc double crochet · sl st slip stitch · FO fasten off
- Square base: begin each motif with a center ring or short chain. Work the chosen color pattern in rounds, placing 3 dc in each corner space to keep the square flat.
- Diamond square: alternate navy and cream rounds, using long surface stitches to outline a centered diamond. Keep each color change at a corner so the join is less visible.
- Star square: work a burgundy center and create eight cream-and-gold points with clusters of dc. Add a gold round around the star, then square the corners with extra stitches.
- Horse square: crochet a forest-green background and embroider a cream running-horse silhouette using a simple chart or surface duplicate stitch. Add a cream inner border and a dark outer round.
- Block all three squares to the same measurement. Join with mattress stitch or a neat sc seam, matching corner stitches carefully before weaving in the ends.
Assembly: Use a grid chart for the horse silhouette and count each row before changing colors. These motifs can become a cushion front, blanket panel or wall textile.
Chestnut Horse Silhouette Banner
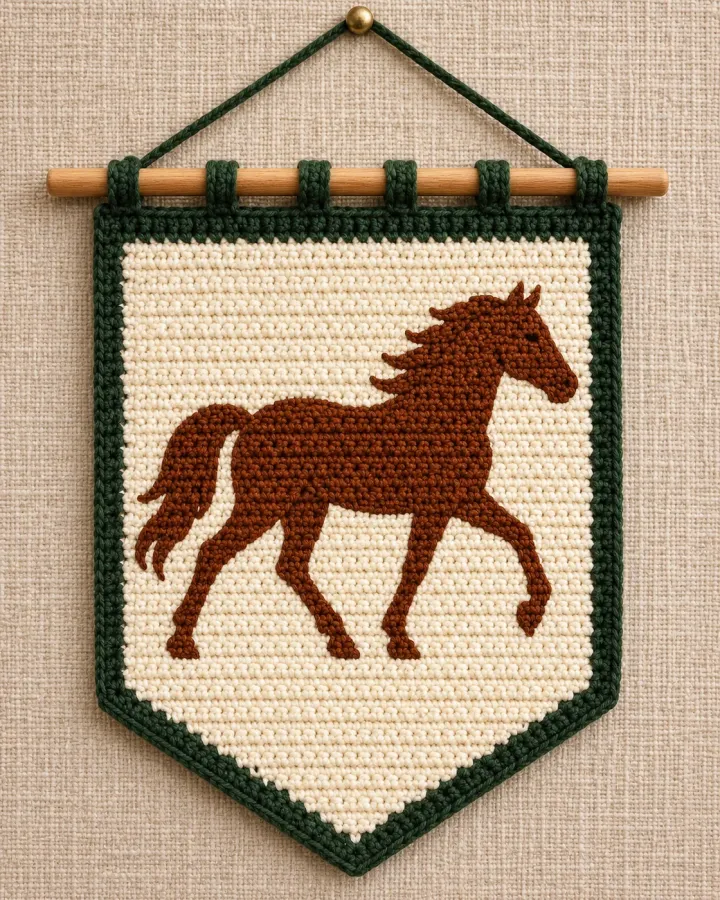
A galloping chestnut horse stands out against a cream crochet panel framed in forest green. The pointed lower edge and wooden dowel give this simple wall banner a vintage stable-room feel without relying on printed fabric.
- LEVEL
- Intermediate
- TRY IT WITH
- Worsted cotton: cream 65 yd, chestnut 35 yd, forest green 30 yd; 4 mm hook; 10 in dowel; tapestry needle
- FINISHING NOTE
- About 9 in tall and 8 in wide.
Short Pattern
Abbreviations: ch chain · sc single crochet · hdc half double crochet · dc double crochet · dec decrease · sl st slip stitch · FO fasten off
- Panel: chain 29 in cream and work 28 sc across for 26 rows. Decrease one stitch at both ends on every other row near the bottom to form a shallow point.
- Border: join forest green and work sc evenly around all four sides, placing 3 stitches at each lower corner. Add a second round if you want a stronger frame.
- Horse motif: use surface crochet or duplicate stitch to build a chestnut silhouette. Start with the body, then add the neck, head, legs and tail as separate connected shapes.
- Top edge: fold over a narrow channel and sew it down, leaving the ends open for a dowel. Crochet a hanging loop from each upper corner and reinforce them securely.
- Weave in ends and steam-block lightly from the back. Insert the dowel and hang the banner as indoor decor, keeping it clear of heat sources.
Assembly: Sketch the horse outline on a gridded chart first. Embroidered duplicate stitch is easier to control than carrying several yarn colors across the panel.
Forest Green Champion Rosette
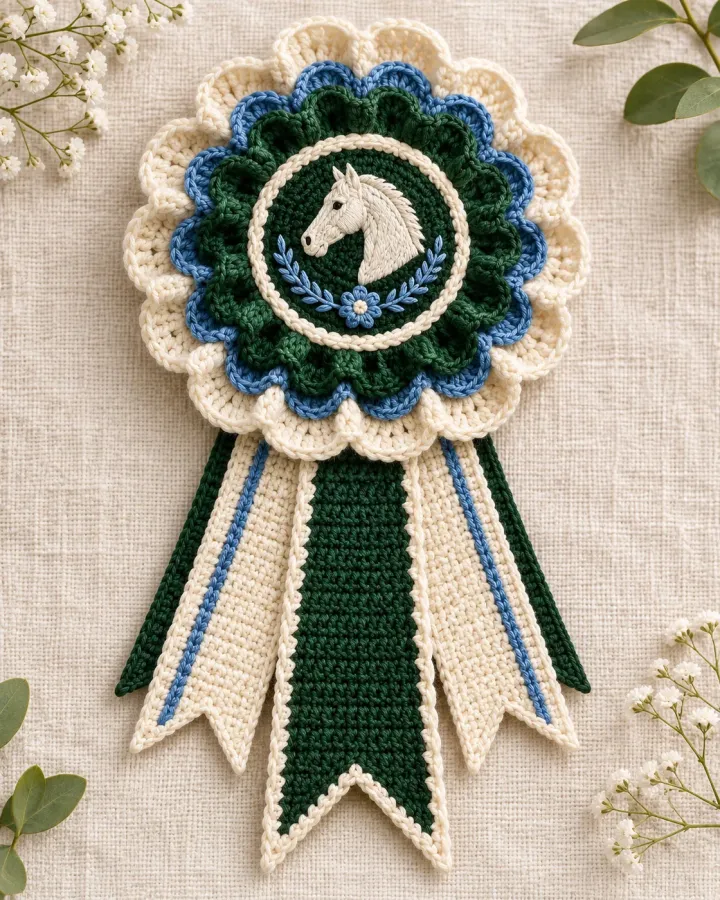
Forest-green and cream ruffles with a narrow blue accent create a fresh take on a traditional champion ribbon. A white horse profile and tiny floral stitches sit in the center, making this decorative rosette distinct from classic red award styles.
- LEVEL
- Intermediate
- TRY IT WITH
- DK cotton: forest green 45 yd, cream 35 yd, muted blue 15 yd; 3 mm hook; tapestry needle; felt backing
- FINISHING NOTE
- About 6.5 in across and 9 in long.
Short Pattern
Abbreviations: MR magic ring · sc single crochet · hdc half double crochet · dc double crochet · inc increase · sl st slip stitch · FO fasten off
- Medallion: crochet a cream circle to 30 stitches. Work one round in blue, then make a green ruffle by placing 3 dc in each stitch of the previous round.
- Center emblem: embroider a small white horse profile using satin stitch and outline the neck with short blue chain stitches. Keep the detail centered and flat.
- Tails: crochet three narrow strips in green and cream. Work sc rows until each is about 5 inches long, then shape the ends with a centered V-notch or angled decreases.
- Layer the tails behind the medallion and sew through all layers. Add a second smaller ruffle if desired, keeping the circle flat rather than overly gathered.
- Finish with a felt backing and secure all yarn ends. Use as shelf decor or attach a safe hanging loop; do not use as official competition equipment.
Assembly: The contrast between green and blue is strongest when the center stays mostly cream. Block the tails before attaching them.
Four Crochet Horseshoe Coasters
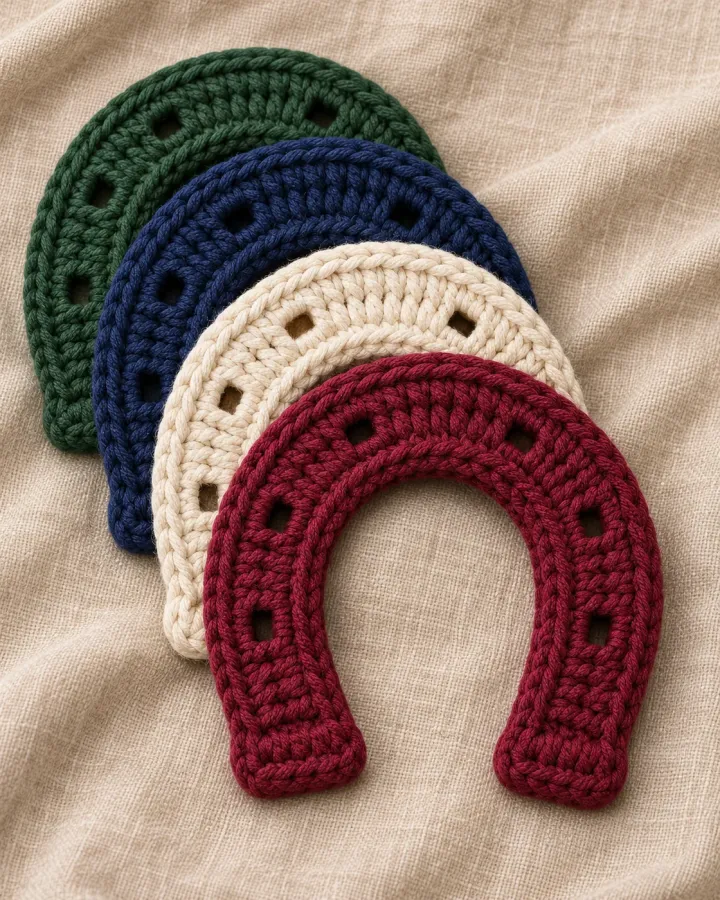
Four sturdy horseshoe-shaped coasters in jewel-toned cotton bring a subtle equestrian accent to a desk or coffee table. Their simple open center keeps the familiar silhouette clear, while dense stitches help each piece lie flat.
- LEVEL
- Confident beginner
- TRY IT WITH
- Worsted cotton: burgundy, cream, navy and forest green, about 20 yd each; 4 mm hook; tapestry needle
- FINISHING NOTE
- Each coaster is about 5 in wide.
Short Pattern
Abbreviations: ch chain · sc single crochet · hdc half double crochet · inc increase · sl st slip stitch · FO fasten off
- Base: chain 18 and work sc back along the chain. At the end, place 3 sc in the last chain, then continue along the underside to create a narrow curved strip.
- Shape the U: work in rows, increasing at both ends of the lower curve and keeping the upper arms straight. Leave a clear opening at the top instead of joining into a ring.
- Add thickness: work a second matching layer and join the two shapes with sc around the outer edge. Add a few stitches across the ends to round them neatly.
- Make four coasters in different colors. Weave in ends and block each piece under a light weight until the arms stay flat and the curve is even.
- Use cotton yarn and hand-wash gently if needed. Let the coaster dry completely before placing it under a drink.
Assembly: A tight gauge helps coasters hold their shape. Avoid acrylic yarn if the pieces will be used with hot mugs.
Stable-Side Crochet Craft Organizer
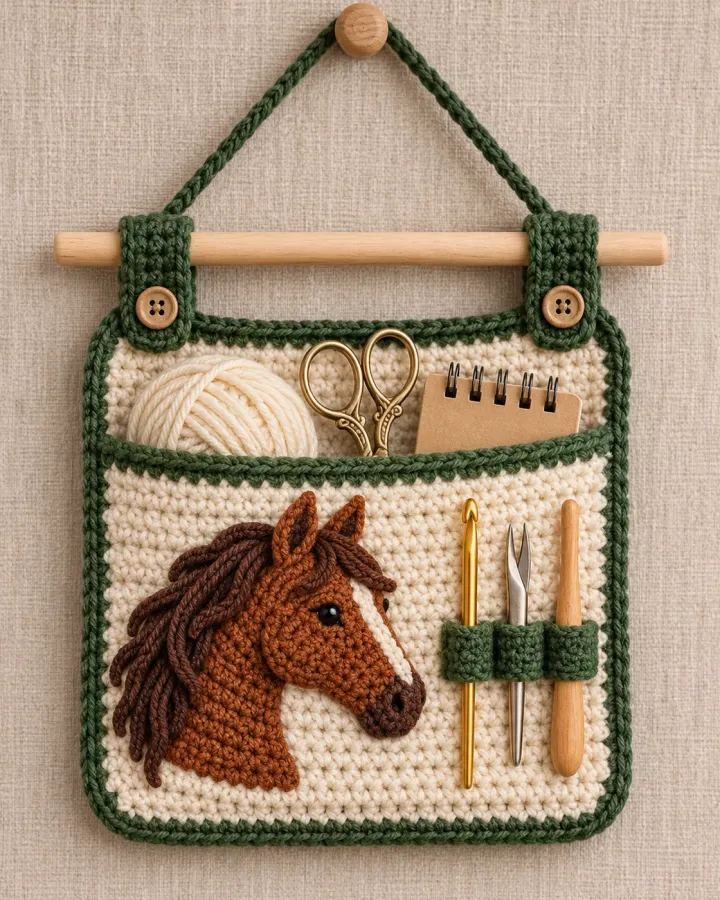
A cream-and-green hanging pocket decorated with a chestnut horse profile keeps hooks, scissors and small notions together. The broad pocket and stitched tool loops turn stable inspiration into a practical organizer for a crochet corner.
- LEVEL
- Intermediate
- TRY IT WITH
- Worsted cotton: cream 90 yd, forest green 50 yd, chestnut 25 yd; 4 mm hook; 9 in dowel; tapestry needle
- FINISHING NOTE
- About 10 in wide and 12 in tall.
Short Pattern
Abbreviations: ch chain · sc single crochet · hdc half double crochet · inc increase · sl st slip stitch · FO fasten off
- Back panel: chain 34 in cream and work 33 sc across for 36 rows. Add a forest-green border with 2 sc in each corner so the rectangle remains square.
- Pocket: make a second rectangle 33 stitches wide and 20 rows tall. Add a green top edge, then sew the sides and bottom to the lower half of the back panel.
- Tool loops: crochet short chains sized for hooks and pens, then sew each loop to the pocket front with firm anchoring stitches. Keep scissors in a separate, secure pocket.
- Horse applique: sew a chestnut horsehead motif onto one side of the pocket. Work the mane in short surface stitches and embroider the eye with dark yarn.
- Fold a sleeve over a dowel at the top and sew it down. Add a hanging cord, test the weight with lightweight craft items, and avoid overloading the organizer.
Assembly: Reinforce the dowel sleeve and pocket corners. This organizer is for craft supplies, not heavy stable tools or animal-care equipment.
Quilted Saddle-Pad Wall Decor
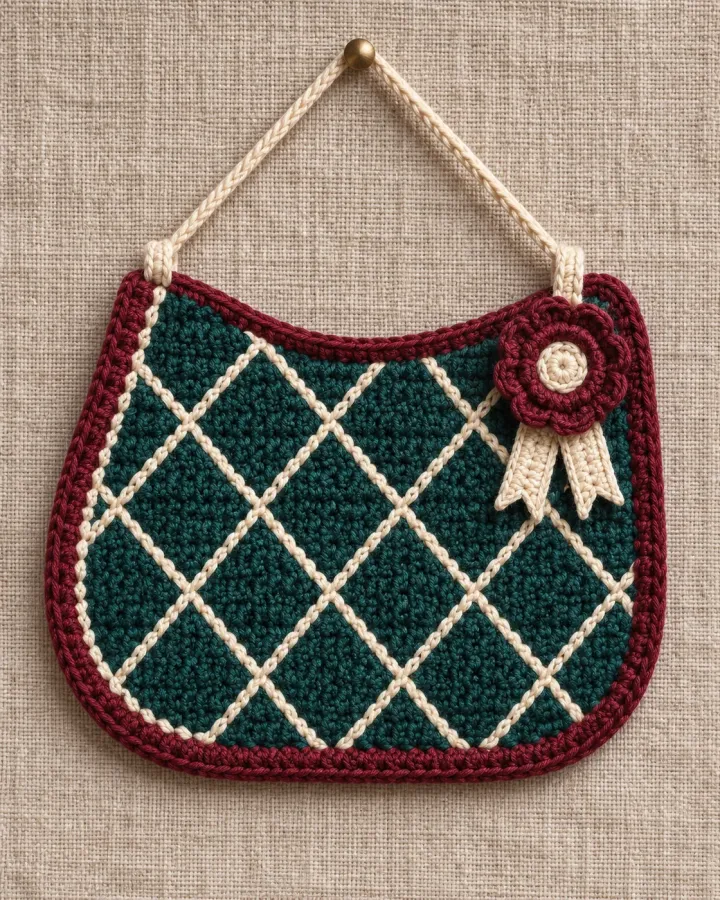
A miniature deep-teal saddle-pad shape features cream diamond quilting, a burgundy border and a small rosette accent. The compact textile borrows the geometry of equestrian gear but is designed solely as a decorative wall piece.
- LEVEL
- Intermediate
- TRY IT WITH
- Worsted cotton: deep teal 65 yd, cream 25 yd, burgundy 20 yd; 4 mm hook; 6 in dowel; tapestry needle
- FINISHING NOTE
- About 8 in wide and 7 in tall.
Short Pattern
Abbreviations: ch chain · sc single crochet · hdc half double crochet · dc double crochet · dec decrease · sl st slip stitch · FO fasten off
- Pad shape: chain 27 in teal and work sc rows for 22 rows. Decrease one stitch at each end for the final four rows to create a gently tapered lower edge.
- Quilting: use cream surface slip stitches to draw diagonal lines across the panel, spacing them evenly to form a diamond grid. Keep the lines loose enough that the fabric does not pucker.
- Border: work a firm burgundy round of sc around the outside, adding extra stitches at the corners and top curves. Make a second panel if you prefer a padded look.
- Rosette: crochet a small burgundy circle, add a cream center and two short tails, then sew it near one upper corner as an accent.
- Add a narrow hanging sleeve across the back and slide in a dowel. Block flat and display indoors; this miniature is not a functional saddle pad.
Assembly: Keep the diamond grid centered and the border even. Use a light dowel so the upper edge does not stretch over time.
Blush Horseshoe Award Rosette
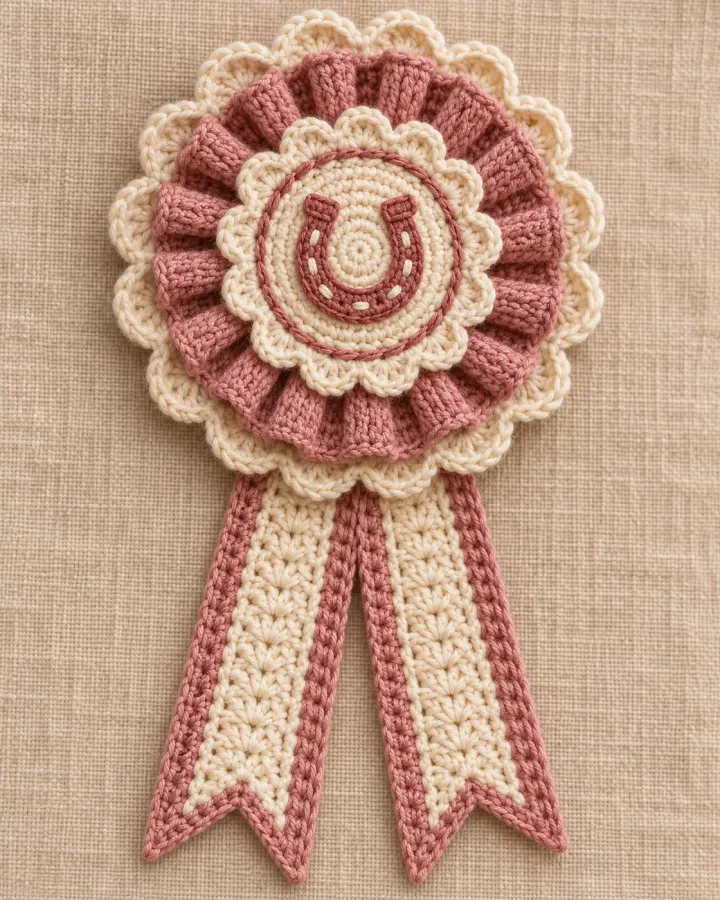
Dusty-rose and cream ruffles surround a raised horseshoe emblem on this soft award-style ribbon. Long pointed tails complete the keepsake shape, offering a romantic palette that feels different from traditional stable colors.
- LEVEL
- Intermediate
- TRY IT WITH
- DK cotton: dusty rose 55 yd, cream 40 yd; 3 mm hook; tapestry needle; felt backing
- FINISHING NOTE
- About 8 in long including tails.
Short Pattern
Abbreviations: MR magic ring · sc single crochet · hdc half double crochet · dc double crochet · inc increase · sl st slip stitch · FO fasten off
- Base: crochet a cream circle and increase evenly to 36 stitches. Work a back-loop round, then join dusty rose to the front loops and make a ruffle with 3 dc in each stitch.
- Emblem: crochet a short curved strip in rose and shape it into a U horseshoe. Sew it to the cream center and add tiny cream stitches to suggest nail marks.
- Tails: make two cream strips with rose edging. Work sc rows, taper the ends with decreases, and add a small center ribbon in rose for extra depth.
- Pinch the tail tops slightly and sew them behind the medallion. Add another small cream ruffle between the center and outer layer if you want more dimension.
- Attach a felt backing and weave in all yarn ends. Display as decor or use a securely sewn hanging loop rather than a sharp pin.
Assembly: Steam-block the tails lightly and keep the horseshoe emblem raised but firmly attached. Avoid sharp brooch findings around children.
Sage Stable Horseshoe Sign
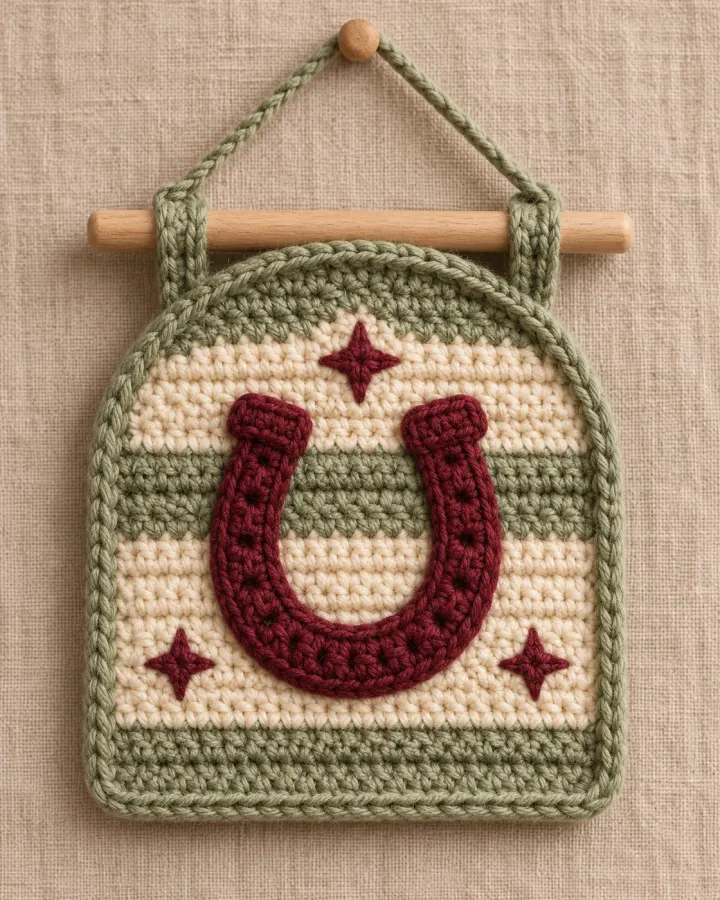
Sage stripes, a burgundy horseshoe and tiny star details give this arched crochet sign a calm cottage-stable feel. A short dowel and braided hanger finish the piece, making it an easy accent for a craft nook or entryway.
- LEVEL
- Confident beginner
- TRY IT WITH
- Worsted cotton: sage 55 yd, cream 45 yd, burgundy 20 yd; 4 mm hook; 8 in dowel; tapestry needle
- FINISHING NOTE
- About 9 in tall and 8 in wide.
Short Pattern
Abbreviations: ch chain · sc single crochet · hdc half double crochet · inc increase · dec decrease · sl st slip stitch · FO fasten off
- Panel: chain 27 in cream and work sc rows for 20 rows. Change to sage for two rows, then return to cream to make a simple horizontal stripe pattern.
- Shape the arch: decrease one stitch at each end over the final six rows, then work a short flat top so the panel can be attached to a dowel sleeve.
- Horseshoe: crochet a narrow burgundy strip and shape it into a U. Sew it to the center with small stitches, then embroider three tiny star or nail details around it.
- Border the sign with sage sc, adding extra stitches around the lower corners. Fold the top edge over the dowel and sew a channel wide enough to slide it through.
- Add a braided hanging loop and weave in all ends. Block the sign flat and hang it indoors as a decorative accent.
Assembly: Keep the top sleeve snug around the dowel and add a fabric backing if the sign curls. The horseshoe is a decorative motif only.
Make thoughtfully and check as you go.
Yarn, hook size and personal tension can change the finished scale. Count every round, stuff gradually and use embroidered features instead of safety eyes when making toys for children under three.