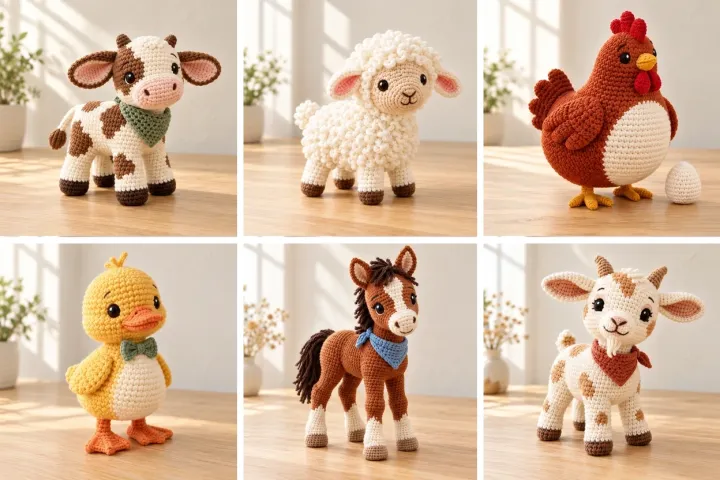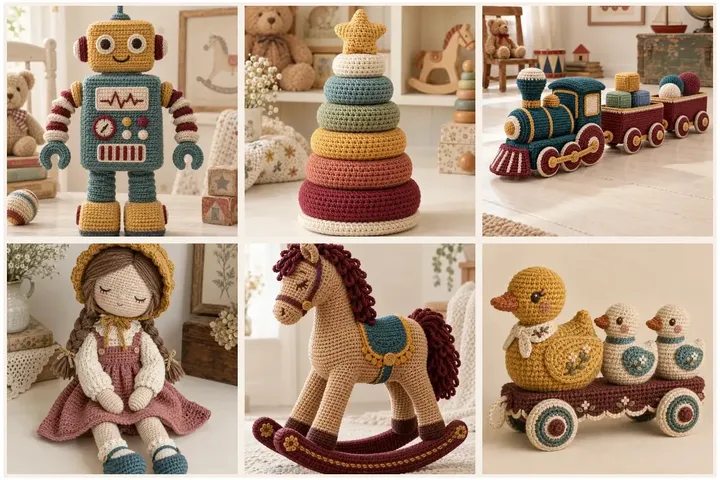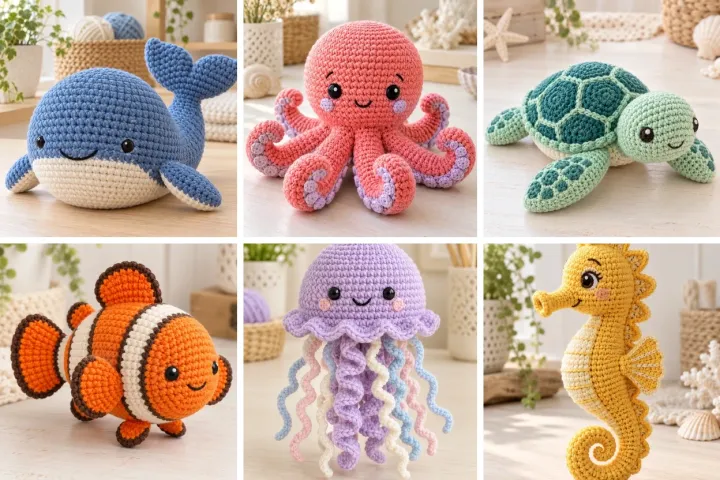
Bring an undersea collection to life with fourteen original crochet companions in ocean blue, coral, sea-glass green and sunny yellow. Each design includes its own image, materials, approximate finished size and step-by-step construction. Work amigurumi in continuous rounds unless a step says to turn, mark each round and use a hook small enough to keep stuffing from showing. Increase and decrease evenly around the shape; stitch counts are included to help you check your progress. The AI-created photos are visual design references, and these original instructions have not been sample-tested, so adjust shaping to your yarn and tension. Embroider facial features and securely sew every fin and accessory. These are decorative designs, not safety-tested toys; small parts may be unsuitable for young children.
Blue Whale with Little Wave
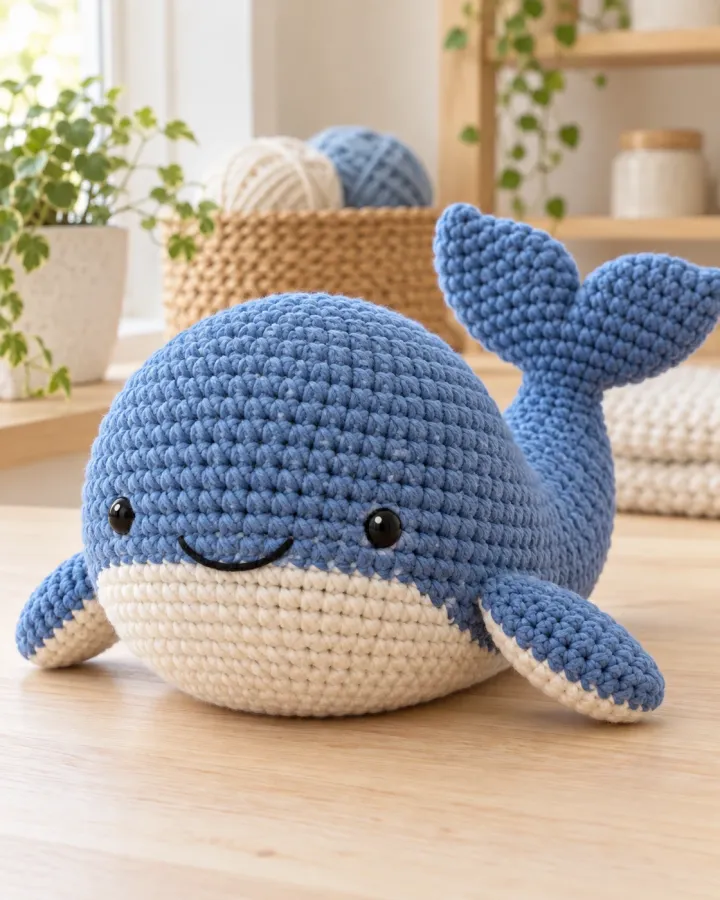
A plump blue whale pairs a cream belly with small side fins and a lifted tail. Its rounded shape and cheerful embroidered smile make it an inviting first project for an ocean-themed amigurumi collection.
- LEVEL
- Confident beginner
- TRY IT WITH
- DK cotton: blue 150 yd, cream 55 yd, black 3 yd; 2.75 mm hook; washable filling
- FINISHING NOTE
- Approx. 7 in long.
Short Pattern
Abbreviations: MR magic ring · ch chain · sc single crochet · inc 2 sc in one stitch · dec invisible decrease over 2 stitches · BLO back loop only · sl st slip stitch
- Body: in blue, make 6 sc in MR. Increase by 6 each round to 36 (12, 18, 24, 30, 36). Work 8 rounds at 36. Begin shaping the nose by decreasing evenly to 30, 24 and 18, adding filling as you go; keep the belly side slightly flatter.
- Continue decreasing to 12 and 6, stuff firmly but not so tightly that stitches spread, then close. The finished shape should be a horizontal oval with a gently tapered front and rounded rear. Adjust the last two rounds if the nose looks too pointed.
- Belly: ch 8 in cream and sc around both sides of the chain, placing 3 sc in each end stitch. Work 4 oval rounds, adding increases only at the curved ends. Stop when the patch covers the lower front; pin in place and sew all around with small even stitches.
- Tail: make two blue flukes. For each, ch 5; work hdc, dc, 3 dc in the final chain, then dc and hdc along the other side. Make a second matching panel, join around the edge and leave the base open for sewing.
- Fins: make two small teardrop panels from MR 6, increase to 12, then work 2 rounds. Flatten and join the edge with sc. Sew to the lower sides, angled slightly back. Attach both flukes at the rear and reinforce each join through several body stitches.
- Embroider two eyes above the belly line and a short curved smile with black yarn. Add a few blue surface stitches where the tail meets the body. Weave in every end and check that the whale balances on its belly.
Assembly: Sew through both layers of each fin and the body fabric. Use embroidered eyes rather than plastic pieces for this decorative keepsake.
Coral Octopus
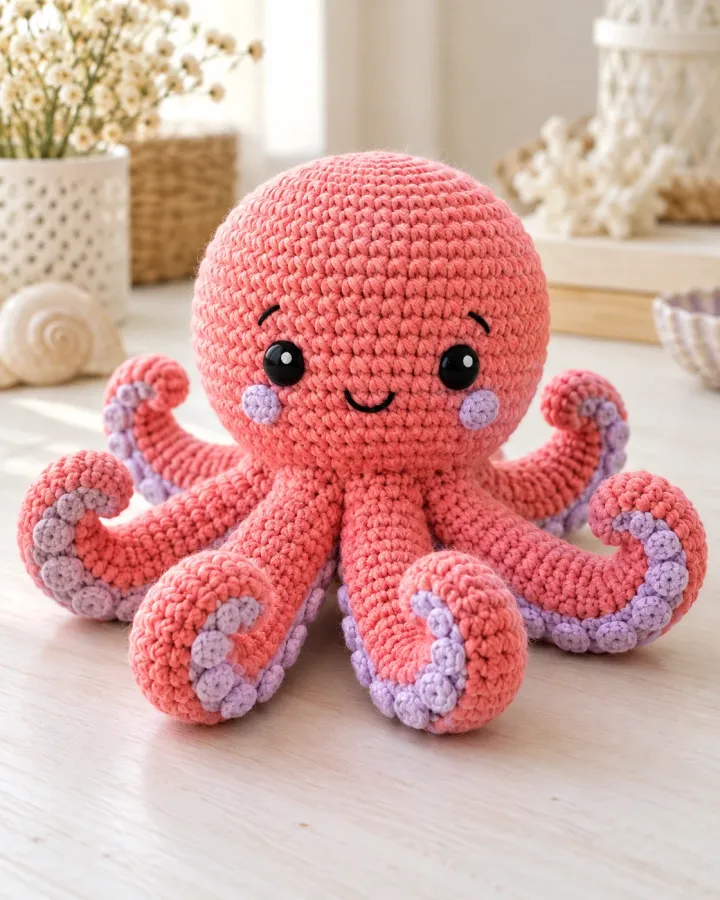
A cheerful coral octopus spreads eight rounded tentacles beneath a softly domed head. Lavender accents trace the curls, while embroidered eyes and a small smile give this playful ocean friend a bright, expressive face.
- LEVEL
- Intermediate
- TRY IT WITH
- DK cotton: coral 180 yd, lavender 35 yd, black 3 yd; 2.75 mm hook; filling
- FINISHING NOTE
- Approx. 8 in across tentacles.
Short Pattern
Abbreviations: MR magic ring · sc single crochet · inc 2 sc in one stitch · dec invisible decrease over 2 stitches · BLO back loop only · sl st slip stitch
- Head: in coral, make 6 sc in MR. Increase evenly to 48 over the next 7 rounds. Work 8 rounds at 48, then decrease evenly to 42, 36, 30, 24, 18, 12 and 6. Add filling before the opening gets small; keep the lower edge broad and flat.
- Tentacles: make 8. Ch 26, then work 2 sc in each chain across to create a naturally curling strip. For a spiral, keep the increases consistent and do not pull the yarn too tightly. Fasten off with a long tail and lightly flatten the first few stitches.
- Optional contrast: surface slip stitch a lavender line down the center of each tentacle, or crochet the last 4 stitches in lavender. Repeat the same placement on all eight so the accents look balanced.
- Arrange four tentacles across the front and four behind the head. Pin them in pairs at equal distances around the lower edge; sew each base securely across several stitches, leaving the curled lengths free.
- Embroider the eyes on the lower half of the head, with a short curved smile centered between them. Add small coral cheek stitches and hide the ends inside the stuffed head.
- Set the octopus on a flat surface and adjust the tentacle curls so it sits steadily. Secure any loose accent strand and make sure no small loop is long enough to catch easily.
Assembly: Keep the tentacle bases closely spaced and strongly sewn. This decorative design has long curled limbs and is not a safety-tested toy.
Sea-Glass Sea Turtle
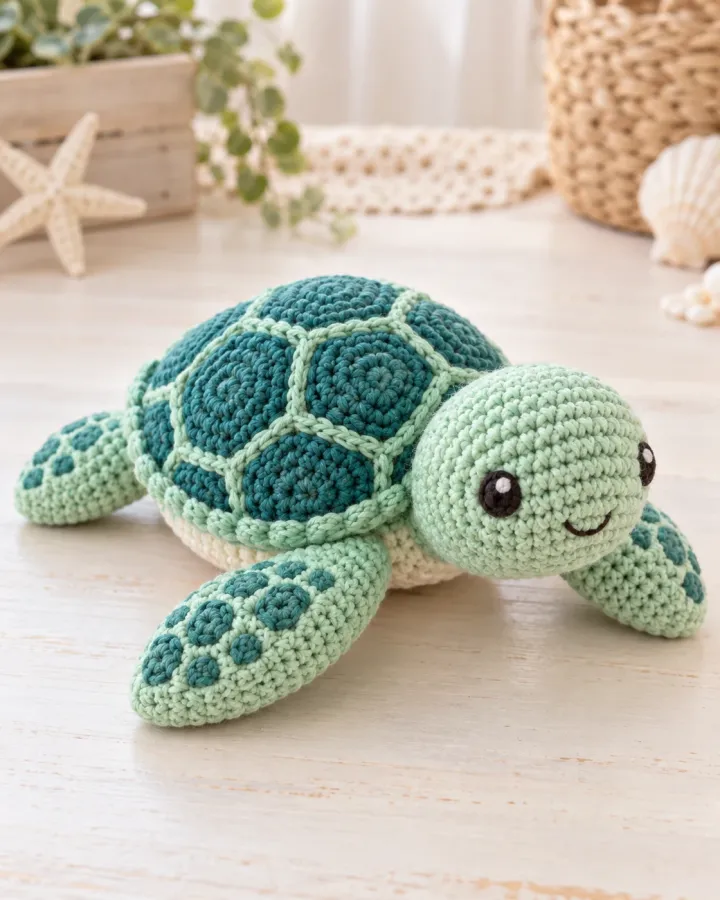
A mint-green sea turtle carries a richly textured teal shell above four rounded flippers. Pale outlines separate the shell plates, and its gentle expression makes the design feel calm, friendly and unmistakably ocean-inspired.
- LEVEL
- Intermediate
- TRY IT WITH
- DK cotton: mint 130 yd, teal 100 yd, pale aqua 35 yd, cream 20 yd; 2.75 mm hook; filling
- FINISHING NOTE
- Approx. 8 in long.
Short Pattern
Abbreviations: MR magic ring · sc single crochet · inc 2 sc in one stitch · dec invisible decrease over 2 stitches · sl st slip stitch · BLO back loop only
- Shell top: in teal, make 6 sc in MR. Increase evenly to 48 over 7 rounds, then work 5 rounds at 48. To suggest plates, surface slip stitch one center line and four short spokes in pale aqua; keep the lines flat and evenly spaced.
- Shell underside: crochet a second teal circle, increasing to 48 and working 2 plain rounds. Place the two shell pieces together with a thin layer of filling between them; join around the edge with sc, stopping to attach the flippers.
- Flippers: make four mint panels. Ch 7, work sc 5, 3 sc in the last chain, then sc 4 along the opposite side. Work 3 oval rounds with increases at each rounded end, then flatten and lightly stuff each piece.
- Position two flippers at the front sides and two at the rear sides, angled outward. Insert each open base between the shell layers before finishing the joining round; sew again through the shell edge for extra strength.
- Head: in mint, make 6 sc in MR and increase to 30. Work 6 rounds at 30, then decrease to 24 and 18. Stuff, leave the opening and sew the head to the front of the shell, centered between the front flippers.
- Embroider the eyes and a small smile. Add a cream belly patch if desired, crocheted as a flat oval from a short chain and sewn across the underside without covering the flipper seams.
Assembly: Check that all four flippers sit at matching angles and the turtle rests without tipping. Keep the shell lines decorative and smooth.
Little Clownfish
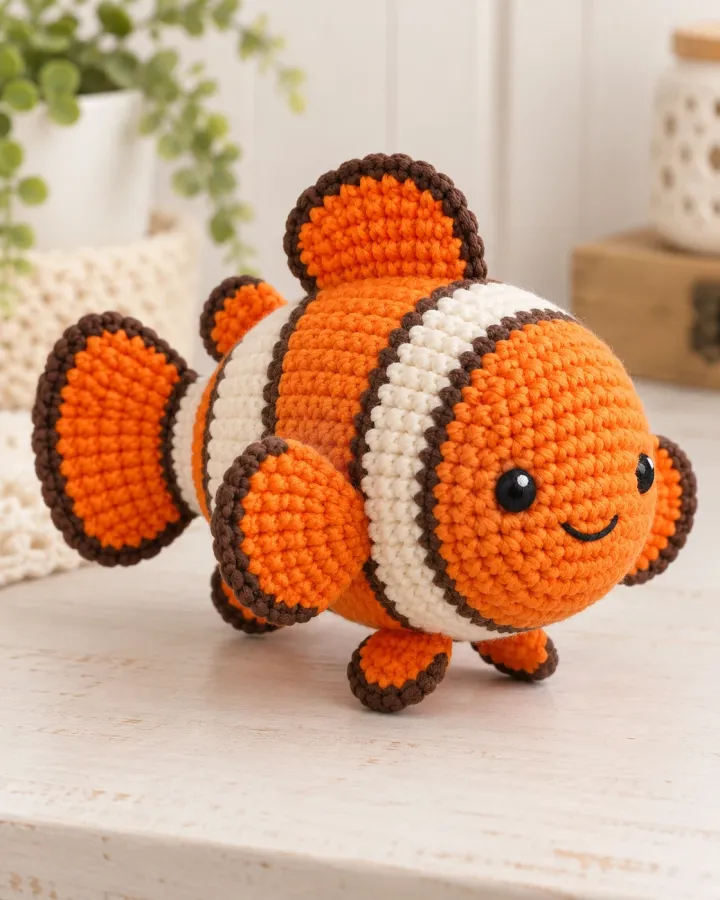
Bright orange stitches and bold cream bands give this little clownfish its recognizable look. Rounded fins frame the plump body, while a tiny embroidered smile adds charm to a colorful shelf display or ocean-themed gift.
- LEVEL
- Confident beginner
- TRY IT WITH
- DK cotton: orange 120 yd, cream 55 yd, cocoa 15 yd, black 3 yd; 2.75 mm hook; filling
- FINISHING NOTE
- Approx. 6.5 in long.
Short Pattern
Abbreviations: MR magic ring · sc single crochet · inc 2 sc in one stitch · dec invisible decrease over 2 stitches · BLO back loop only · sl st slip stitch
- Body: in orange, make 6 sc in MR and increase evenly to 42. Work 5 rounds at 42. For the first band, work 2 rounds cream, carrying the orange yarn neatly inside; work 5 orange rounds, 2 cream rounds, then 4 orange rounds.
- Decrease evenly to 36, 30, 24 and 18, maintaining orange across the back and cream over the belly where possible. Stuff firmly in small amounts so the body stays oval; finish decreasing to 12 and 6, then close.
- Band edging: with cocoa, surface slip stitch along both sides of each cream band. Keep the outline narrow and even. Where the band wraps the body, use small embroidery stitches to make the stripe boundary continuous.
- Tail: crochet two orange fan-shaped panels. Ch 5 and work dc increases into the last chain, then continue along the opposite side. Join the panels, flatten and attach at the tapered back of the body.
- Make two upper and two lower fins using short foundation chains and rows of sc, hdc and dc to form a rounded fan. Add cocoa edging, then sew the fins in mirrored positions, one pair high and one pair low.
- Embroider a small eye on each visible side and a short smile near the nose. Stitch the tail and fins through several body stitches, then check that the fish rests steadily on its side.
Assembly: Carry color changes inside the fabric without pulling tight. The cocoa outlines are stitched details; do not use glued or plastic trim.
Pastel Jellyfish
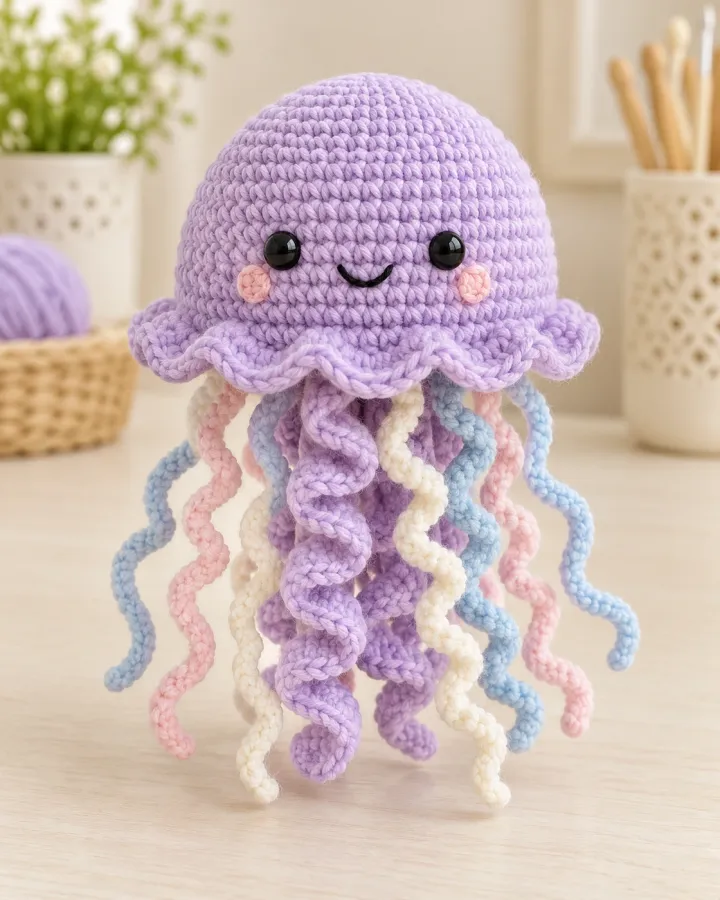
A lavender bell with a softly scalloped rim floats above a cluster of pastel tentacles. Raised crochet texture and tiny embroidered eyes keep the silhouette sweet and simple, like a little jelly drifting through calm water.
- LEVEL
- Confident beginner
- TRY IT WITH
- DK cotton: lavender 130 yd, pale pink 25 yd, blue 25 yd, cream 25 yd, black 3 yd; 2.75 mm hook; filling
- FINISHING NOTE
- Approx. 8 in including tentacles.
Short Pattern
Abbreviations: MR magic ring · sc single crochet · inc 2 sc in one stitch · dec invisible decrease over 2 stitches · BLO back loop only · sl st slip stitch · ch chain
- Bell: in lavender, make 6 sc in MR and increase evenly to 48 over 7 rounds. Work 4 rounds at 48, then crochet one round in BLO to define the rim. Decrease to 42 and 36; add filling, keeping the opening broad and shallow.
- Decrease to 30, 24, 18, 12 and 6, adding the last filling before closing. The bell should be a rounded dome with a visibly wider lower edge. Add a little more stuffing if the crown collapses.
- Scalloped rim: rejoin lavender at the front loop left by the BLO round. Repeat *sl st, ch 3, 2 dc in the same stitch, skip 1 stitch* around. Space the scallops evenly and keep them soft rather than stiff.
- Tentacles: make 8–10 short chains in lavender, pink, pale blue and cream. Work 2 sc in each chain to curl them, or use a flat chain for a straighter strand. Vary lengths slightly but avoid very long dangling loops.
- Sew each tentacle base to the underside of the bell, distributing colors around the center. Add a few shorter straight strands between the curled ones for texture and balance.
- Embroider eyes and a tiny smile above the rim. Secure each end inside the bell and arrange the tentacles so the jellyfish can sit upright on its scalloped edge.
Assembly: All tentacles are sewn onto the underside and ends are buried inside the bell. Keep strands short and firmly attached.
Golden Seahorse
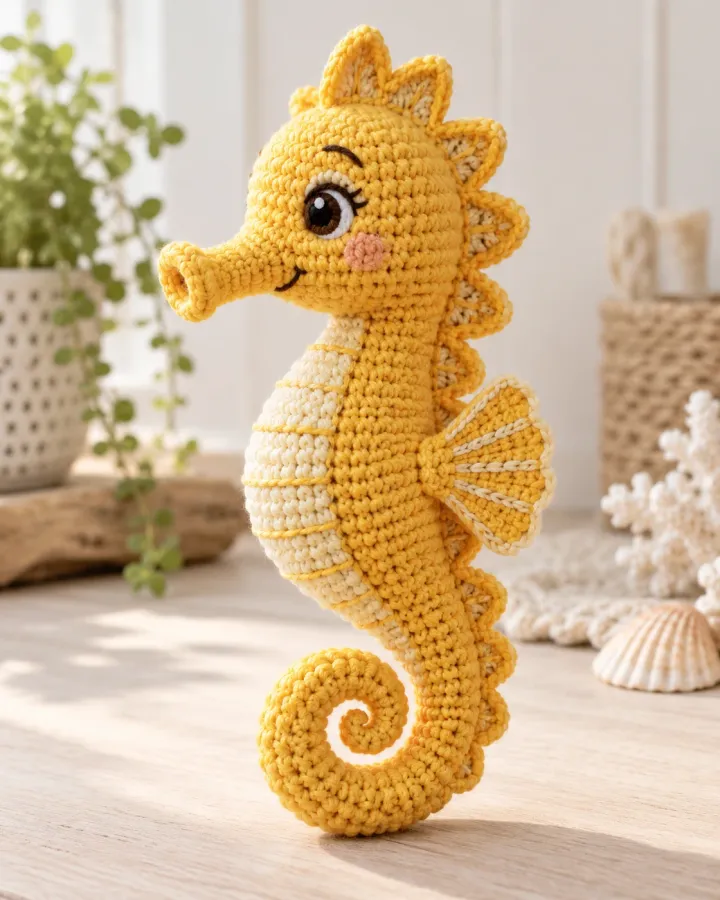
A sunny golden seahorse curls its tail beneath a long curved body, with a neat snout and delicate fin ridges. Cream accents and embroidered eyes bring definition to this graceful, distinctive amigurumi sea creature.
- LEVEL
- Advanced
- TRY IT WITH
- DK cotton: golden yellow 180 yd, cream 35 yd, orange 20 yd, black 3 yd; 2.5 mm hook; filling
- FINISHING NOTE
- Approx. 8 in tall.
Short Pattern
Abbreviations: MR magic ring · sc single crochet · inc 2 sc in one stitch · dec invisible decrease over 2 stitches · sl st slip stitch · ch chain
- Trunk: begin at the curled tail tip with MR 6 in yellow. Increase to 12, then work 6 rounds at 12. Increase to 18 over the next round and work 5 rounds. Gradually increase to 24 for the belly, then decrease toward 18 at the chest.
- Shape the neck by working 6 rounds at 18, then 5 rounds at 12. Add filling as you go, using the blunt end of a hook to reach the narrow neck. Bend the stuffed tail into a loose curl and tack its inner curve with matching yarn.
- Head: continue increasing to 18 and work 4 rounds. For the snout, crochet a small tube from MR 6, work 5 rounds at 6, lightly stuff and sew to the front of the head. Angle it slightly downward.
- Dorsal fin: make a flat yellow strip from ch 14 and return with alternating sc and hdc to create small points. Sew along the back from shoulder to tail, easing the strip around the curved shape.
- Side fin: crochet two small fan panels in yellow and cream. Join their edges and sew one to each side near the middle of the trunk. Add short orange surface stitches along the back ridge for a subtle accent.
- Embroider one visible eye on each side and a short curved brow. Secure the head, fin edges and tail curl with hidden stitches; adjust filling to keep the seahorse upright without flattening its profile.
Assembly: Keep the snout tube narrow and the tail curl open enough to remain soft. The curved shape relies on secure hidden tacking.
Sky-Blue Dolphin
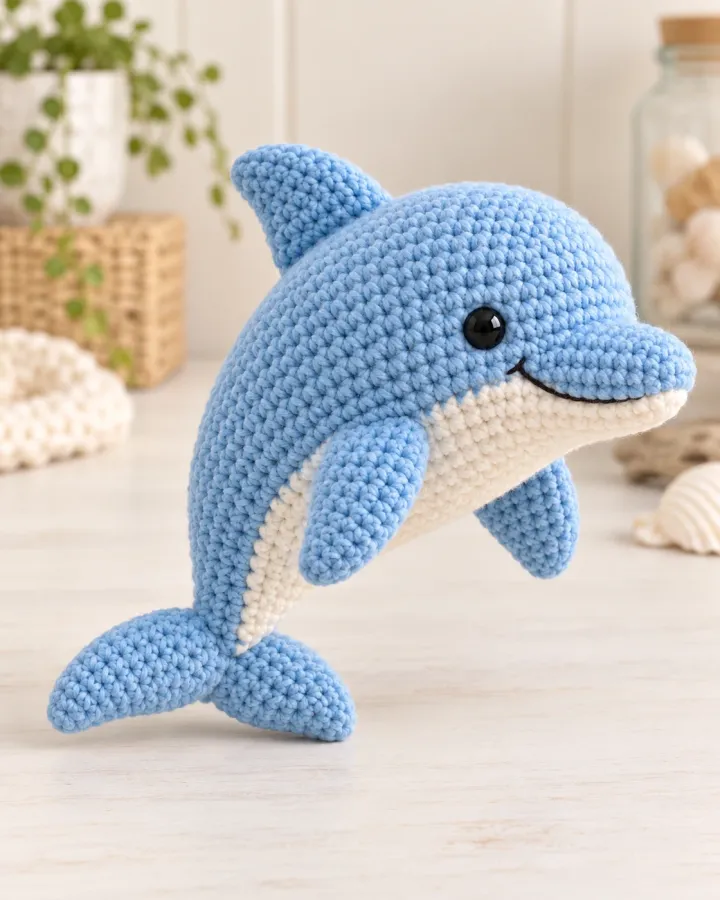
A sky-blue dolphin arches forward with a pale belly, rounded flippers and a lifted tail. Its smooth silhouette and small stitched smile keep the shaping approachable while giving the finished figure an energetic ocean-ready pose.
- LEVEL
- Intermediate
- TRY IT WITH
- DK cotton: sky blue 160 yd, cream 55 yd, black 3 yd; 2.75 mm hook; filling
- FINISHING NOTE
- Approx. 8 in long.
Short Pattern
Abbreviations: MR magic ring · sc single crochet · inc 2 sc in one stitch · dec invisible decrease over 2 stitches · sl st slip stitch · ch chain
- Body: start at the nose with MR 6 in blue. Increase evenly to 30, then work 5 rounds at 30. Increase to 36 for 4 rounds, then decrease gradually to 30 and 24 as the body narrows toward the tail.
- Continue to 18 stitches for 3 rounds, stuffing the wider body firmly and leaving the tail end flexible. Decrease to 12 and 6, close the opening and curve the body slightly upward by stitching the underside of the tail base to itself.
- Belly: crochet a cream oval from ch 8, working around both sides and adding increases at each end for 5 rounds. Pin along the lower body from behind the nose to the tail, then sew around the full edge with small stitches.
- Dorsal fin: make two blue triangular panels with a broad base and sloped top. Join around the edge, lightly fill the base and sew to the top center of the body, slightly behind its midpoint.
- Side flippers: crochet two flat teardrops from ch 6, increase at the rounded end and work 2 more rounds. Flatten and sew to either side, angled back. Make two small tail flukes from the same shape and attach symmetrically.
- Embroider eyes and a short smile near the nose. Use hidden stitches to lift the tail into a gentle arc and check that both flippers are aligned before weaving in the final ends.
Assembly: Use the same number of rounds for matching fins. Keep all shaping stitches tight so the filling remains hidden.
Hermit Crab in a Spiral Shell
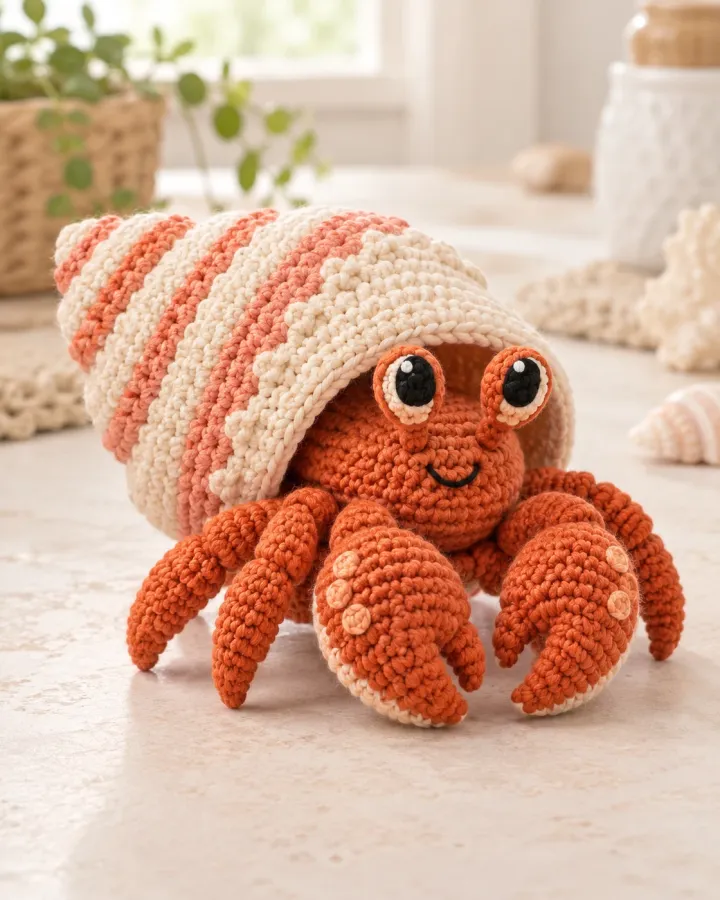
A rust-orange hermit crab peeks from a cream-and-coral spiral shell, lifting two rounded claws above its little legs. Contrasting shell rows and bright eyes turn this compact design into a lively undersea character.
- LEVEL
- Intermediate
- TRY IT WITH
- DK cotton: rust 100 yd, coral 50 yd, cream 70 yd, brown 20 yd, black 3 yd; 2.75 mm hook; filling
- FINISHING NOTE
- Approx. 6.5 in tall.
Short Pattern
Abbreviations: MR magic ring · sc single crochet · inc 2 sc in one stitch · dec invisible decrease over 2 stitches · sl st slip stitch · ch chain
- Crab body: in rust, make 6 sc in MR and increase to 30. Work 5 rounds at 30, then decrease to 24 and 18. Add filling and close to 12 stitches; leave a long tail for sewing the body partly inside the shell.
- Shell base: in cream, make 6 sc in MR and increase evenly to 48. Work 8 rounds at 48, changing to coral for two rounds and back to cream for two rounds to form broad spiral-like bands.
- Shape the shell opening by decreasing across the last two rounds to 42 and 36 stitches. Add a lightly stuffed smaller inner coil starting with MR 6 and increasing to 30; sew it in a curved spiral across one side of the shell.
- Make two claws from MR 6, increase to 18, work 3 rounds, then flatten the front and sew a short line to create a pincer notch. Make four short legs as narrow tubes, stuff only at the base and close each end.
- Sew claws at the front of the crab body, then attach the four legs underneath in mirrored pairs. Position the body at the shell opening and stitch its back firmly to the inside edge.
- Add embroidered eyes on two short crocheted stalks. Secure the stalk bases through the body and shell edge, keeping the eyes even. Weave in ends and check the crab sits without rolling forward.
Assembly: The shell is a decorative, stuffed component sewn to the crab. Reinforce the body seam and both eye stalks.
Silver Baby Seal
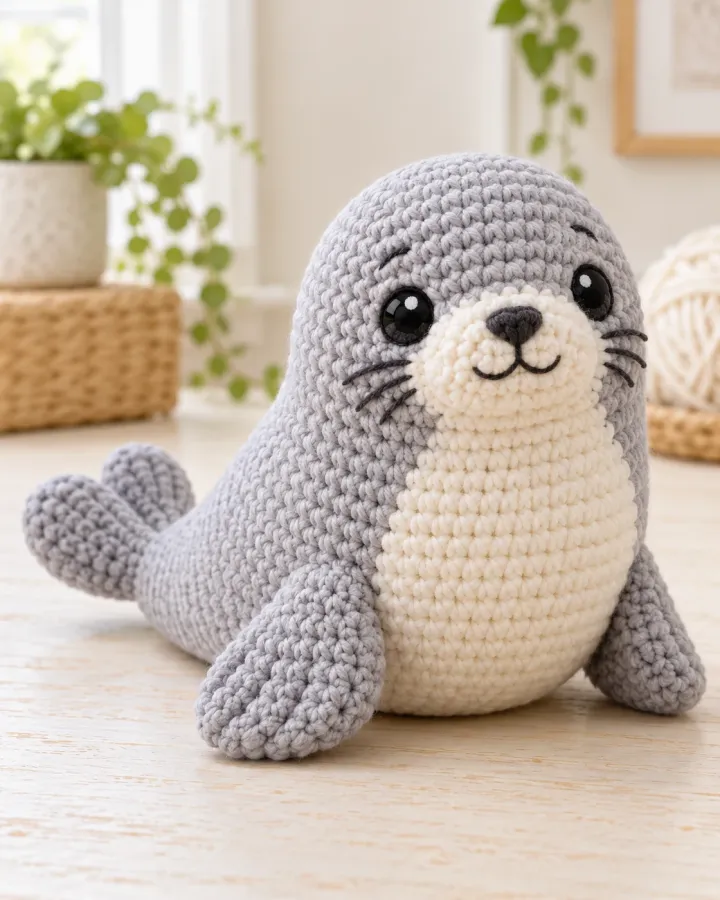
A plump silver-gray seal pup rests on its cream belly with small side flippers and bright embroidered eyes. Simple rounded shaping and a soft neutral palette make this an especially cuddly addition to the ocean collection.
- LEVEL
- Confident beginner
- TRY IT WITH
- DK cotton: silver gray 150 yd, cream 55 yd, black 3 yd; 2.75 mm hook; filling
- FINISHING NOTE
- Approx. 7 in long.
Short Pattern
Abbreviations: MR magic ring · sc single crochet · inc 2 sc in one stitch · dec invisible decrease over 2 stitches · sl st slip stitch · ch chain
- Body: in gray, make 6 sc in MR and increase evenly to 42. Work 8 rounds at 42, then decrease to 36, 30, 24, 18, 12 and 6. Fill gradually, keeping the underside broad and the head end slightly narrower.
- Muzzle: in cream, make 6 sc in MR and increase to 18. Work 2 rounds at 18, then decrease to 12. Add a small amount of filling and sew to the front of the face, leaving the upper edge slightly raised.
- Belly: crochet a long cream oval beginning with ch 9. Work around both sides and increase at the ends for 6 rounds. Pin along the lower half of the body and sew all around, easing the oval to fit without puckering.
- Flippers: make four flat gray teardrops. Ch 6, work sc along one side, 3 sc in the last chain and sc back along the other side. Work 2 rounds with increases at the rounded end; flatten and close each base.
- Sew two flippers to the upper sides and two near the rear, all pointing outward. Embroider eyes above the muzzle, a small black nose and two short whisker marks on each cheek.
- Check the seal lies level on its belly. Add a few short gray surface stitches at the flipper seams and weave every end inside the stuffed body.
Assembly: Keep the four flippers flat and evenly matched so the seal rests steadily. Embroider all facial details.
Teal Stingray
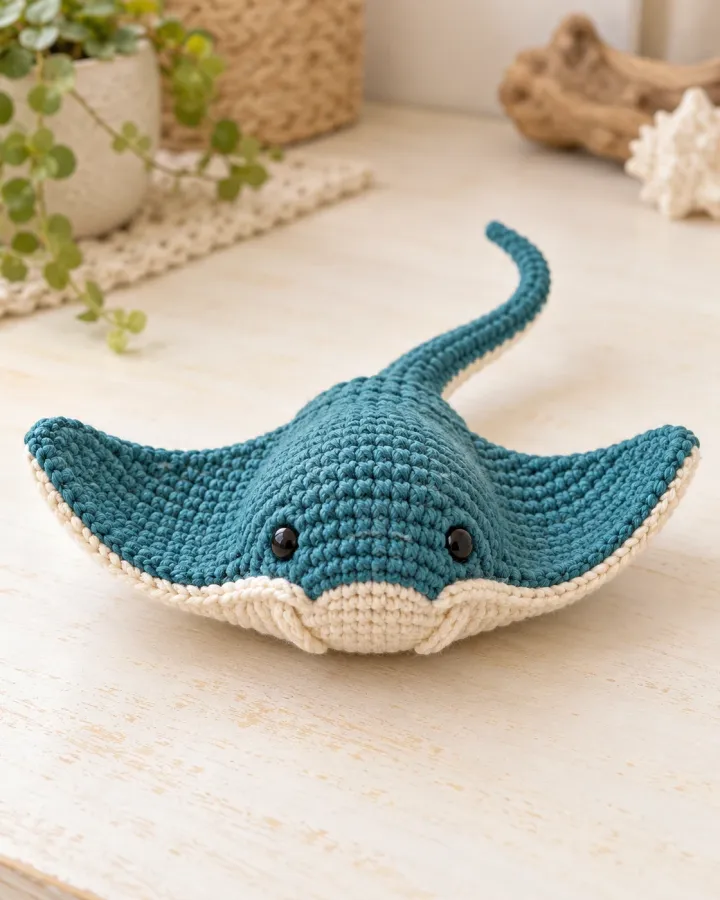
A teal stingray spreads broad diamond-shaped wings above a pale underside, with tiny eyes and a soft tapered tail. Its flat profile and subtle stitch texture give the design a graceful silhouette that stands apart from rounder sea friends.
- LEVEL
- Intermediate
- TRY IT WITH
- DK cotton: teal 150 yd, cream 65 yd, deep teal 20 yd, black 3 yd; 2.75 mm hook; light filling
- FINISHING NOTE
- Approx. 8 in wide.
Short Pattern
Abbreviations: MR magic ring · ch chain · sc single crochet · inc 2 sc in one stitch · dec invisible decrease over 2 stitches · sl st slip stitch
- Top panel: ch 3 in teal and work 2 sc in the second chain. Turn, ch 1 and increase at both ends of each row until the row reaches 34 stitches, forming the wide wing span.
- Work 5 rows even, then decrease one stitch at each end every other row to shape the rear point. Continue until 8 stitches remain. Fasten off and weave in the starting tail.
- Underside: repeat the panel in cream, matching row counts exactly. Place the panels together and join around the edge with sc, adding only a thin layer of filling in the center disk so the wings remain flexible.
- At the rear point, continue with teal to crochet a narrow tail tube of 6 sc for 12 rounds. Lightly stuff the first half and taper the tip by decreasing to 4 stitches before closing.
- Add two small teal side fins if desired, crocheted as flat triangles and sewn just behind the eyes. Embroider the eyes near the front edge and add two short curved lines for a gentle smile.
- Block the wings flat while damp, then allow them to dry fully. Check the joining seam for gaps and reinforce the tail where it emerges from the body.
Assembly: Use minimal filling so the broad wings stay flat. The tail is soft yarn and contains no wire.
Coral Red Lobster
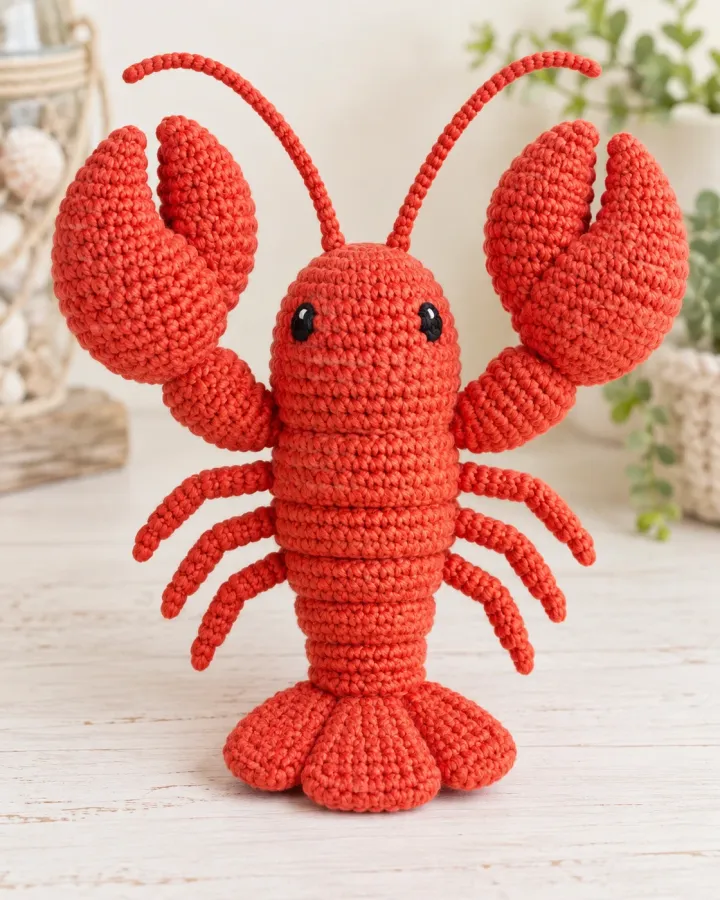
A vivid coral lobster raises two oversized rounded claws above a segmented body and tiny walking legs. Its strong color and playful proportions create a bold focal point among the softer blues and pastels in the collection.
- LEVEL
- Intermediate
- TRY IT WITH
- DK cotton: coral red 180 yd, cream 25 yd, black 3 yd; 2.75 mm hook; filling
- FINISHING NOTE
- Approx. 8 in long.
Short Pattern
Abbreviations: MR magic ring · sc single crochet · inc 2 sc in one stitch · dec invisible decrease over 2 stitches · sl st slip stitch · ch chain
- Body: crochet a red oval starting with ch 8 and working around both sides. Increase at each end to 36 stitches, work 5 rounds even, then decrease gradually to 24. Stuff firmly and close the rear end with a rounded seam.
- Tail fan: make five small red tapered panels from MR 6, increasing to 12 and working 2 rounds. Flatten and sew side by side across the back of the body, with the center panel extending slightly farther.
- Claws: make two matching pieces. Crochet an oval palm from MR 6 to 24, work 4 rounds, then decrease to 18 and stuff. Make a separate smaller pincer thumb from MR 6 to 12 over 3 rounds; attach it to the palm with a narrow gap to suggest the claw opening.
- Arms: make two narrow tubes of 8 sc for 12 rounds, stuff lightly and attach each claw to a tube. Sew the arm bases to the front sides of the body and anchor them through several stitches.
- Walking legs: make six short tubes in red, 6 sc for 8 rounds. Flatten the ends and sew three on each side beneath the body. Add two short antennae from chains worked back with slip stitches.
- Embroider small eyes and a curved mouth. Add cream segment lines across the underside with surface slip stitches and check that the claws are balanced without pulling the body to one side.
Assembly: The lobster contains many sewn-on parts. Reinforce each limb and claw base; this is decorative and not safety-tested for children.
Aqua Narwhal
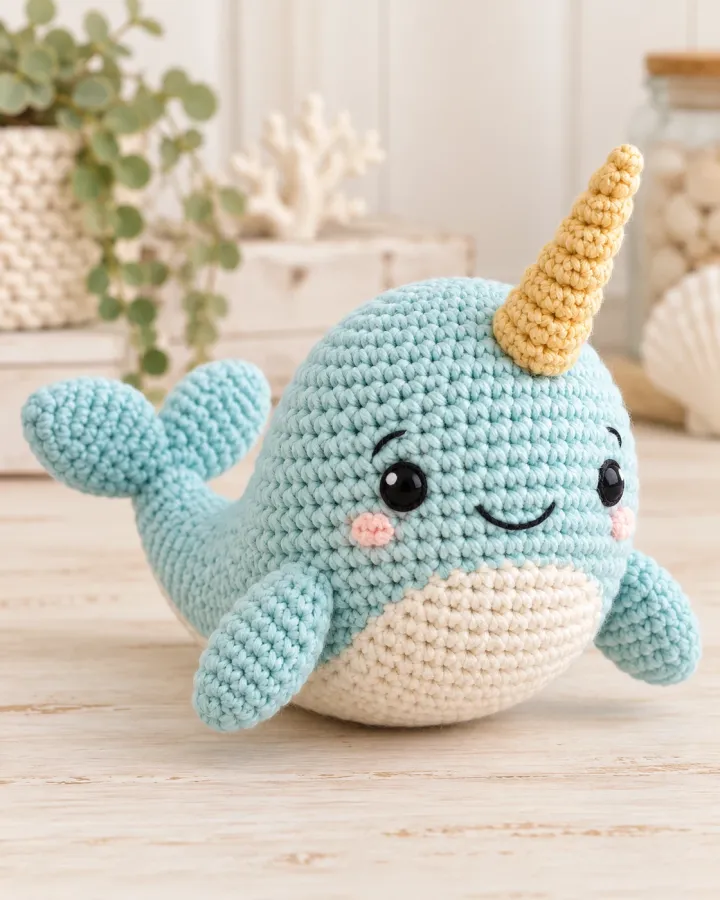
A pale-aqua narwhal carries a softly spiraled golden tusk above its cream belly and tiny rounded fins. The gentle whale-like shape keeps it cuddly, while the horn gives this ocean character its unmistakable storybook silhouette.
- LEVEL
- Intermediate
- TRY IT WITH
- DK cotton: pale aqua 145 yd, cream 55 yd, gold 25 yd, black 3 yd; 2.75 mm hook; filling
- FINISHING NOTE
- Approx. 7 in long; tusk about 2 in.
Short Pattern
Abbreviations: MR magic ring · sc single crochet · inc 2 sc in one stitch · dec invisible decrease over 2 stitches · sl st slip stitch · ch chain
- Body: in aqua, make 6 sc in MR and increase to 42. Work 7 rounds at 42, then decrease to 36, 30, 24, 18, 12 and 6. Stuff firmly, keeping the front gently rounded and the rear slightly tapered.
- Belly: make a cream oval from ch 8, work around the chain and increase at each end for 5 rounds. Pin centered on the underside and sew around the edge, easing the fabric so it lies flat.
- Tusk: in gold, make 6 sc in MR and work a narrow tube at 6 stitches for 12 rounds. Increase to 8 for 3 rounds, then taper back to 4 and close. Lightly stuff the base only.
- Create the spiral by wrapping a second gold strand around the tusk in a gentle diagonal and stitching it down every few rounds. Keep the cord flat against the surface and secure both ends inside the tube.
- Fins: make two aqua teardrops from a short chain and two tiny tail flukes. Flatten, edge with sc and sew to the sides and rear. Position the tusk above the forehead, angled slightly forward, and anchor its base through several rounds.
- Embroider eyes on both sides and a tiny smile. Check the tusk stands upright and shorten its filling if it leans; secure all ends inside the body.
Assembly: The tusk is soft yarn, not a rigid point. Stitch it broadly to the head and keep the tip gently rounded.
Peach Starfish
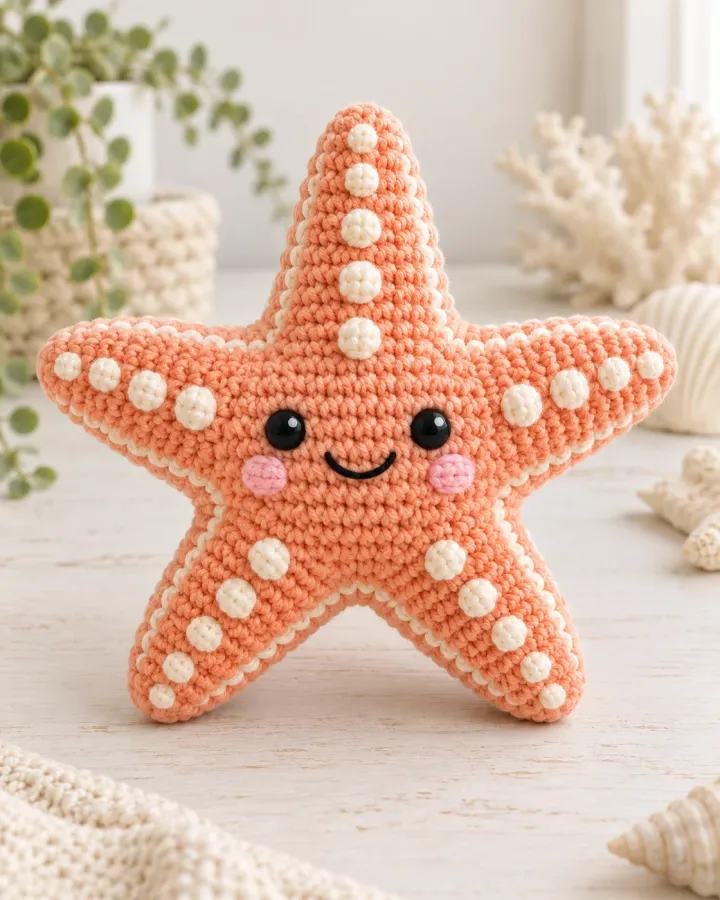
A warm peach starfish spreads five softly rounded arms around a textured center. Cream edge accents and a smiling embroidered face make this simple ocean motif feel friendly, while its flat shape displays neatly on a shelf.
- LEVEL
- Confident beginner
- TRY IT WITH
- DK cotton: peach 100 yd, cream 25 yd, black 3 yd; 2.75 mm hook; light filling
- FINISHING NOTE
- Approx. 7 in across.
Short Pattern
Abbreviations: MR magic ring · sc single crochet · inc 2 sc in one stitch · dec invisible decrease over 2 stitches · sl st slip stitch · ch chain
- Make two peach star panels. For each, begin with MR 10 and work 2 rounds at 10 for the center. To form an arm, work 6 stitches, turn, and decrease one stitch at each edge every other row until 2 remain; repeat from the next 2 center stitches.
- Repeat the short-row shaping five times around the center, leaving a few stitches between arm bases. Keep the arm lengths and decrease sequence identical so the points match when the panels are joined.
- Place the panels together and join with sc in peach, working around all five arms. Pause halfway around each arm to add a small amount of filling, pushing it toward the tip without stretching the stitches.
- Add cream surface slip stitches along one edge of each arm or work a cream round around the full outline. Keep the edging relaxed so the star stays flat and the points do not curl.
- Embroider two eyes, a small curved smile and optional cheek marks on the center. Stitch through both panels and bury the yarn ends inside before closing the final seam.
- Block the star gently into a five-point shape while damp. Allow it to dry flat and check that each arm is equally filled and the center remains smooth.
Assembly: Use light filling so the starfish keeps a flat display shape. Embroider all facial features securely.
Sunny Pufferfish
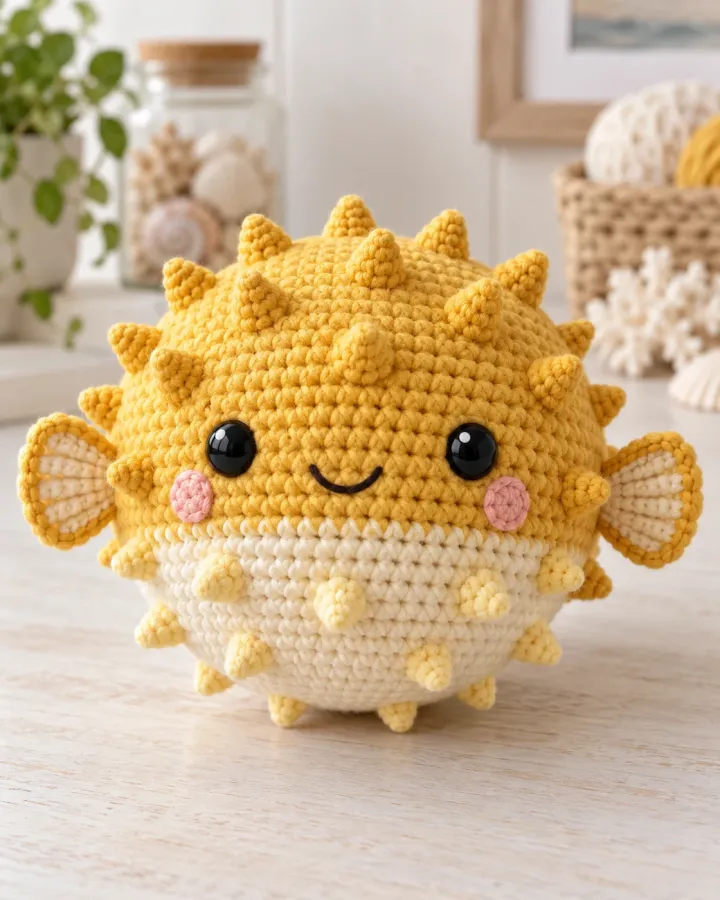
A round golden pufferfish shows off short, soft crochet spikes, tiny side fins and a pale belly. Its compact shape and bright color make the fish instantly recognizable, while the embroidered face keeps the look gentle and cheerful.
- LEVEL
- Intermediate
- TRY IT WITH
- DK cotton: golden yellow 160 yd, cream 45 yd, orange 20 yd, black 3 yd; 2.75 mm hook; filling
- FINISHING NOTE
- Approx. 6 in across.
Short Pattern
Abbreviations: MR magic ring · sc single crochet · inc 2 sc in one stitch · dec invisible decrease over 2 stitches · sl st slip stitch · ch chain · bobble 4-dc bobble
- Body: in yellow, make 6 sc in MR and increase evenly to 54. Work 8 rounds at 54, then decrease to 48, 42 and 36. Add filling steadily to create a round ball; keep the stitch fabric dense so no filling shows.
- Continue decreasing to 30, 24, 18, 12 and 6. Finish stuffing before the last two rounds, close the opening and roll the shape gently between your hands to distribute filling evenly.
- Belly: crochet a cream oval from ch 7, increasing at the ends for 5 rounds. Pin over the lower front and sew all around. Use small stitches so the patch lies smoothly over the curved surface.
- Spikes: work 4-dc bobbles directly onto the yellow surface, spacing them in staggered rows across the back and sides. Keep each bobble low and soft, and leave clear spaces around the face, fins and belly.
- Fins: make two small yellow fan panels using sc, hdc and dc along a short chain. Join the edges and sew one to each side. Make a small tail fan and anchor it at the rear center.
- Embroider the eyes and a tiny smile in black. Add short orange stitches to the tail edge, then check every bobble is secure and the fish rests without rolling.
Assembly: Use rounded bobbles rather than sharp points. Keep the design soft, with no wire or rigid inserts.
Make thoughtfully and check as you go.
Yarn, hook size and personal tension can change the finished scale. Count every round, stuff gradually and use embroidered features instead of safety eyes when making toys for children under three.