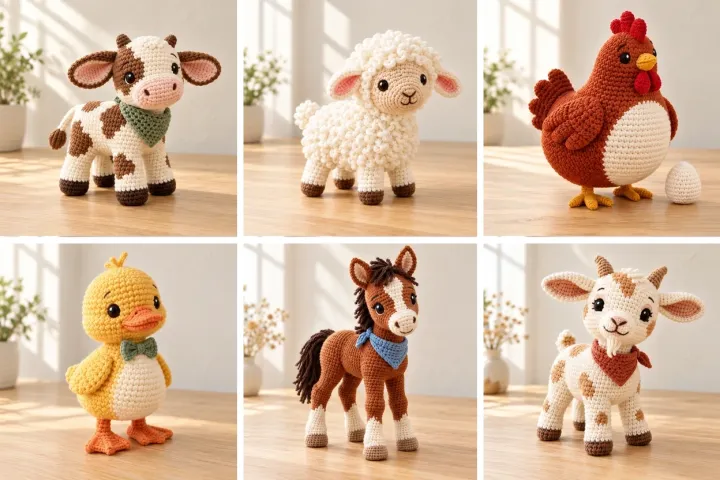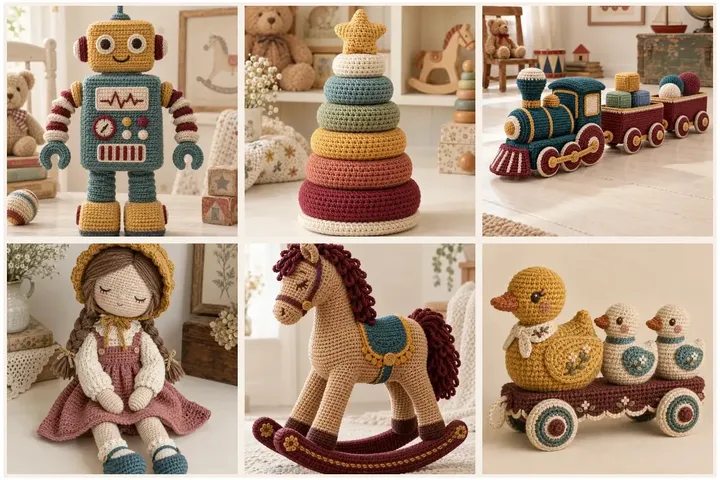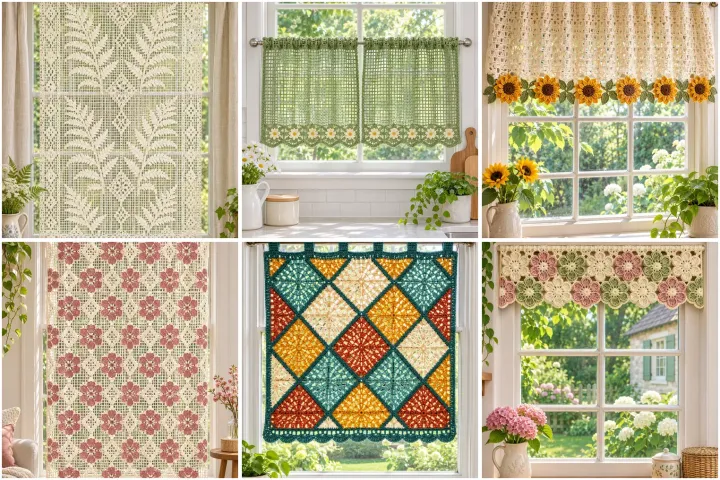
Bring handmade texture to a window with lightweight panels, café curtains, valances and small stationary accents. This collection avoids repeating the stepped Art Deco valance from the existing home-accessories article and instead explores botanical filet lace, motif joins, arched toppers and simple modern colorwork. Crochet curtains filter light but do not provide blackout coverage or reliable privacy at night; pair them with a suitable backing or existing curtain when needed. Measure the window and rod before beginning because hook placement and hardware vary. Use secure, short attachments for stationary decor, keep long cords and loops away from children, and ensure window treatments do not obstruct emergency exits or ventilation. These original pattern drafts are not sample-tested; adjust stitch counts and blocking to your yarn and gauge. The AI-created photographs are visual references for the finished concepts.
Ivory Fern Filet Curtain Panel
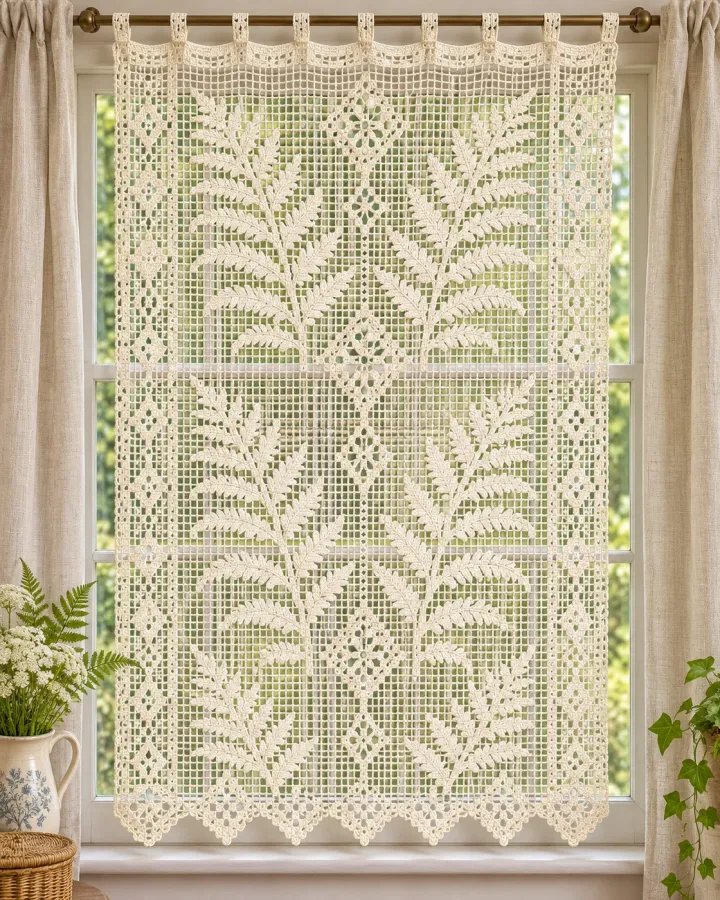
An ivory full-length filet panel combines open mesh with raised fern motifs that catch the daylight. Its airy pattern suits a bright cottage window and keeps the glass visible, while a firm top band helps the lightweight curtain hang evenly.
- LEVEL
- Intermediate
- TRY IT WITH
- Size 10 cotton thread: ivory 1,000–1,400 yd depending on window; 2.25 mm hook; stitch markers; blocking pins
- FINISHING NOTE
- Custom panel; sample shown about 24 × 48 in.
Short Pattern
Abbreviations: ch chain · sc single crochet · dc double crochet · ch-sp chain space · sl st slip stitch · FO fasten off
- Measure the finished panel width and length. Make a small filet swatch and block it first; use the blocked gauge to calculate the number of mesh squares needed across the window.
- Work a foundation chain in a multiple that matches the chart repeat, plus turning stitches. Crochet the lower border first, then build the panel upward in dc mesh blocks.
- Place fern motifs by filling selected mesh squares with dc clusters and shaping the leaves with small groups of stitches. Mark each repeat so the branches stay aligned from row to row.
- Finish with a reinforced top band. Add evenly spaced short tabs or a rod pocket sized to the curtain rod, keeping the openings consistent across the width.
- Wet-block the panel to its final measurements and let it dry fully before hanging. Open filet lace filters light but is not a privacy or blackout lining.
Assembly: Use a light thread and block carefully; the finished panel can stretch under its own weight. Confirm the rod and mounting hardware can support the textile.
Sage Daisy Café Curtain Pair
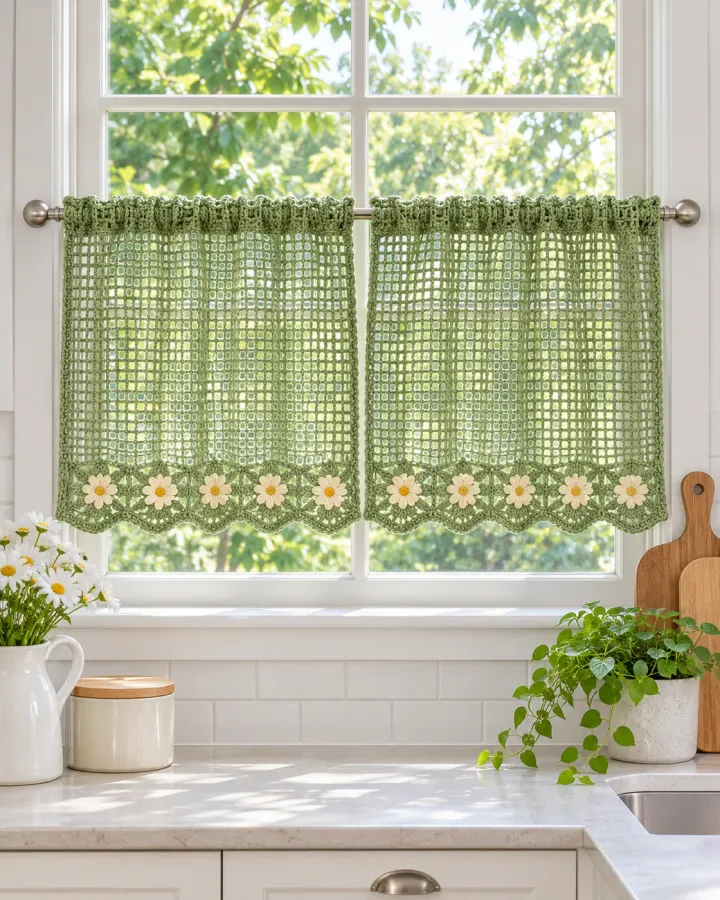
Two sage mesh café curtains cover the lower half of a kitchen window, finished with cream daisies along the scalloped hem. The short panels preserve the upper view while adding a fresh botanical detail in washable cotton.
- LEVEL
- Intermediate
- TRY IT WITH
- DK cotton: sage 300 yd, cream 40 yd; 3 mm hook; tapestry needle; blocking mat
- FINISHING NOTE
- Make each panel to half the rod width plus gathering ease; sample about 18 × 24 in.
Short Pattern
Abbreviations: ch chain · sc single crochet · hdc half double crochet · dc double crochet · ch-sp chain space · sl st slip stitch · FO fasten off
- Measure the lower window section and divide the desired coverage into two panels. Add about 10 percent width for a soft gather and swatch the mesh before calculating the chain.
- Work each panel from the lower edge upward in repeating mesh rows. Keep the side edges solid with a narrow sc border so the fabric does not curl.
- Crochet small cream daisies separately using a tight center ring and five or six petal loops. Make enough for an even row across both lower hems.
- Sew the flowers to the solid border with matching thread, then add a scalloped edge between motifs. Weave in ends on the reverse and block both panels to identical dimensions.
- Make short rod tabs or a narrow casing at the top. Hang the pair on a café rod and keep the panels clear of a sink tap, stove or other heat source.
Assembly: Keep each panel light and washable. The mesh offers filtered light, not full privacy; add a separate lining if needed.
Botanical Cream Window Valance
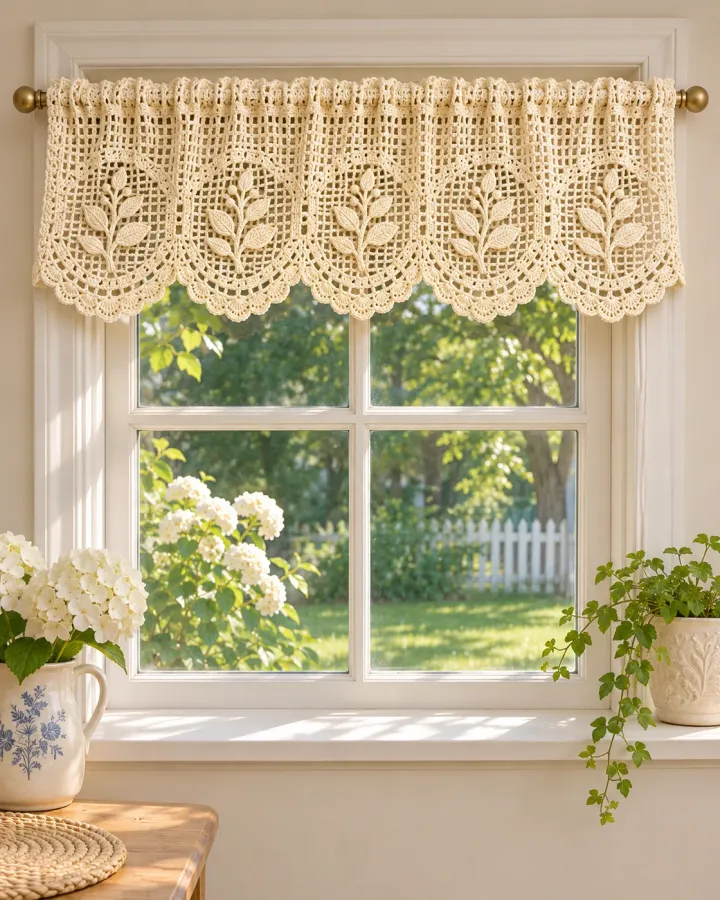
A warm-cream valance pairs airy mesh with a repeating leaf border and tidy scallops. Designed to sit across the upper window, it leaves most of the glass open and offers a softer botanical alternative to geometric toppers.
- LEVEL
- Confident beginner
- TRY IT WITH
- DK cotton: cream 260 yd, sage 25 yd; 3.5 mm hook; tapestry needle
- FINISHING NOTE
- Custom width; sample about 36 × 12 in.
Short Pattern
Abbreviations: ch chain · sc single crochet · hdc half double crochet · dc double crochet · tr treble crochet · sl st slip stitch · FO fasten off
- Measure the rod span and choose a repeat that divides evenly into the finished width. Crochet a gauge strip and block it before making the foundation chain.
- Work the main body in alternating solid dc rows and open mesh rows until the valance reaches the desired depth. Keep the top edge straight for easy mounting.
- Along the lower edge, work repeating leaf motifs: use a short chain, clusters of hdc and dc, then a sl st back at the base to form each pointed leaf.
- Join the leaves with small chain arches and finish with a shallow scallop. Add a solid rod pocket or short tabs at evenly marked intervals.
- Block flat, checking that the lower edge hangs level. Mount on a secure rod and keep the valance away from hot bulbs and open flames.
Assembly: The openwork is decorative and does not block sunlight. If the window needs privacy, use a separate curtain or lining behind it.
Dusty-Blue Lace Window Swag
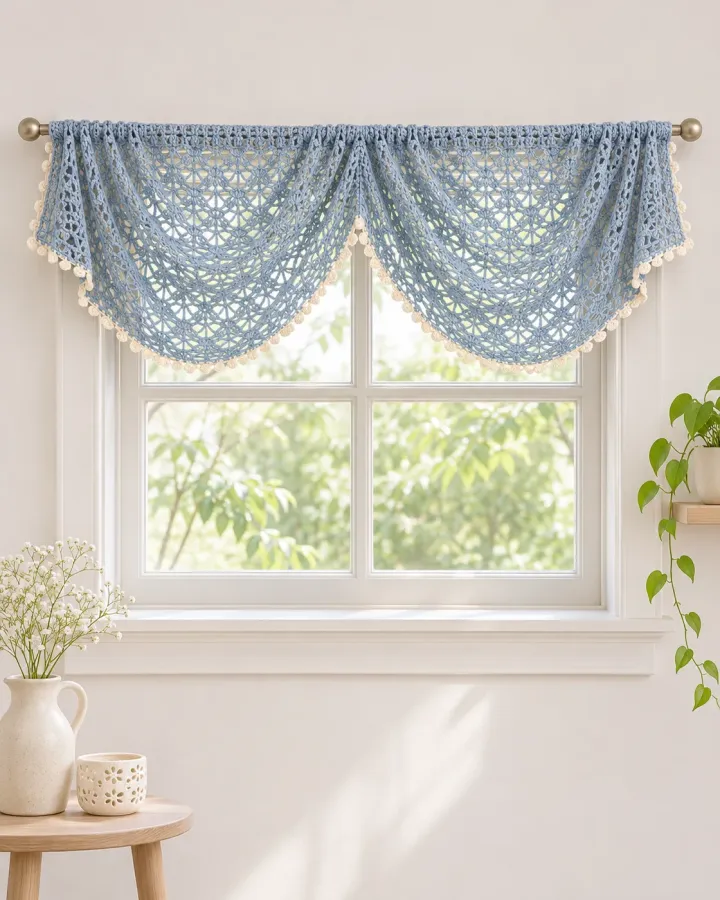
A dusty-blue lace swag drapes in two relaxed curves across a small window, edged in cream picots. The shallow dips create movement without heavy layers, making this a light decorative topper for a simple neutral room.
- LEVEL
- Intermediate
- TRY IT WITH
- DK cotton: dusty blue 240 yd, cream 25 yd; 3.25 mm hook; blocking wires or pins
- FINISHING NOTE
- About 40 in wide; adjust the span and dip depth to the window.
Short Pattern
Abbreviations: ch chain · sc single crochet · hdc half double crochet · dc double crochet · ch-sp chain space · picot ch 3, sl st in first ch · FO fasten off
- Measure the full rod span and mark two or three support points. Crochet a foundation strip slightly longer than the span so the swag can form gentle curves.
- Build the lace body with repeating dc clusters separated by chain spaces. Increase the outer sections gradually so the fabric drapes instead of pulling tight at the ends.
- Work a cream picot edging along both lower curves. Keep the repeats even and add a small number of stitches at each dip to prevent the edge from pinching.
- Add short reinforced loops at the rod supports, not long tie cords. Block the swag over a curved template so both dips have matching depth.
- Attach to fixed rod points and test that the weight is distributed evenly. Do not use long loose cords or place the swag where it can tangle around a child.
Assembly: Support the swag at more than two points if the span is wide. Keep all attachment loops short and secured to fixed hardware.
Sunflower Border Mesh Valance
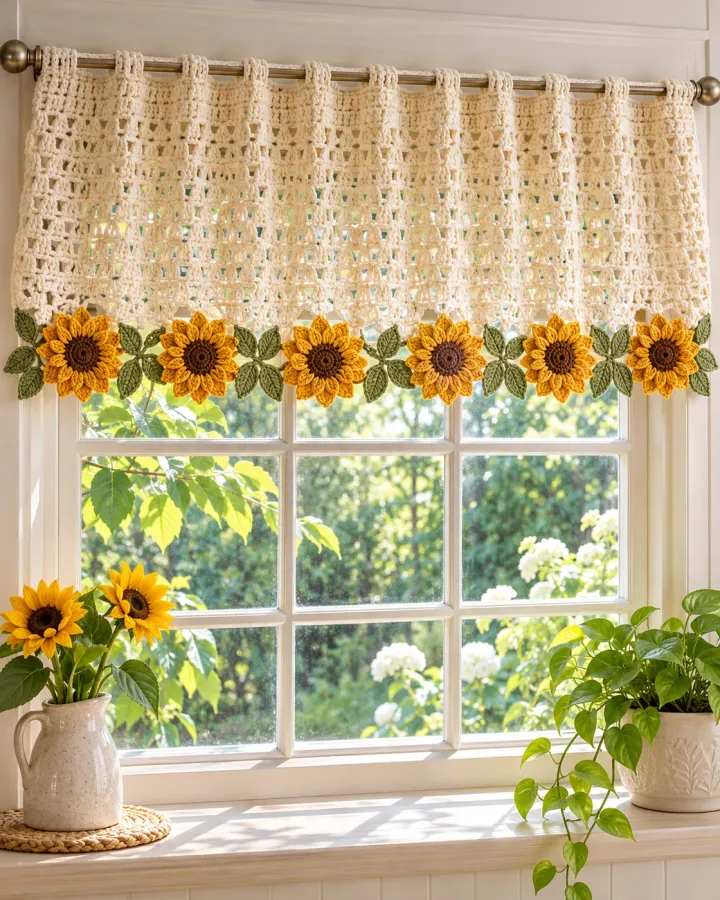
A cream mesh valance is finished with a row of golden sunflower motifs and sage leaves. The floral border gives a bright focal line across the window while the open upper section keeps the treatment light and easy to size.
- LEVEL
- Intermediate
- TRY IT WITH
- DK cotton: cream 240 yd, golden yellow 80 yd, brown 20 yd, sage 35 yd; 3.5 mm hook
- FINISHING NOTE
- About 36 × 14 in; make the width to fit your rod.
Short Pattern
Abbreviations: MR magic ring · ch chain · sc single crochet · hdc half double crochet · dc double crochet · sl st slip stitch · FO fasten off
- Swatch the mesh and calculate a foundation chain in whole repeat units. Work the cream panel from the top down, stopping several inches above the intended flower band.
- Make each sunflower center with brown yarn in a small ring. Work yellow petal loops around it, using consistent stitch counts so the flowers remain the same size.
- Crochet sage leaves as small pointed ovals, adding a center vein with surface sl st. Make two leaves for each flower and block them lightly.
- Join the flowers and leaves into one continuous border with slip stitches. Sew the border to the mesh panel, aligning each motif evenly across the width.
- Add a firm top edge with rod tabs or a casing. Block the finished valance flat and hang it away from direct contact with heaters or cooking flames.
Assembly: Count the floral repeats before joining the panel so both ends finish symmetrically. Use colorfast cotton and follow its care instructions.
Colorful Granny-Square Window Valance
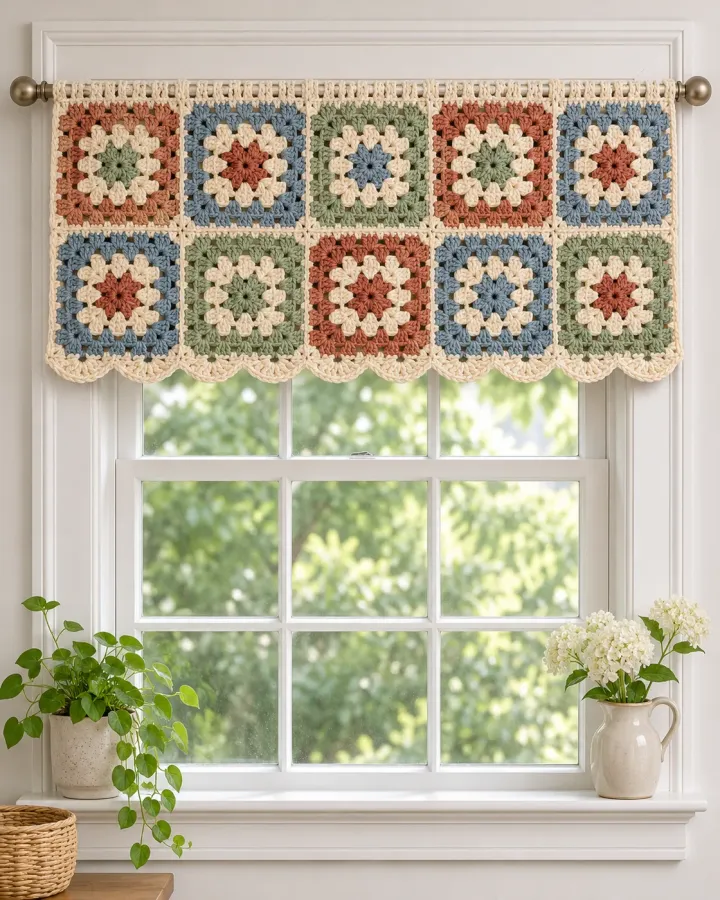
Muted terracotta, sage, dusty blue and cream granny squares form a colorful window topper with a tidy scalloped hem. A cream joining border unifies the palette, turning familiar square motifs into a compact textile rather than a full curtain.
- LEVEL
- Confident beginner
- TRY IT WITH
- DK cotton: terracotta, sage, dusty blue and cream, about 60 yd each; 3.5 mm hook; tapestry needle
- FINISHING NOTE
- Sample uses ten 5 in squares; adjust the number to the window width.
Short Pattern
Abbreviations: MR magic ring · ch chain · sc single crochet · dc double crochet · sl st slip stitch · FO fasten off
- Make one test granny square and block it to the target size. Multiply the blocked width by the number of squares needed to cover the rod with a little ease.
- Crochet the remaining squares in a planned color sequence, changing shades every round. Finish every square with the same cream outer round for consistent joins.
- Join squares with mattress stitch or a flat slip-stitch seam. Keep the seam tension relaxed so the valance does not buckle across the window.
- Add a top band of sc wide enough for a rod pocket, or attach short tabs between squares. Work a shallow scallop along the lower edge.
- Block the whole piece and confirm the rod slides freely. Use a secure rod and avoid pulling on individual square joins when opening or closing it.
Assembly: A square-based valance is easy to resize: add or remove motifs before joining. Keep the top band stable to support the fabric weight.
Fern Sidelight Lace Panel
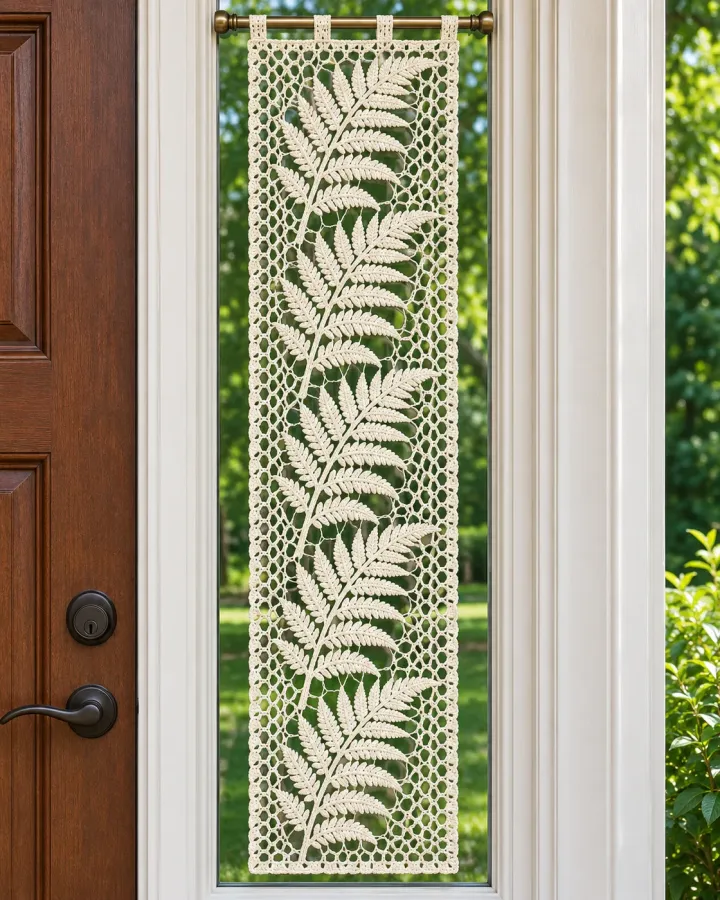
A narrow ivory panel places a repeating fern down the center of an airy mesh field, sized for a sidelight or slim window. The straight edges keep the long shape crisp and make blocking simpler than a shaped curtain.
- LEVEL
- Intermediate
- TRY IT WITH
- Size 10 cotton thread: ivory 450–650 yd; 2.25 mm hook; blocking pins; tapestry needle
- FINISHING NOTE
- Custom panel; sample about 10 × 36 in.
Short Pattern
Abbreviations: ch chain · sc single crochet · dc double crochet · ch-sp chain space · sl st slip stitch · FO fasten off
- Measure the glass area and decide how much light should pass through. Make a blocked mesh swatch and calculate the chain for the chosen panel width.
- Work the panel in filet rows, keeping a narrow solid border on both sides. Place the fern motif in the center using filled mesh squares or surface embroidery.
- Repeat the fern chart vertically, aligning stems on the same center line. Use markers at each motif repeat to avoid shifting the pattern across rows.
- Finish top and bottom with several solid rows, then add small short loops or a rod pocket. Keep the hanging points close together so the panel does not sag.
- Wet-block to the exact window dimensions and dry flat. Secure the panel without obstructing a door latch, window opening or emergency exit.
Assembly: For a glass door sidelight, use secure stationary mounting and keep the lace clear of handles and hinges.
Leaf-Embroidered Curtain Holdbacks
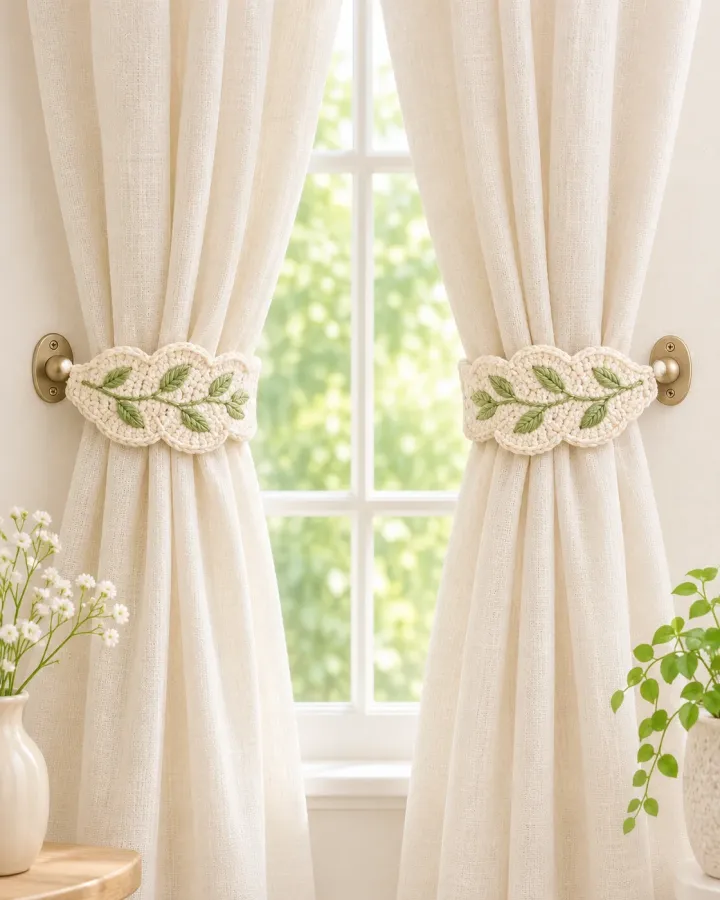
Cream crochet bands with sage leaf embroidery gather neutral curtains at fixed wall hooks. Their broad, flat shape is easy to crochet and avoids long decorative cords, while the understated botanical stitching coordinates with many window styles.
- LEVEL
- Confident beginner
- TRY IT WITH
- Worsted cotton: cream 45 yd, sage 10 yd; 4 mm hook; two fixed wall hooks; tapestry needle
- FINISHING NOTE
- Each band about 3 × 10 in; adjust to the curtain fullness.
Short Pattern
Abbreviations: ch chain · sc single crochet · hdc half double crochet · sl st slip stitch · FO fasten off
- Measure around the gathered curtain and add enough length for a small overlap. Chain to that measurement and work sc rows until the band is about 3 inches wide.
- Make the band slightly tapered at each end by decreasing one stitch over the final two rows. Add a small button loop at one end and a firmly sewn button at the other.
- Embroider a simple sage branch down the center with short surface stitches. Keep the leaves flat and secure so they cannot snag the curtain fabric.
- Repeat for the second band and block both pieces to matching dimensions. Install fixed wall hooks at a height and position suitable for the curtain.
- Use the band only when secured around a curtain and fixed to its hook. Do not leave loops or cords hanging freely, especially in rooms used by children.
Assembly: Use fixed hooks and short bands only; never make a long free-hanging loop. Follow current window-covering cord-safety guidance in homes with children.
Dusty-Rose Filet Flower Curtain
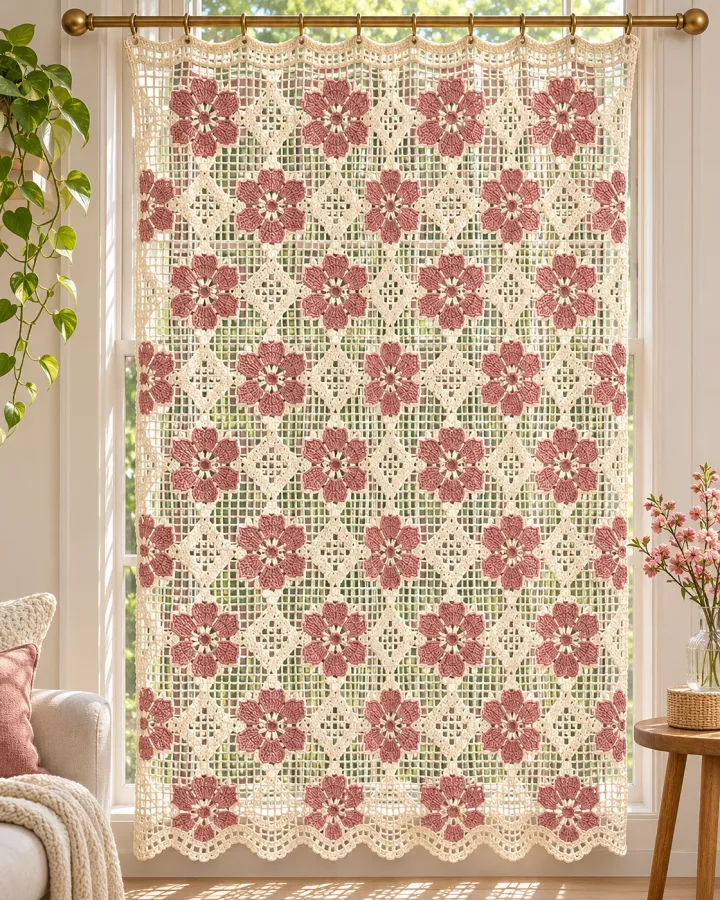
A full filet panel alternates dusty-rose blossoms with cream diamond mesh for a gentle vintage look. Repeating squares make the pattern easy to chart across a wide window, and the scalloped lower edge softens the straight curtain silhouette.
- LEVEL
- Intermediate
- TRY IT WITH
- Size 10 cotton thread: cream 800 yd, dusty rose 300 yd; 2.25 mm hook; blocking wires
- FINISHING NOTE
- Custom; sample about 24 × 48 in.
Short Pattern
Abbreviations: ch chain · sc single crochet · dc double crochet · ch-sp chain space · sl st slip stitch · FO fasten off
- Create a filet chart with a repeating flower square and diamond mesh. Swatch the chart in thread and block it before calculating the complete panel dimensions.
- Work the panel from the bottom upward, repeating the flower blocks across each row. Carry the rose thread loosely at the side or join a new strand for each motif.
- Keep a narrow cream border between motifs to define the diamonds. Count filled and open squares at the end of each row before turning.
- Finish the lower edge with a repeating scallop and the upper edge with a firm rod pocket. Weave in color-change ends securely on the reverse.
- Block the panel to square the motifs and hang from a supported rod. The open lace filters light and should be paired with a privacy layer when needed.
Assembly: Colorwork in filet lace can distort if floats are tight. Keep unused thread relaxed and block only after all ends are woven in.
Stained-Glass Diamond Window Panel
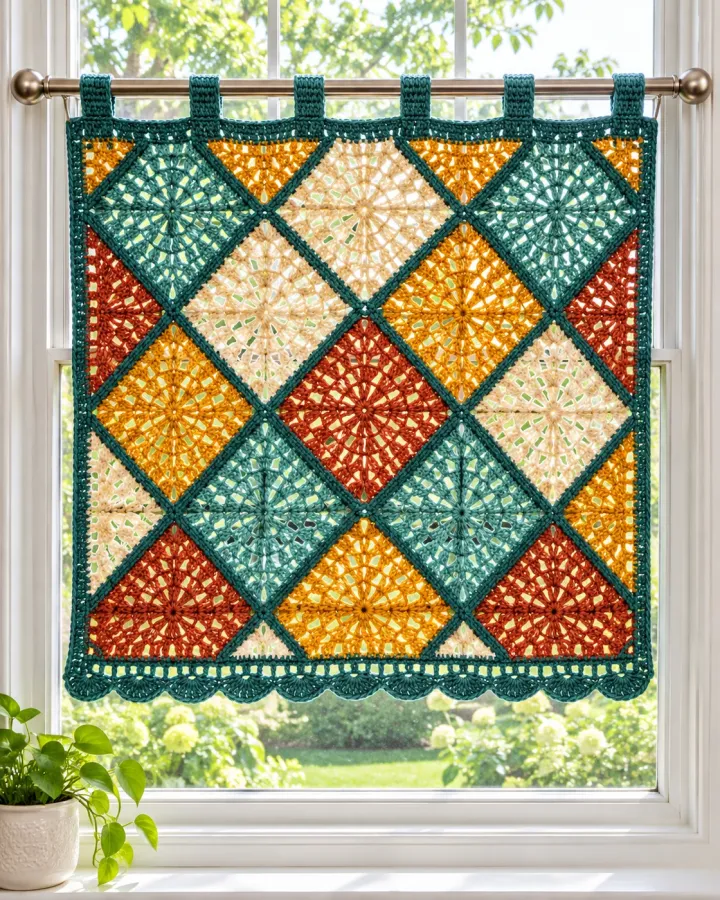
Teal, amber, rust and cream crochet diamonds create a stained-glass effect in a short window panel. Dark teal joins outline each openwork motif, giving the colorful design a strong graphic look without copying an existing geometric valance.
- LEVEL
- Intermediate
- TRY IT WITH
- DK cotton: teal 180 yd, amber 70 yd, rust 70 yd, cream 70 yd; 3.5 mm hook; tapestry needle
- FINISHING NOTE
- About 24 × 30 in; resize by adding motif rows and columns.
Short Pattern
Abbreviations: MR magic ring · ch chain · sc single crochet · hdc half double crochet · dc double crochet · sl st slip stitch · FO fasten off
- Crochet open-center diamond motifs in alternating colors. Begin with a small ring, work a square in rounds, then turn it on point when planning the layout.
- Add a dark teal border to each motif, using the same stitch count on all four sides. Block the diamonds before joining so their corners align neatly.
- Join motifs at the corners with a flat seam to create a rectangular panel. Fill small gaps at the outer edge with half motifs in teal or cream.
- Work a reinforced teal border around the panel and add short rod tabs along the top edge. Space tabs evenly so the weight is supported.
- Hang in a well-supported window and check the joins after the first week. The openwork is decorative rather than a blackout or privacy treatment.
Assembly: Use colorfast cotton and secure every join. Block the assembled panel flat before adding the rod tabs.
Lavender Arched Window Valance
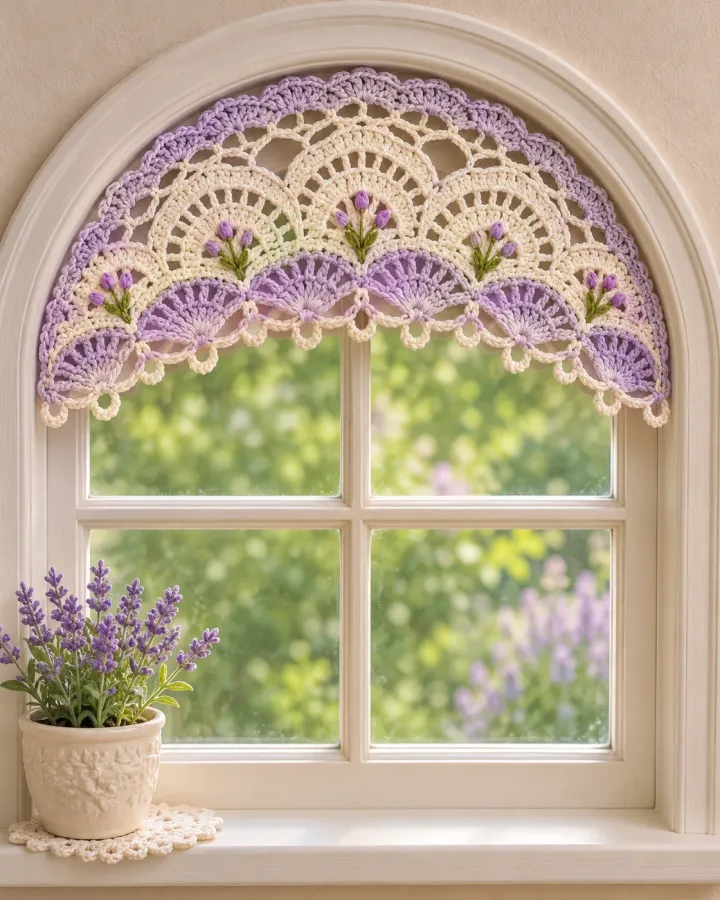
A lavender-and-cream lace topper follows the curve of an arched window, with small bud details tucked into the scalloped border. The semicircular shape creates a tailored fit for a window that is difficult to dress with a straight valance.
- LEVEL
- Intermediate
- TRY IT WITH
- DK cotton: lavender 170 yd, cream 120 yd, leaf green 8 yd; 3.25 mm hook; flexible measuring tape
- FINISHING NOTE
- Custom semicircle; sample about 30 in across and 12 in deep.
Short Pattern
Abbreviations: MR magic ring · ch chain · sc single crochet · hdc half double crochet · dc double crochet · inc increase · sl st slip stitch · FO fasten off
- Measure the arch carefully at several points and make a paper template. Crochet a semicircle swatch and block it to verify the curve before starting the full piece.
- Begin at the center top with a foundation ring or short chain. Increase evenly on each row, adding stitches at both ends to keep the panel flat.
- Work lavender lace bands separated by cream rows. Add tiny green bud motifs along the lower edge using short chains and small leaf stitches.
- Finish the curved edge with a cream scallop and the straight bottom with a firm border. Add short mounting tabs that follow the arch template.
- Block over the paper template and attach to secure fixed points. Check that the valance does not interfere with opening the window.
Assembly: An arch can vary substantially from one frame to another. Make a template and verify the blocked shape before installing hardware.
Crochet Suncatcher Medallion Hoop
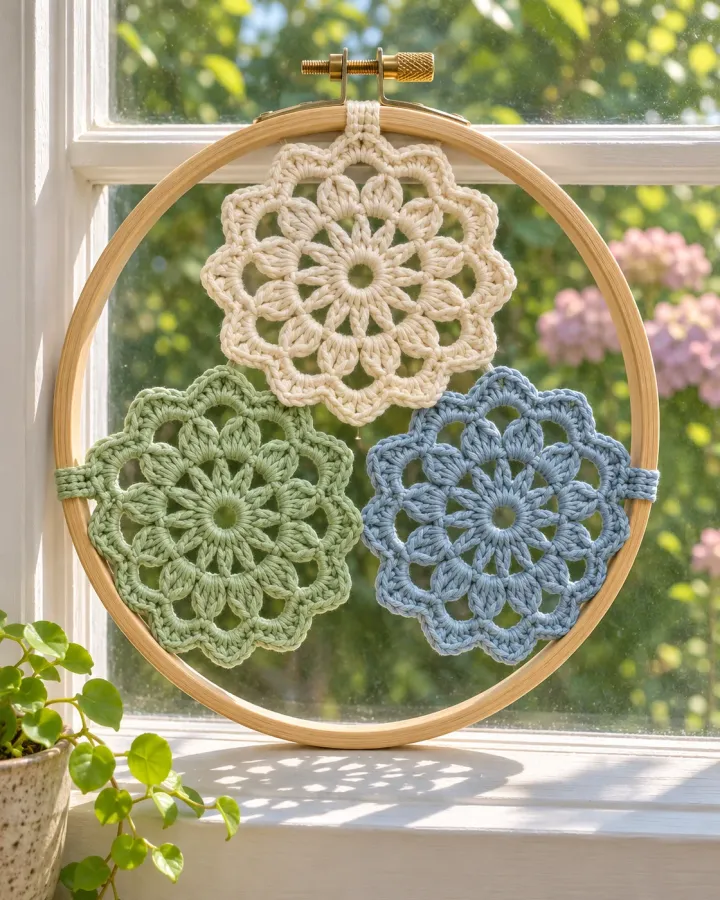
Three openwork medallions in cream, sage and dusty blue sit within a wooden embroidery hoop for a simple stationary window accent. Their floral lace centers catch the daylight while the compact hoop keeps the display tidy and controlled.
- LEVEL
- Confident beginner
- TRY IT WITH
- DK cotton: cream 20 yd, sage 20 yd, dusty blue 20 yd; 3 mm hook; 10 in wooden hoop; tapestry needle
- FINISHING NOTE
- About 10 in across.
Short Pattern
Abbreviations: MR magic ring · ch chain · sc single crochet · hdc half double crochet · dc double crochet · sl st slip stitch · FO fasten off
- Make three flat medallions, each beginning with a small ring and increasing in dc rounds. Use a final chain-space round to create the open floral lace pattern.
- Block each medallion to a matching size. Weave in the ends and check that the outer rounds are firm enough to be sewn into a hoop.
- Arrange the motifs inside the hoop with even spacing. Stitch their outer edges to one another and to the hoop at several points so they cannot shift.
- Trim excess yarn and tighten the hoop screw. Add a short fixed mounting loop or secure the hoop directly to a wall hook; avoid long dangling cords.
- Hang the decoration away from window handles and moving sashes. Inspect the attachment periodically and keep it out of reach of small children.
Assembly: Treat the hoop as stationary decor. Secure it independently and do not hang it where a moving window or blind cord can catch it.
Pastel Flower-Motif Window Topper
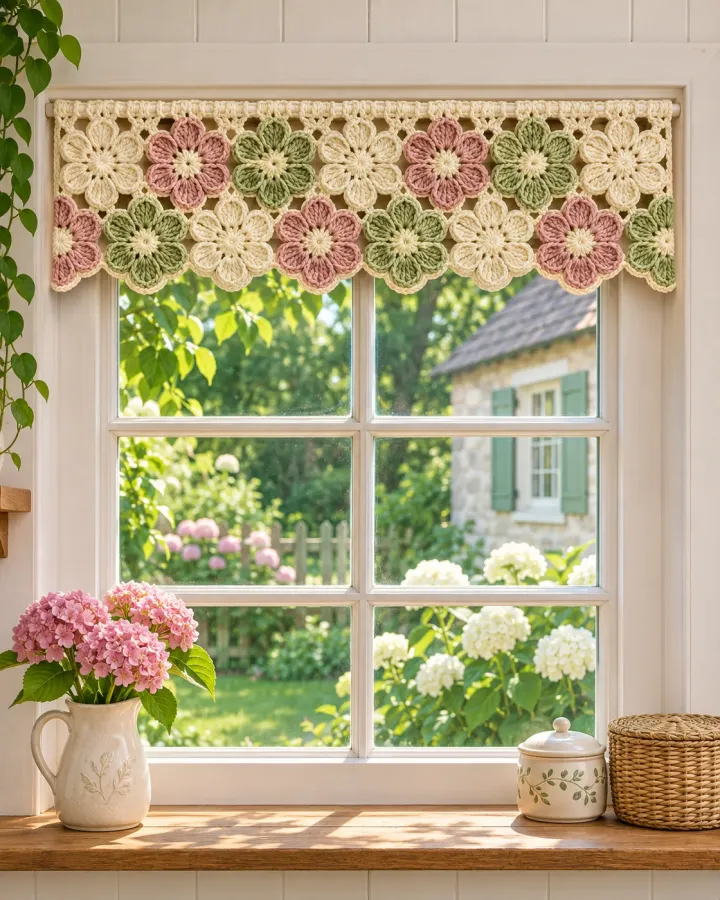
Cream, dusty-pink and sage crochet flowers join into a shallow topper for a sunny cottage window. The connected motifs create a soft scalloped outline, with no long dangling strings and enough open space to keep the window bright.
- LEVEL
- Confident beginner
- TRY IT WITH
- DK cotton: cream 100 yd, dusty pink 55 yd, sage 55 yd; 3.5 mm hook; tapestry needle
- FINISHING NOTE
- Custom width; each flower is about 4 in across.
Short Pattern
Abbreviations: MR magic ring · ch chain · sc single crochet · hdc half double crochet · dc double crochet · sl st slip stitch · FO fasten off
- Crochet flower motifs with a tight center ring and five rounded petals. Make each flower in two colors and use the same stitch count so all motifs match.
- Join flowers as you work the final round, connecting petal valleys with slip stitches. Make a strip long enough to cover the top of the window.
- Add cream half-motifs along the top edge to create a straight line for mounting, then work a short sc border across the row.
- Block the strip flat and sew short fabric tabs or crochet loops along the top. Keep every loop small and secured to the rod.
- Hang as a stationary topper and check that it cannot fall into a sink, heater or opening window. Keep cords and loose ends trimmed.
Assembly: Join motifs securely at multiple points. This topper is decorative and does not provide privacy or sun blocking.
Snowflake and Sunburst Window Panel
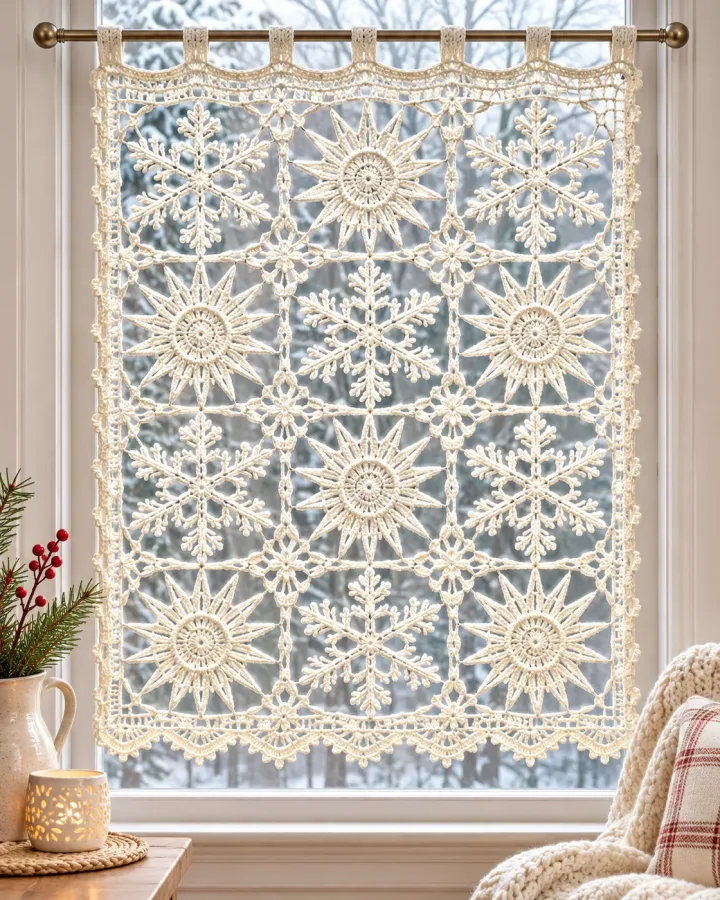
An ivory seasonal panel alternates snowflake and sunburst motifs in a rectangular lace grid. Its crisp openwork reads beautifully against daylight and can stay up through winter, adding a handmade focal point without heavy fabric layers.
- LEVEL
- Intermediate
- TRY IT WITH
- Size 10 cotton thread: ivory 900–1,200 yd; 2.25 mm hook; blocking pins; tapestry needle
- FINISHING NOTE
- Custom panel; sample about 24 × 36 in.
Short Pattern
Abbreviations: MR magic ring · ch chain · sc single crochet · dc double crochet · tr treble crochet · sl st slip stitch · FO fasten off
- Crochet one snowflake and one sunburst medallion as gauge samples. Block them to the intended size and decide how many rows and columns fit the window.
- Make the remaining motifs with consistent outer rounds. Add chain loops at the same points on every motif so joins align into a straight grid.
- Join medallions with a flat slip-stitch seam or narrow crochet bridges. Alternate the snowflake and sunburst placement to balance the pattern across the panel.
- Work a firm border around all four edges and add short rod tabs or a casing across the top. Reinforce the corners before hanging.
- Wet-block the finished panel and let it dry completely. Use a secure rod and keep the openwork clear of heaters, candles and window mechanisms.
Assembly: This lace panel is a decorative light filter, not an insulating or blackout curtain. Check the support hardware before hanging.
Make thoughtfully and check as you go.
Yarn, hook size and personal tension can change the finished scale. Count every round, stuff gradually and use embroidered features instead of safety eyes when making toys for children under three.