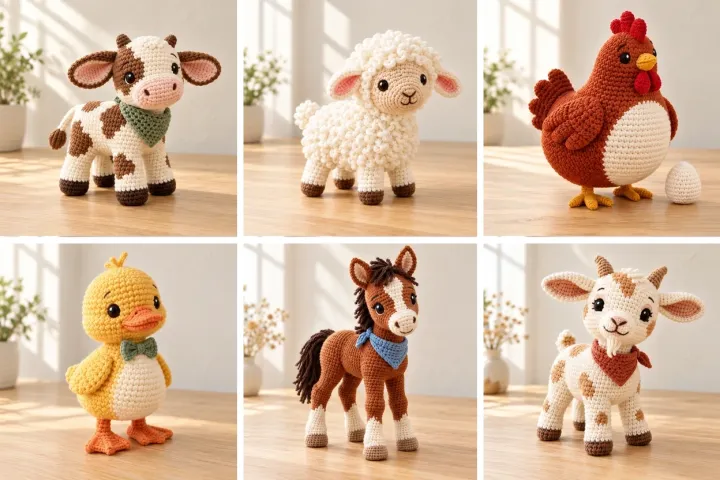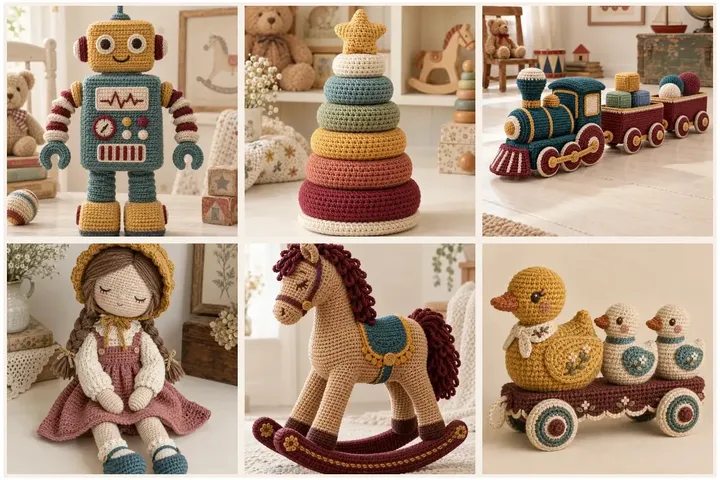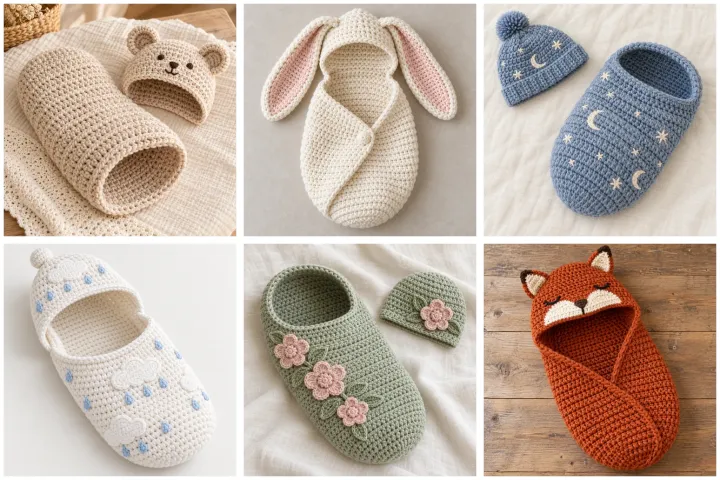
These twelve concepts are decorative crochet photo props, not wearable sleep sacks, swaddles or bedding. The images show each prop empty. For any photo with a baby, use only during an awake session with a responsible adult continuously holding and supporting the baby, keeping the face unobstructed; remove the prop immediately afterward. Never use a cocoon for sleep or naps, and keep soft items out of a crib or bassinet. The short guides below describe how to make the empty decorative shell and matching accents; they are original, untested craft drafts, not infant-product safety certifications. Check yarn labels, inspect every seam and follow current pediatric safe-sleep guidance.
Oatmeal Teddy-Bear Cocoon Set
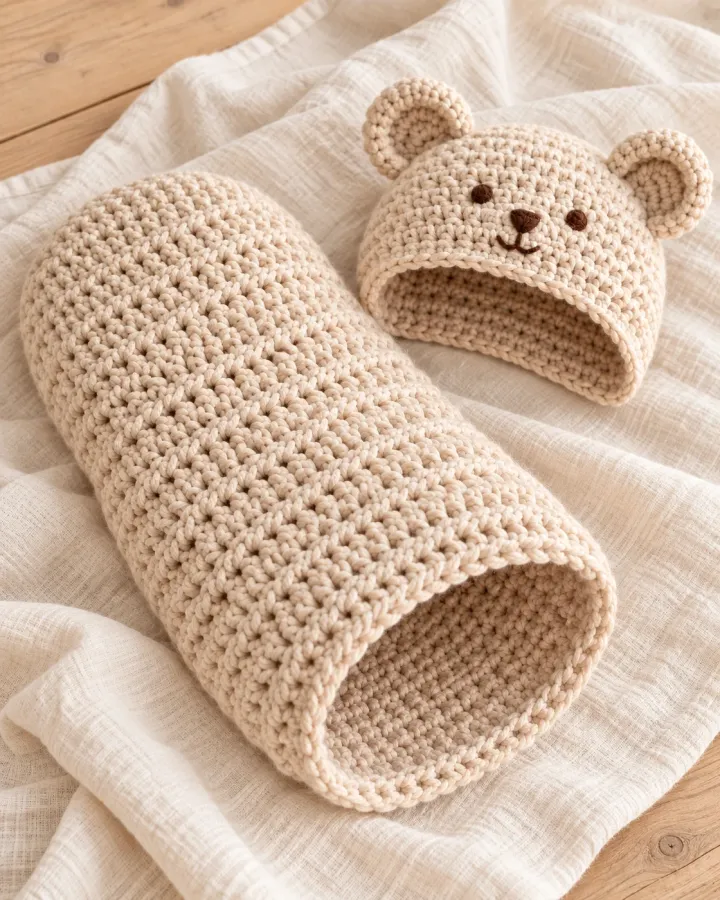
An oatmeal crochet photo-prop cocoon is paired with a soft bear-ear hood and a tiny embroidered muzzle. The neutral yarn and rounded silhouette create a classic keepsake look, while the open tube is photographed empty as a decorative prop.
- LEVEL
- Intermediate
- TRY IT WITH
- DK cotton: oatmeal 220 yd, cream 35 yd, cocoa 10 yd; 4 mm hook; tapestry needle
- FINISHING NOTE
- Decorative shell approx. 7 in across and 12 in long; adjust for display scale.
Short Pattern
Abbreviations: MR magic ring · ch chain · sc single crochet · hdc half double crochet · inc 2 sc in one stitch · sl st slip stitch · BLO back loop only
- Base: with oatmeal, make 6 sc in MR. Increase evenly by 6 each round until 48 stitches. Work one round in BLO to turn the edge upward.
- Cocoon wall: work 20 rounds of sc at 48 stitches. Keep tension even and the tube open; fasten off and weave the tail inside. This is a decorative shell, not a fitted infant garment.
- Hood panel: ch 25 and work 24 sc for 12 rows. Fold the panel over the opening edge and sew along the sides, leaving the opening clear.
- Bear ears: make two small oatmeal circles from MR 6 to 12, then add a smaller cream center. Flatten and stitch the full base securely to the hood.
- Embroider a small cocoa nose and short mouth on the hood. Photograph the prop empty; do not add ties, buttons or loose parts.
Assembly: Keep the cocoon empty in product photos. It is not a sleep sack, swaddle or safe sleep surface; see the prominent photo-prop notice above.
Floppy Bunny-Ear Cocoon
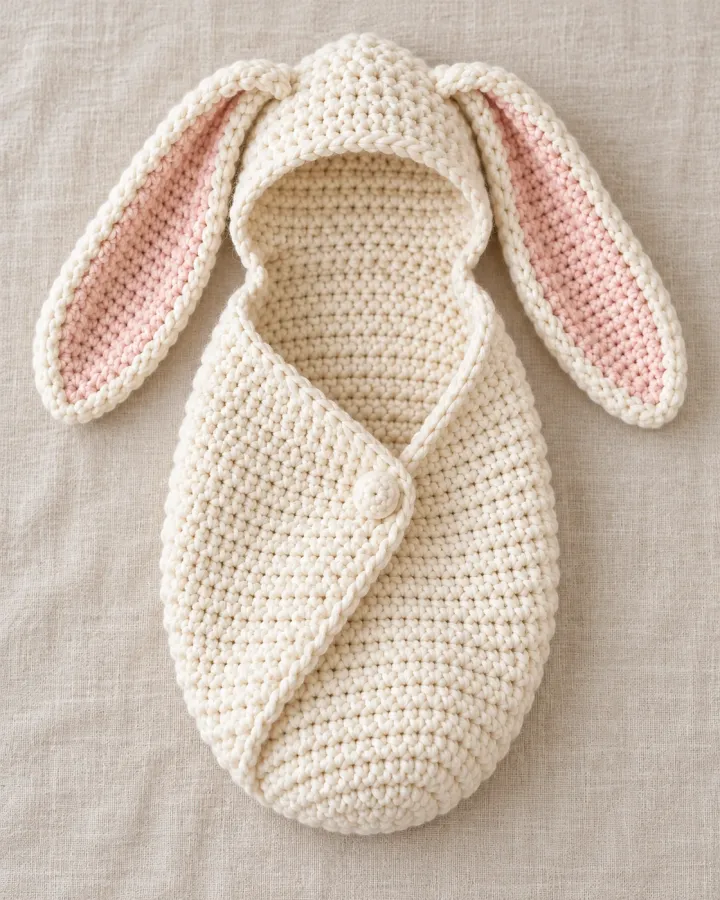
A soft ivory crochet shell has a matching hood with long floppy ears and muted blush centers. The simple cream-and-pink palette gives the photo prop a gentle storybook feel, with the unoccupied cocoon arranged open to show its handmade texture.
- LEVEL
- Intermediate
- TRY IT WITH
- DK cotton: ivory 230 yd, blush 25 yd; 4 mm hook; tapestry needle
- FINISHING NOTE
- Decorative shell approx. 7 in across and 12 in long.
Short Pattern
Abbreviations: MR magic ring · ch chain · sc single crochet · hdc half double crochet · inc 2 sc in one stitch · sl st slip stitch · BLO back loop only
- Make the circular base in ivory: 6 sc in MR, then increase by 6 each round to 48 stitches. Work one BLO round to create a clear base-to-wall corner.
- Work 20 even rounds at 48 stitches for the open shell. Keep the top edge relaxed and finish with one round of sl st for a tidy rim.
- For each ear, ch 15 and work around both sides of the chain, placing 3 sc in the final chain. Continue for 5 oval rounds, then fasten off. Make two ivory ears and two smaller blush inner panels.
- Sew each blush panel flat to an ivory ear. Pinch the ear base and stitch it securely to a short cream hood panel made from ch 23 and 10 rows of sc.
- Attach the hood panel at the rear rim only, leaving the opening unobstructed. Weave all ends inside and arrange the shell empty for photography.
Assembly: Do not place a baby inside or leave one unattended with this prop. Keep the face uncovered during any awake, directly supported photo session.
Moon-and-Stars Cocoon Set
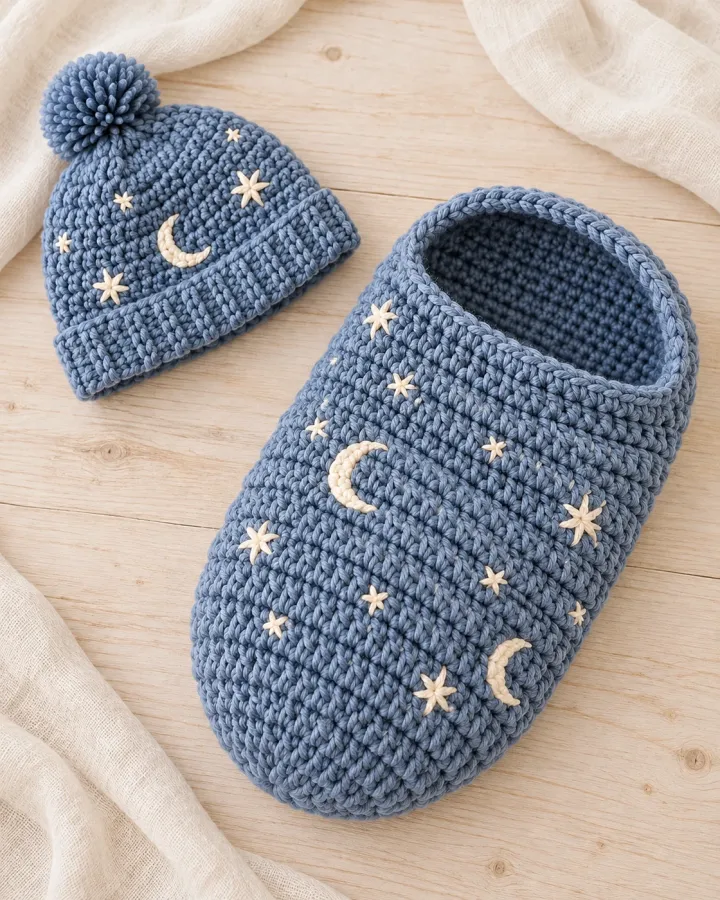
Dusty-blue crochet surrounds a matching cap embroidered with cream moons and scattered stars. The celestial color palette makes a calm, polished photo-prop theme, and the empty cocoon is arranged as a soft decorative tube rather than a sleep setup.
- LEVEL
- Intermediate
- TRY IT WITH
- DK cotton: dusty blue 220 yd, cream 30 yd, pale gold 8 yd; 4 mm hook
- FINISHING NOTE
- Decorative shell approx. 7 in across and 12 in long.
Short Pattern
Abbreviations: MR magic ring · ch chain · sc single crochet · hdc half double crochet · dc double crochet · inc increase · sl st slip stitch · BLO back loop only
- Work a flat base in dusty blue: 6 sc in MR and increase evenly to 48. Work one round in BLO, then 20 rounds of sc without increases to form the tube.
- Cap crown: make 6 sc in MR and increase to 36. Work 6 even rounds, then decrease evenly to 30 and 24. Add a short brim of 2 rounds in BLO and fasten off.
- Moon motif: crochet a small cream circle from MR 6 to 18. Fold one side inward and stitch it down to form a crescent. Make 3 tiny stars with five embroidered straight-stitch arms each.
- Sew the crescent and stars flat onto the cap and add a few small star stitches around the cocoon wall. Secure each end inside the fabric.
- Lay the empty cocoon beside the cap on a plain backdrop. Keep the entire set away from sleep spaces.
Assembly: All celestial details should be embroidered or sewn flat. The cap and cocoon are photo accessories only, not sleepwear.
Cloud-and-Raindrop Cocoon
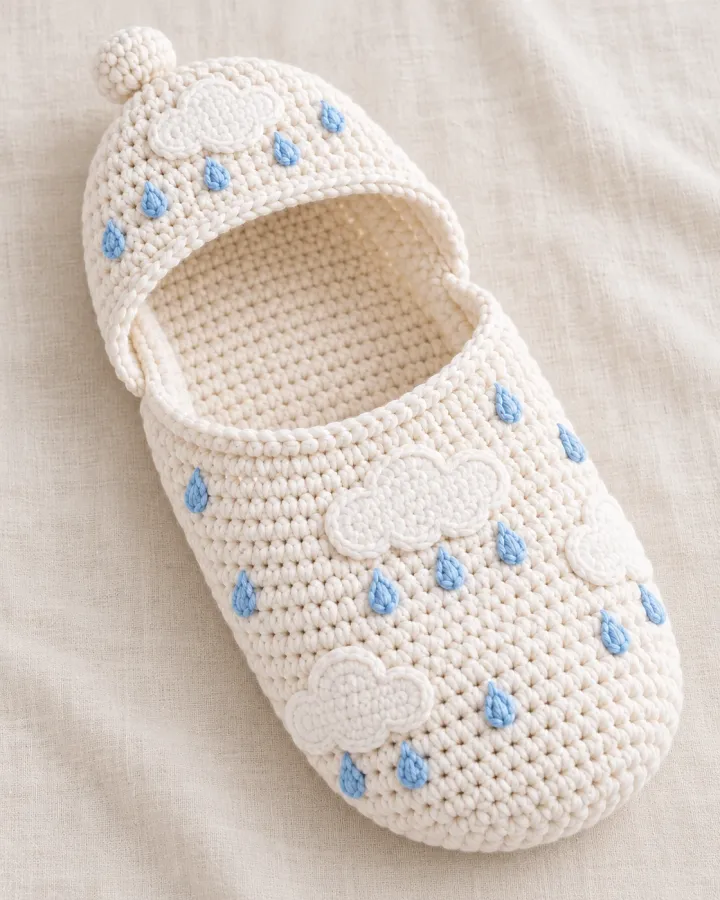
Cloud-white crochet forms an open photo-prop shell with a rounded hood and delicate blue raindrop embroidery. Its airy palette looks clean and modern in a product flat lay, while the simple shape keeps attention on the soft stitch texture.
- LEVEL
- Confident beginner
- TRY IT WITH
- DK cotton: cloud white 220 yd, pale blue 20 yd, silver gray 8 yd; 4 mm hook
- FINISHING NOTE
- Decorative shell approx. 7 in across and 12 in long.
Short Pattern
Abbreviations: MR magic ring · ch chain · sc single crochet · hdc half double crochet · inc increase · dec decrease · sl st slip stitch · BLO back loop only
- Base and wall: make 6 sc in MR. Increase by 6 each round to 48, work one round in BLO, then crochet 20 rounds evenly at 48 stitches.
- Hood: ch 25 and work 24 sc for 10 rows. Shape the top corners with one decrease at each end for the final 2 rows, then sew the panel to the back half of the shell rim.
- Cloud appliqué: make three small white bobbles or flat circles, arrange them as a cloud and stitch around every edge near the hood.
- Embroider 5–7 pale-blue raindrops beneath the cloud using short vertical stitches and a small V at each lower tip. Secure the ends inside.
- Steam lightly only if suitable for the yarn label, then photograph the shell empty on a flat backdrop.
Assembly: Use this as an empty decorative photo prop only. It is not bedding or a sleep product; never leave a baby in or on it.
Sage Daisy-Garden Cocoon
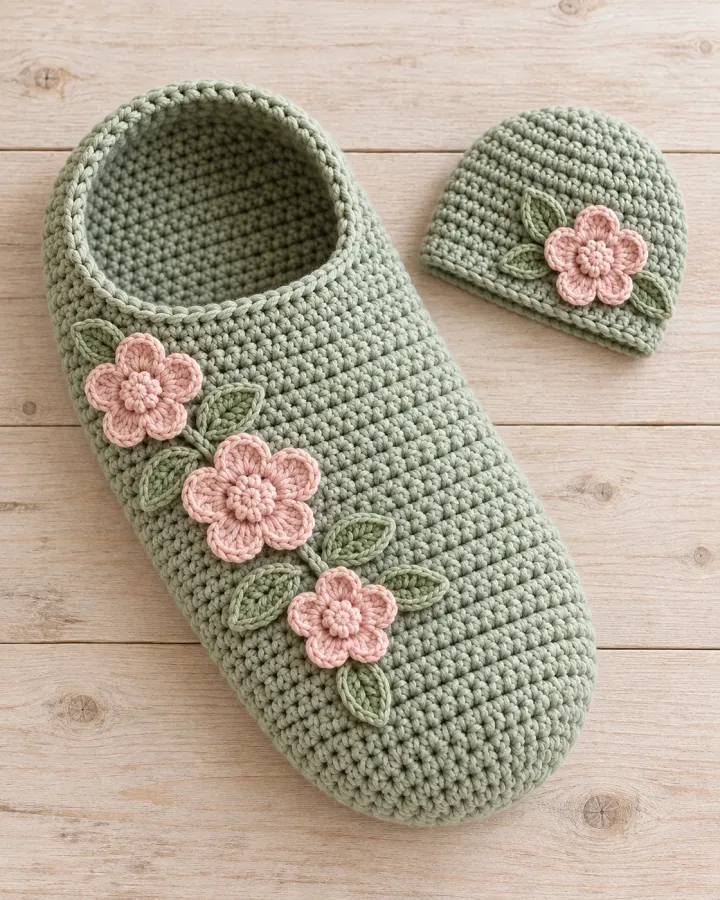
A sage-green crochet shell is decorated with a few flat ivory daisies and leaves around its outer edge. The botanical accents feel fresh and handmade without crowding the design, making this empty cocoon set a bright springtime photo prop.
- LEVEL
- Intermediate
- TRY IT WITH
- DK cotton: sage 210 yd, ivory 25 yd, mustard 8 yd; 4 mm hook
- FINISHING NOTE
- Decorative shell approx. 7 in across and 12 in long.
Short Pattern
Abbreviations: MR magic ring · ch chain · sc single crochet · hdc half double crochet · dc double crochet · inc increase · sl st slip stitch · BLO back loop only
- Crochet the base from MR 6 and increase evenly to 48 stitches. Work 1 round in BLO and 20 rounds of sc for a soft, straight-sided tube.
- Make 3 daisy centers in mustard: MR 6, join, then work 5 petals with ch 3, 2 dc and sl st back into the center. Keep each flower small and flat.
- For each leaf, ch 6 and work sc, hdc, dc, hdc, sc along the chain; work 2 sc in the end and return along the other side. Make 4 leaves.
- Arrange flowers and leaves in a loose cluster on the outer wall. Sew every petal and leaf edge down to prevent lifted loops.
- Add a matching flat sage cap if desired, using 6 sc in MR, increasing to 36 and working 6 rounds even.
Assembly: Keep appliqués flat and fully sewn. The pictured arrangement is empty; do not use the cocoon for sleep or unattended placement.
Rust-Fox Hood Cocoon
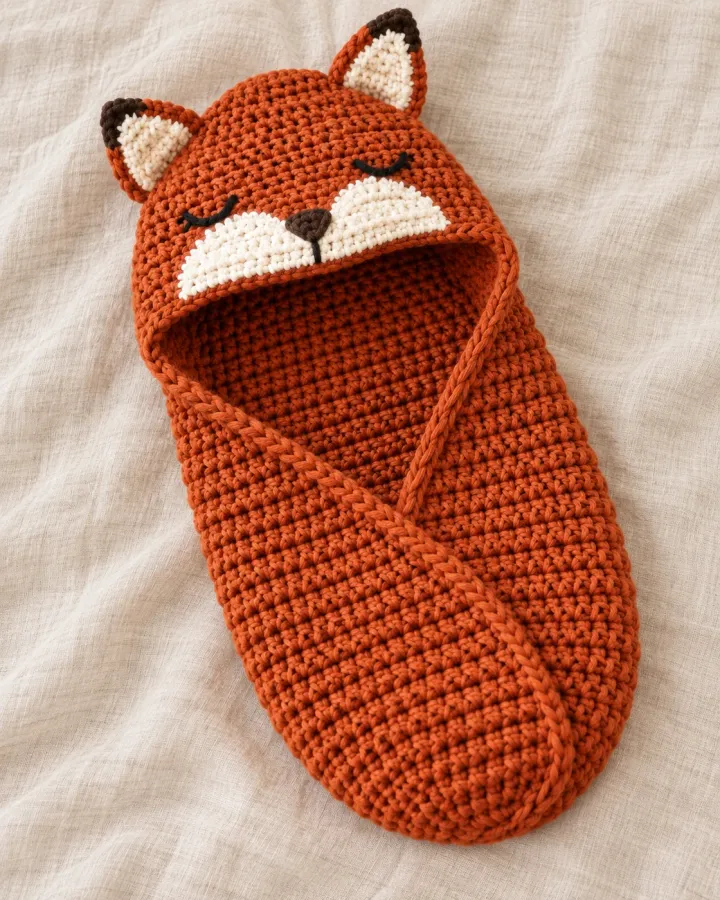
A warm rust crochet cocoon is paired with a fox hood featuring small ears and an embroidered cream muzzle. The woodland palette and clean contrast create an expressive portrait prop, while all facial details are stitched directly into the yarn.
- LEVEL
- Intermediate
- TRY IT WITH
- DK cotton: rust 220 yd, cream 35 yd, charcoal 5 yd; 4 mm hook
- FINISHING NOTE
- Decorative shell approx. 7 in across and 12 in long.
Short Pattern
Abbreviations: MR magic ring · ch chain · sc single crochet · hdc half double crochet · inc increase · dec decrease · sl st slip stitch · BLO back loop only
- Make a rust base with 6 sc in MR and increase by 6 each round to 48. Work one round in BLO and 20 even rounds to form the open shell.
- Hood panel: ch 25, work 24 sc for 10 rows and fasten off. Sew it to the back half of the rim, leaving the front opening wide.
- Ears: make two rust triangles from ch 7, working 6 sc then decreasing one stitch at each end on the next 2 rows. Add smaller cream triangles and sew securely to the hood panel.
- Muzzle: crochet a flat cream oval from ch 7, work around both sides and increase at each end for 3 rounds. Sew it flat on the hood and embroider a small charcoal nose and mouth.
- Add short charcoal eye stitches and weave all ends inside. Keep the face detail flat and the photo prop empty.
Assembly: No plastic eyes or loose parts: embroider the face and secure ears through several stitches. This is not an infant sleep product.
Cloud-Fleece Lamb Cocoon
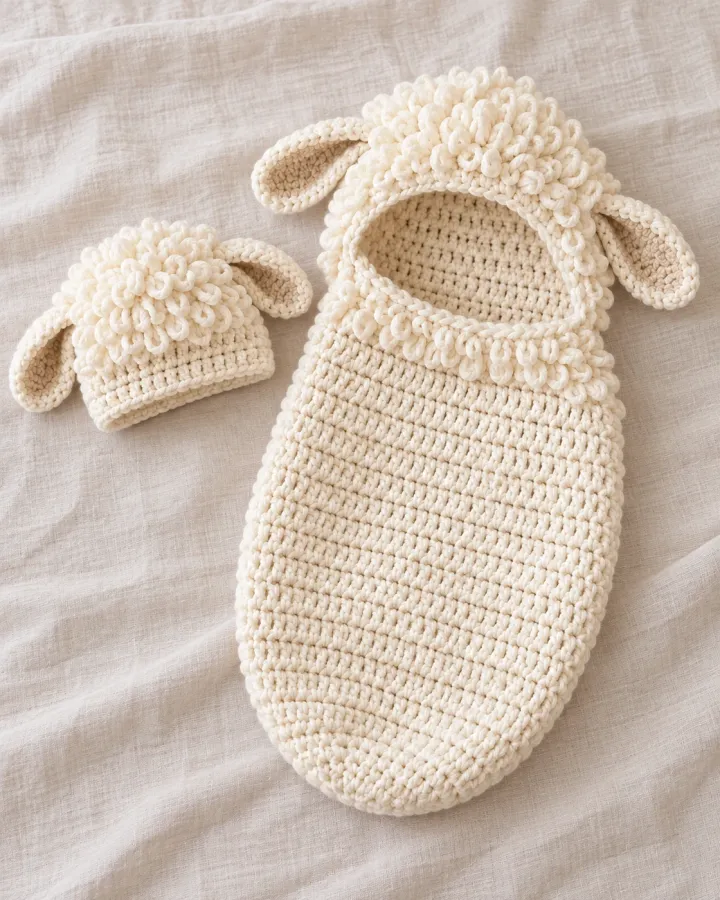
Cream crochet surrounds a lamb-inspired hood with short loop-stitch fleece and soft floppy ears. The gentle texture contrasts with the smooth open shell, giving this unoccupied photo prop a cozy farm-animal theme without adding hard or detachable pieces.
- LEVEL
- Intermediate
- TRY IT WITH
- DK cotton: cream 230 yd, warm beige 20 yd, charcoal 4 yd; 4 mm hook
- FINISHING NOTE
- Decorative shell approx. 7 in across and 12 in long.
Short Pattern
Abbreviations: MR magic ring · ch chain · sc single crochet · hdc half double crochet · inc increase · sl st slip stitch · BLO back loop only
- Base: make 6 sc in MR and increase evenly to 48. Work one round in BLO, then 20 rounds of sc in cream. Keep the opening broad and the tube unstuffed.
- Hood panel: ch 23 and work 22 sc for 10 rows. Round the top by decreasing one stitch at each end for 2 rows; sew it to the rear rim.
- Add fleece texture to the hood only: join cream, ch 3 and sl st into the next stitch, repeating in spaced rows. Keep loops short, even and firmly anchored.
- Make two beige ear ovals from ch 9 and 4 oval rounds. Fold each base and sew it to the sides of the hood. Embroider small charcoal face lines.
- Inspect every loop and seam, trim tails, and display the shell empty with the hood beside it.
Assembly: Loop stitch can snag; keep loops short and secure. Never use the prop for sleep or leave a baby on it.
Butterfly-Wing Photo Cocoon
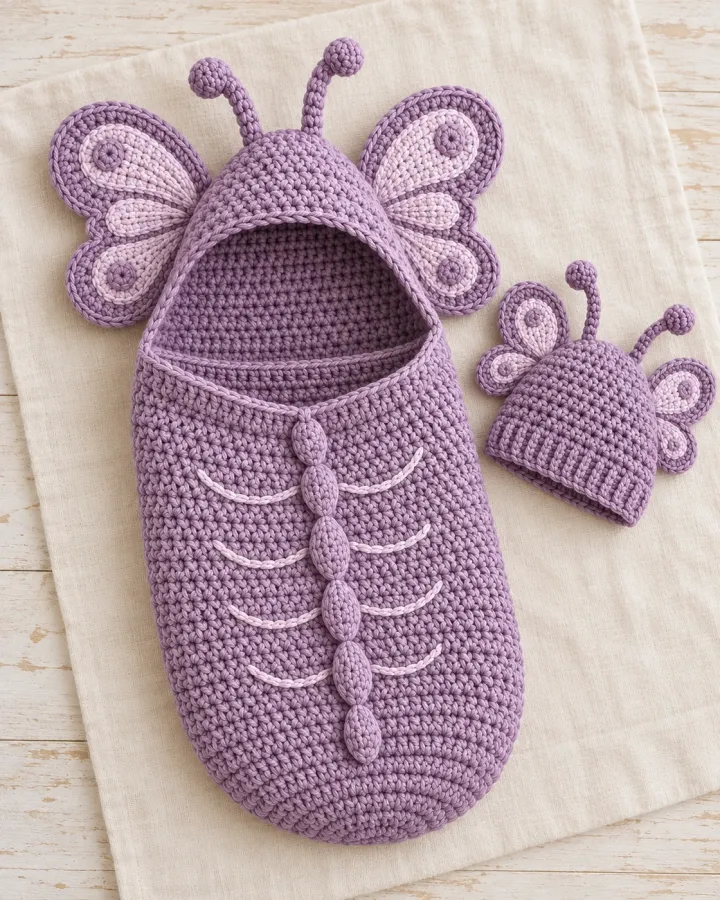
Muted lilac crochet is paired with a butterfly-inspired hood and soft wing panels in a tonal palette. Fine embroidered body lines and symmetrical shapes turn the empty cocoon into a whimsical portrait accessory with a polished, handmade look.
- LEVEL
- Intermediate
- TRY IT WITH
- DK cotton: lilac 220 yd, dusty rose 25 yd, cream 8 yd; 4 mm hook
- FINISHING NOTE
- Decorative shell approx. 7 in across and 12 in long.
Short Pattern
Abbreviations: MR magic ring · ch chain · sc single crochet · hdc half double crochet · dc double crochet · inc increase · sl st slip stitch · BLO back loop only
- Crochet a lilac base: 6 sc in MR, increase by 6 to 48, work 1 BLO round and 20 even rounds for the shell.
- Make a hood panel from ch 25 and 10 rows of 24 sc. Sew it to the back rim only so the front opening remains clear.
- For each wing, ch 8 and work around both sides, placing 3 stitches at the tip. Make 2 rounds in lilac and one smaller dusty-rose wing panel; sew each color layer flat together.
- Attach two upper wings to the hood sides with several passes through the base. Embroider a short cream body line and two tiny curved antenna lines.
- Mirror wing placement on both sides and check that no edge lifts. Arrange the empty prop on a neutral background.
Assembly: Wing panels are decorative and must be sewn down around their edges. Keep the cocoon empty and out of any sleep area.
Blush Petal-Frame Cocoon
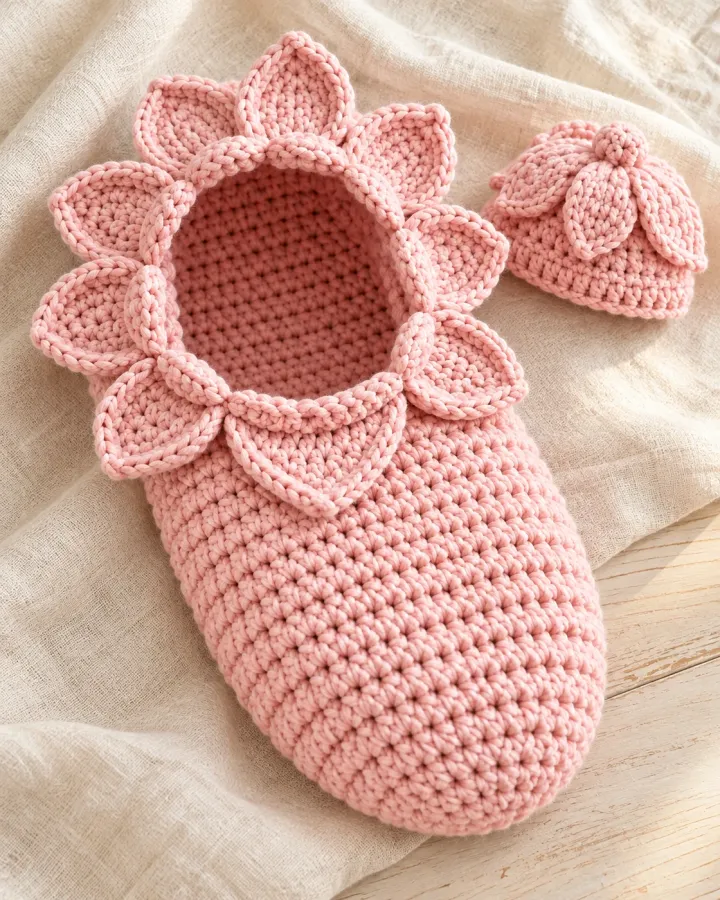
A blush crochet cocoon features broad soft petals framing the hood opening and a matching simple cap. The flower silhouette makes a striking photo-prop set, while the solid open tube and carefully attached petals keep the display tidy and cohesive.
- LEVEL
- Intermediate
- TRY IT WITH
- DK cotton: blush 230 yd, cream 25 yd, sage 12 yd; 4 mm hook
- FINISHING NOTE
- Decorative shell approx. 7 in across and 12 in long.
Short Pattern
Abbreviations: MR magic ring · ch chain · sc single crochet · hdc half double crochet · dc double crochet · inc increase · sl st slip stitch · BLO back loop only
- Make the base with 6 sc in MR and increase by 6 each round to 48. Work one round in BLO, then 20 rounds even to create the empty tube.
- Hood panel: ch 25, work 24 sc for 9 rows and sew to the rear rim. Leave the front edge open.
- Petals: make 6 flat ovals by chaining 9 and working around both sides with increases at each end for 4 rounds. Shape each point softly by decreasing one stitch at both ends on the final round.
- Sew the petal bases around the hood opening, overlapping them slightly. Stitch the full base of every petal so no loose loops protrude.
- Add a small cream circle at the center and a simple sage cap if desired. Display the shell empty on a bright flat lay.
Assembly: Petals are decorative framing, not a cover. Keep a baby’s face completely unobstructed during any supervised photo setup.
Golden Sunflower Cocoon
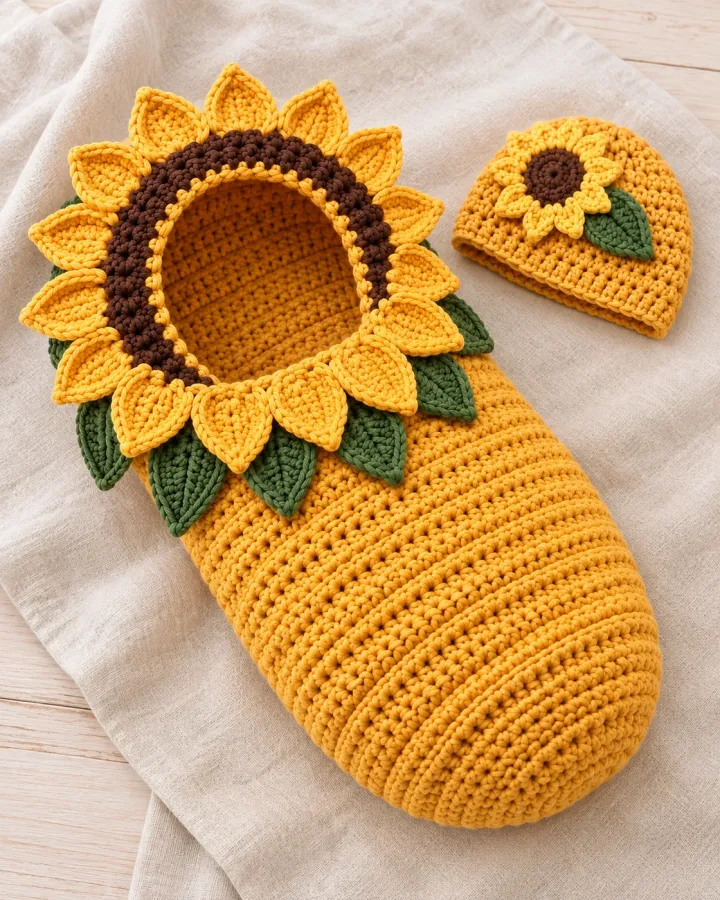
Golden-yellow crochet and a warm brown flower center create a cheerful sunflower hood for this empty photo-prop shell. A few flat green leaves add contrast without overwhelming the design, giving the set a bright seasonal look for craft photography.
- LEVEL
- Intermediate
- TRY IT WITH
- DK cotton: golden yellow 230 yd, brown 20 yd, sage 20 yd; 4 mm hook
- FINISHING NOTE
- Decorative shell approx. 7 in across and 12 in long.
Short Pattern
Abbreviations: MR magic ring · ch chain · sc single crochet · hdc half double crochet · dc double crochet · inc increase · sl st slip stitch · BLO back loop only
- Crochet the shell base from 6 sc in MR, increasing evenly to 48. Work one round in BLO and 20 rounds of sc at 48 stitches.
- Make a hood panel from ch 23 and 10 rows of 22 sc. Sew it securely along the rear half of the rim.
- Flower center: crochet a brown circle from MR 6 to 24, working 2 plain rounds. Make 8 narrow yellow petals from ch 7, sc 6 and 3 stitches in the final chain; return with hdc and sl st.
- Arrange the petals around the circle and sew the complete flower flat to one side of the hood. Add two sage leaf shapes and sew down all edges.
- Weave ends inside and display the empty cocoon with the hood opening visible.
Assembly: Avoid long petal loops or loose leaf tips. This handmade accessory is not a sleep sack, blanket or infant support.
Sea-Glass Whale-Wave Cocoon
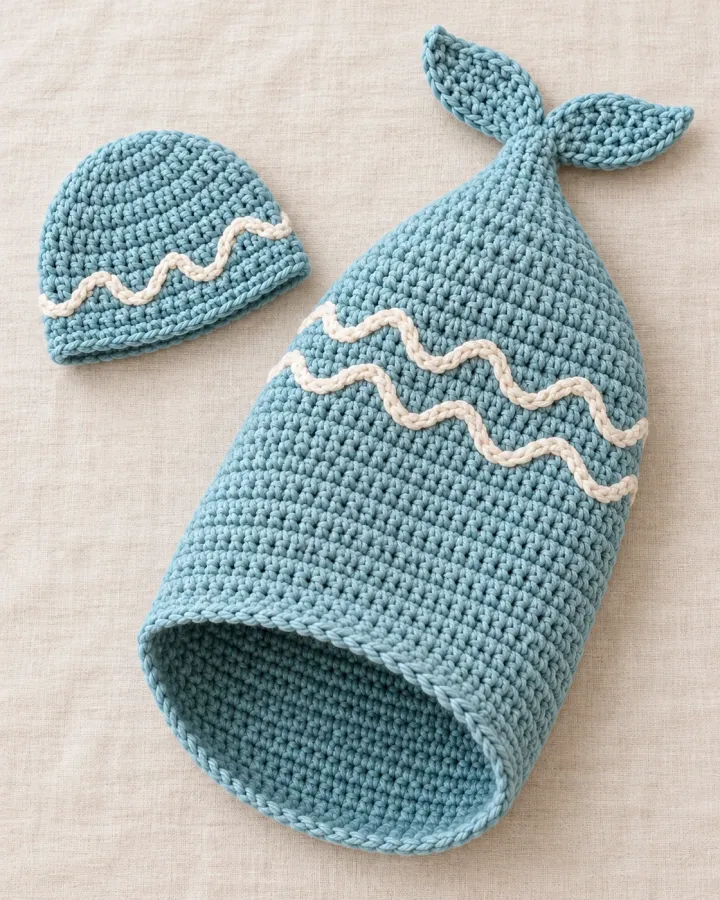
A sea-glass blue crochet shell uses embroidered wave lines and a tiny whale-tail detail at the hood. The ocean theme feels modern and gender-neutral, and the unoccupied prop is styled as a simple product display rather than a sleeping scene.
- LEVEL
- Intermediate
- TRY IT WITH
- DK cotton: sea-glass blue 230 yd, cream 20 yd, deep teal 8 yd; 4 mm hook
- FINISHING NOTE
- Decorative shell approx. 7 in across and 12 in long.
Short Pattern
Abbreviations: MR magic ring · ch chain · sc single crochet · hdc half double crochet · inc increase · dec decrease · sl st slip stitch · BLO back loop only
- Make a flat base with 6 sc in MR, increasing evenly by 6 to 48. Work one round in BLO followed by 20 even rounds in sea-glass blue.
- Ch 25 and make a 24-sc hood panel for 10 rows. Sew it to the back half of the opening, leaving the front open.
- Whale-tail accent: ch 7, work 6 sc, then make 3 sc in the end and return along the other side. Make two small rounded lobes and sew the tail flat to the hood.
- Embroider 3 curved wave lines in deep teal along one outer side. Keep the lines short and anchored at both ends.
- Add a small cream oval patch near the hood if desired, sewing all around it. Photograph the shell empty and keep it away from sleep spaces.
Assembly: Keep embroidery flat and all edges secured. Do not use the cocoon as a nest, sleep surface or unattended infant holder.
Rose-Garden Cocoon Set
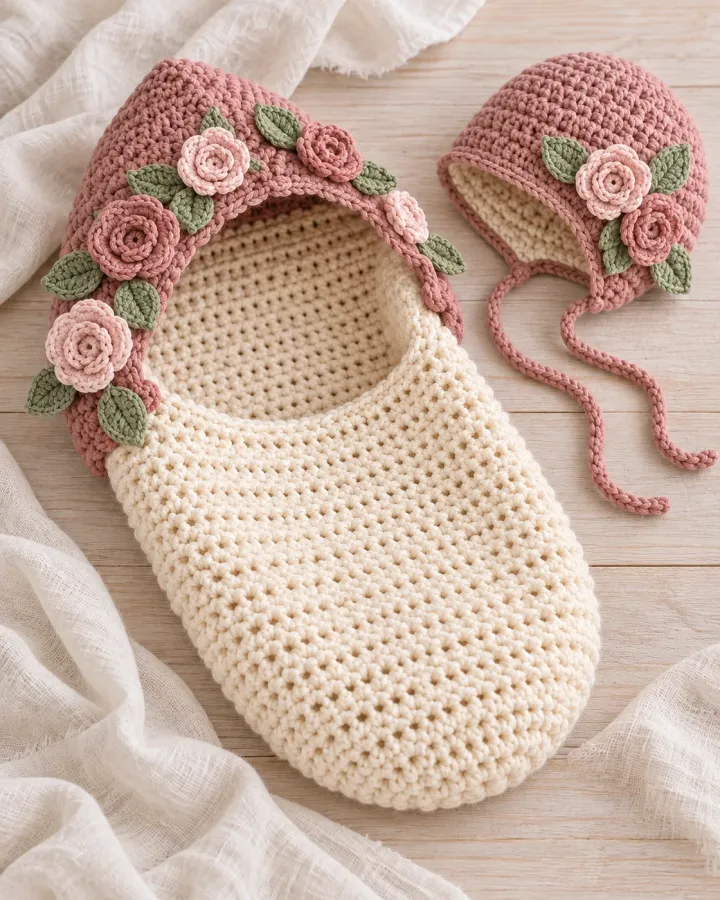
An ivory crochet shell is paired with a rose-colored hood and small crochet roses with sage leaves. The romantic garden palette looks elegant in a boutique-style flat lay, while the unoccupied tube stays simple and the decorative motifs sit securely in place.
- LEVEL
- Intermediate
- TRY IT WITH
- DK cotton: ivory 220 yd, dusty rose 30 yd, sage 15 yd; 4 mm hook
- FINISHING NOTE
- Decorative shell approx. 7 in across and 12 in long.
Short Pattern
Abbreviations: MR magic ring · ch chain · sc single crochet · hdc half double crochet · dc double crochet · inc increase · sl st slip stitch · BLO back loop only
- Work an ivory base from MR 6, increasing evenly to 48 stitches. Add one BLO round and 20 rounds even for the open shell.
- Make a dusty-rose hood panel: ch 25, work 24 sc for 10 rows, then sew it along the rear half of the rim.
- For each small rose, ch 18, work 2 dc into each chain across, then roll the strip into a spiral and sew the base securely. Make 3 roses.
- Make 4 sage leaves by chaining 6 and working sc, hdc, dc, hdc, sc along the chain and returning along the other side. Sew roses and leaves flat to the hood panel.
- Secure all layers through their centers and edges, weave in every tail and arrange the cocoon empty with the cap beside it.
Assembly: Sew each rose through its center and around its base so it cannot unravel. The set is for brief supervised photography only, never for sleep.
Make thoughtfully and check as you go.
Yarn, hook size and personal tension can change the finished scale. Count every round, stuff gradually and use embroidered features instead of safety eyes when making toys for children under three.