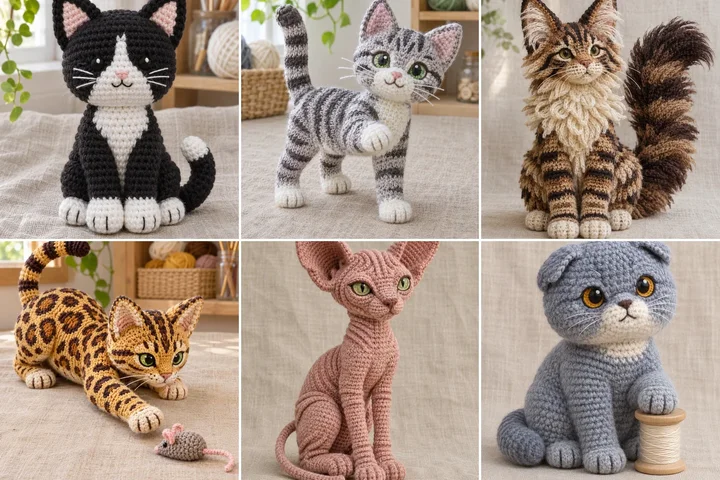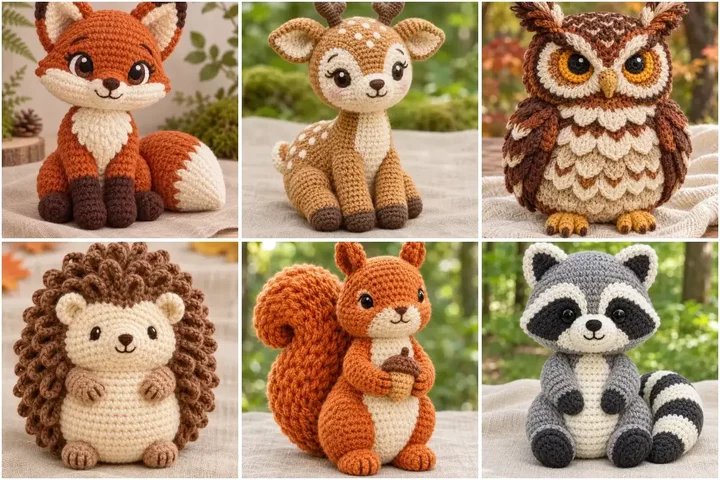
Meet a cozy woodland collection of crochet amigurumi: familiar forest friends with distinct shapes, colors and details. These step-by-step designs use US crochet terms and include materials, approximate finished sizes, shaping guidance and model-specific finishing notes. Embroidered facial features are a soft option for keepsakes; if a toy is intended for a young child, choose securely stitched details and follow age-appropriate toy-safety guidance.
Rust Fox and Cream-Tip Tail
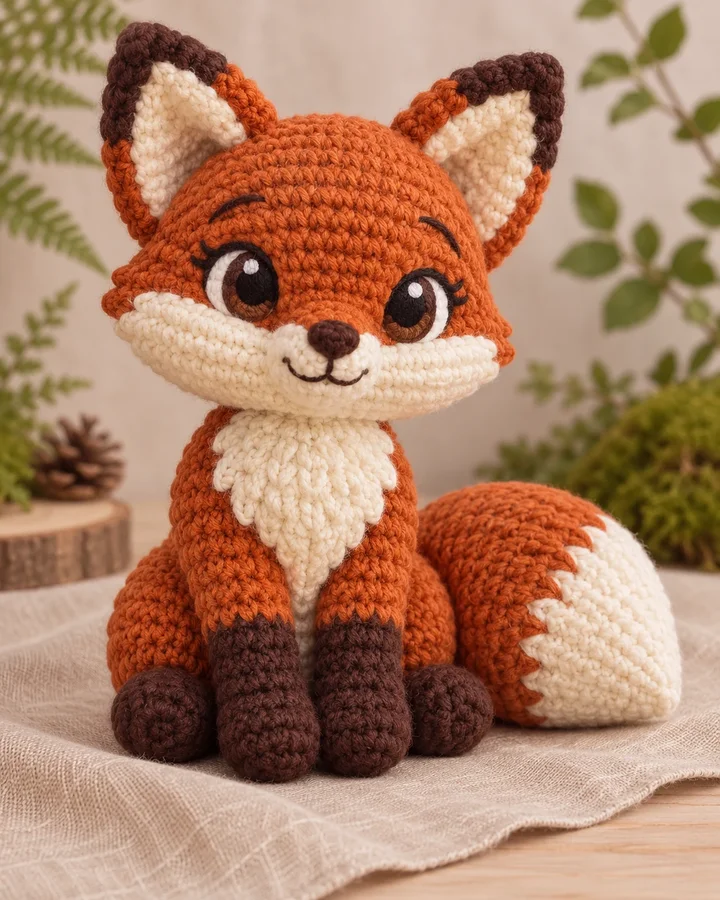
A rust-orange fox sits upright with a fluffy curled tail, dark paws and a soft cream chest. Its high ears and broad muzzle give this classic woodland character a lively silhouette and clear color blocks.
- LEVEL
- Confident beginner
- TRY IT WITH
- Worsted #4 yarn: rust 100 yd, cream 35 yd, dark brown 20 yd; 3.5 mm hook; stuffing; tapestry needle
- FINISHING NOTE
- About 8 in tall (20 cm).
Short Pattern
Abbreviations: ch chain · sc single crochet · inc increase · dec invisible decrease · sl st slip stitch · BLO back loop only · st(s) stitch(es) · MR magic ring
- Work the body and head in continuous sc rounds, increasing from 6 sc in a magic ring to 36; crochet 10 rounds even, then decrease gradually for the lower body. Stuff firmly as the opening narrows.
- For the head, begin with 6 sc in a magic ring and increase to 30. Work 8 rounds even; add cream muzzle patches as two small ovals and embroider a dark nose before closing.
- Make two tapered ears in rust with cream inner panels, two short arms and two dark-tipped legs. Crochet a long tail as a flattened tube, changing to cream for the final 4 rounds.
- Pin the head above the body, align the cream chest panel down the front, and sew limbs symmetrically. Curve the tail to one side and secure it at two points so it holds its shape.
Assembly: Use embroidered eyes and secure the tail, ears and muzzle with small repeated stitches. Angle the ears slightly outward to preserve the fox’s alert expression.
Spotted Fawn with Soft Antlers
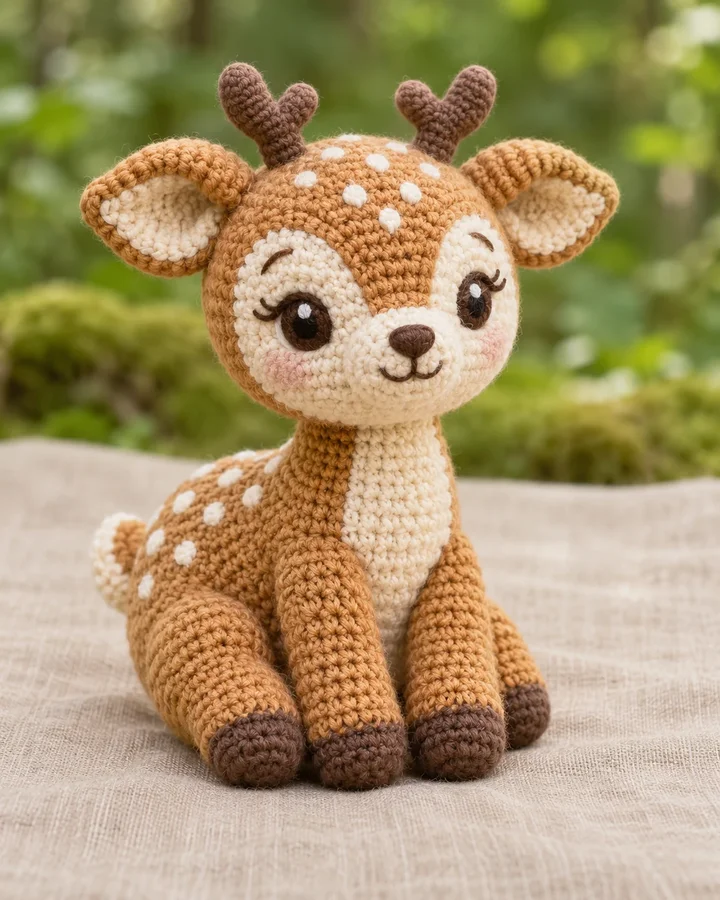
A warm caramel fawn has a cream muzzle and belly, tiny white back spots and small rounded antlers. Its seated pose and gentle face distinguish it from the collection’s taller moose calf.
- LEVEL
- Intermediate
- TRY IT WITH
- Worsted #4 yarn: caramel 90 yd, cream 35 yd, cocoa 15 yd; 3.5 mm hook; stuffing; tapestry needle
- FINISHING NOTE
- About 8.5 in tall (22 cm).
Short Pattern
Abbreviations: ch chain · sc single crochet · inc increase · dec invisible decrease · sl st slip stitch · BLO back loop only · st(s) stitch(es) · MR magic ring
- Crochet the pear-shaped body from the base upward: begin with 6 sc in a magic ring, increase evenly to 36, work 8 rounds, then decrease at the shoulders. Stuff gradually and leave a neck opening.
- Make the head as a rounded sphere, increasing to 30 stitches and working 7 rounds even. Add a cream oval muzzle and embroider the nose and eyes before closing.
- Crochet four short legs with cocoa hoof tips, two folded ears with cream centers, and two small antlers as branching curved tubes. Keep each antler lightly stuffed so it bends gently.
- Sew the head to the neck with the muzzle facing forward. Attach legs evenly beneath the body, then place the ears and antlers above the eyes; embroider small cream spots across the back.
Assembly: Anchor each spot with several tight stitches rather than loose surface loops. Position the antlers close to the crown and reinforce their bases so they remain softly upright.
Chestnut Owl with Layered Feathers
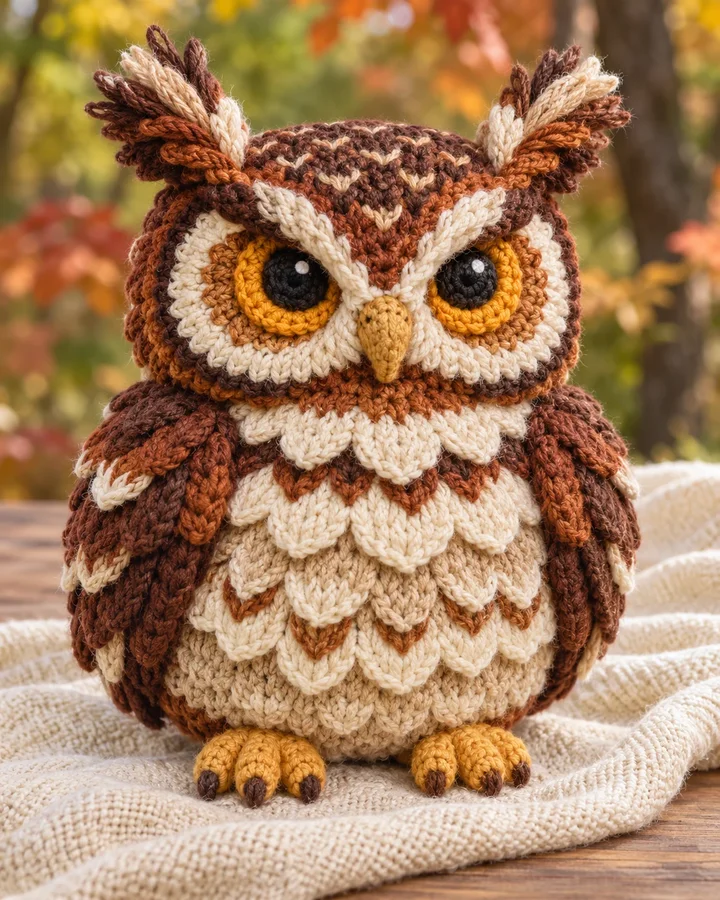
This rounded chestnut owl features cream feather panels, golden eye rings and small tufted ears. Layered crochet shapes give the chest depth, while its compact body makes a distinctive shelf or gift companion.
- LEVEL
- Intermediate
- TRY IT WITH
- Worsted #4 yarn: chestnut 90 yd, cream 45 yd, ochre 20 yd, charcoal 10 yd; 3.5 mm hook; stuffing
- FINISHING NOTE
- About 7 in tall (18 cm).
Short Pattern
Abbreviations: ch chain · sc single crochet · inc increase · dec invisible decrease · sl st slip stitch · BLO back loop only · st(s) stitch(es) · MR magic ring
- Work the body as an oval-based sphere: ch 9, sc around both sides of the chain with increases at each end, then continue in joined rounds to form a rounded base and tall body. Stuff before closing the crown.
- Crochet two cream eye patches as small circles and two ochre rings slightly larger than the embroidered eyes. Layer the circles, placing them symmetrically across the upper front.
- Make a cream belly panel with short rows of scallop stitches. Add chestnut wing ovals and small ear tufts; use alternating front-loop stitches on the belly to suggest feathers.
- Sew eye patches and belly panel to the body before attaching wings. Place wings along the sides, then add small feet at the base and embroider a short beak between the eyes.
Assembly: Keep the eye rings level and leave a small gap for the beak. Stitch the wings along their upper edges only so their lower curves sit slightly raised.
Loop-Spine Hedgehog
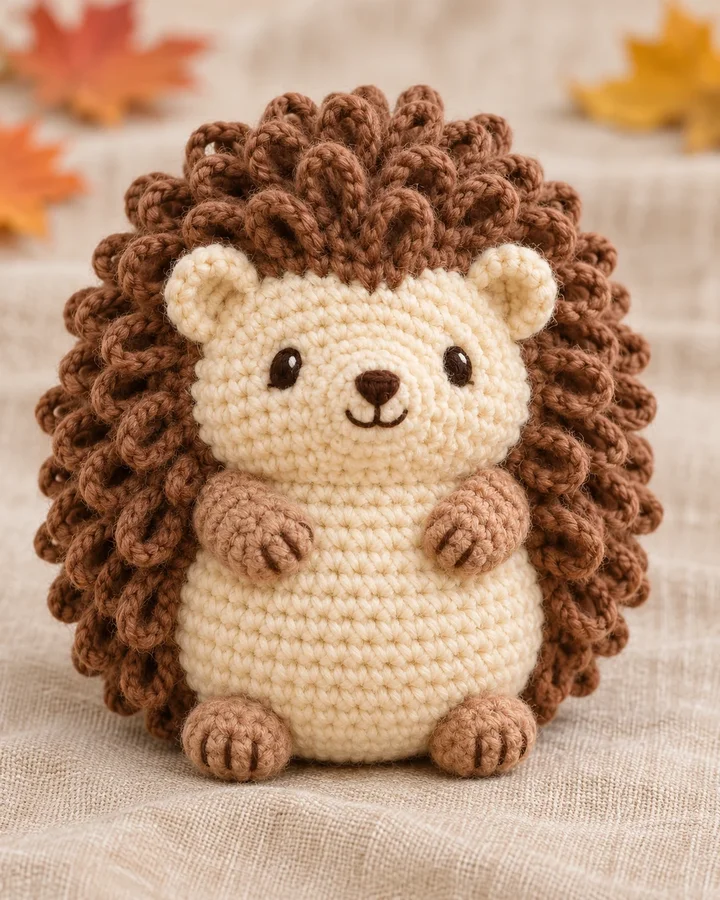
A cocoa-brown hedgehog wears a dense halo of soft loop stitches over a cream face and belly. Its low, rounded body and tiny paws make the textured back the unmistakable focus of this forest design.
- LEVEL
- Intermediate
- TRY IT WITH
- Worsted #4 yarn: cocoa 100 yd, cream 40 yd, tan 15 yd; 3.5 mm hook; stuffing
- FINISHING NOTE
- About 6.5 in long (16.5 cm).
Short Pattern
Abbreviations: ch chain · sc single crochet · inc increase · dec invisible decrease · sl st slip stitch · BLO back loop only · st(s) stitch(es) · MR magic ring
- Crochet a plump oval body in cream, increasing from a chain base at both ends. Work in rounds until it is wide enough for a seated plush, then begin decreasing at the rear and stuff as you go.
- Switch to cocoa across the upper half of the body to form a cap. Work the face area in cream, shaping a tapered muzzle with two decrease rounds toward the nose.
- Create loop stitches across the cocoa cap, spacing loops every 1–2 stitches and varying their lengths slightly. Add two small round ears, four compact paws and a dark embroidered nose.
- Sew the ears at the boundary between cream and cocoa. Attach paws beneath the body, then embroider eyes on the cream face and anchor the nose at the muzzle tip.
Assembly: Keep loop-spine loops secure but soft; trim only the longest outliers. Place the cream face panel centered so the textured cap frames it evenly.
Acorn-Holding Red Squirrel
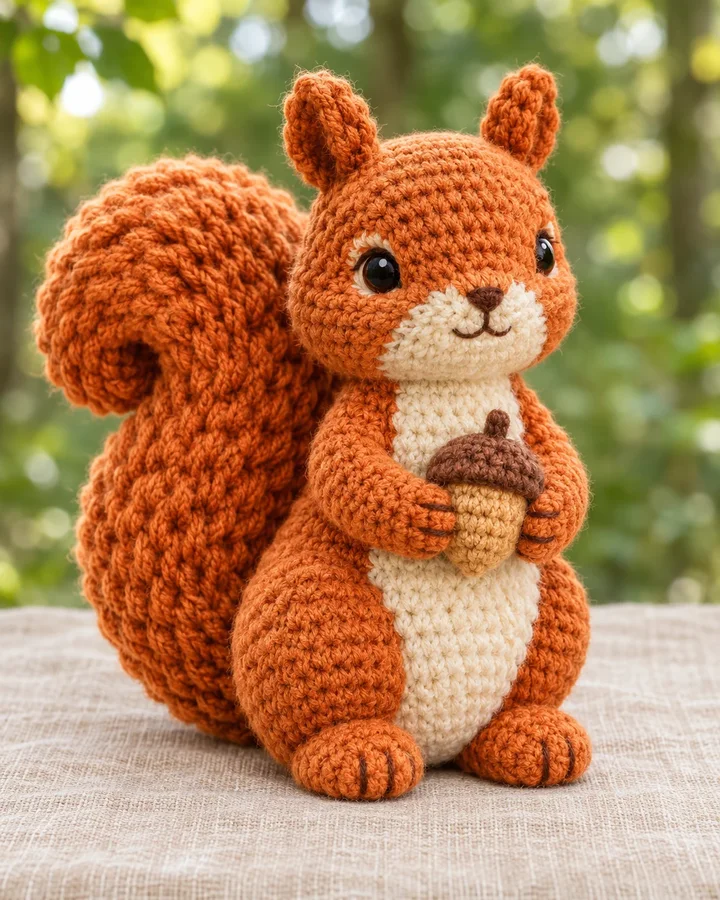
A cinnamon-red squirrel hugs a tiny acorn beneath a large curled tail. Cream cheeks and belly brighten the design, while the tail’s raised texture gives this small seated woodland friend its signature shape.
- LEVEL
- Intermediate
- TRY IT WITH
- Worsted #4 yarn: cinnamon 95 yd, cream 35 yd, cocoa 20 yd; 3.5 mm hook; stuffing
- FINISHING NOTE
- About 8 in tall (20 cm).
Short Pattern
Abbreviations: ch chain · sc single crochet · inc increase · dec invisible decrease · sl st slip stitch · BLO back loop only · st(s) stitch(es) · MR magic ring
- Crochet a rounded body from the base upward, increasing to 30 sc and working 8 rounds even. Shape a narrower shoulder and stuff firmly, leaving the top open for the head.
- Make a round head with cream cheek patches; add pointed ears and embroider the face. Crochet two short arms that curve inward to hold the acorn at chest height.
- For the tail, crochet a long tapered tube, stuff lightly and curve it into a C shape. Add raised surface ridges in cinnamon using slip stitches worked along the outer curve.
- Sew the head to the body, position the tail behind one side and tack it at the base and mid-curve. Attach arms around a small two-color acorn so it rests securely against the belly.
Assembly: Curve and pin the tail before sewing so it balances the seated body. Use a few hidden anchor stitches behind the acorn to keep it from swinging.
Masked Raccoon with Ringed Tail
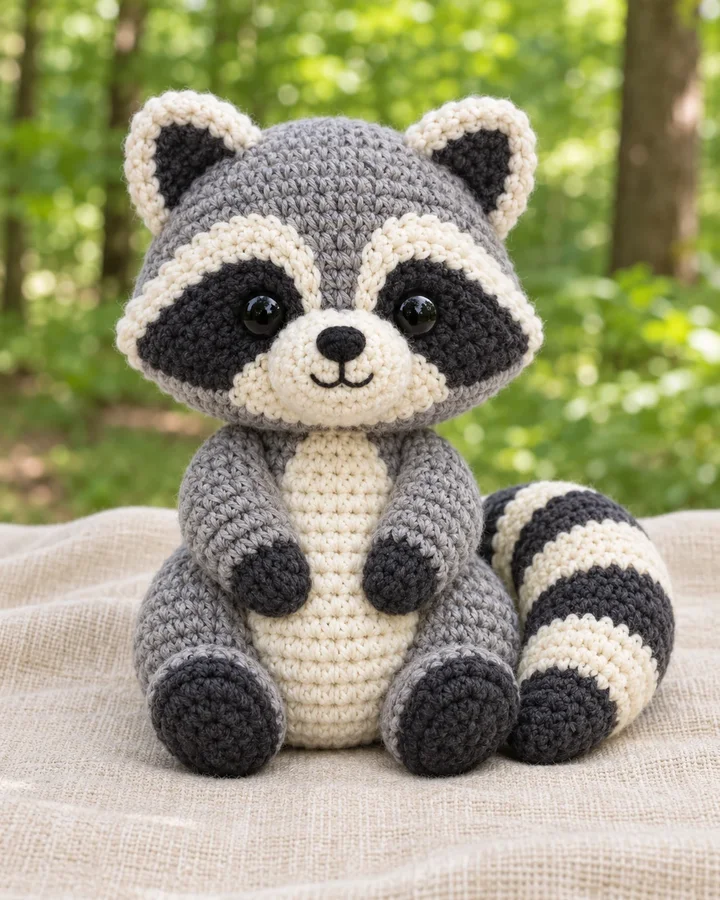
A silver-gray raccoon has a bold charcoal eye mask, cream muzzle and a curled tail striped in alternating shades. The graphic face and clear tail rings make this design easy to recognize at a glance.
- LEVEL
- Intermediate
- TRY IT WITH
- Worsted #4 yarn: silver 90 yd, charcoal 35 yd, cream 30 yd; 3.5 mm hook; stuffing
- FINISHING NOTE
- About 8 in tall (20 cm).
Short Pattern
Abbreviations: ch chain · sc single crochet · inc increase · dec invisible decrease · sl st slip stitch · BLO back loop only · st(s) stitch(es) · MR magic ring
- Work the body in silver from a magic ring, increase to 30 sc and crochet 8 rounds even. Shape the shoulders with two decrease rounds and fill with stuffing before closing.
- Crochet a round silver head and attach a cream muzzle oval. Add a charcoal mask as two tapered patches joined across the bridge; embroider eyes within the mask.
- Make two round ears with charcoal inner panels, short arms and legs, and a long tail tube. Change between silver and charcoal every 3 rounds to create distinct rings.
- Sew the head onto the body and align the mask horizontally. Attach the striped tail to the lower back, curve it beside the body and tack the tip to the base for support.
Assembly: Keep the eye mask centered and level before stitching it down. Secure the tail at two points so the striped curve remains visible from the front.
Honey-Muzzle Bear Cub
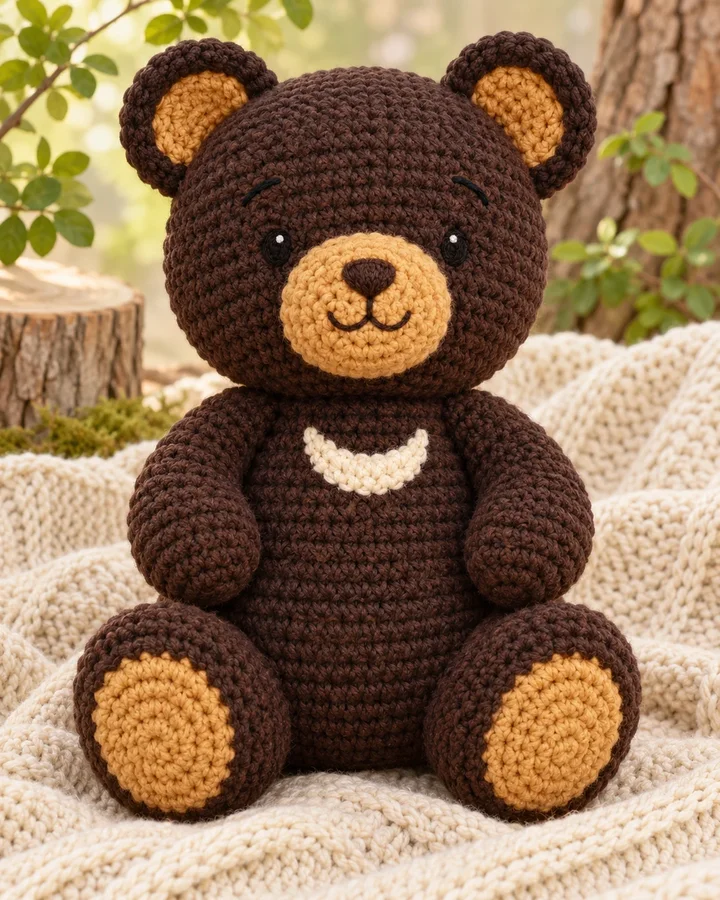
A deep espresso bear cub has a honey-colored muzzle, rounded ears and large soft paws. A small crescent chest patch adds a gentle accent without competing with the plush’s simple, huggable silhouette.
- LEVEL
- Confident beginner
- TRY IT WITH
- Worsted #4 yarn: espresso 110 yd, honey 25 yd, cream 10 yd; 3.5 mm hook; stuffing
- FINISHING NOTE
- About 8 in seated (20 cm).
Short Pattern
Abbreviations: ch chain · sc single crochet · inc increase · dec invisible decrease · sl st slip stitch · BLO back loop only · st(s) stitch(es) · MR magic ring
- Crochet the body as a squat oval, increasing to 36 sc and working 8 rounds even. Decrease the upper section to 24 stitches, stuff firmly and leave a short neck opening.
- Make the head as a sphere with 6 increases per round to 36 stitches, then work 6 rounds even. Add a honey muzzle oval and embroider the nose and mouth.
- Crochet two small round ears, two short arms and broad oval feet. Add honey foot pads and a small cream crescent patch for the chest.
- Attach the head and limbs, placing the feet slightly forward so the bear sits steadily. Sew the chest patch flat and center the muzzle between the ears.
Assembly: Reinforce each foot through the body so the bear can sit without tipping. Keep the crescent patch flat and securely woven around its edges.
Woodland Badger with Stripe
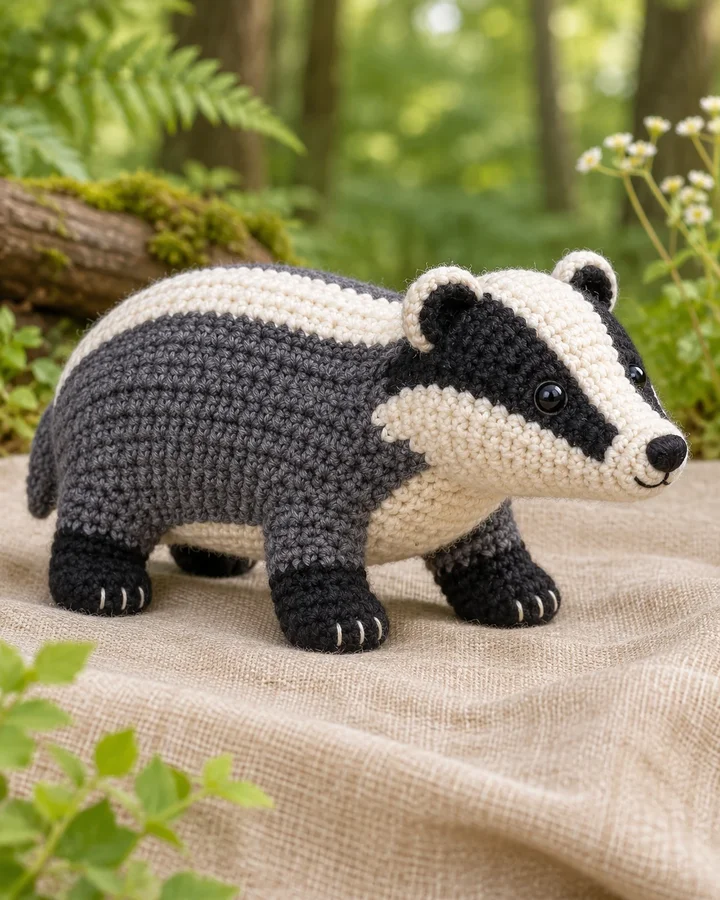
A low-slung charcoal badger is marked by a broad cream stripe running over its crown and down its back. Short sturdy legs and a long muzzle create a playful shape distinct from rounder forest plushies.
- LEVEL
- Intermediate
- TRY IT WITH
- Worsted #4 yarn: charcoal 90 yd, cream 45 yd, black 15 yd; 3.5 mm hook; stuffing
- FINISHING NOTE
- About 9 in long (23 cm).
Short Pattern
Abbreviations: ch chain · sc single crochet · inc increase · dec invisible decrease · sl st slip stitch · BLO back loop only · st(s) stitch(es) · MR magic ring
- Crochet an elongated oval body in charcoal, working increases at each end of a foundation chain. Continue in rounds to make a low cylinder, stuff lightly and close the rear.
- Form the head as a tapered tube with a rounded black nose. Add cream side stripes from the nose toward the crown, leaving a charcoal stripe between them around the eyes.
- Make four short legs with broad feet and small round ears. Crochet a narrow cream stripe panel from forehead to back, shaping it to lie over the crown and spine.
- Sew the head to the front of the body, attach legs beneath at equal spacing, and stitch the cream back stripe along its full length. Place the ears low and wide.
Assembly: Align the face stripes before attaching the head, then continue the center stripe smoothly over the crown. Check that all four feet rest flat.
Long-Eared Woodland Hare
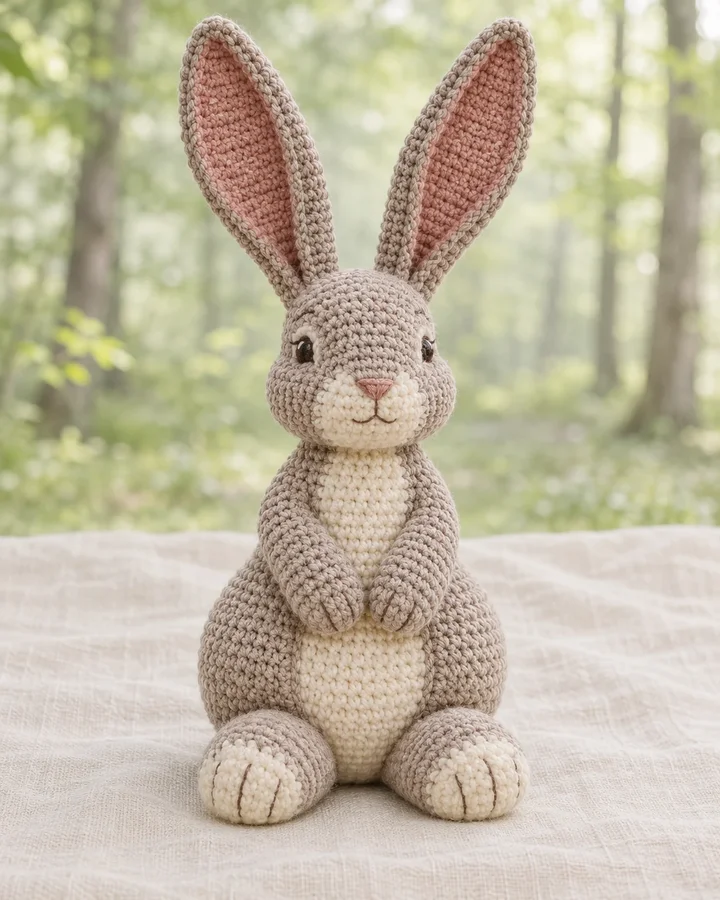
A soft taupe hare sits upright with very long ears, a cream belly and dusty-rose inner ear panels. Oversized hind feet and a calm expression give it a graceful silhouette unlike the smaller dormouse.
- LEVEL
- Intermediate
- TRY IT WITH
- Worsted #4 yarn: taupe 100 yd, cream 30 yd, dusty rose 15 yd; 3.5 mm hook; stuffing
- FINISHING NOTE
- About 10 in tall (25 cm).
Short Pattern
Abbreviations: ch chain · sc single crochet · inc increase · dec invisible decrease · sl st slip stitch · BLO back loop only · st(s) stitch(es) · MR magic ring
- Crochet a rounded pear body, increasing to 36 sc and working 8 rounds even. Decrease toward the shoulders; stuff firmly and leave the top open for the head.
- Make a round head with a slightly projecting cream muzzle. Embroider a small nose and eyes, then add two long narrow ears worked as flat ovals with taupe outer rounds and rose inner panels.
- Crochet long arms, broad oval hind feet and a small round tail. Lightly stuff the limbs and embroider toe lines on each foot.
- Sew the head to the body, attach arms along the front and angle the ears upward with a gentle outward curve. Place feet forward so the hare sits securely.
Assembly: Add a few hidden stitches halfway down each ear to keep the curve. Embroider matching toe details and make the face features level before closing the head.
Riverbank Beaver with Paddle Tail
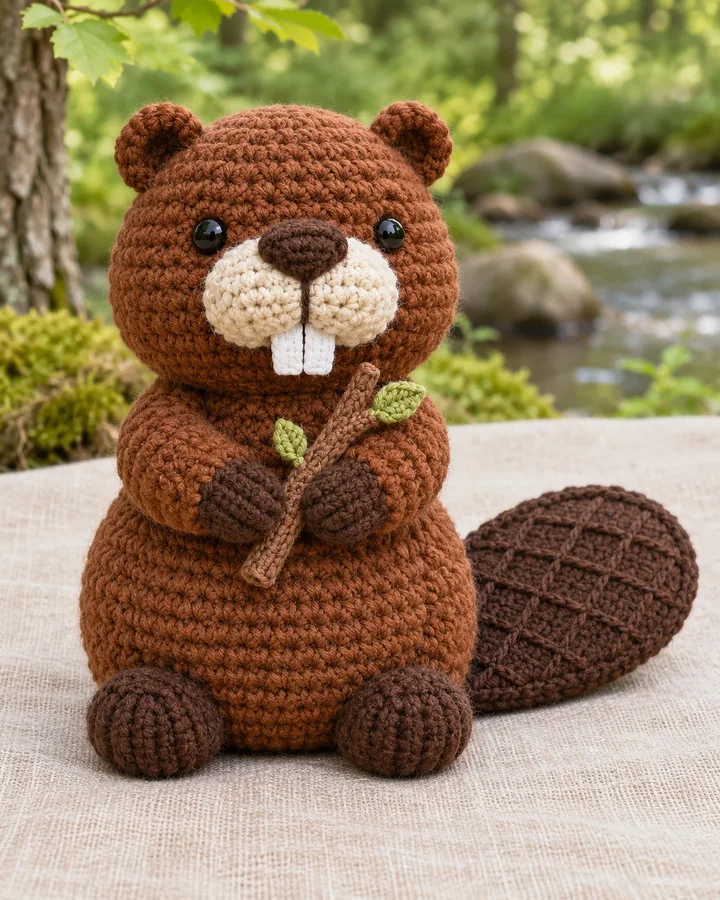
This chestnut beaver holds a small crocheted twig and has a broad, flattened paddle tail with a subtle crosshatch surface. Cream cheeks and prominent front teeth give the plush its friendly riverbank character.
- LEVEL
- Intermediate
- TRY IT WITH
- Worsted #4 yarn: chestnut 100 yd, dark brown 25 yd, cream 20 yd, sage 10 yd; 3.5 mm hook; stuffing
- FINISHING NOTE
- About 8 in seated (20 cm).
Short Pattern
Abbreviations: ch chain · sc single crochet · inc increase · dec invisible decrease · sl st slip stitch · BLO back loop only · st(s) stitch(es) · MR magic ring
- Crochet a rounded body from a magic ring, increasing to 36 sc and working 8 rounds even. Shape the top with decreases and stuff firmly, leaving room to attach the head.
- Make a large round head with cream cheek puffs and a dark nose. Add two small white front teeth with short stitched rectangles; embroider the eyes above the muzzle.
- Crochet two short arms and broad feet. Work the tail as a flat oval in dark brown, using back-loop-only rows and surface slip stitches to create a subtle crosshatch.
- Attach the head and limbs, then sew the paddle tail low on the back so it rests flat beside the body. Place a small crocheted twig between the arms.
Assembly: Flatten the tail as you sew and catch its full base securely into the body. Keep the teeth short and firmly embroidered rather than loose appliqués.
Soft Gray Wolf Pup
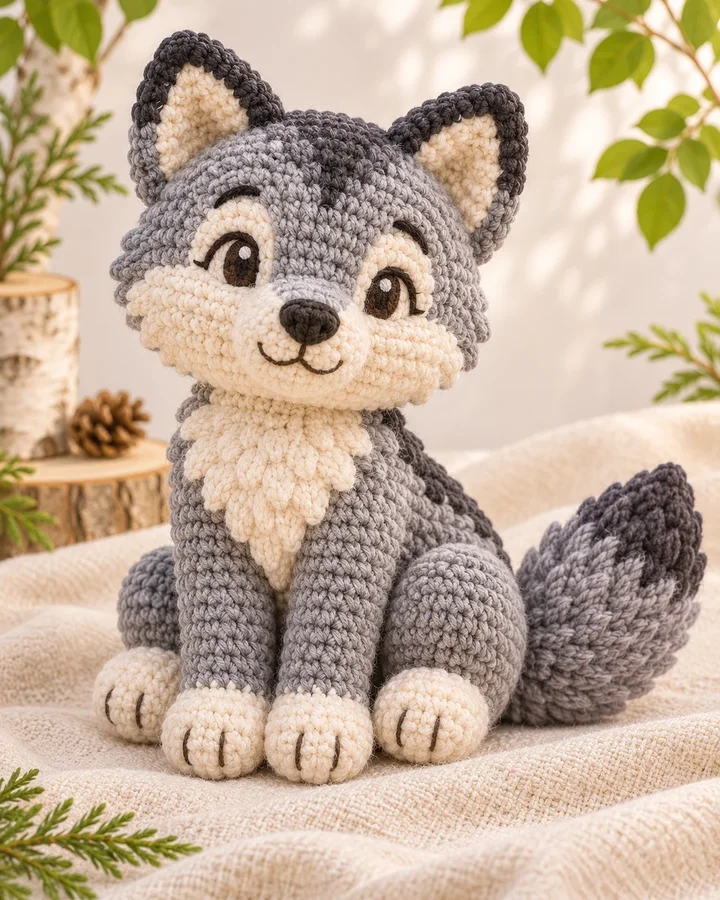
A slate-gray wolf pup has a cream chest, dark-tipped ears and a full tail tipped in charcoal. Its seated posture and rounded features keep the forest canine sweet and plush rather than fierce.
- LEVEL
- Intermediate
- TRY IT WITH
- Worsted #4 yarn: slate 95 yd, cream 35 yd, charcoal 20 yd; 3.5 mm hook; stuffing
- FINISHING NOTE
- About 9 in seated (23 cm).
Short Pattern
Abbreviations: ch chain · sc single crochet · inc increase · dec invisible decrease · sl st slip stitch · BLO back loop only · st(s) stitch(es) · MR magic ring
- Crochet a firm oval body in slate, increasing to 36 sc and working 8 rounds. Shape shoulders with decreases, add stuffing and leave a neck opening.
- Make a rounded head, adding a cream muzzle and chest bib. Crochet two triangular ears with charcoal tips, folding the bases slightly before sewing them to the crown.
- Work four short legs and a tapered tail with a charcoal end. Add small cream toe markings with embroidery and shape the tail into a gentle curve.
- Sew the head and bib in line with the body, attach the legs evenly, then anchor the tail at the back and curve it to one side. Embroider kind eyes and nose.
Assembly: Pin ears at equal height before stitching. Secure the tail along its base and midsection so the charcoal tip remains visible beside the pup.
Striped-Tail Chipmunk
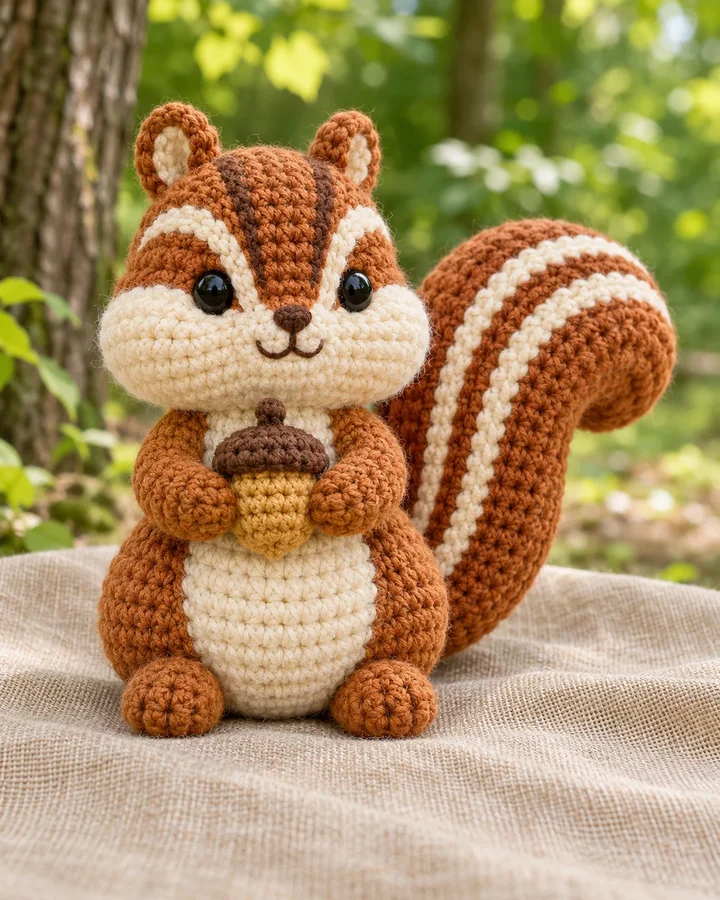
A russet chipmunk hugs a tiny acorn, with cream cheek bands and a tall tail marked by three pale stripes. The striped tail and smaller build distinguish it from the red squirrel design.
- LEVEL
- Intermediate
- TRY IT WITH
- Worsted #4 yarn: russet 90 yd, cream 35 yd, cocoa 15 yd; 3.5 mm hook; stuffing
- FINISHING NOTE
- About 7.5 in tall (19 cm).
Short Pattern
Abbreviations: ch chain · sc single crochet · inc increase · dec invisible decrease · sl st slip stitch · BLO back loop only · st(s) stitch(es) · MR magic ring
- Crochet a compact pear-shaped body and round head in russet, working increases to 30 stitches and several even rounds. Add cream belly and cheek patches as you shape.
- Make two small ears, short arms and rounded feet. Crochet a small acorn from a brown cap and tan base, keeping it small enough to fit between the paws.
- Crochet a thick curved tail as a tapered tube. Work three cream surface bands around the upper curve, using evenly spaced slip stitches to form the chipmunk’s stripes.
- Attach the head and feet, position the acorn between both arms and sew the tail behind the body so it arches upward and remains visible.
Assembly: Check that the pale tail bands follow the curve without twisting. Anchor both the tail base and outer curve so the plush stands or sits without falling backward.
Golden-Bib Pine Marten
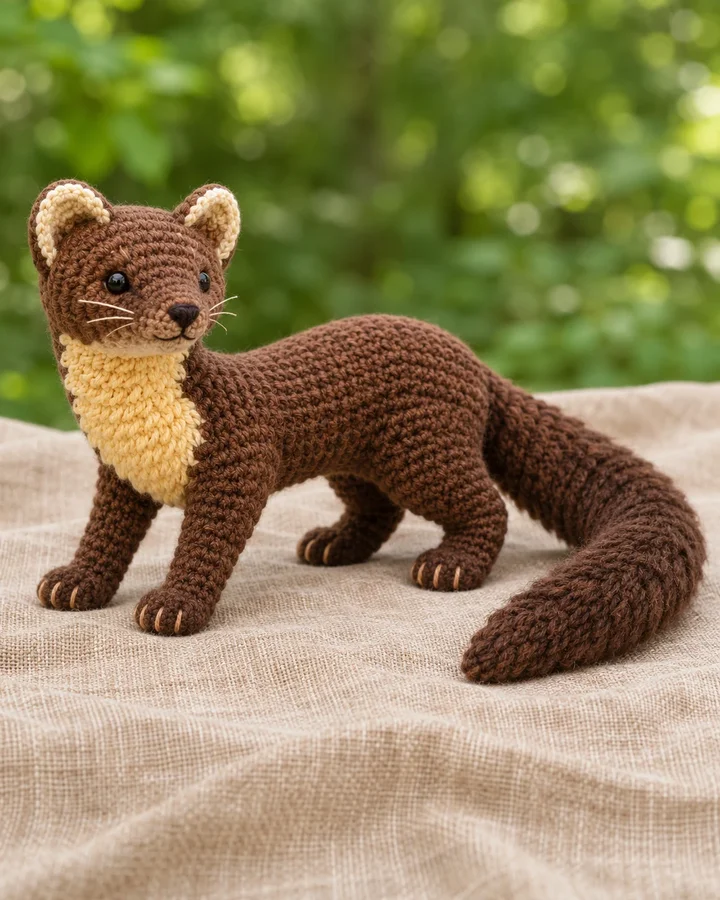
A slender chocolate-brown pine marten has a golden-cream throat bib, small rounded ears and a long sweeping tail. Its elongated four-legged body gives the collection a more natural, low woodland profile.
- LEVEL
- Intermediate
- TRY IT WITH
- Worsted #4 yarn: chocolate 100 yd, golden cream 30 yd, dark brown 20 yd; 3.5 mm hook; stuffing
- FINISHING NOTE
- About 10 in long (25 cm).
Short Pattern
Abbreviations: ch chain · sc single crochet · inc increase · dec invisible decrease · sl st slip stitch · BLO back loop only · st(s) stitch(es) · MR magic ring
- Crochet the body as a long tube, starting with a chain oval and increasing at both ends. Work rounds evenly to form a slim torso, stuffing lightly so it can rest on four legs.
- Shape a small tapered head with a pointed muzzle and embroidered whisker dots. Add the golden bib as a flat oval, widening at the chest and narrowing toward the neck.
- Make four short curved legs and a long tapered tail. Crochet small ears and a few surface stitches along the back for subtle texture.
- Sew the head to the body, attach the bib at the front and place legs at equal intervals underneath. Curve the tail along the floor and tack it near the tip.
Assembly: Keep the body low and balanced on all four feet. Anchor the bib at its full edge and secure the tail so it does not pull the narrow torso sideways.
Tawny Moose Calf
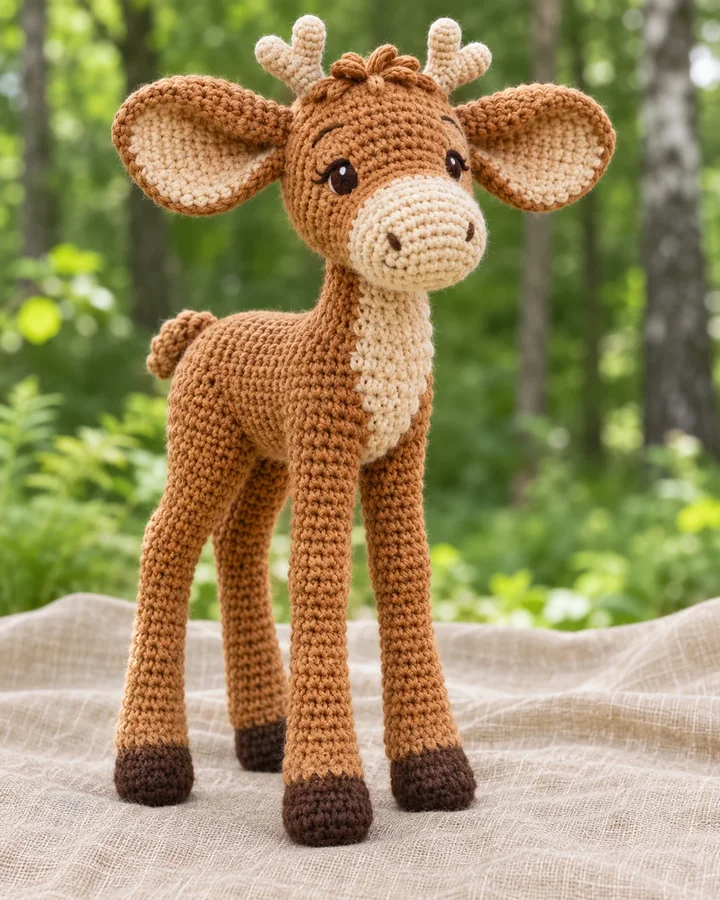
This taller tawny moose calf features long legs, a broad cream muzzle and wide soft ears. Small branching antlers create a woodland silhouette that contrasts with the fawn’s compact seated shape.
- LEVEL
- Intermediate
- TRY IT WITH
- Worsted #4 yarn: tawny 110 yd, cream 35 yd, cocoa 20 yd; 3.5 mm hook; stuffing
- FINISHING NOTE
- About 11 in tall (28 cm).
Short Pattern
Abbreviations: ch chain · sc single crochet · inc increase · dec invisible decrease · sl st slip stitch · BLO back loop only · st(s) stitch(es) · MR magic ring
- Crochet a narrow upright body and long neck as one piece, increasing from 18 to 30 stitches at the torso. Stuff firmly and work the neck straight for 8 rounds.
- Make a large cream muzzle oval and sew it to the lower face. Crochet long legs with cocoa hoof tips and attach them under the torso with the front pair slightly forward.
- Create wide oval ears with cream inner panels. Make two soft antlers from short branching tubes, stuff lightly and join the branches before attaching them to the crown.
- Sew the head and muzzle into the top of the neck, position ears outward, then stitch antlers behind the brow. Attach legs and check that the calf stands with all hooves level.
Assembly: Reinforce antler branches at each junction and keep them lightly stuffed so they remain flexible. Adjust leg placement before final sewing to help the figure stand.
Sleepy Dormouse with Leaf Cap
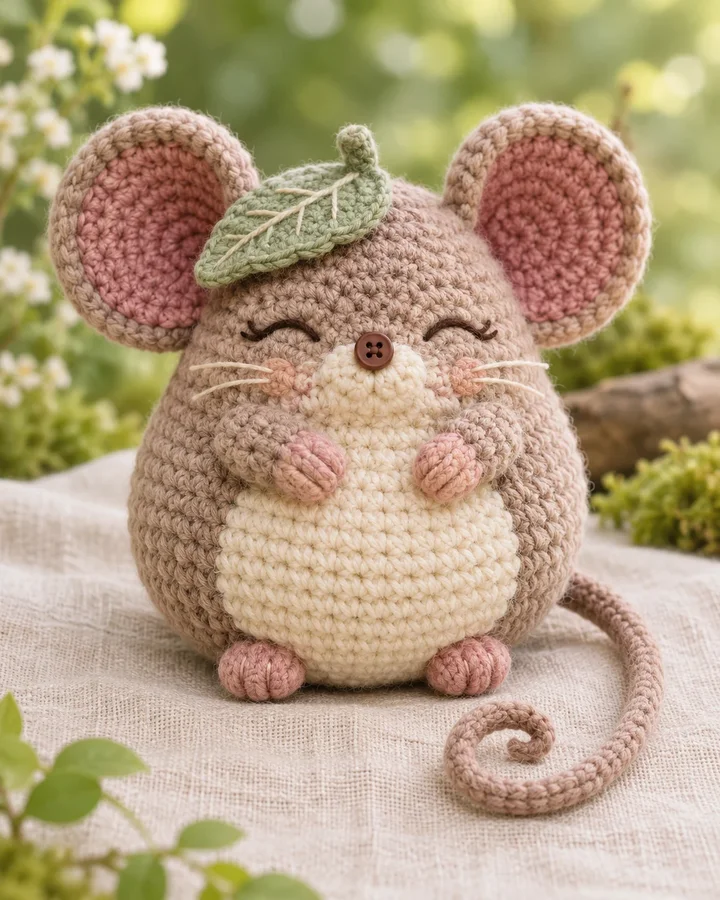
A round taupe dormouse has oversized rose-lined ears, a curled tail and a tiny sage leaf cap. Its sleepy embroidered expression and compact proportions make it the gentlest, most whimsical figure in the woodland group.
- LEVEL
- Intermediate
- TRY IT WITH
- Worsted #4 yarn: taupe 90 yd, cream 30 yd, dusty rose 20 yd, sage 10 yd; 3.5 mm hook; stuffing
- FINISHING NOTE
- About 6.5 in seated (16.5 cm).
Short Pattern
Abbreviations: ch chain · sc single crochet · inc increase · dec invisible decrease · sl st slip stitch · BLO back loop only · st(s) stitch(es) · MR magic ring
- Crochet a plump oval body, increasing to 36 sc and working 8 rounds. Shape the top with decreases, stuff firmly and leave an opening for the head if worked separately.
- Make a round head with a cream muzzle and two oversized ears. Add dusty-rose inner ear ovals and embroider closed, curved eyes to create the sleepy expression.
- Crochet a long thin tail and curl it into a loose spiral; make tiny feet and a flat sage leaf with a short stem. Add a small raised vein using surface embroidery.
- Sew the head to the body, attach ears symmetrically and place the tail low at the back. Stitch the leaf securely at a slight angle on the crown.
Assembly: Anchor the curled tail at two points so it keeps its shape. Secure the leaf and stem with several small stitches, and embroider the closed eyes evenly.
Make thoughtfully and check as you go.
Yarn, hook size and personal tension can change the finished scale. Count every round, stuff gradually and use embroidered features instead of safety eyes when making toys for children under three.